Shindig for administrators
This visual guide is aimed specifically at the panel convenors who are taking the admin role and the conference volunteers who will be assisting them. Below we use admin/convenor as more or less interchangeable terms.
The first thing we'd advise is to run through this 10-minute interactive demo of the Shindig environment. Having done that we'd suggest reading the content below to see how this applies to use in an academic conference.
Lastly, you may also watch this video which gives a demonstration of the environment (with commentary).
Shindig can be accessed in your browser using Chrome, Firefox, Safari or Edge - albeit we've seen best performance to-date in Chrome. It is also possible to access it on a mobile device BUT NOT when taking the admin role.
1. Admin entry and setup
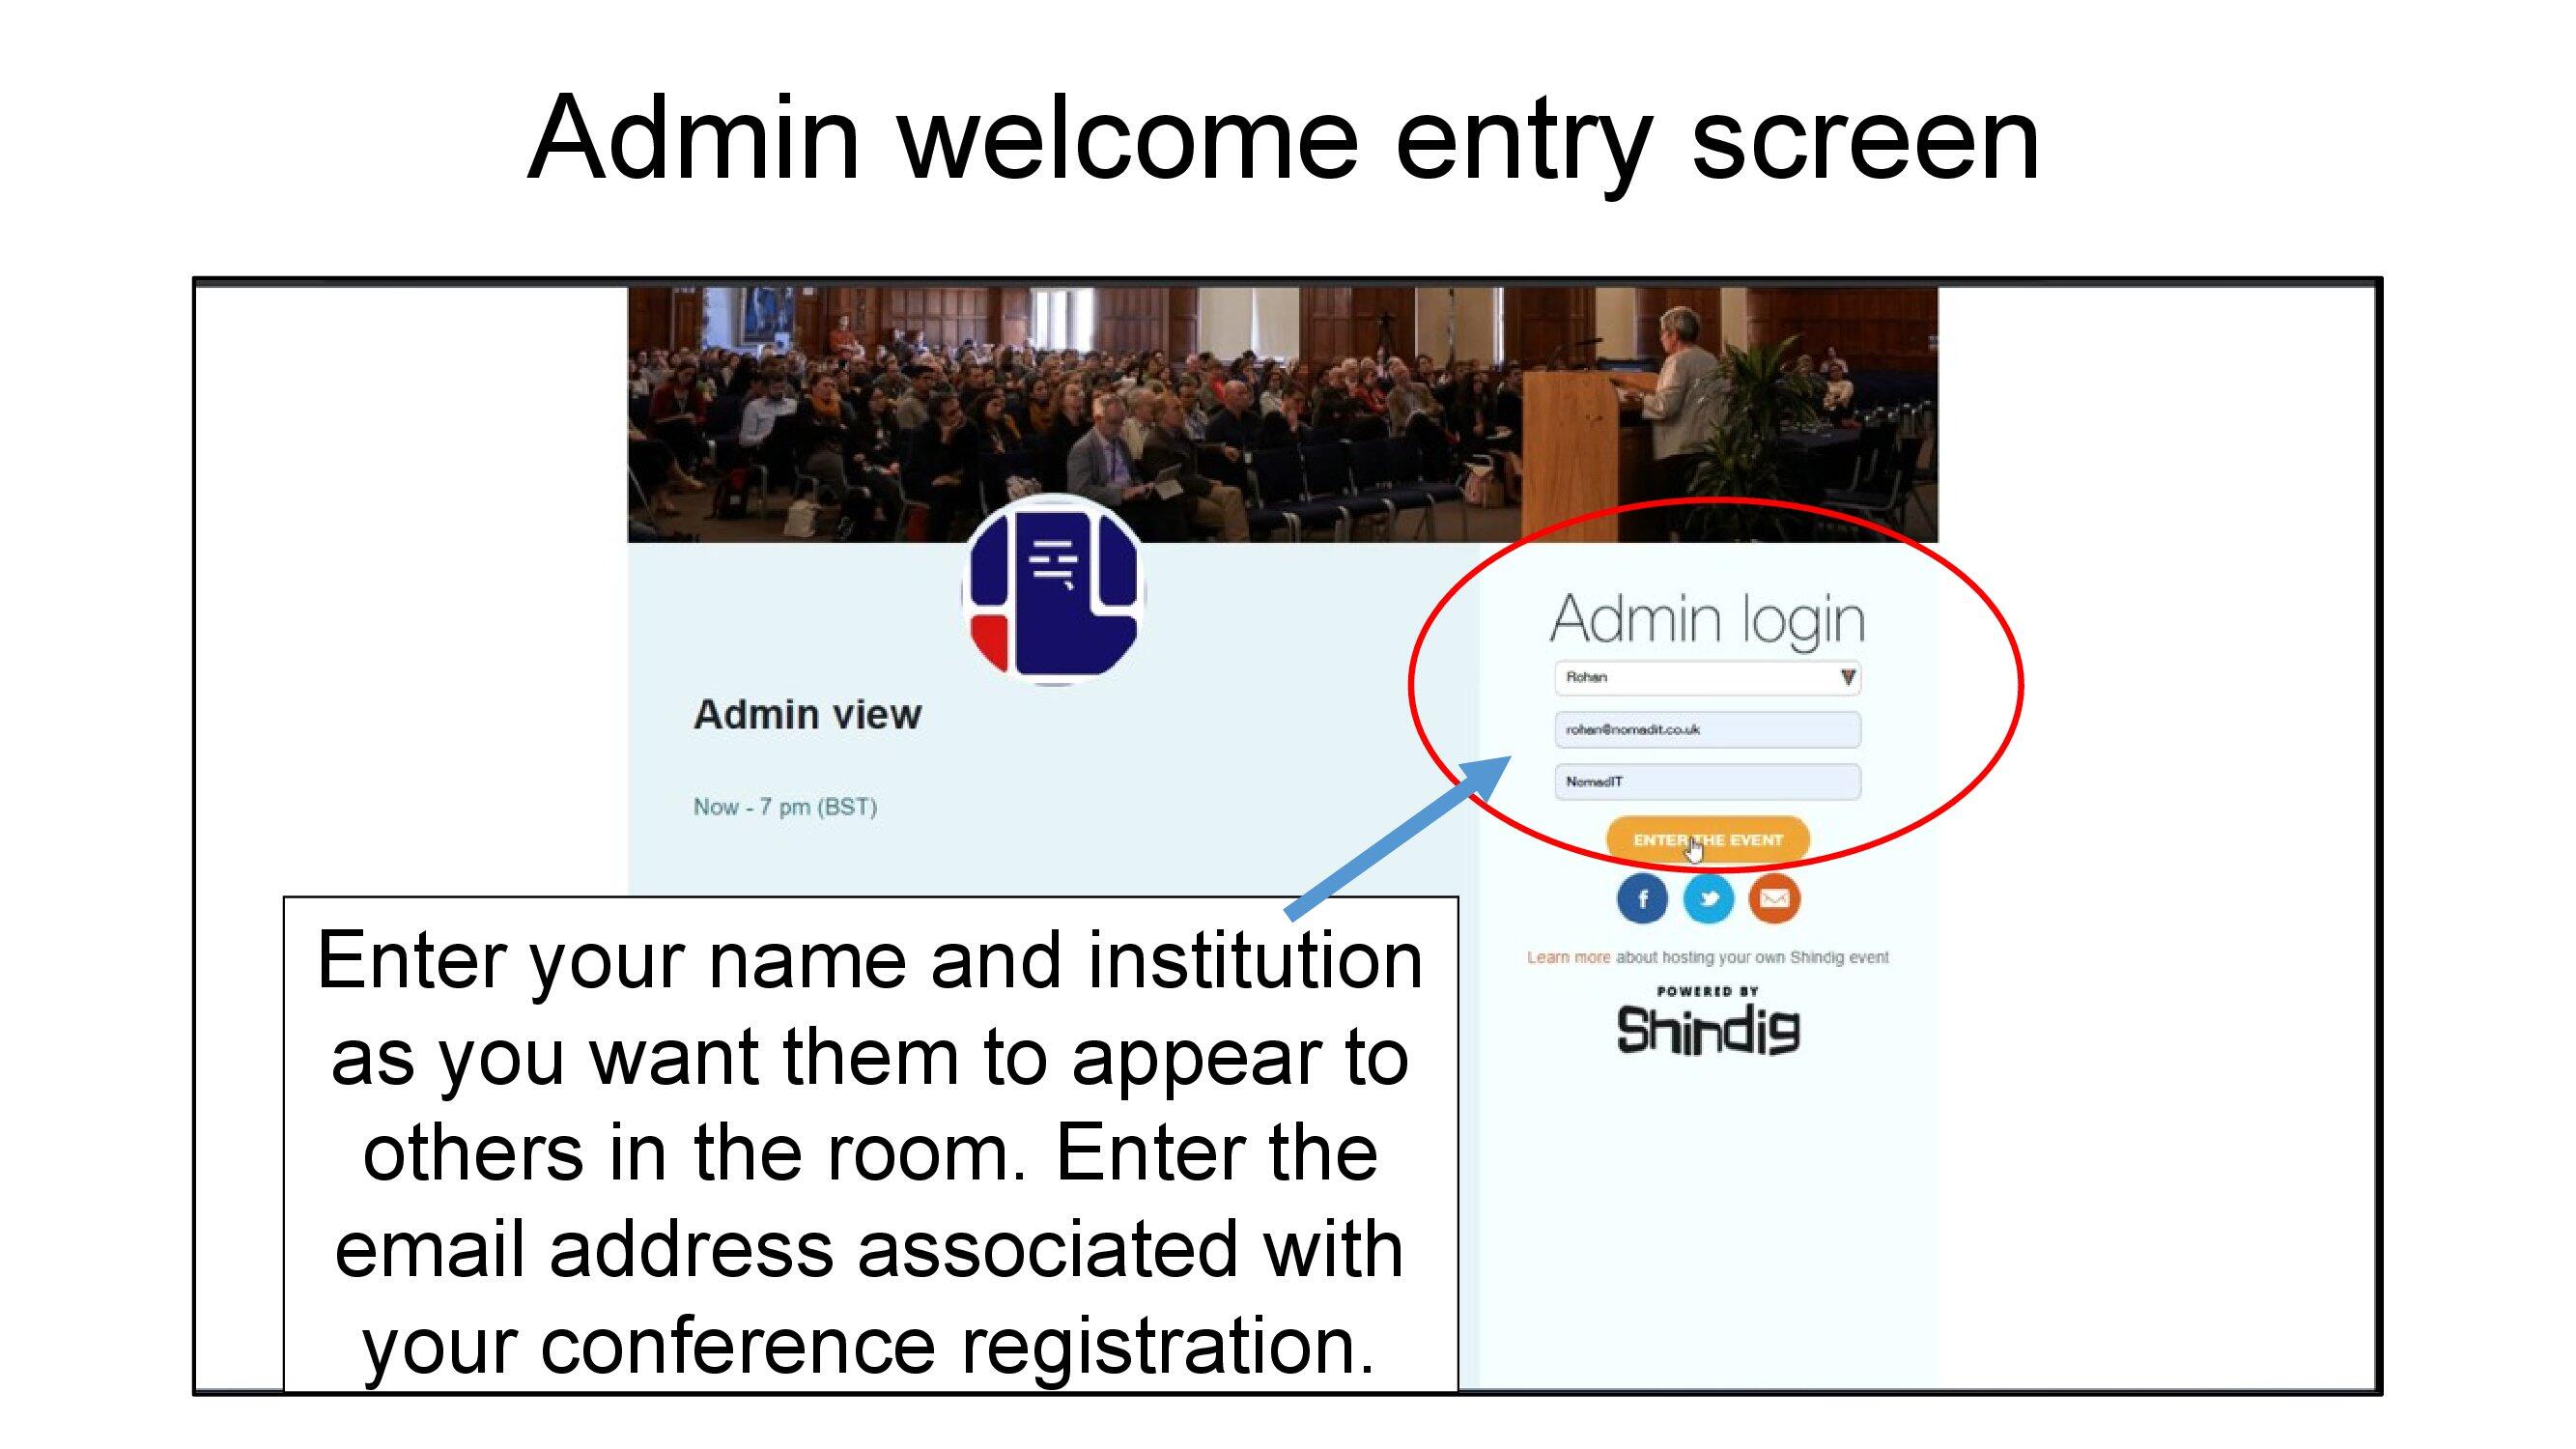
The URL to enter as an admin is different from the participant URL. We will provide that to session admins.
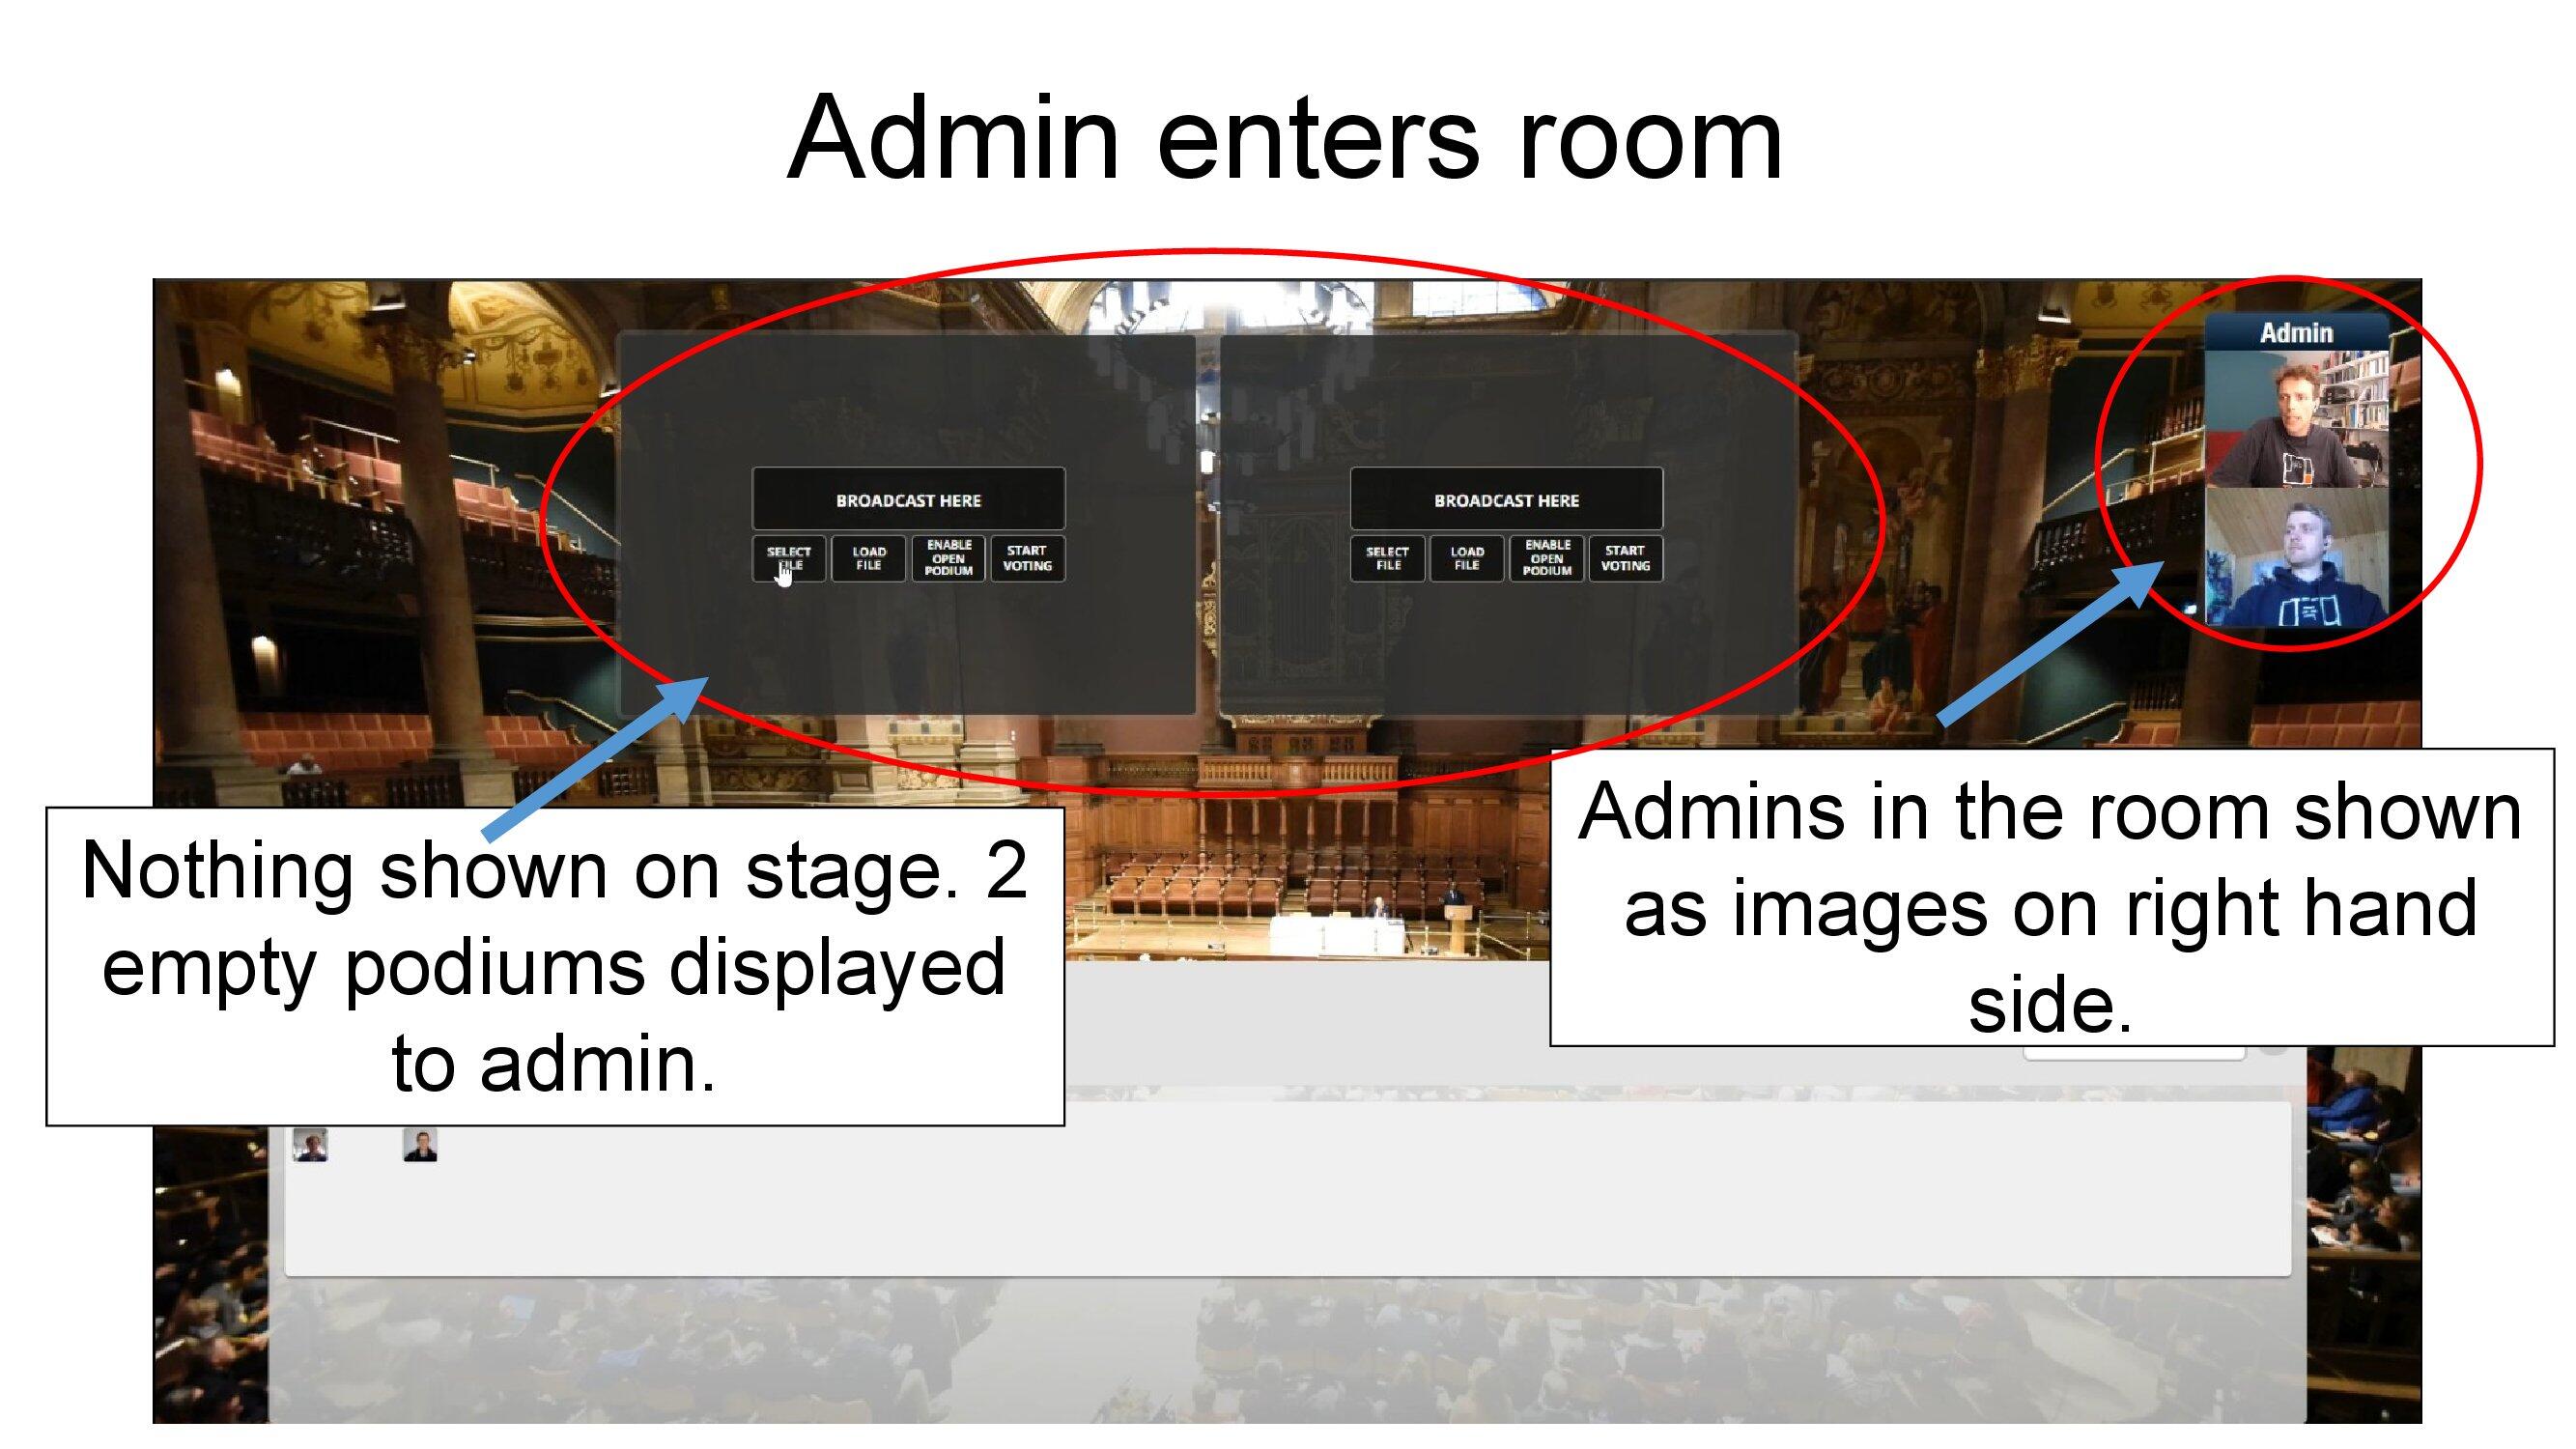
It is wise to enter your panel room in advance, just as in a F2F conference, to get prepared.
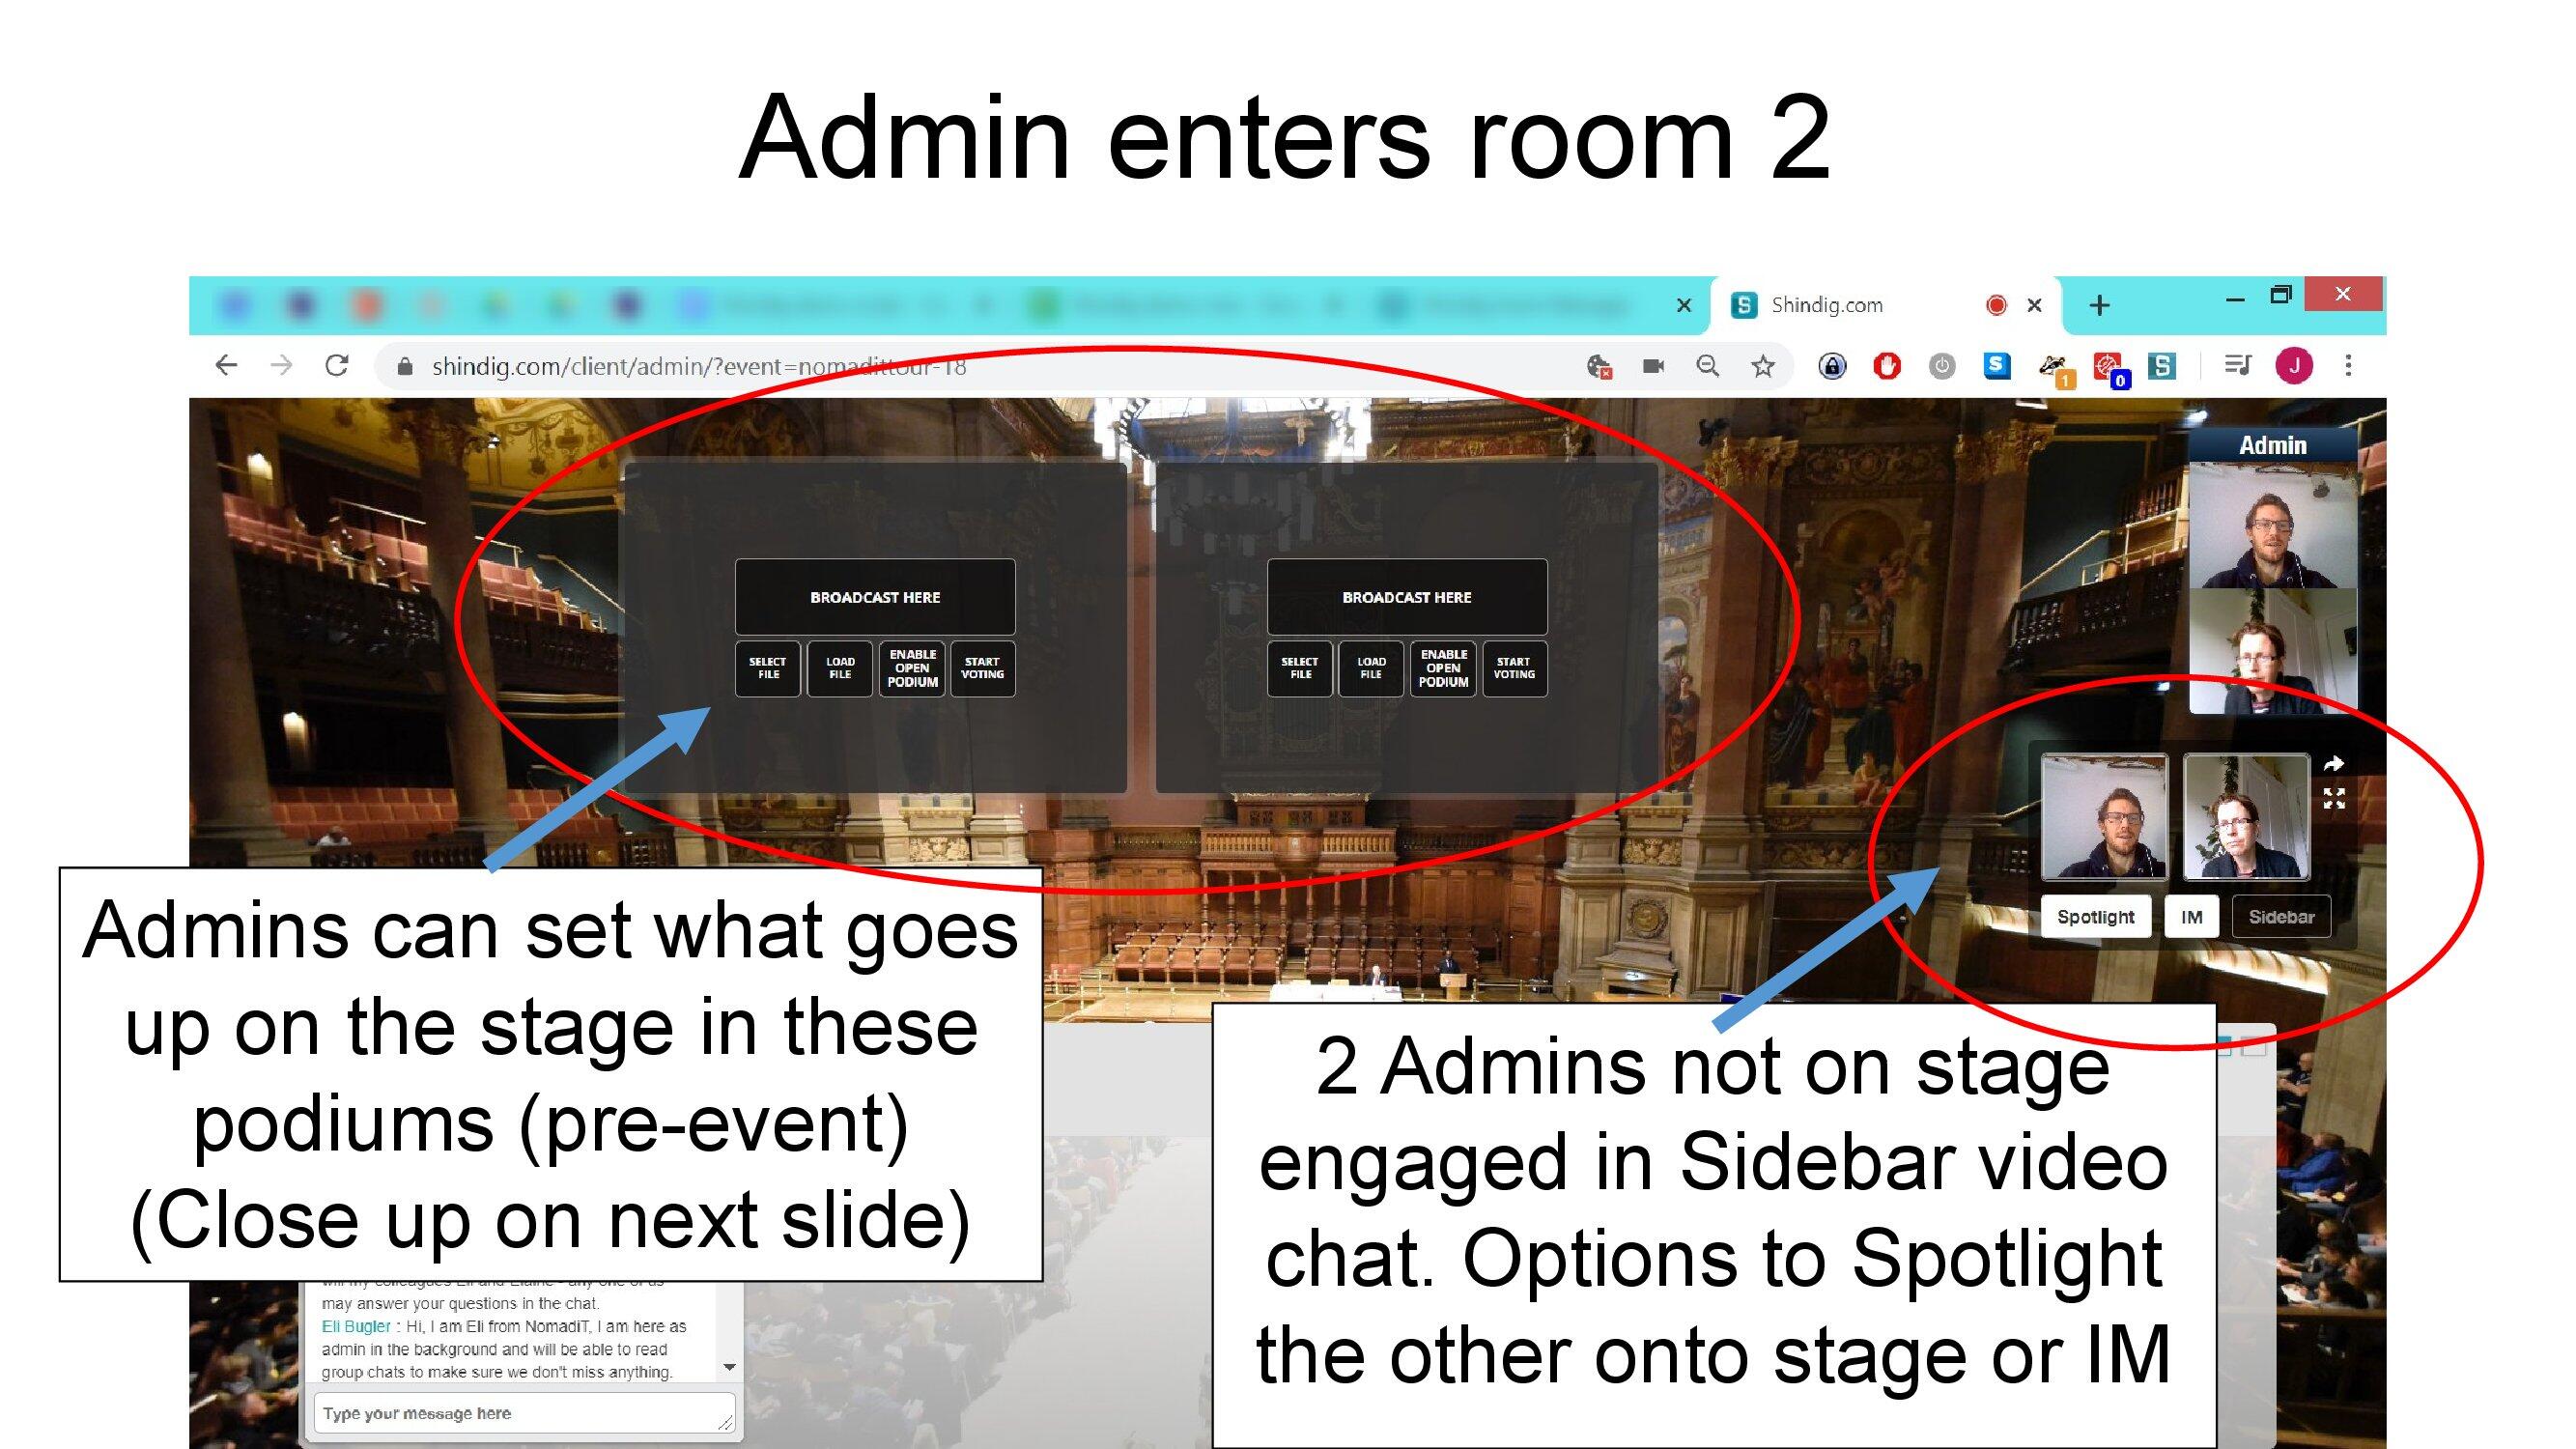
This allows you to talk to your fellow convenors and meet the conference volunteer who will be looking after your room.
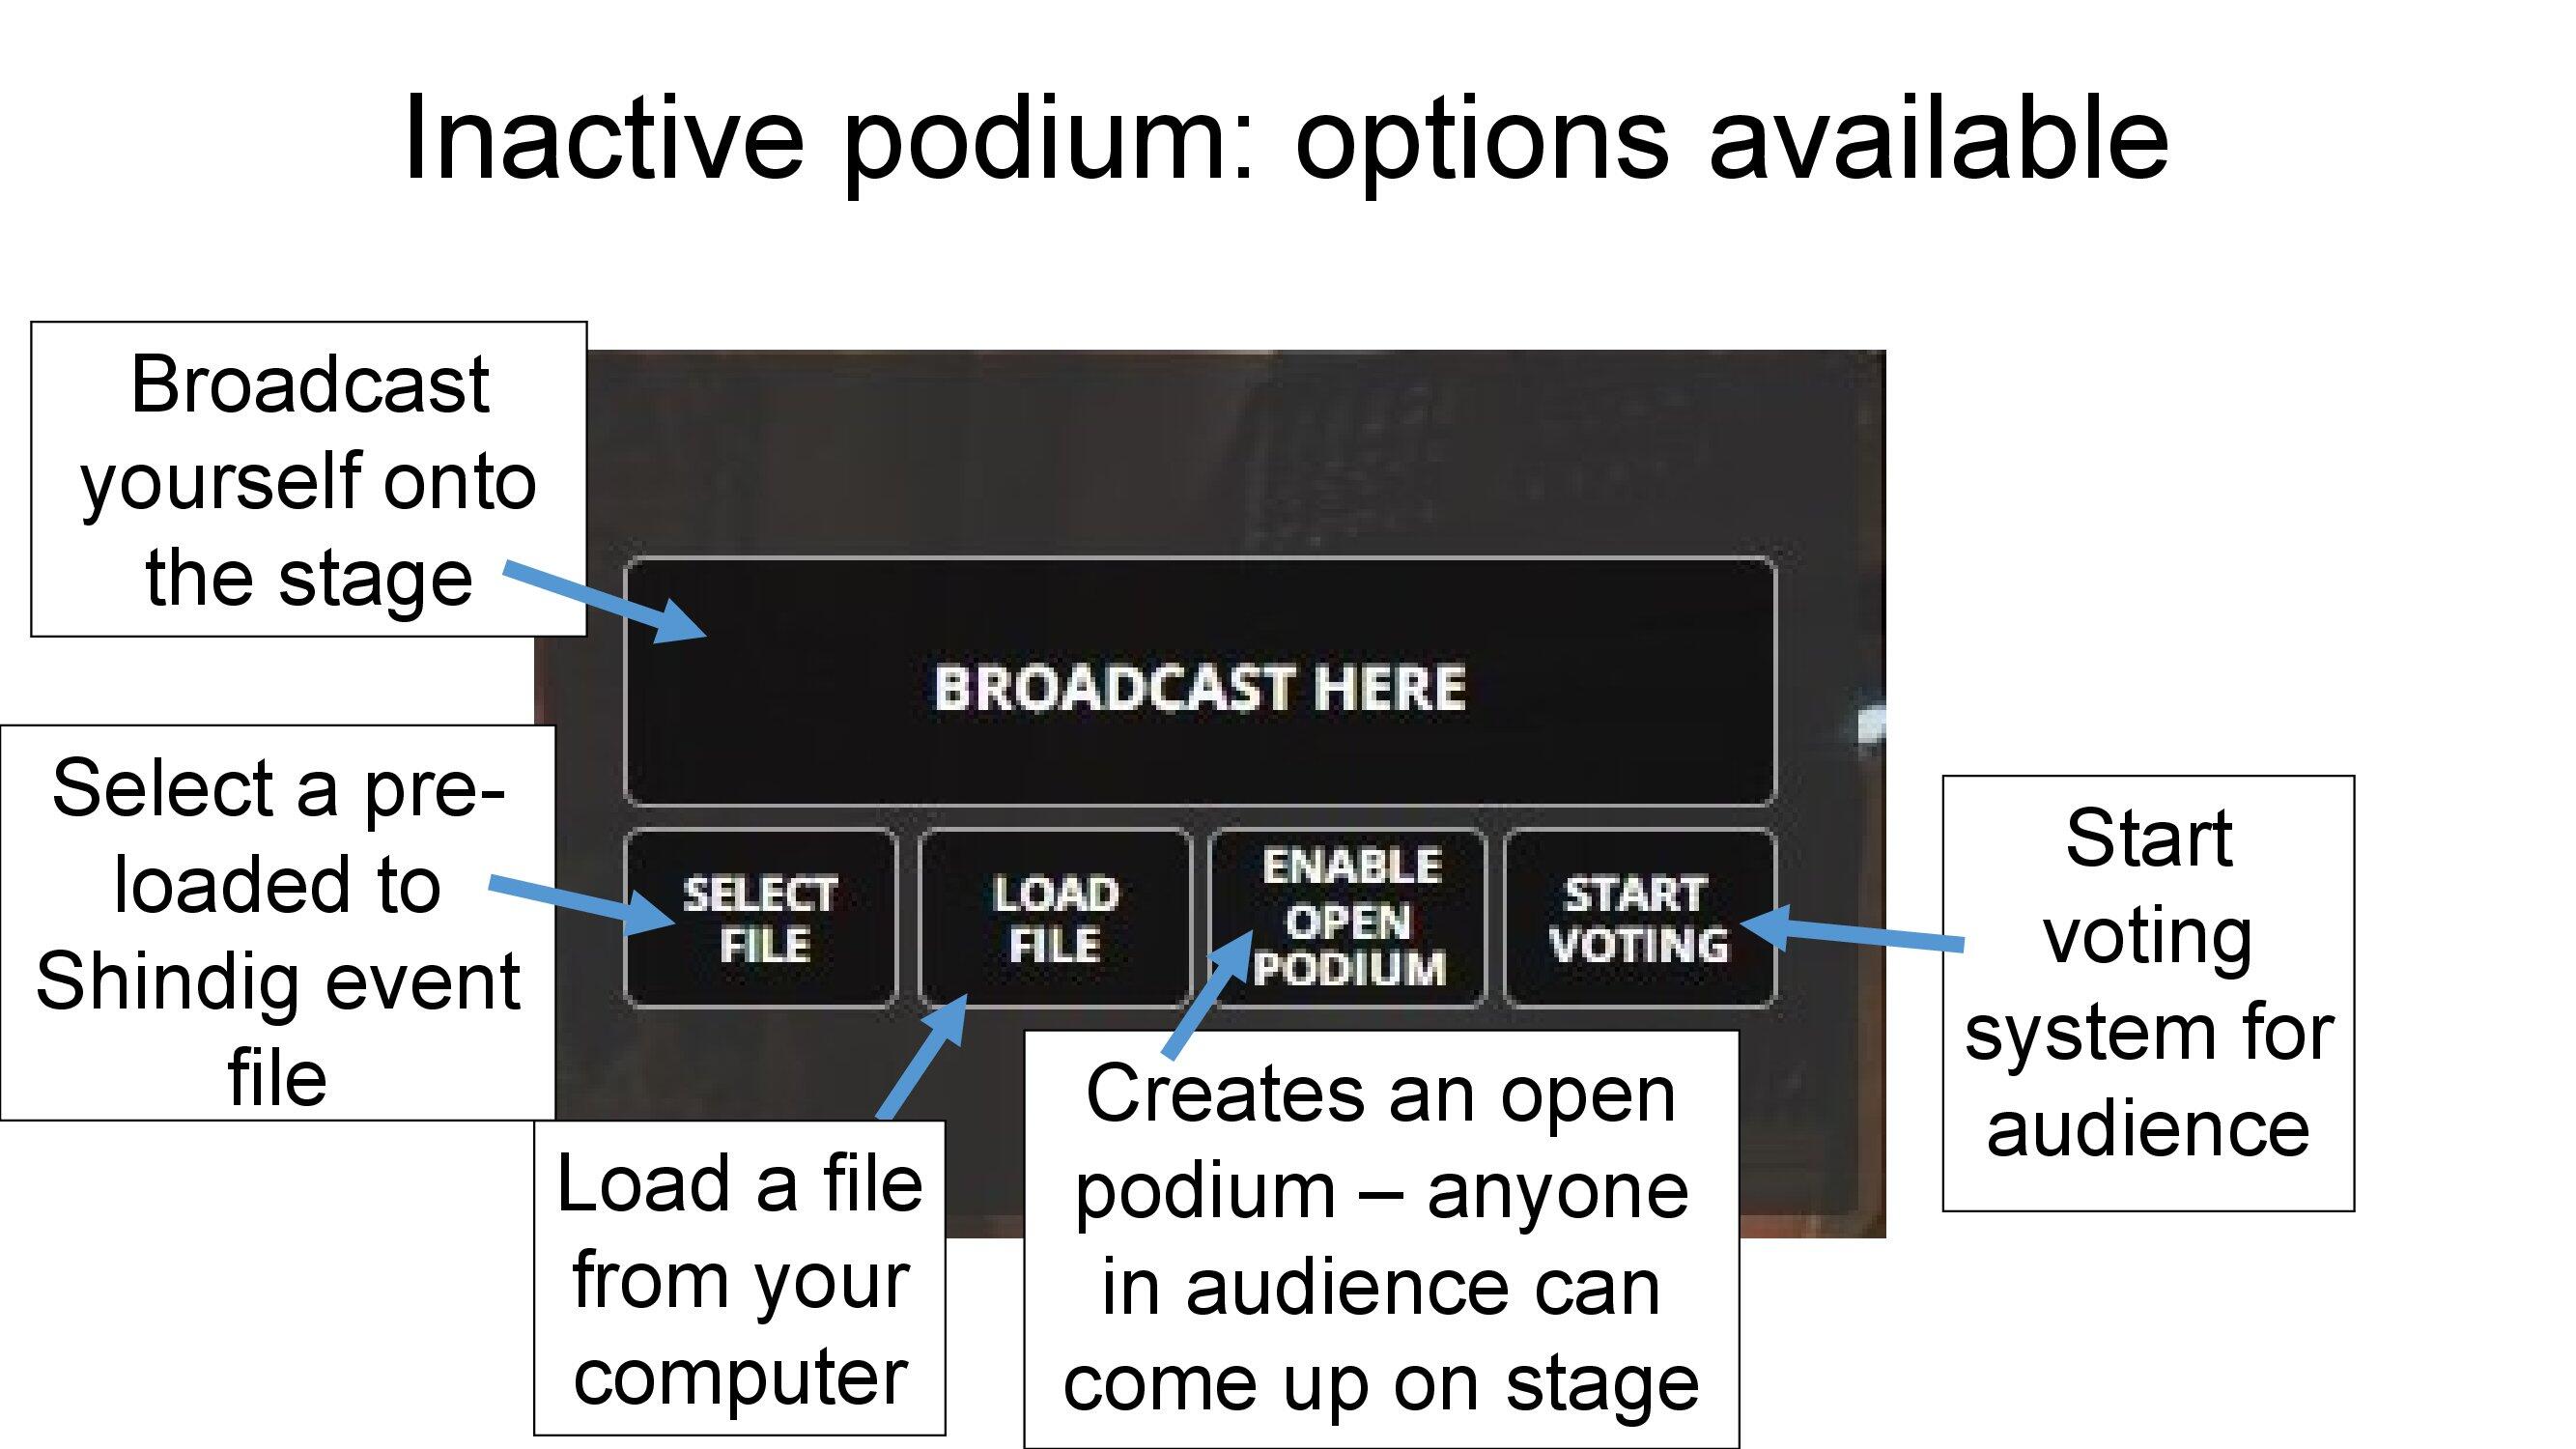
Each podium of four available, can be used to display files or a speaker, and are controlled by the admin.
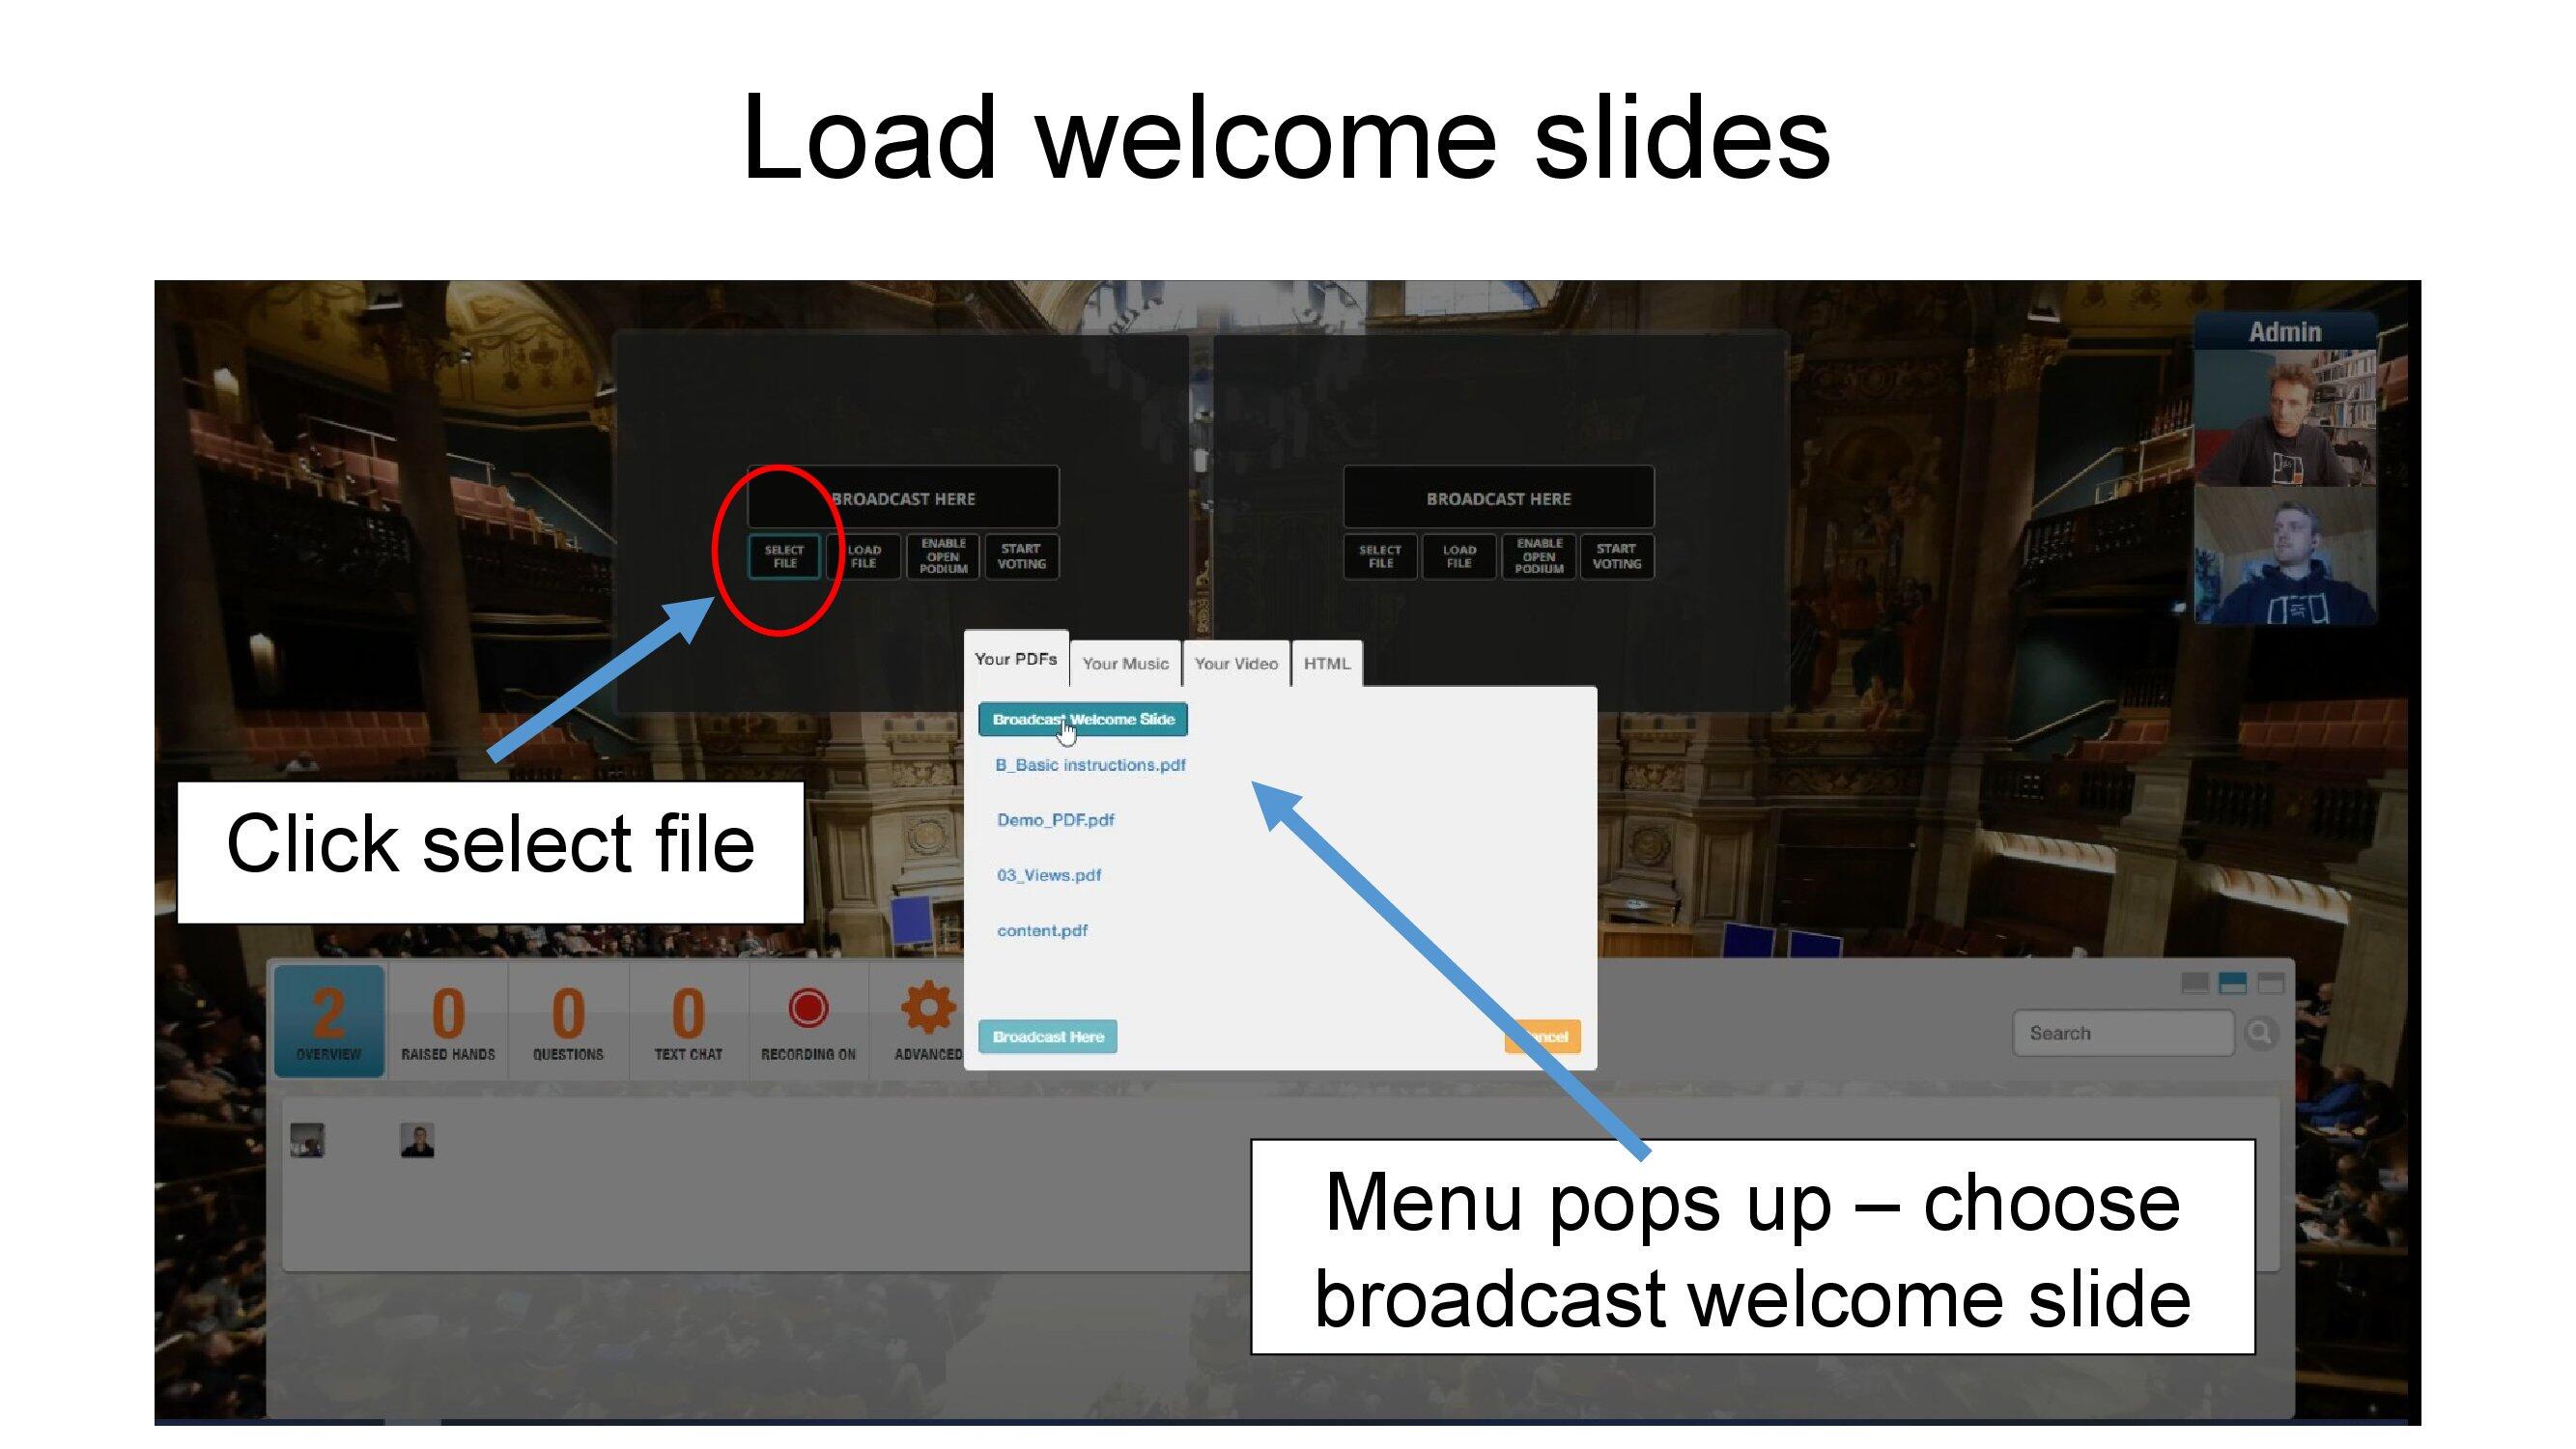
It is helpful for those entering the room early to see a couple of welcome slides, identifying the panel and reminding them of basic tech instructions.
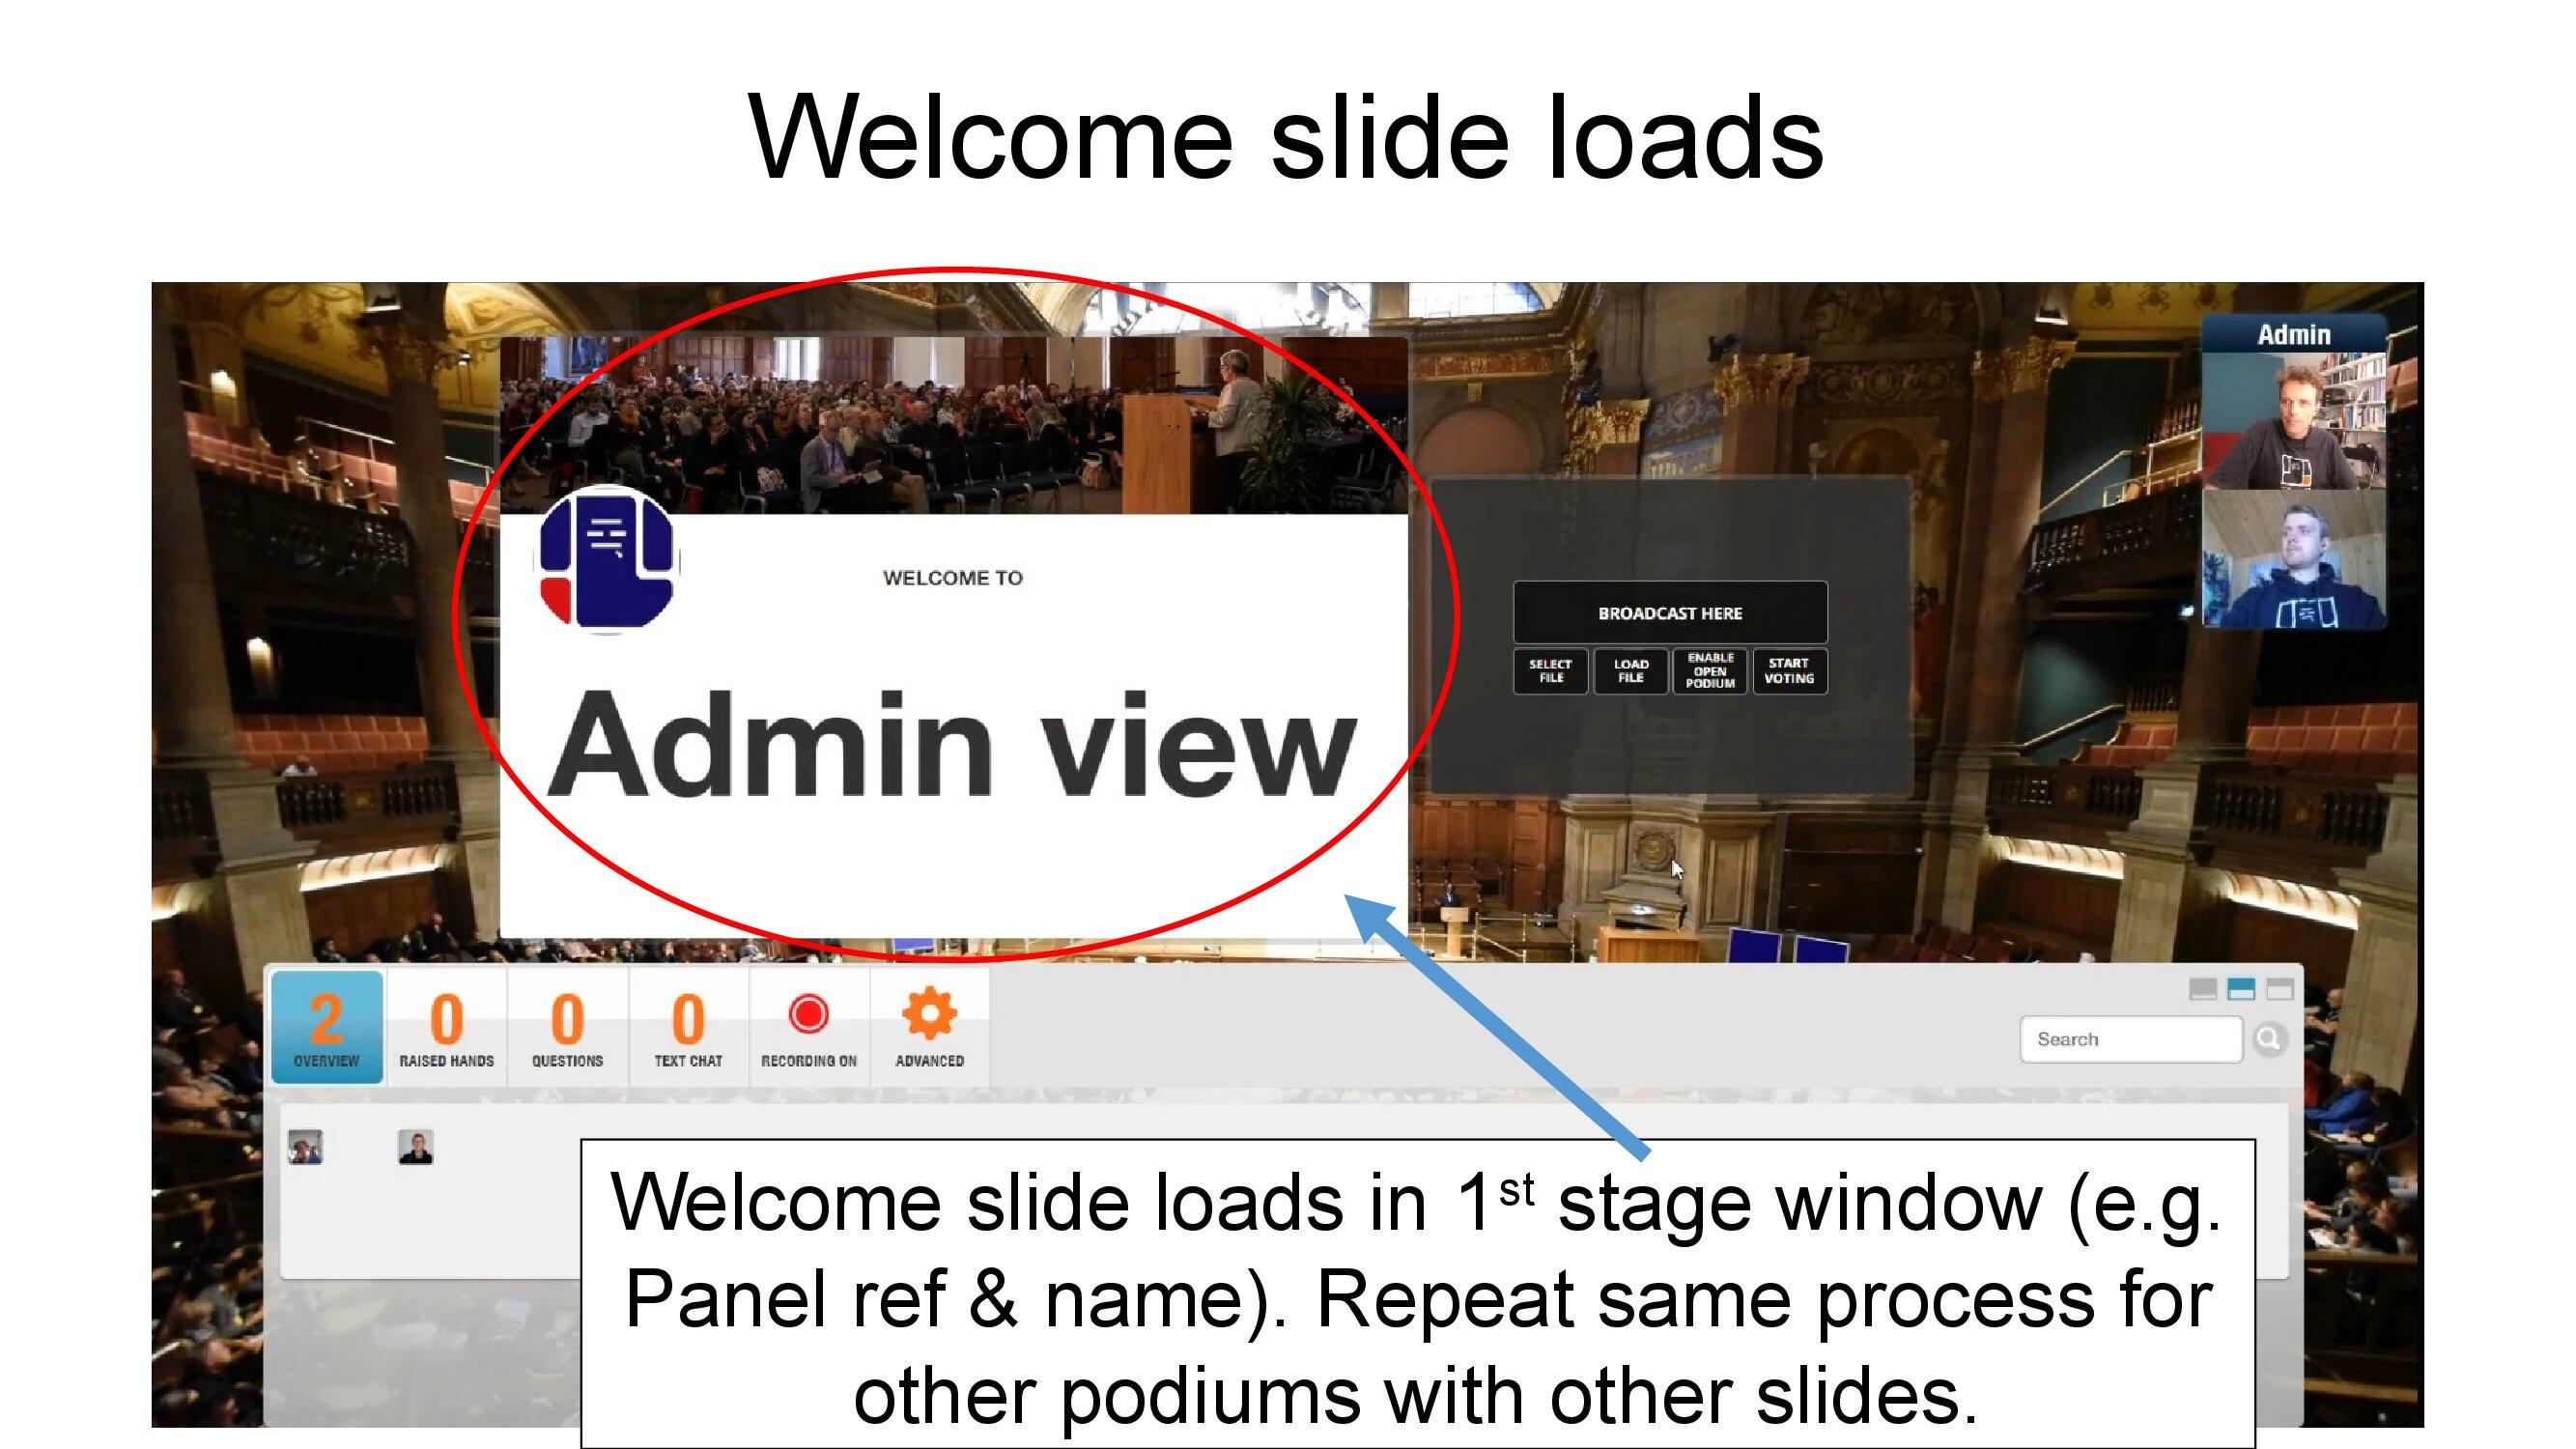
Each panel has an automated welcome slide (which names the panel/session) which should be put up initially.
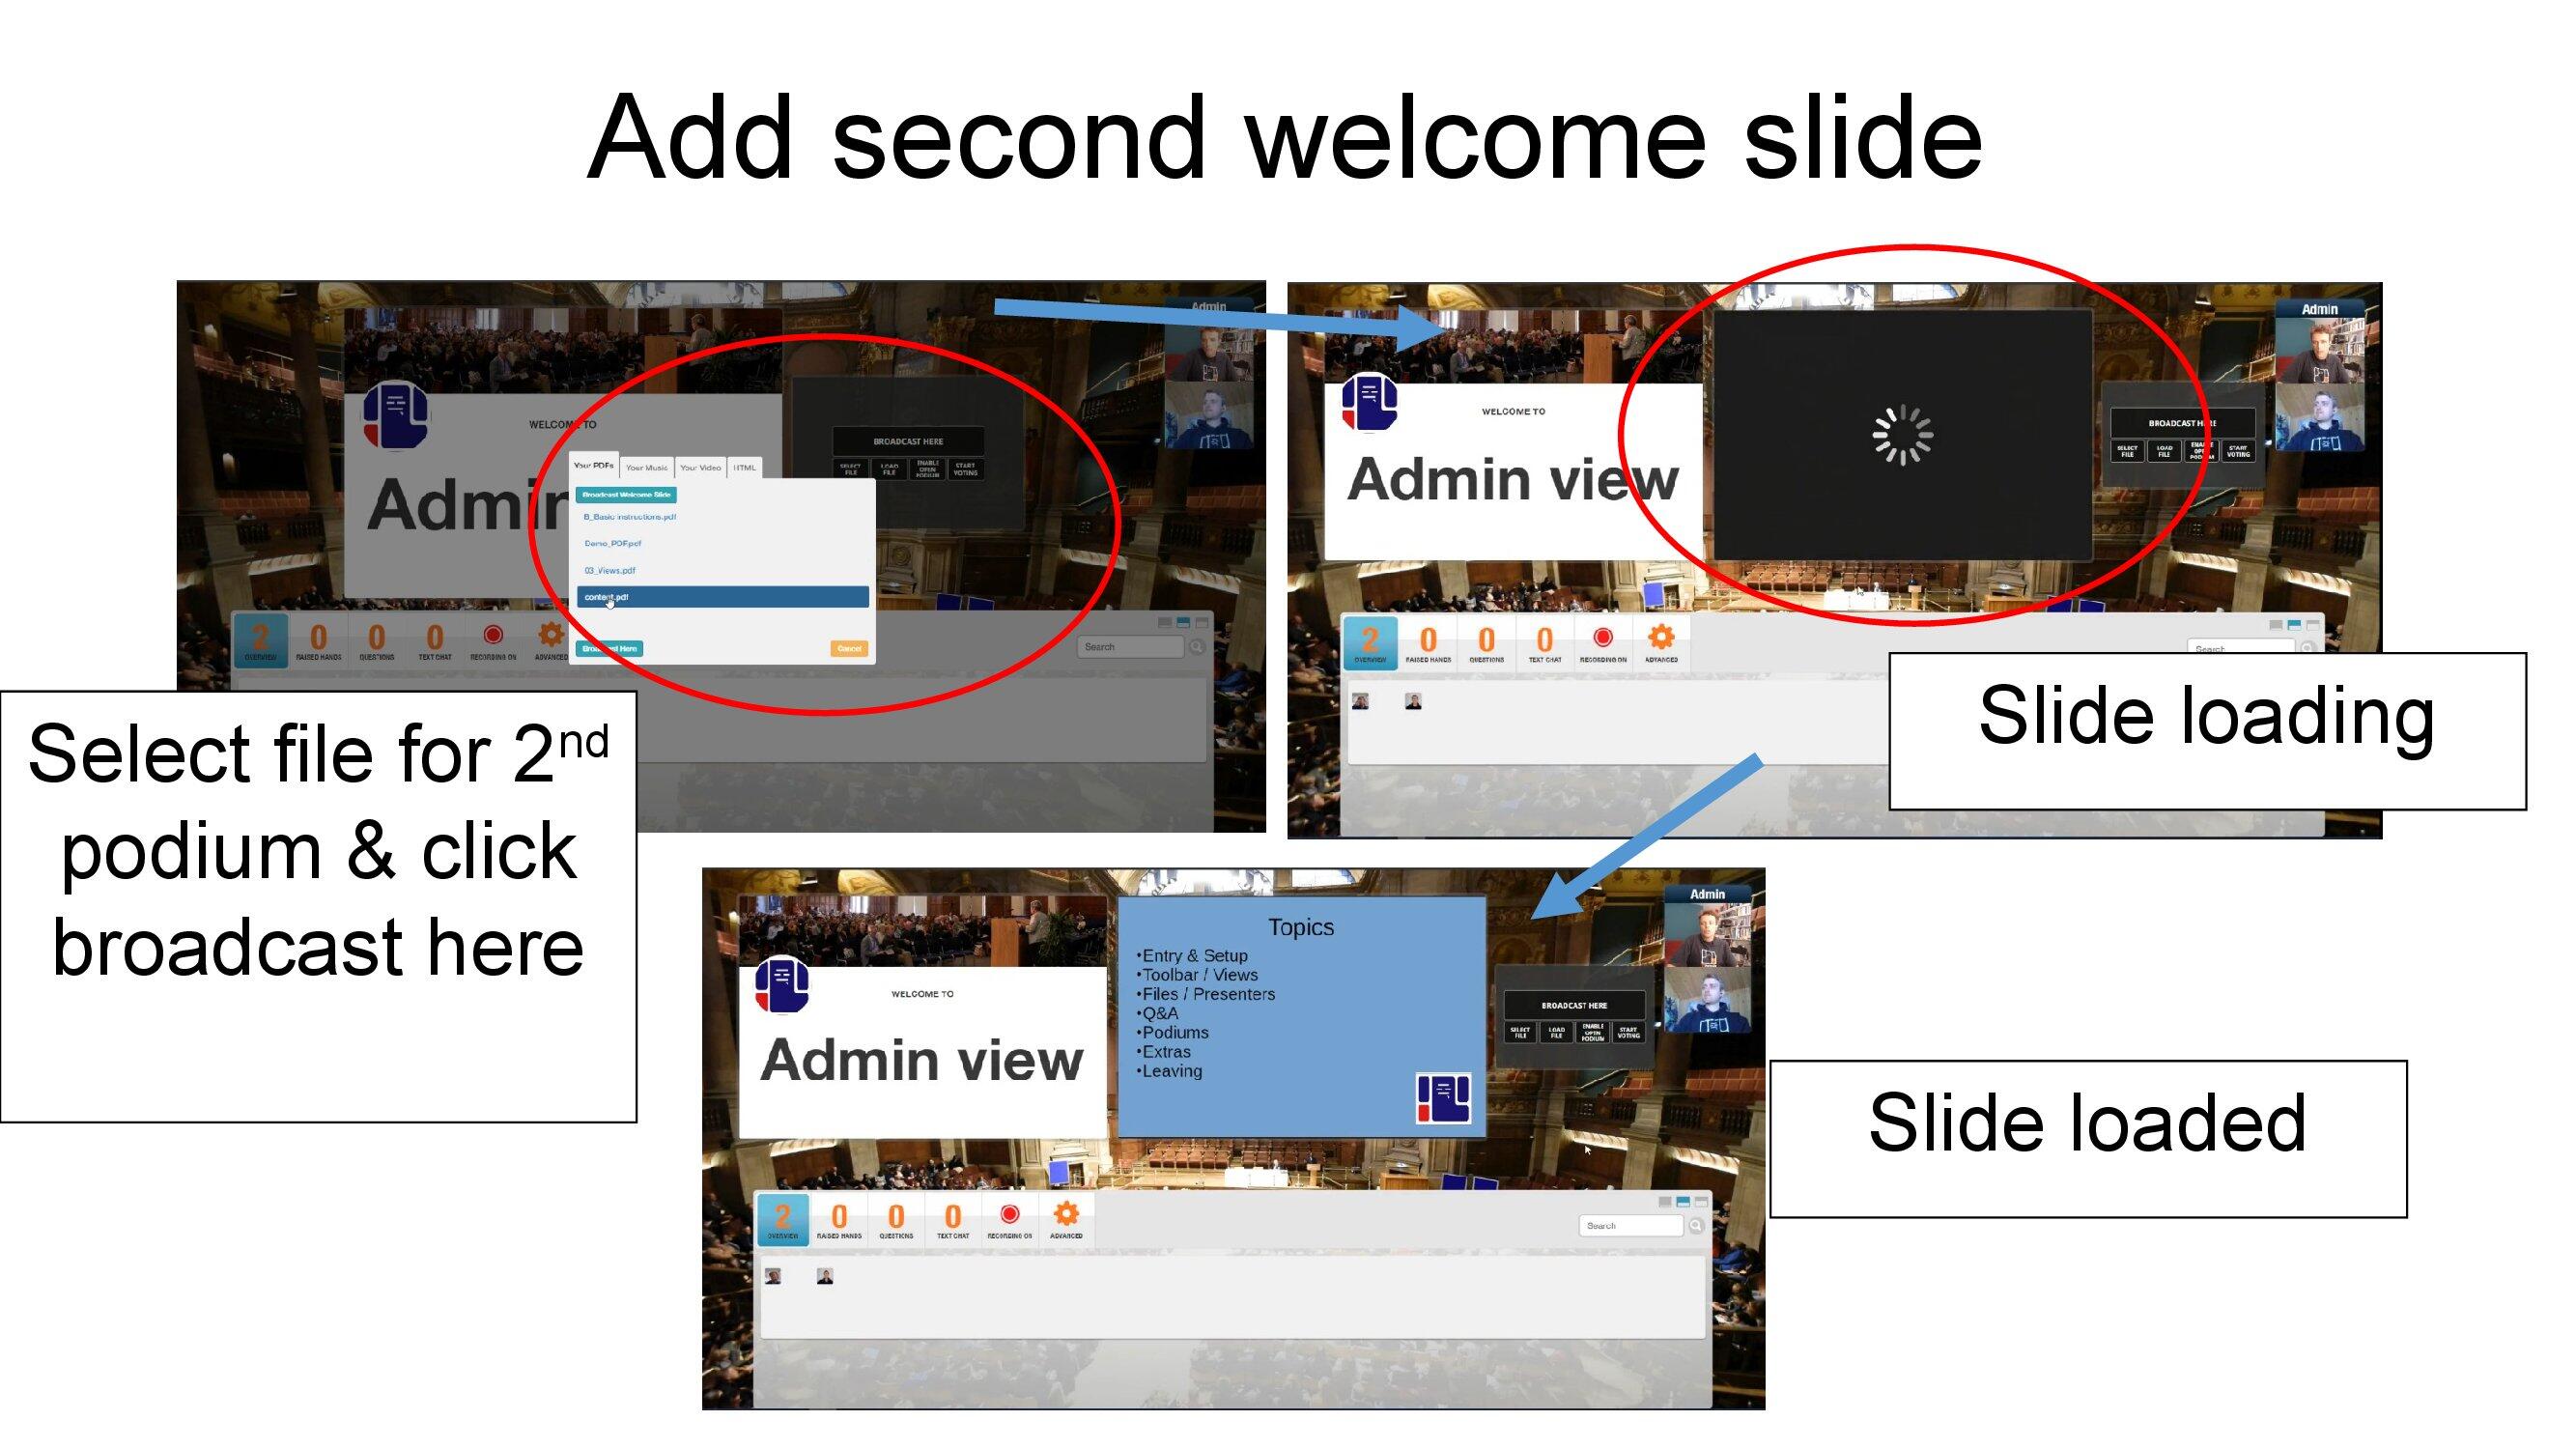
We'd suggest loading the second slide which gives basic tech guidance to participants.
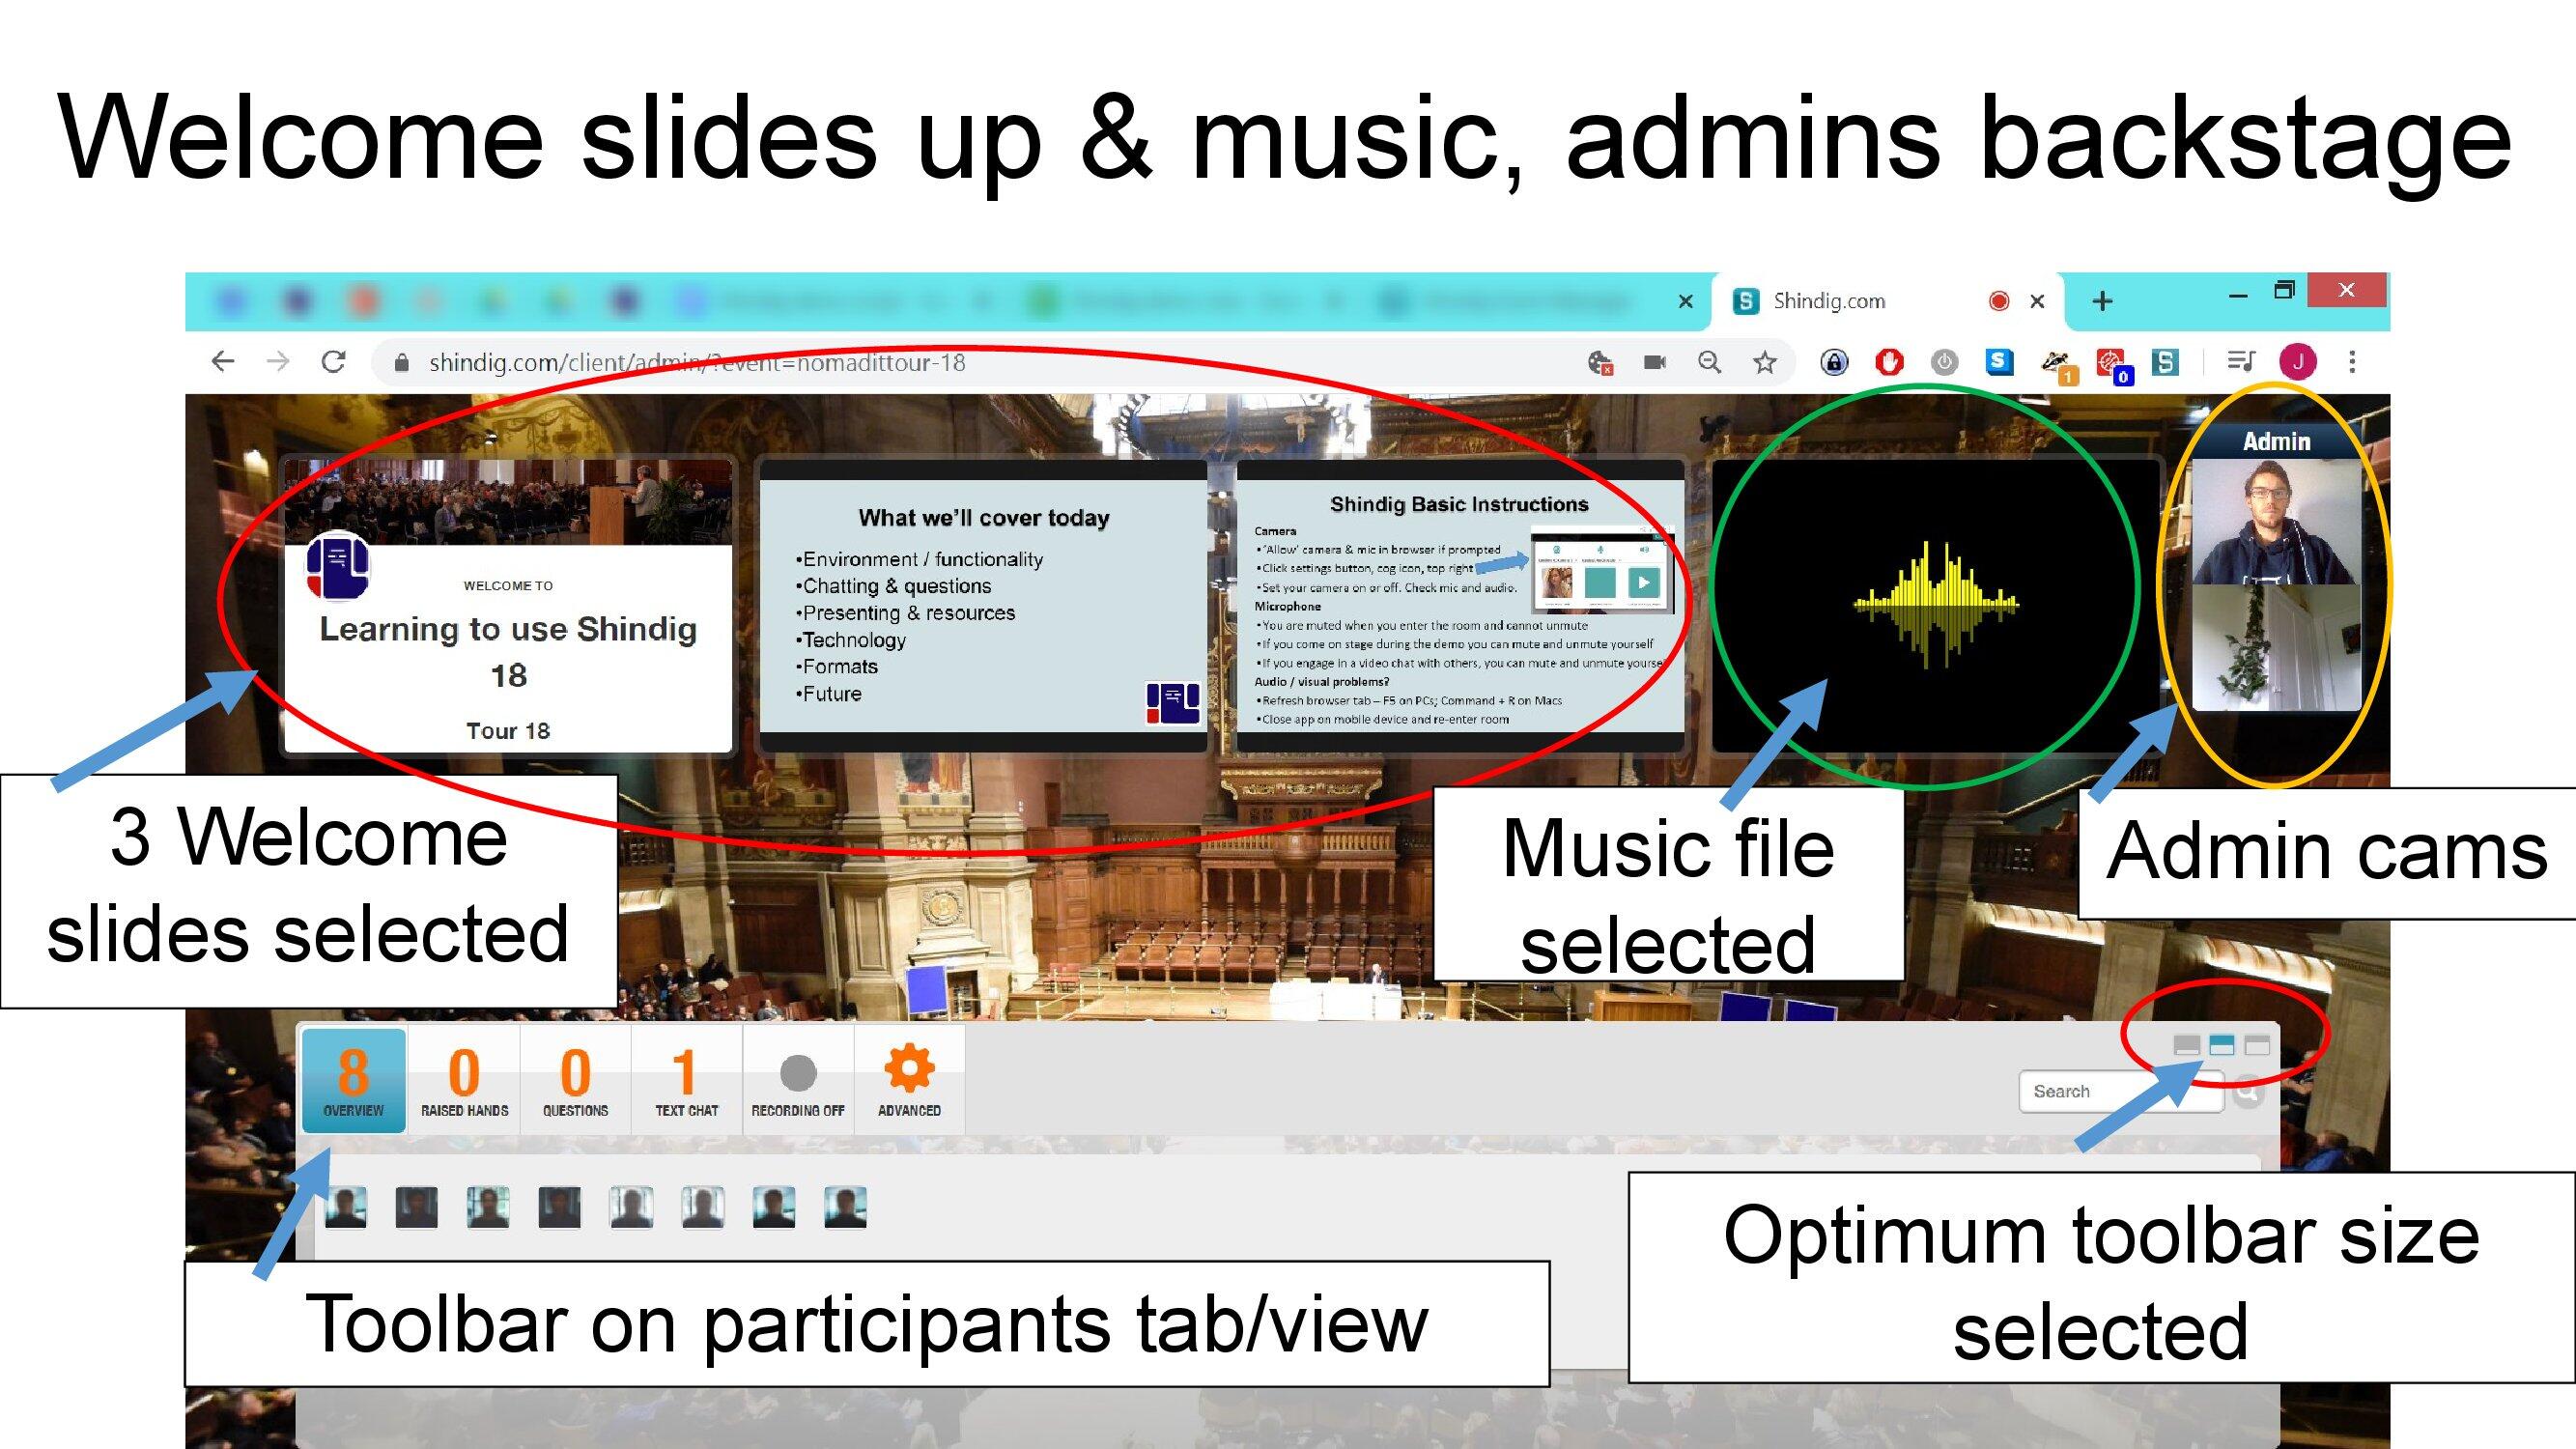
However you may also load your own slides, or even some calming music. Admins do not need to stay on stage, while slides or presentations are running.
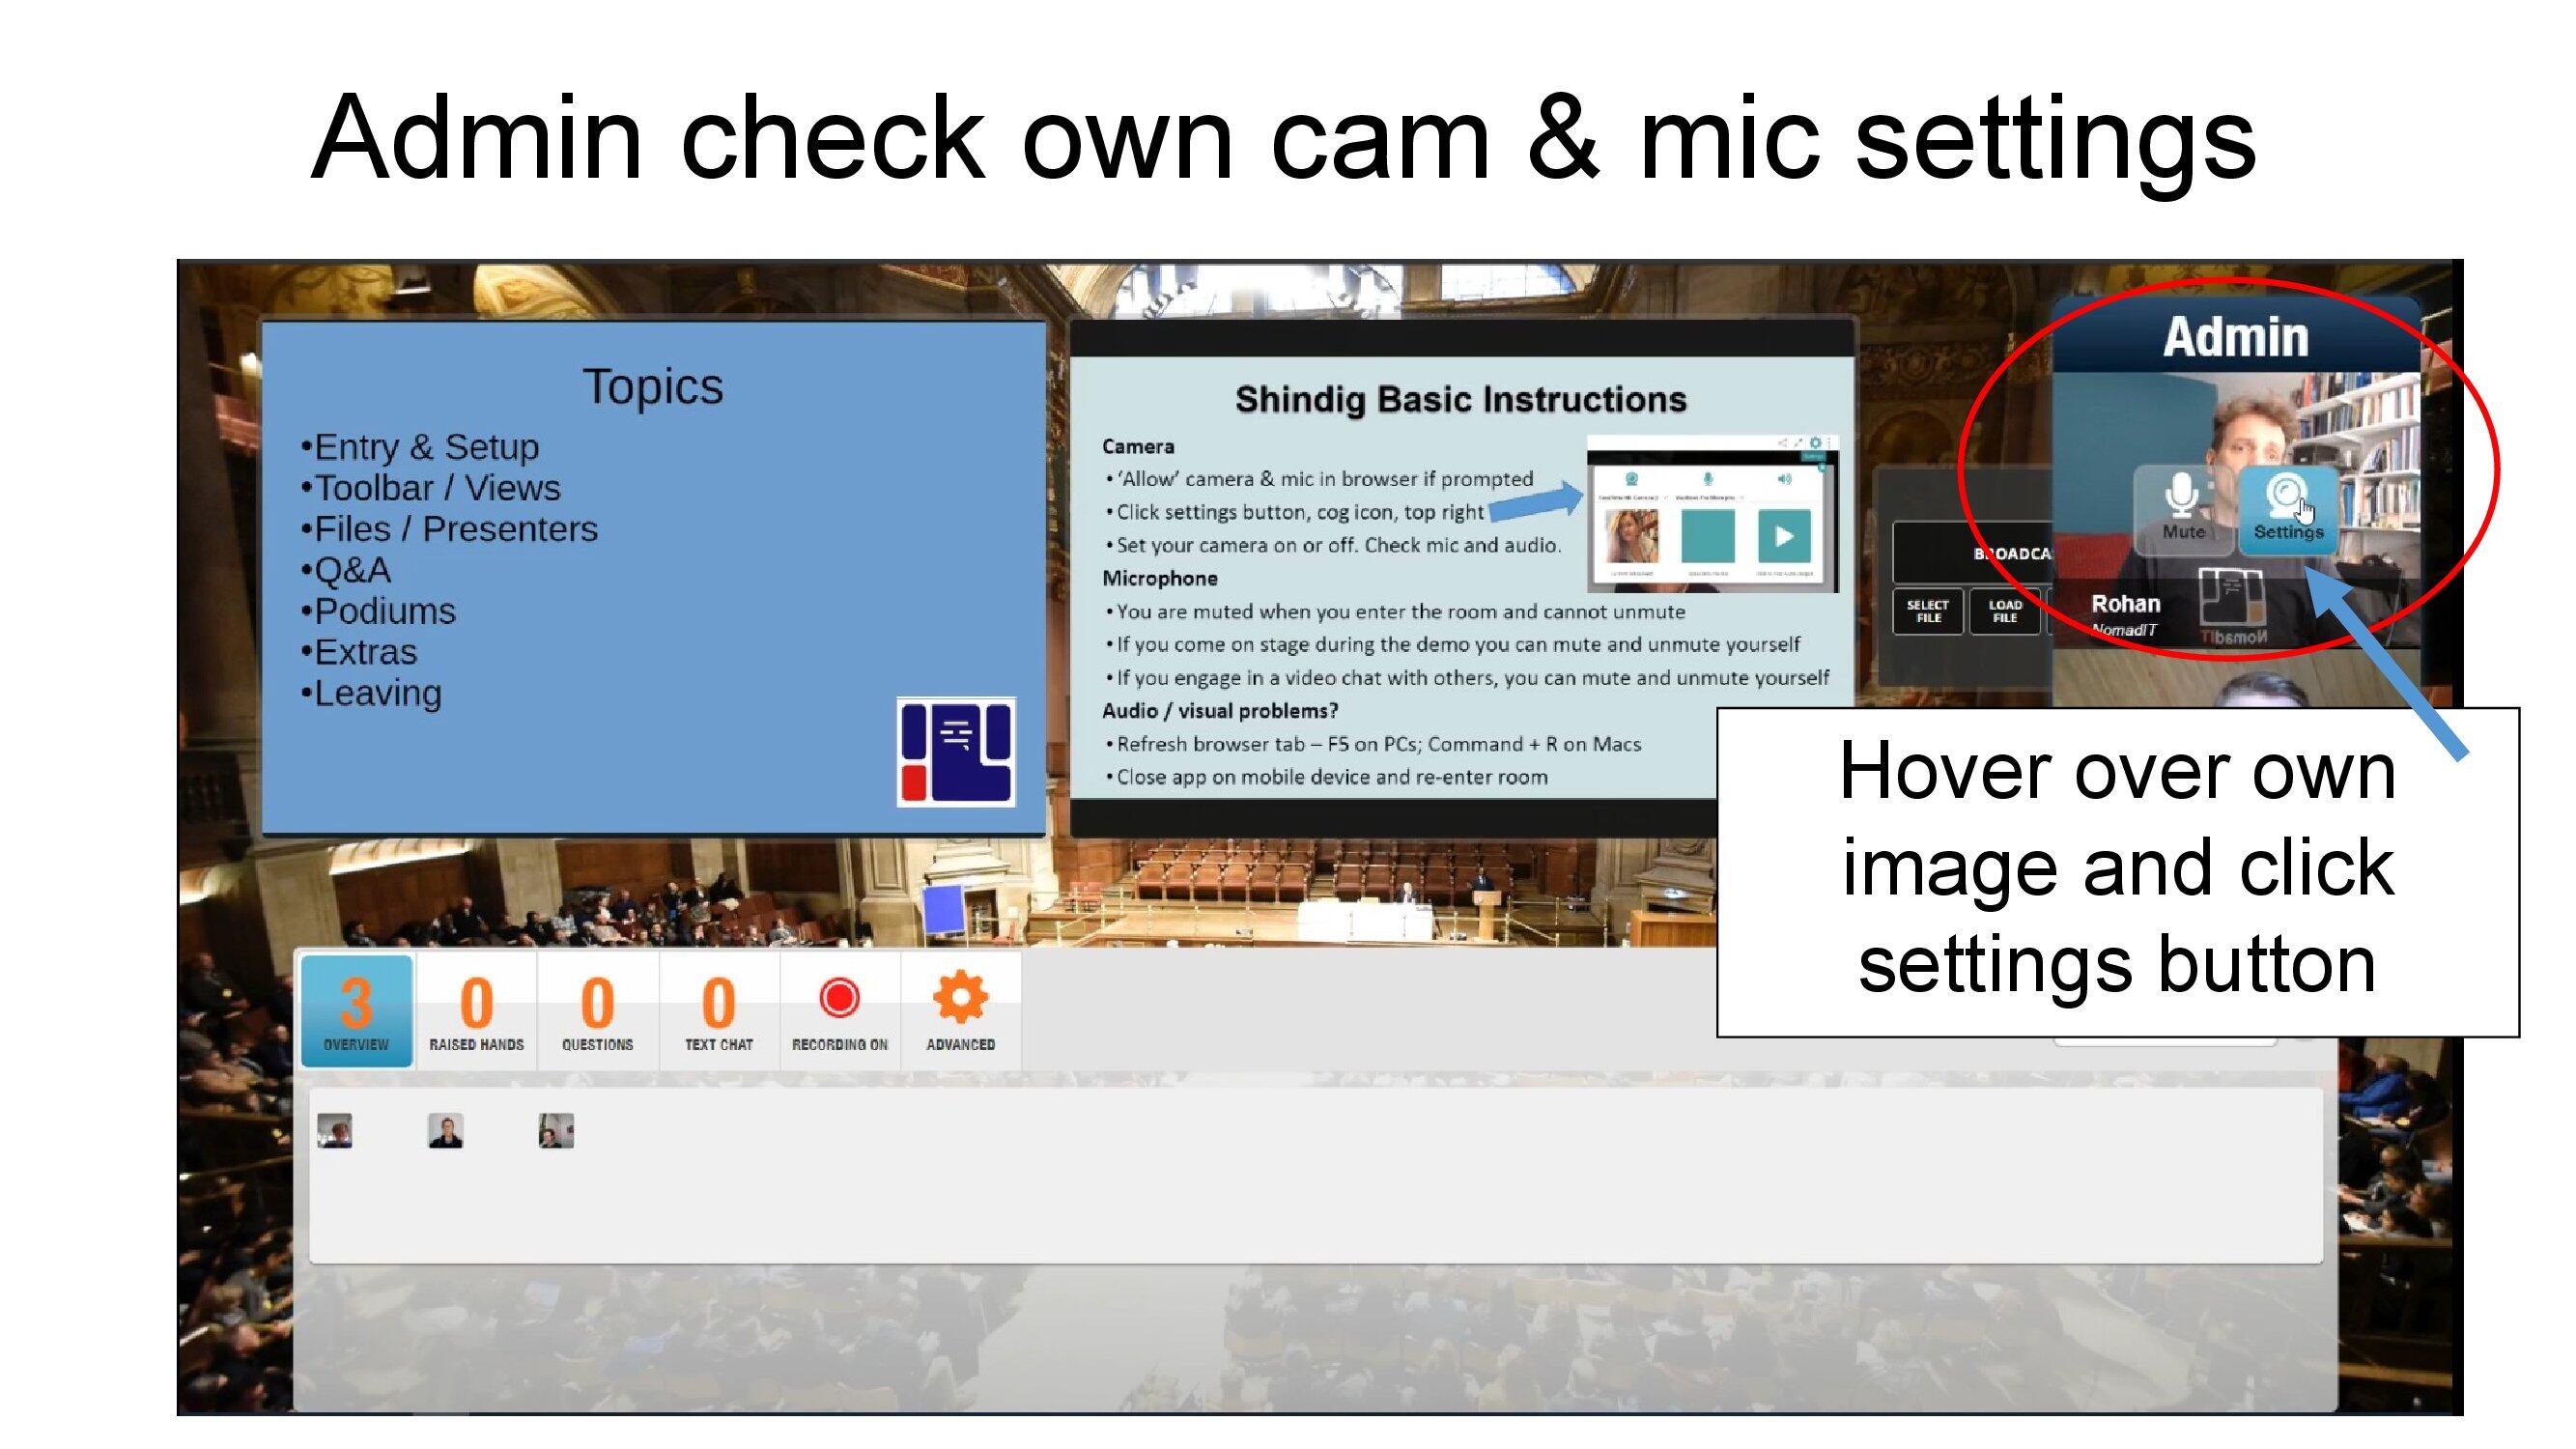
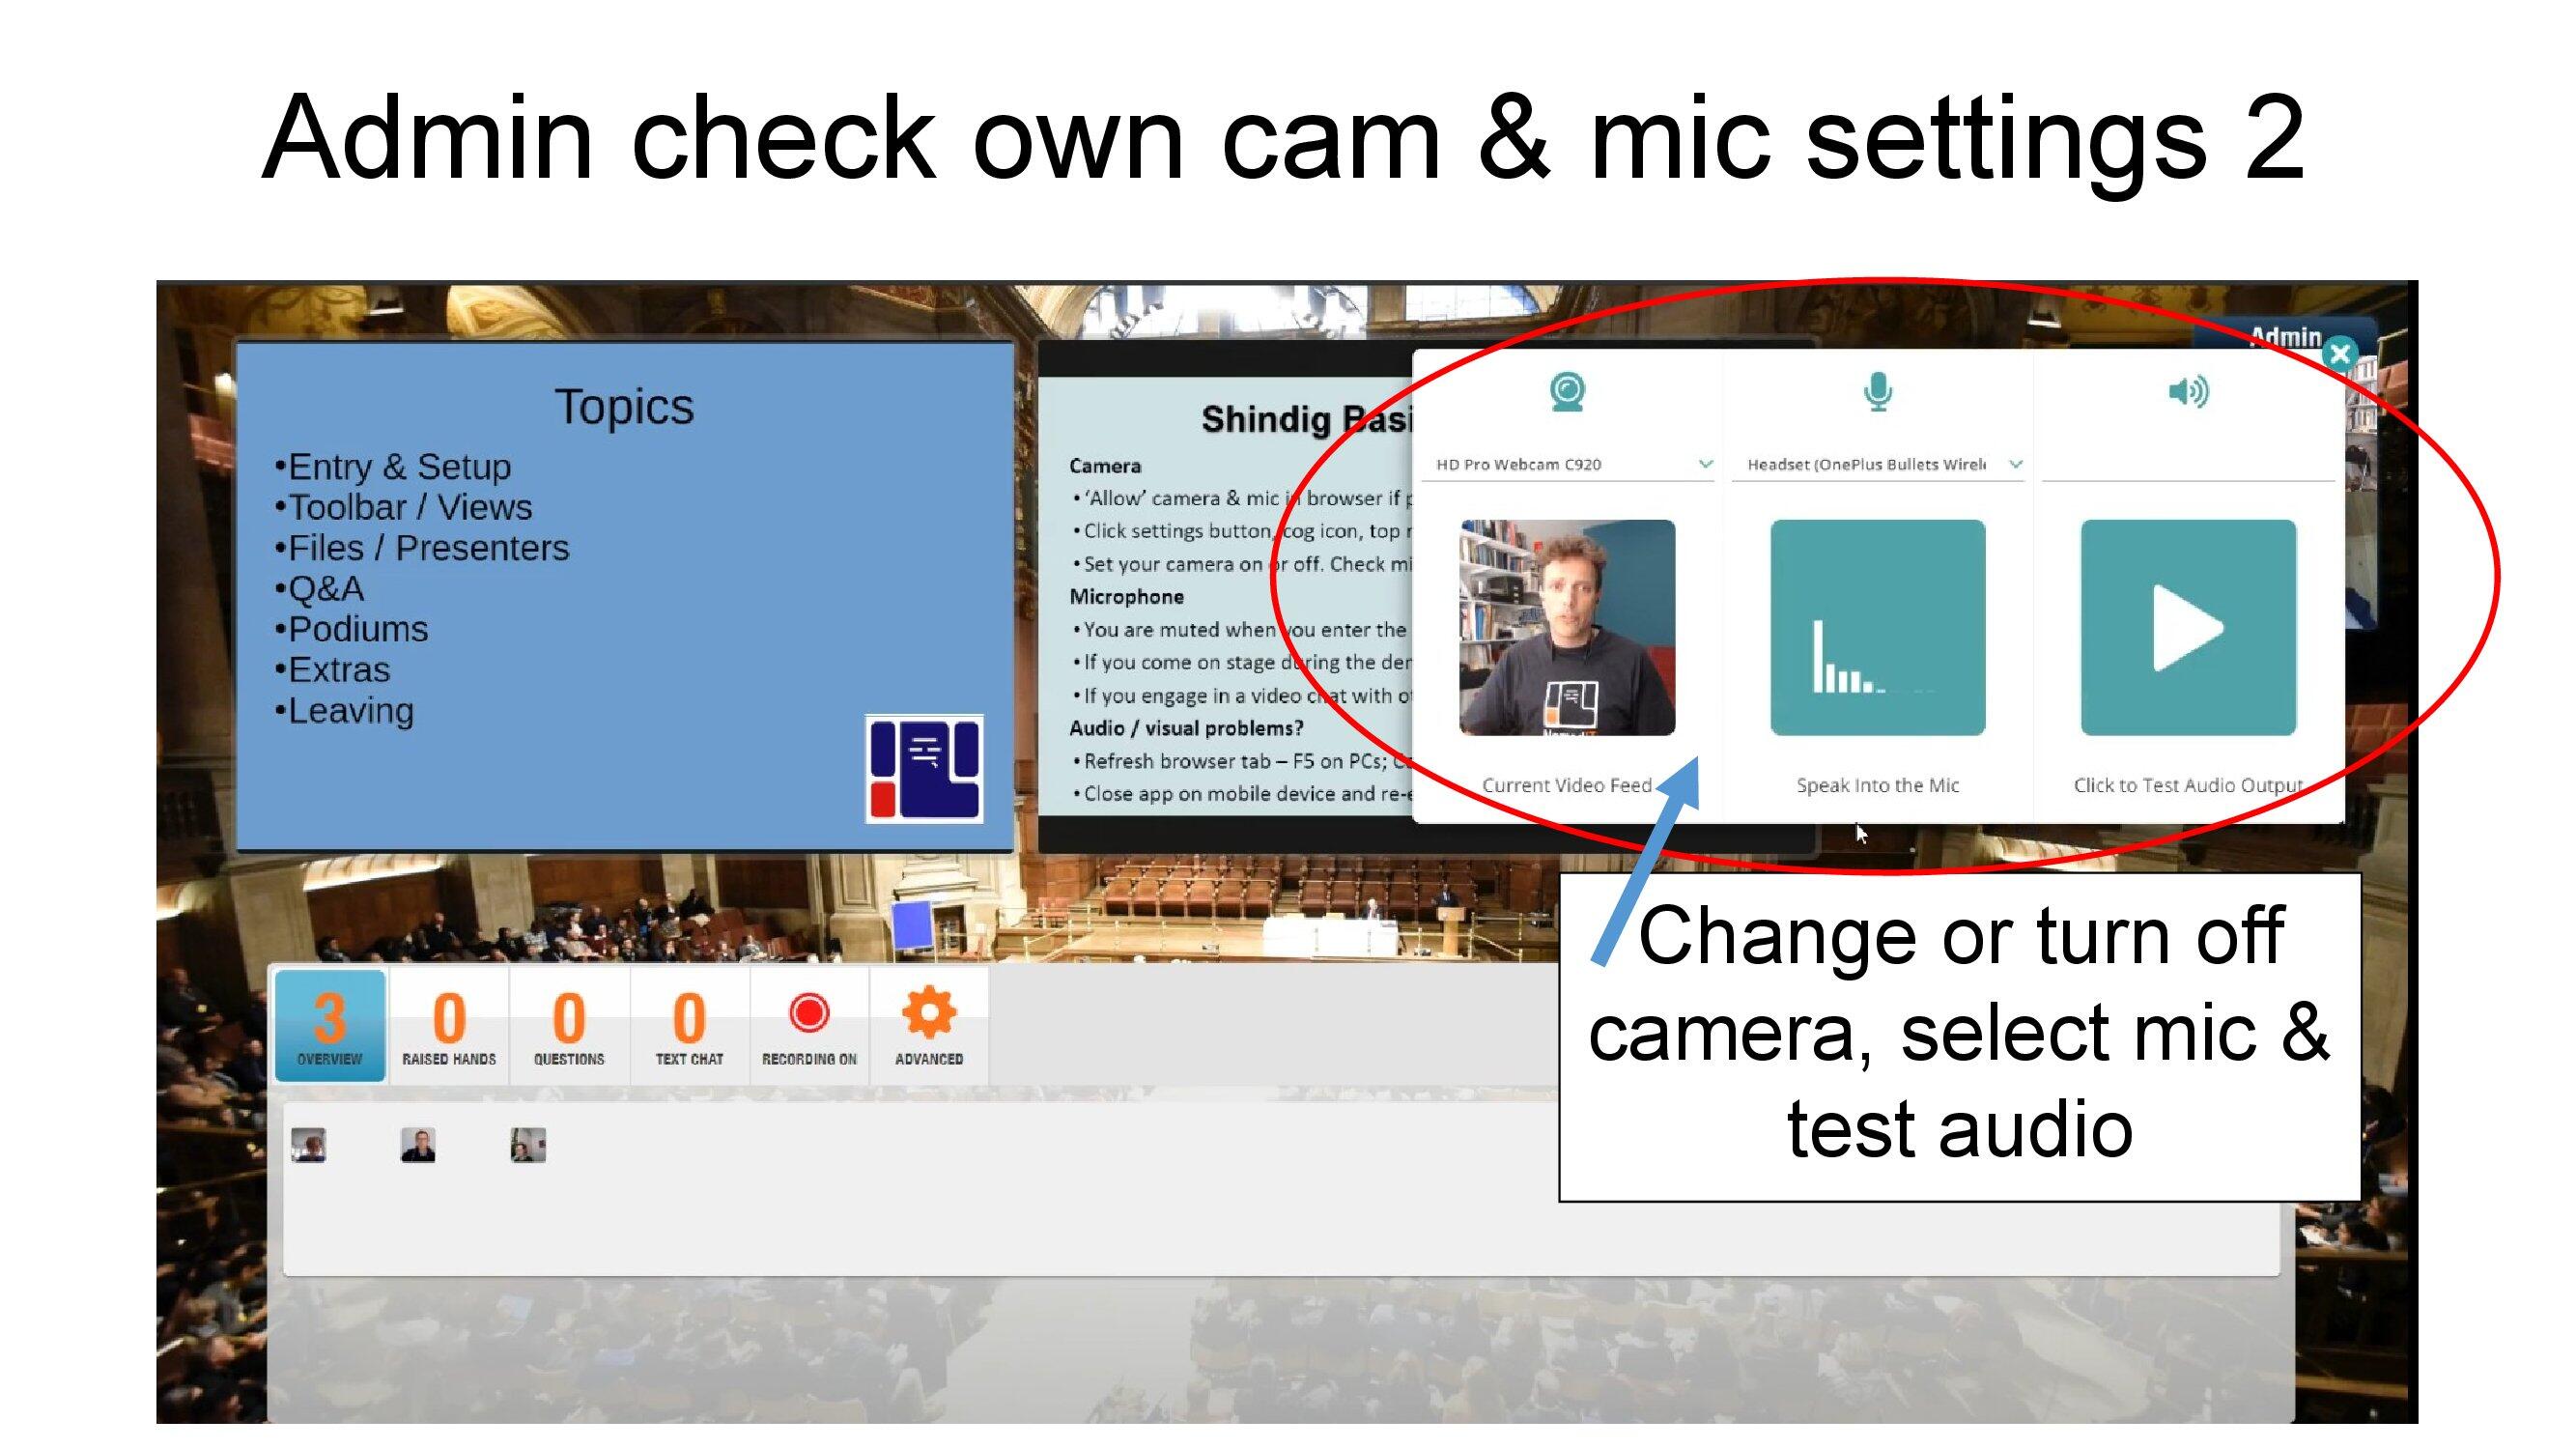
Before going on stage, it's worth checking your camera/mic settings.
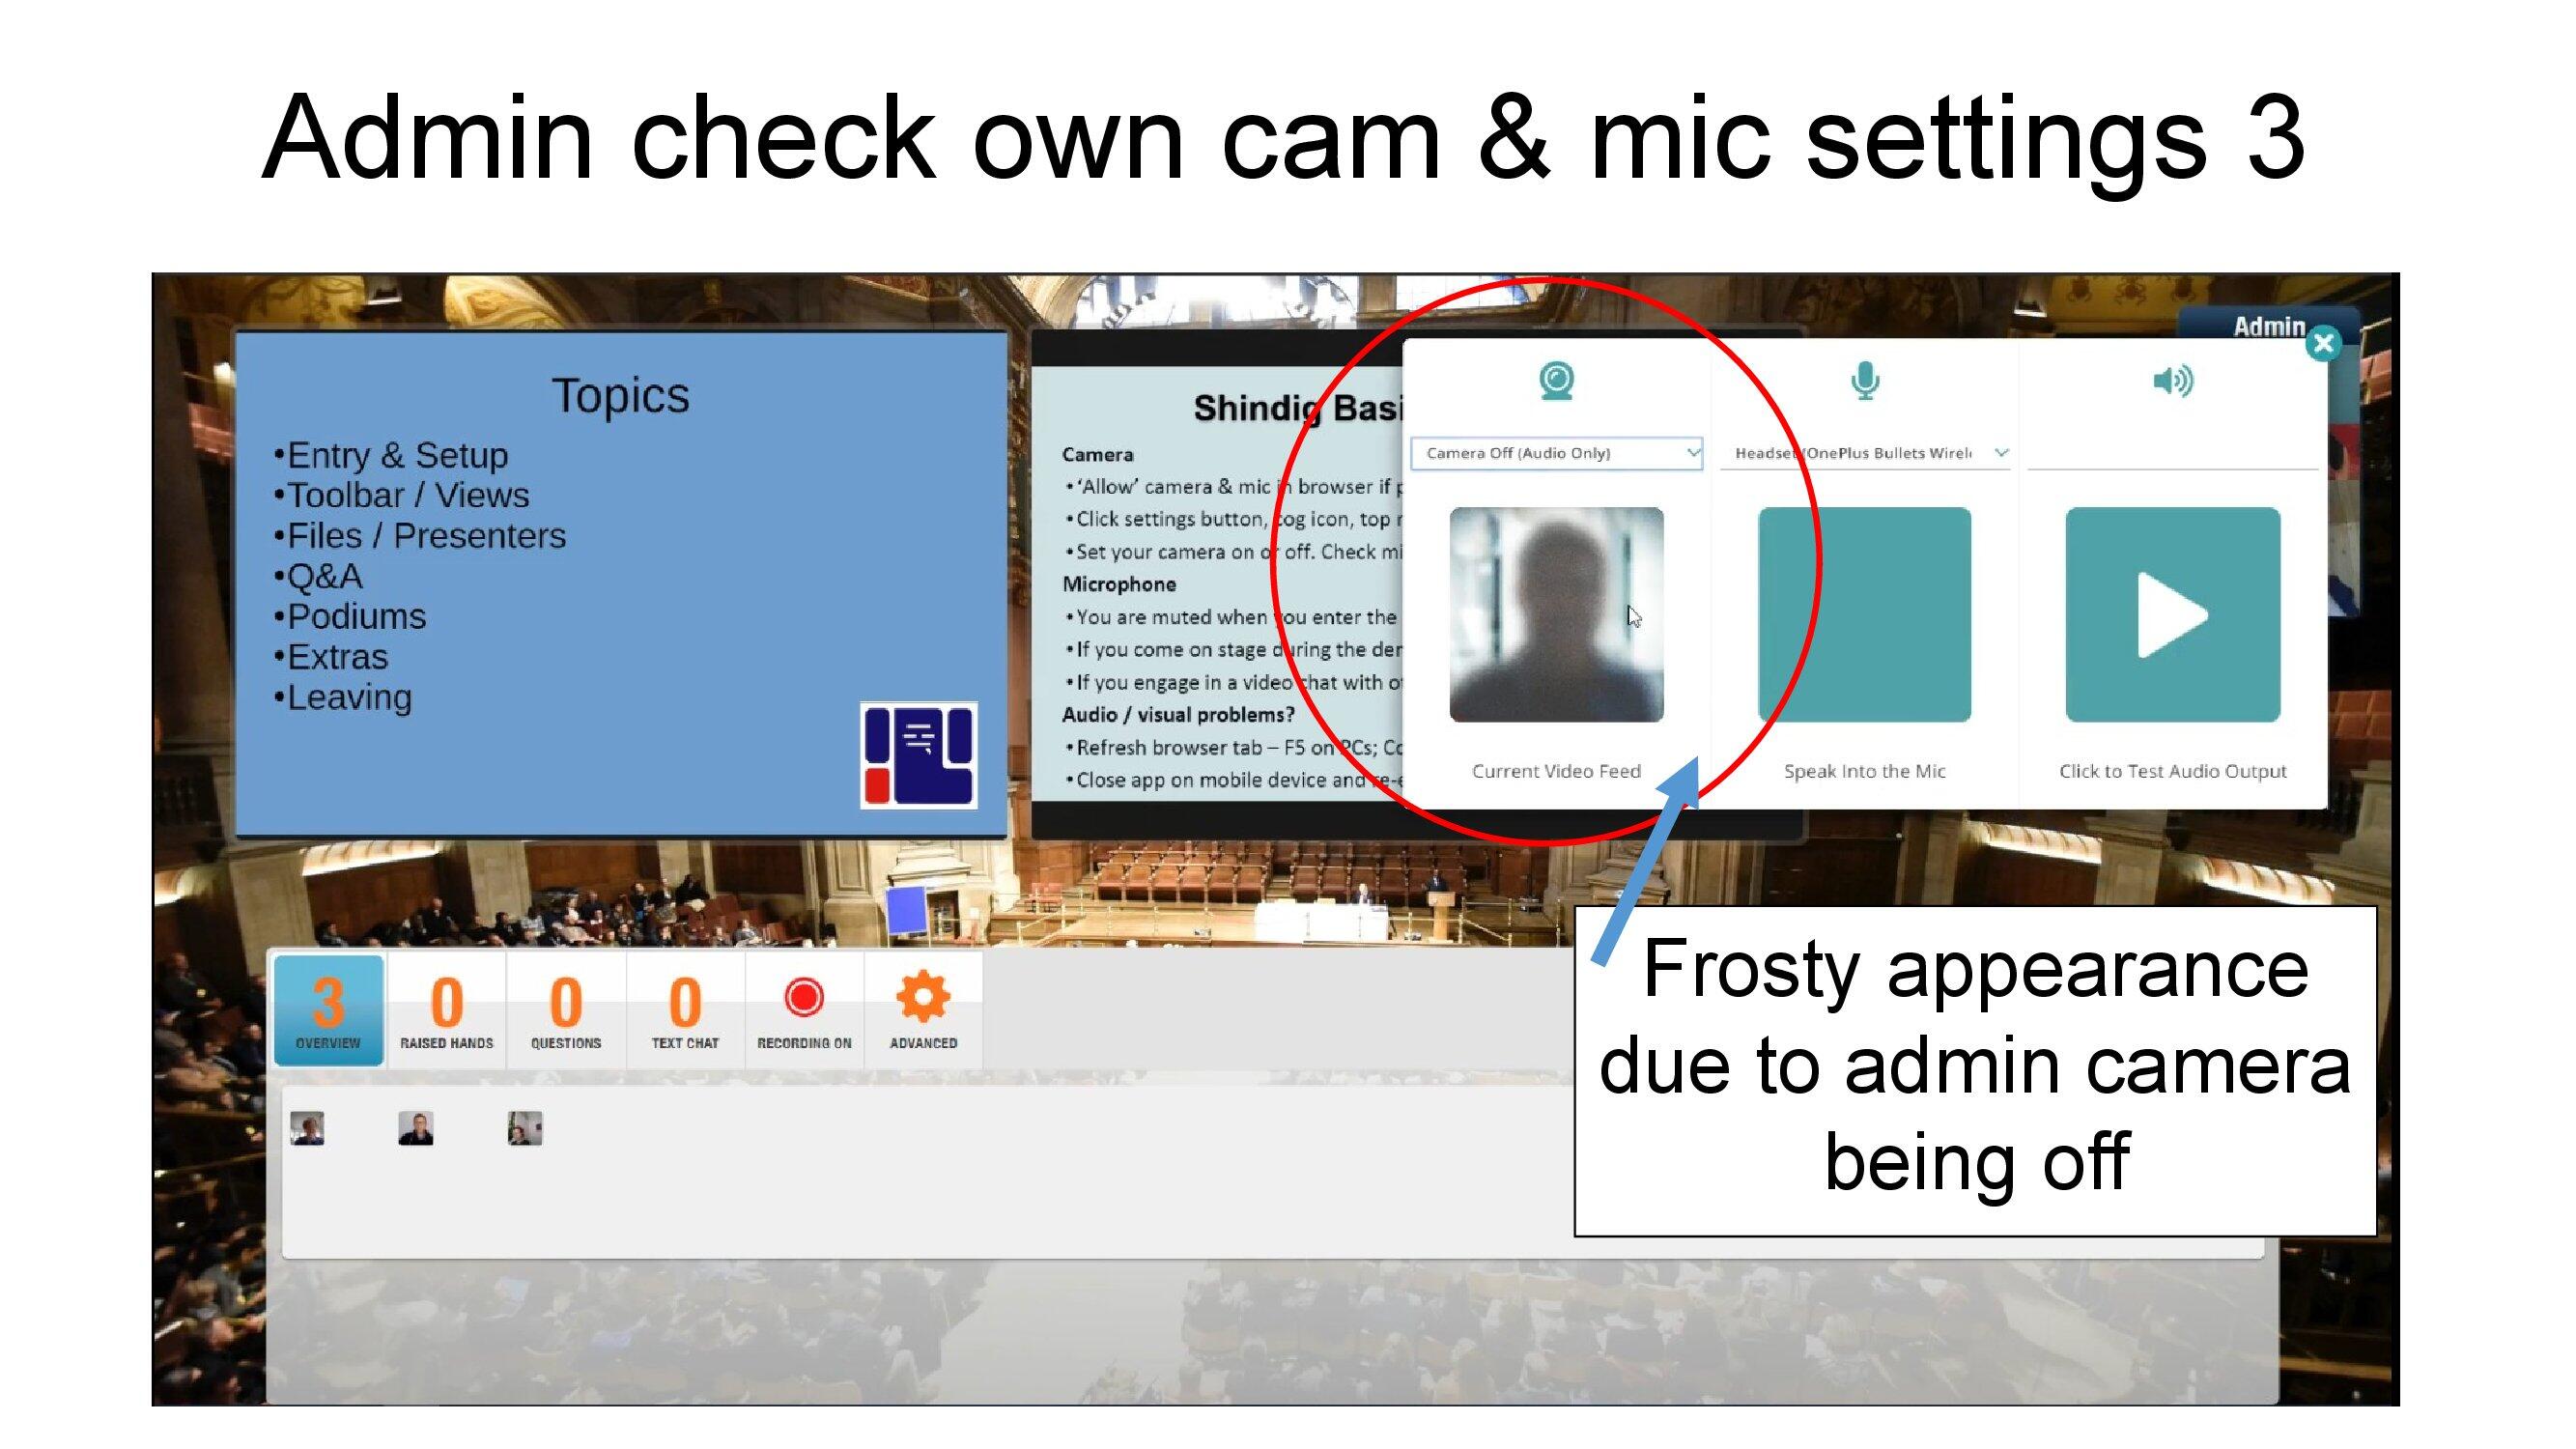
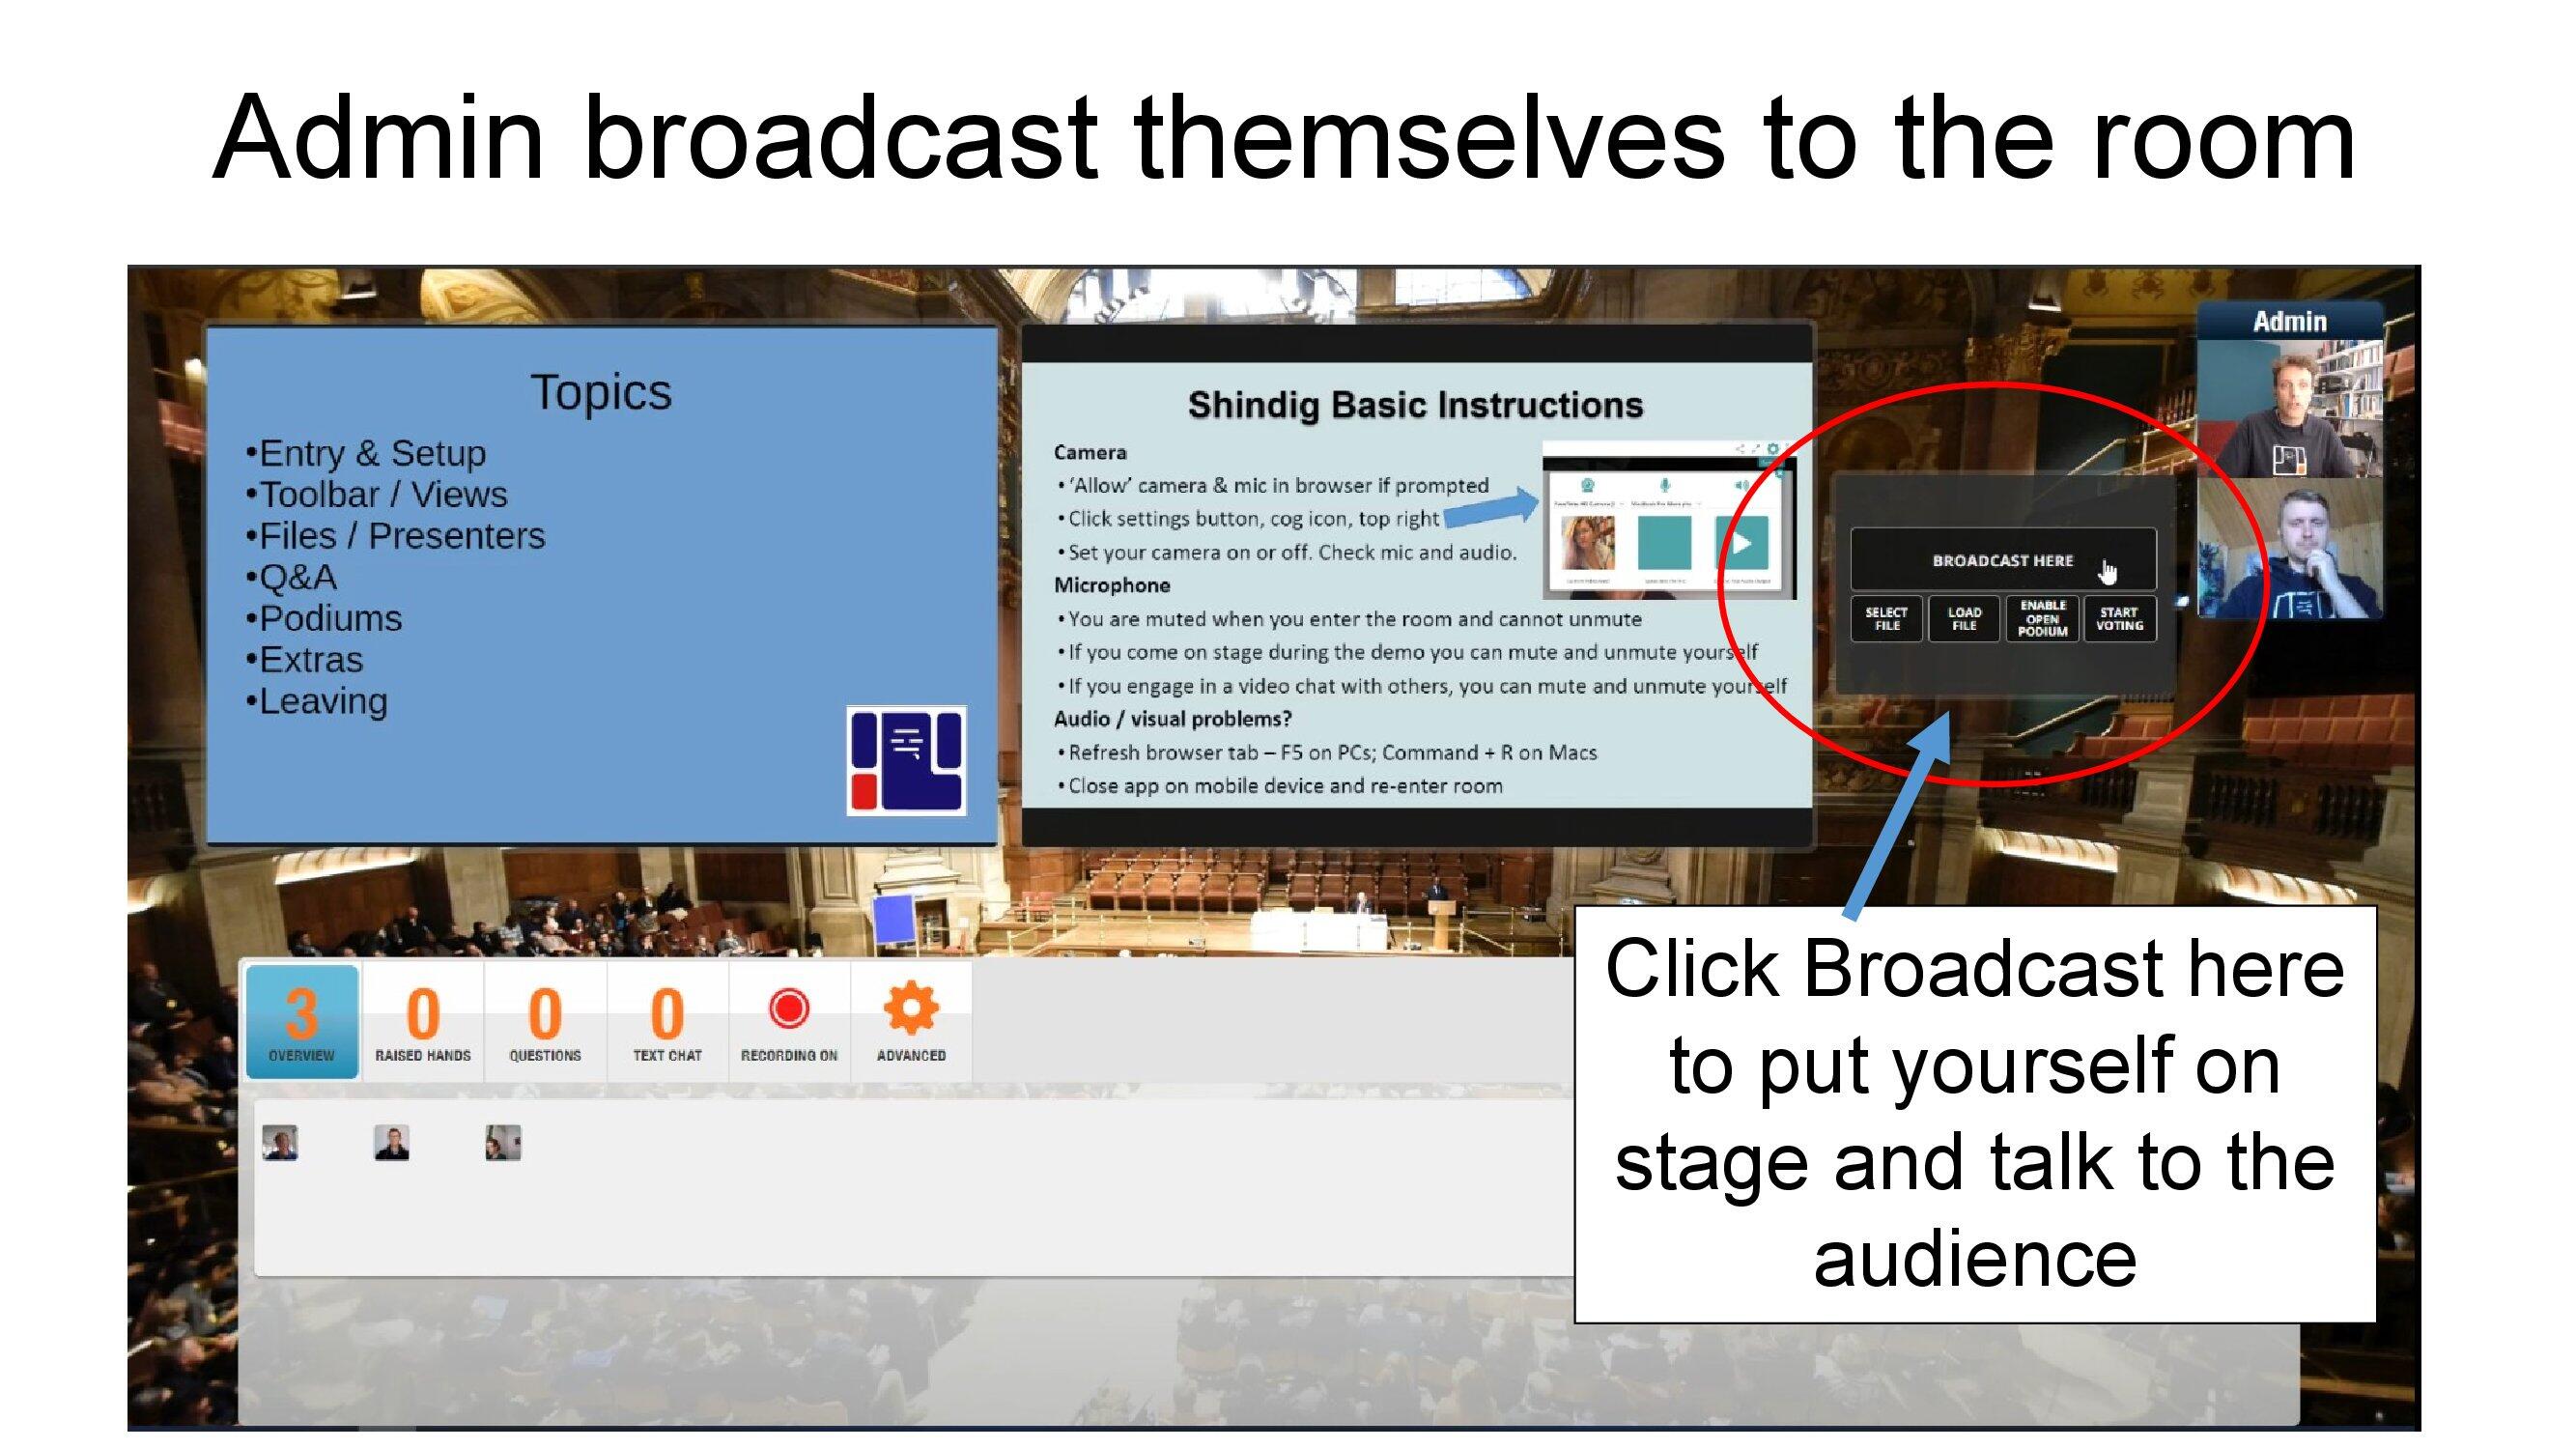
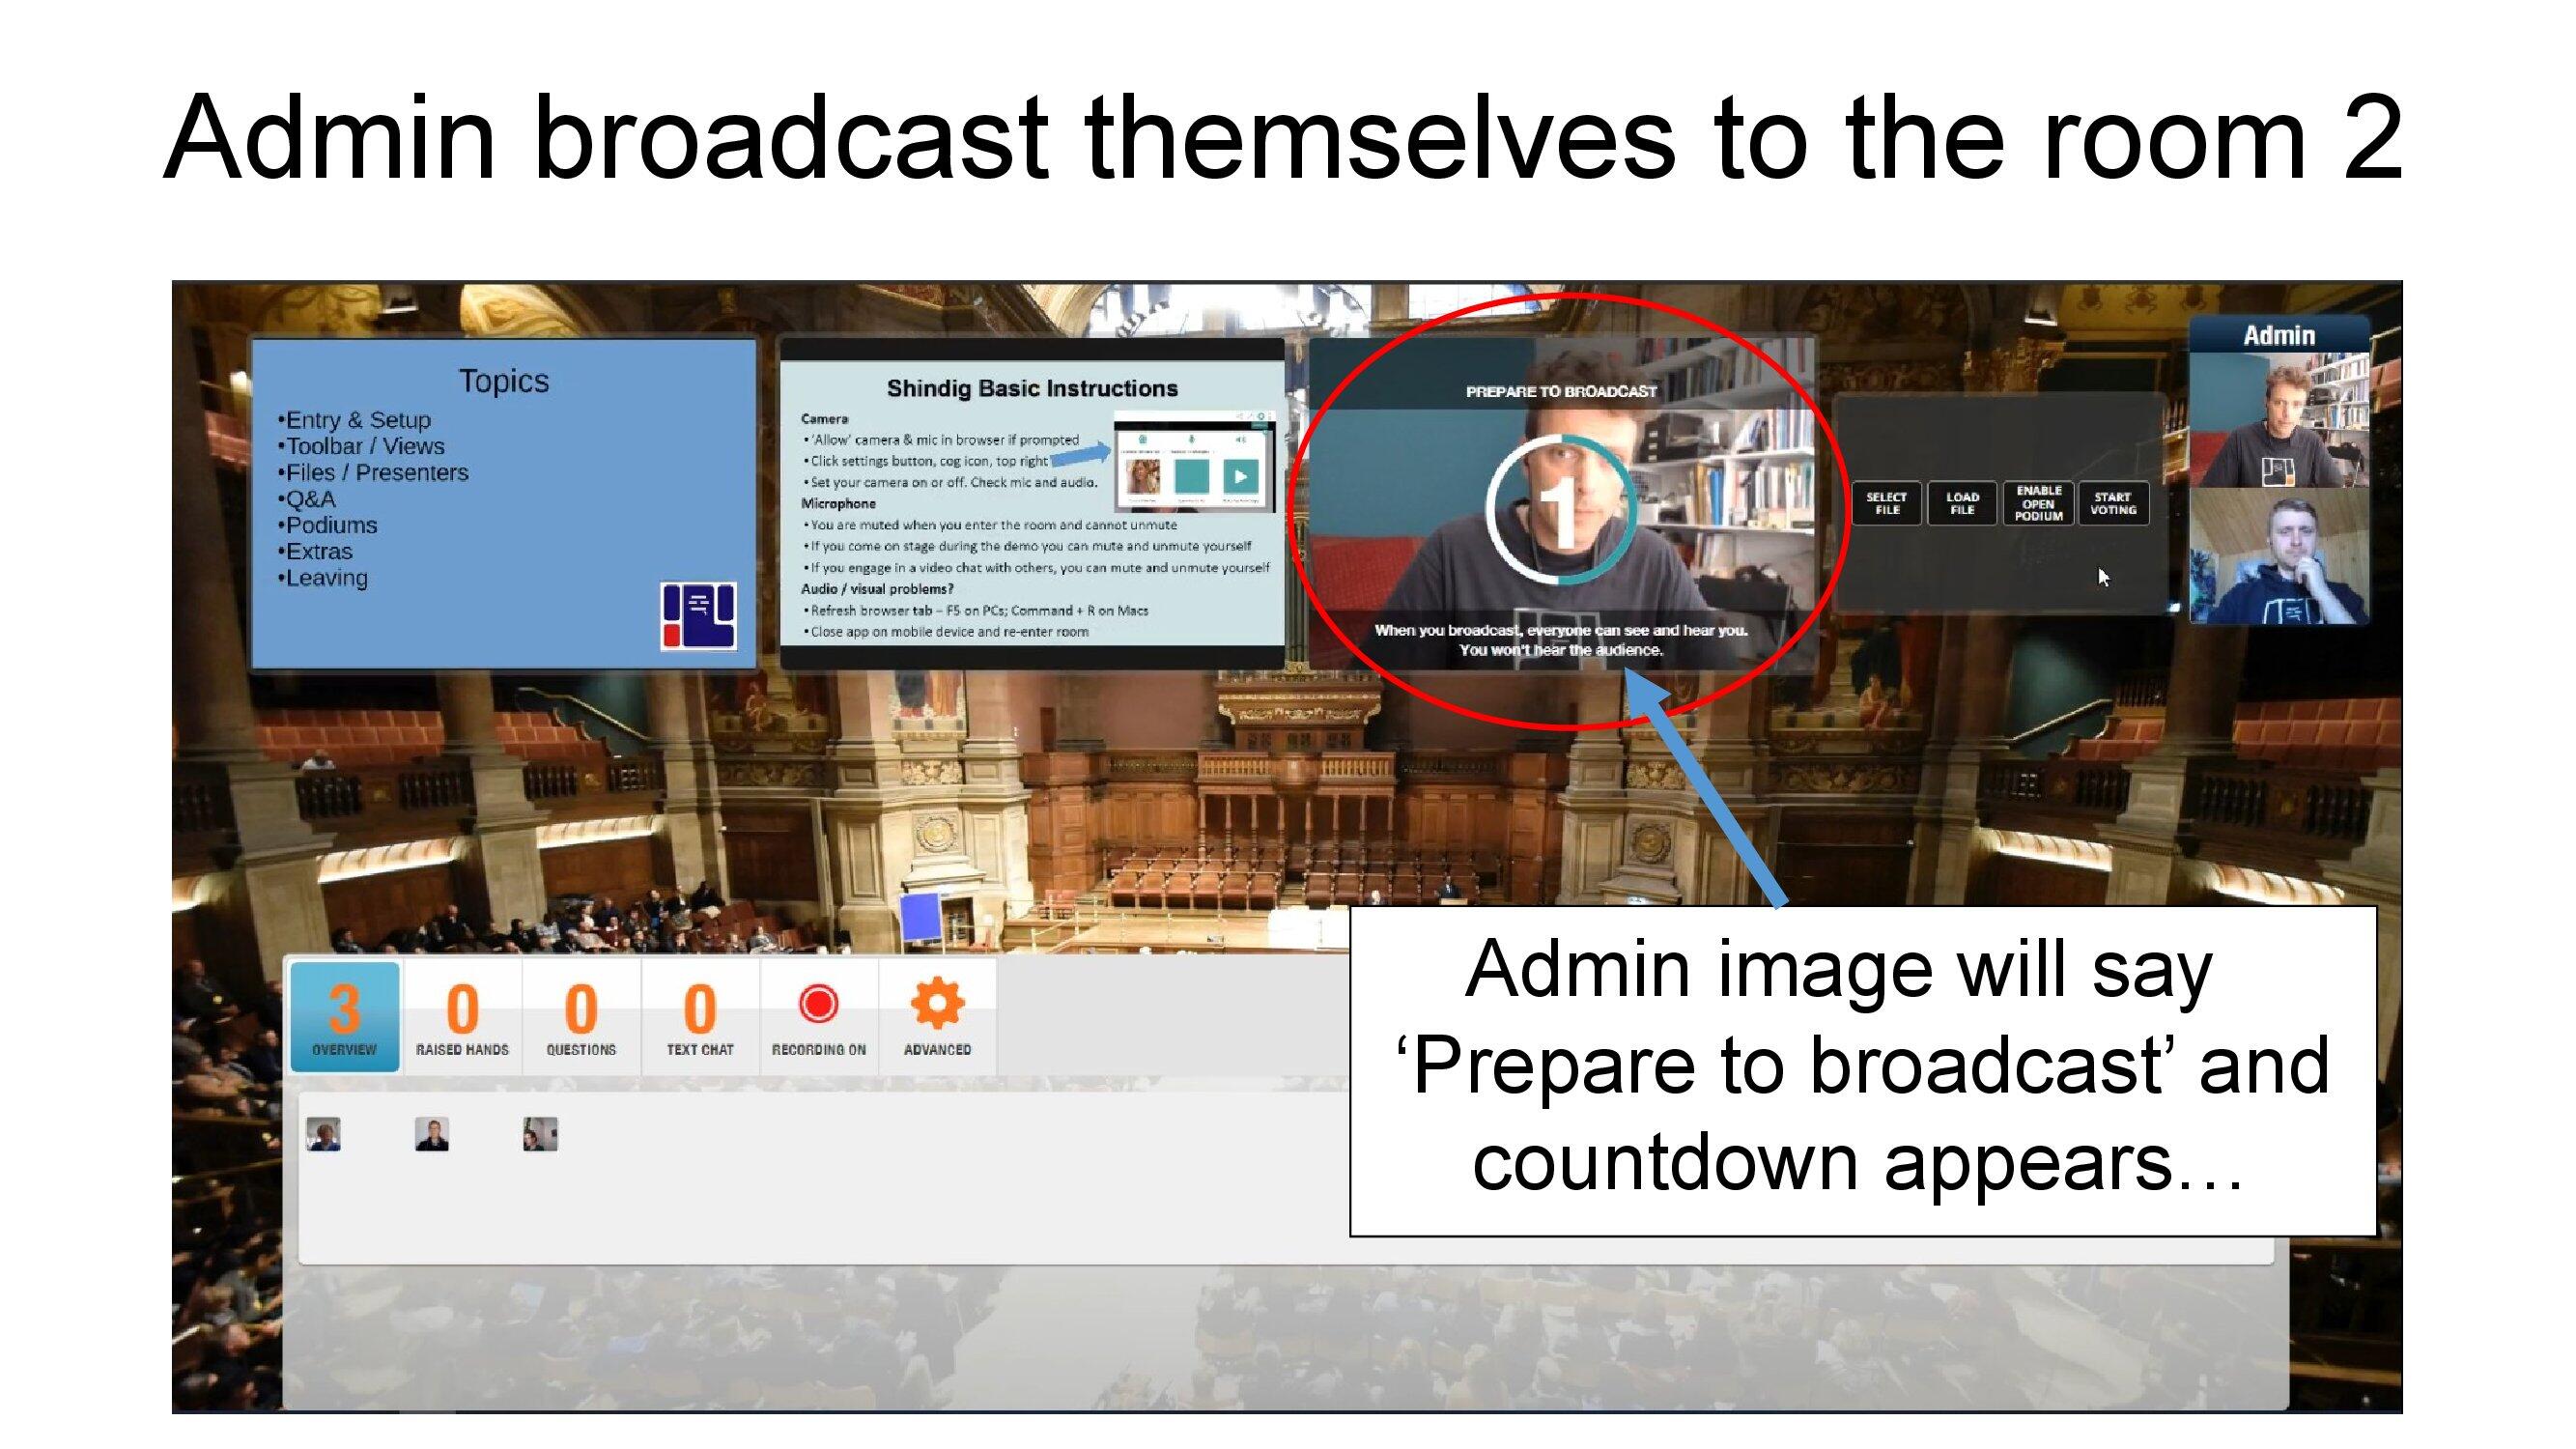
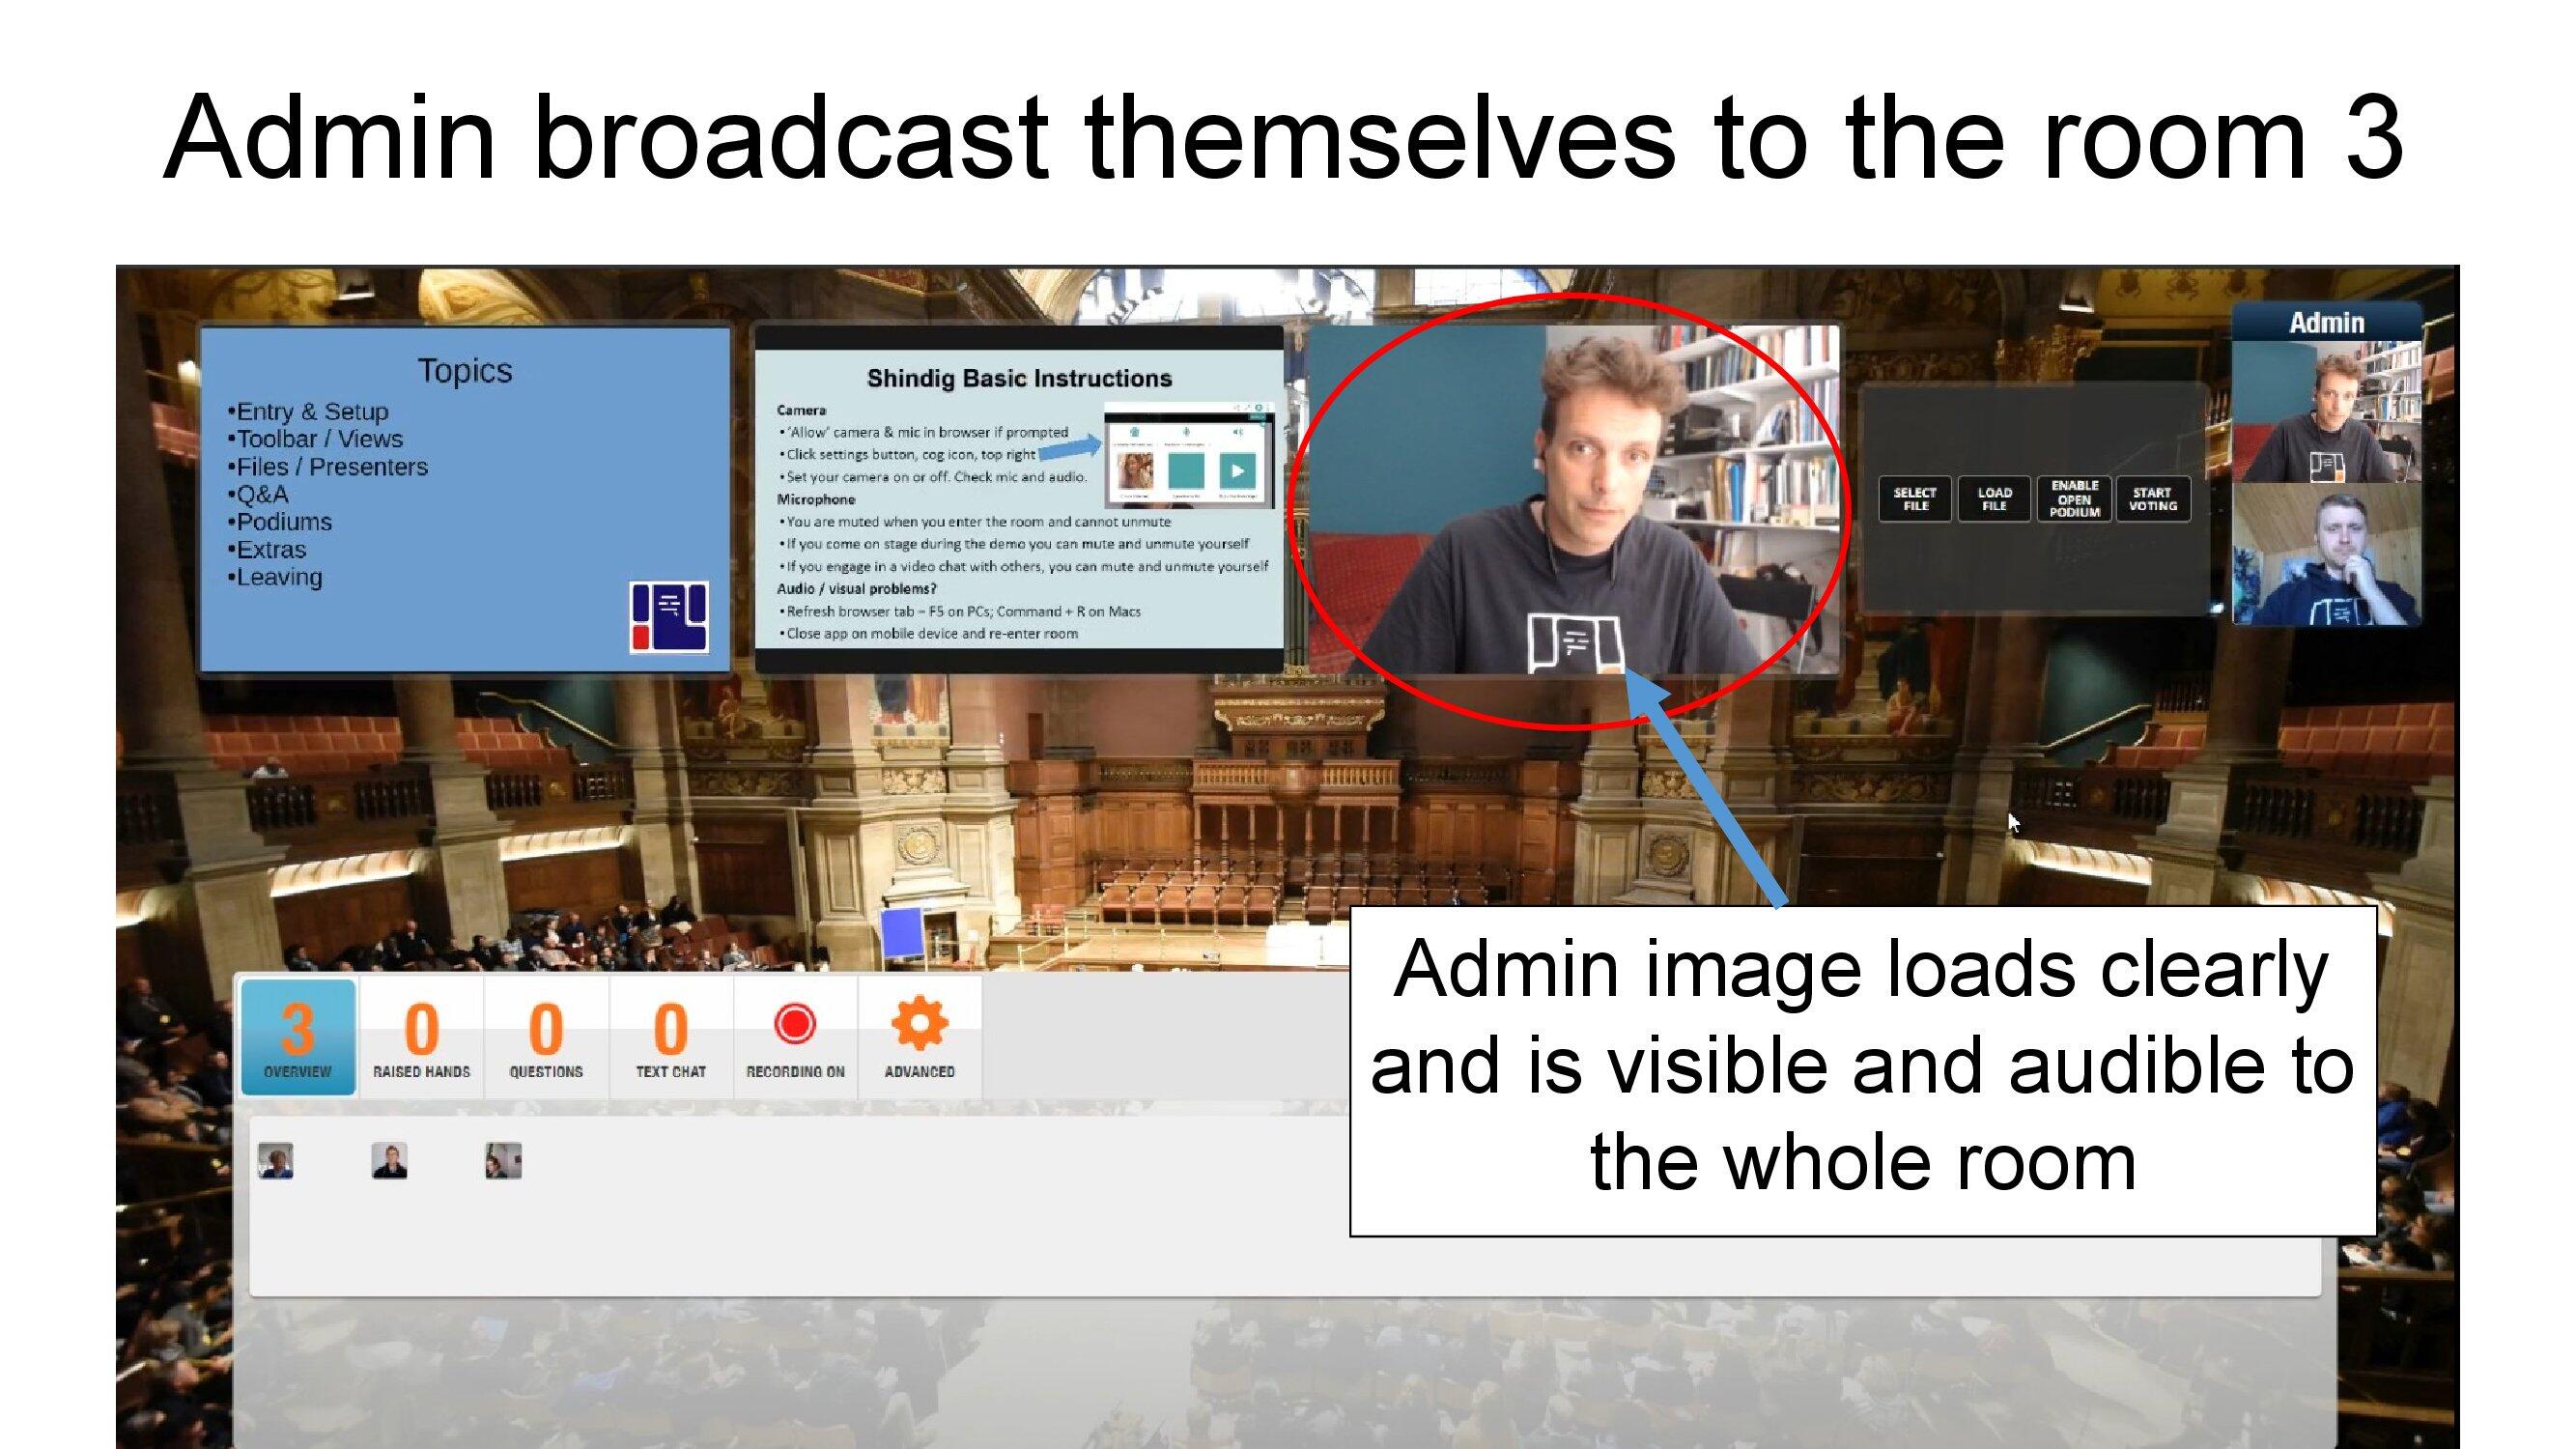
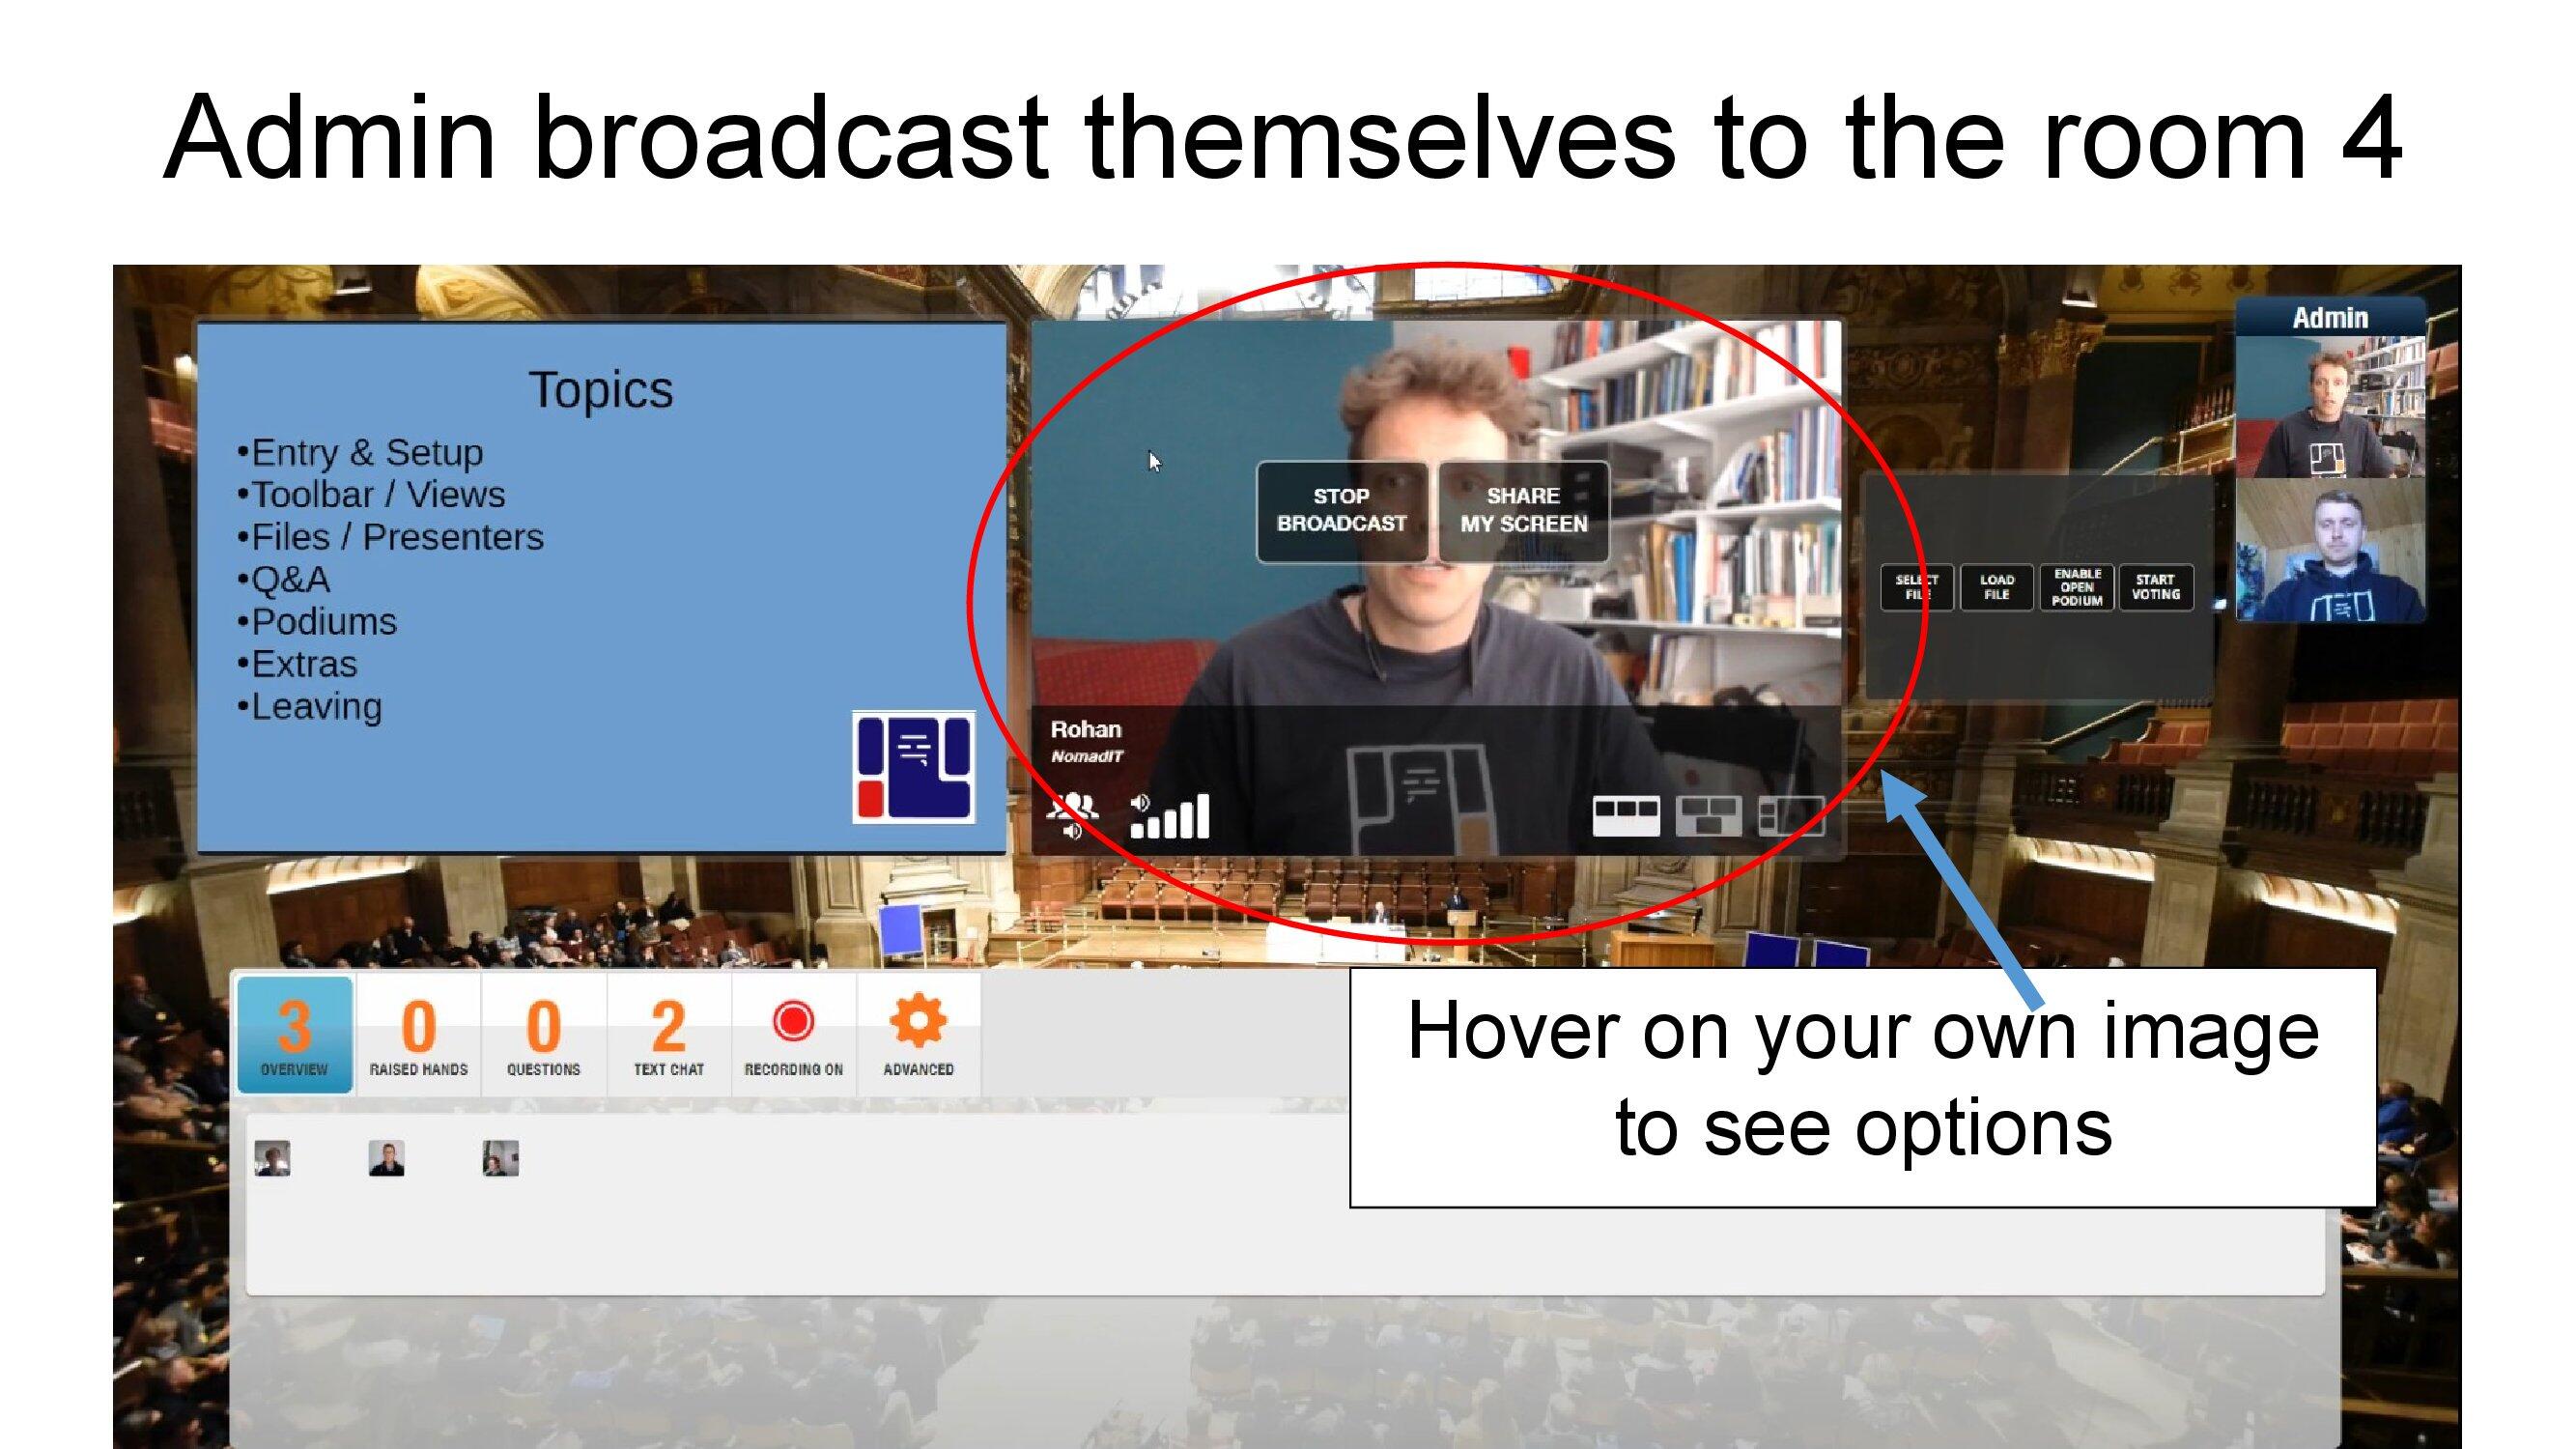
Once up on stage and introducing the panel, you may wish to take down the welcome slides and put up one of your own explaining the running order, etc.
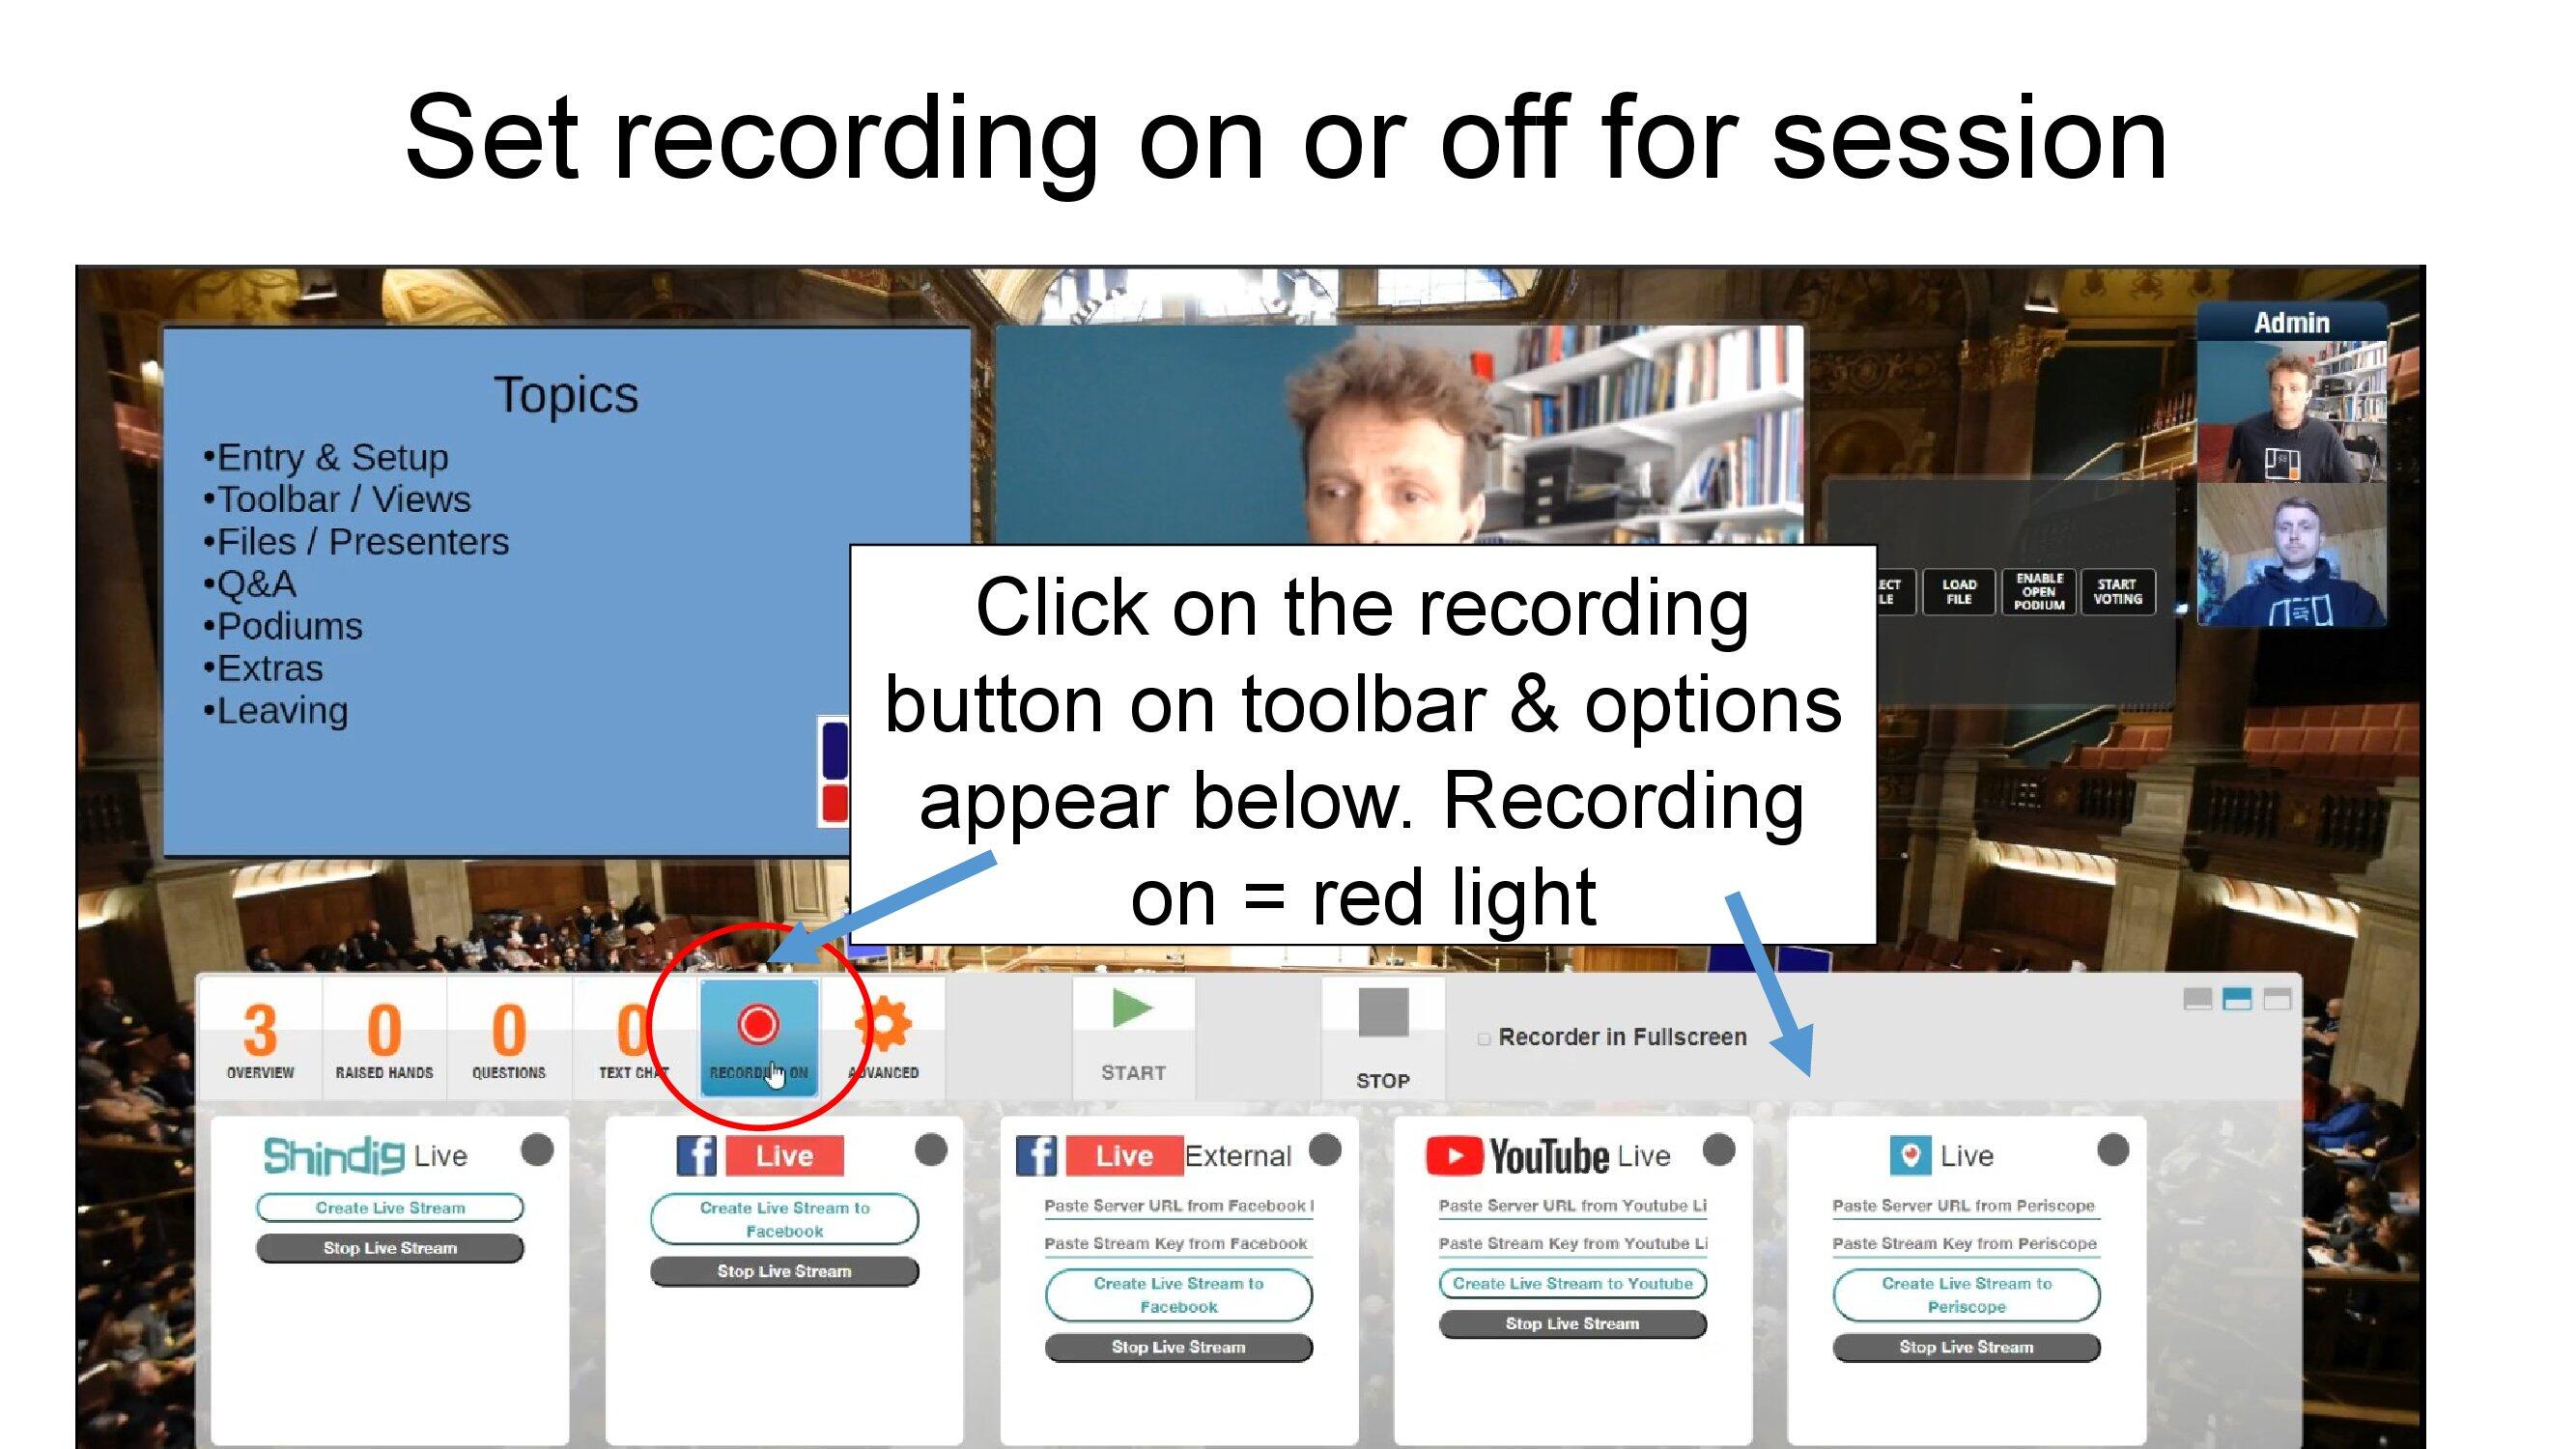
If you are not recording the session, you will need to just switch off the default action: which is to start recording at the specified start time of the session.
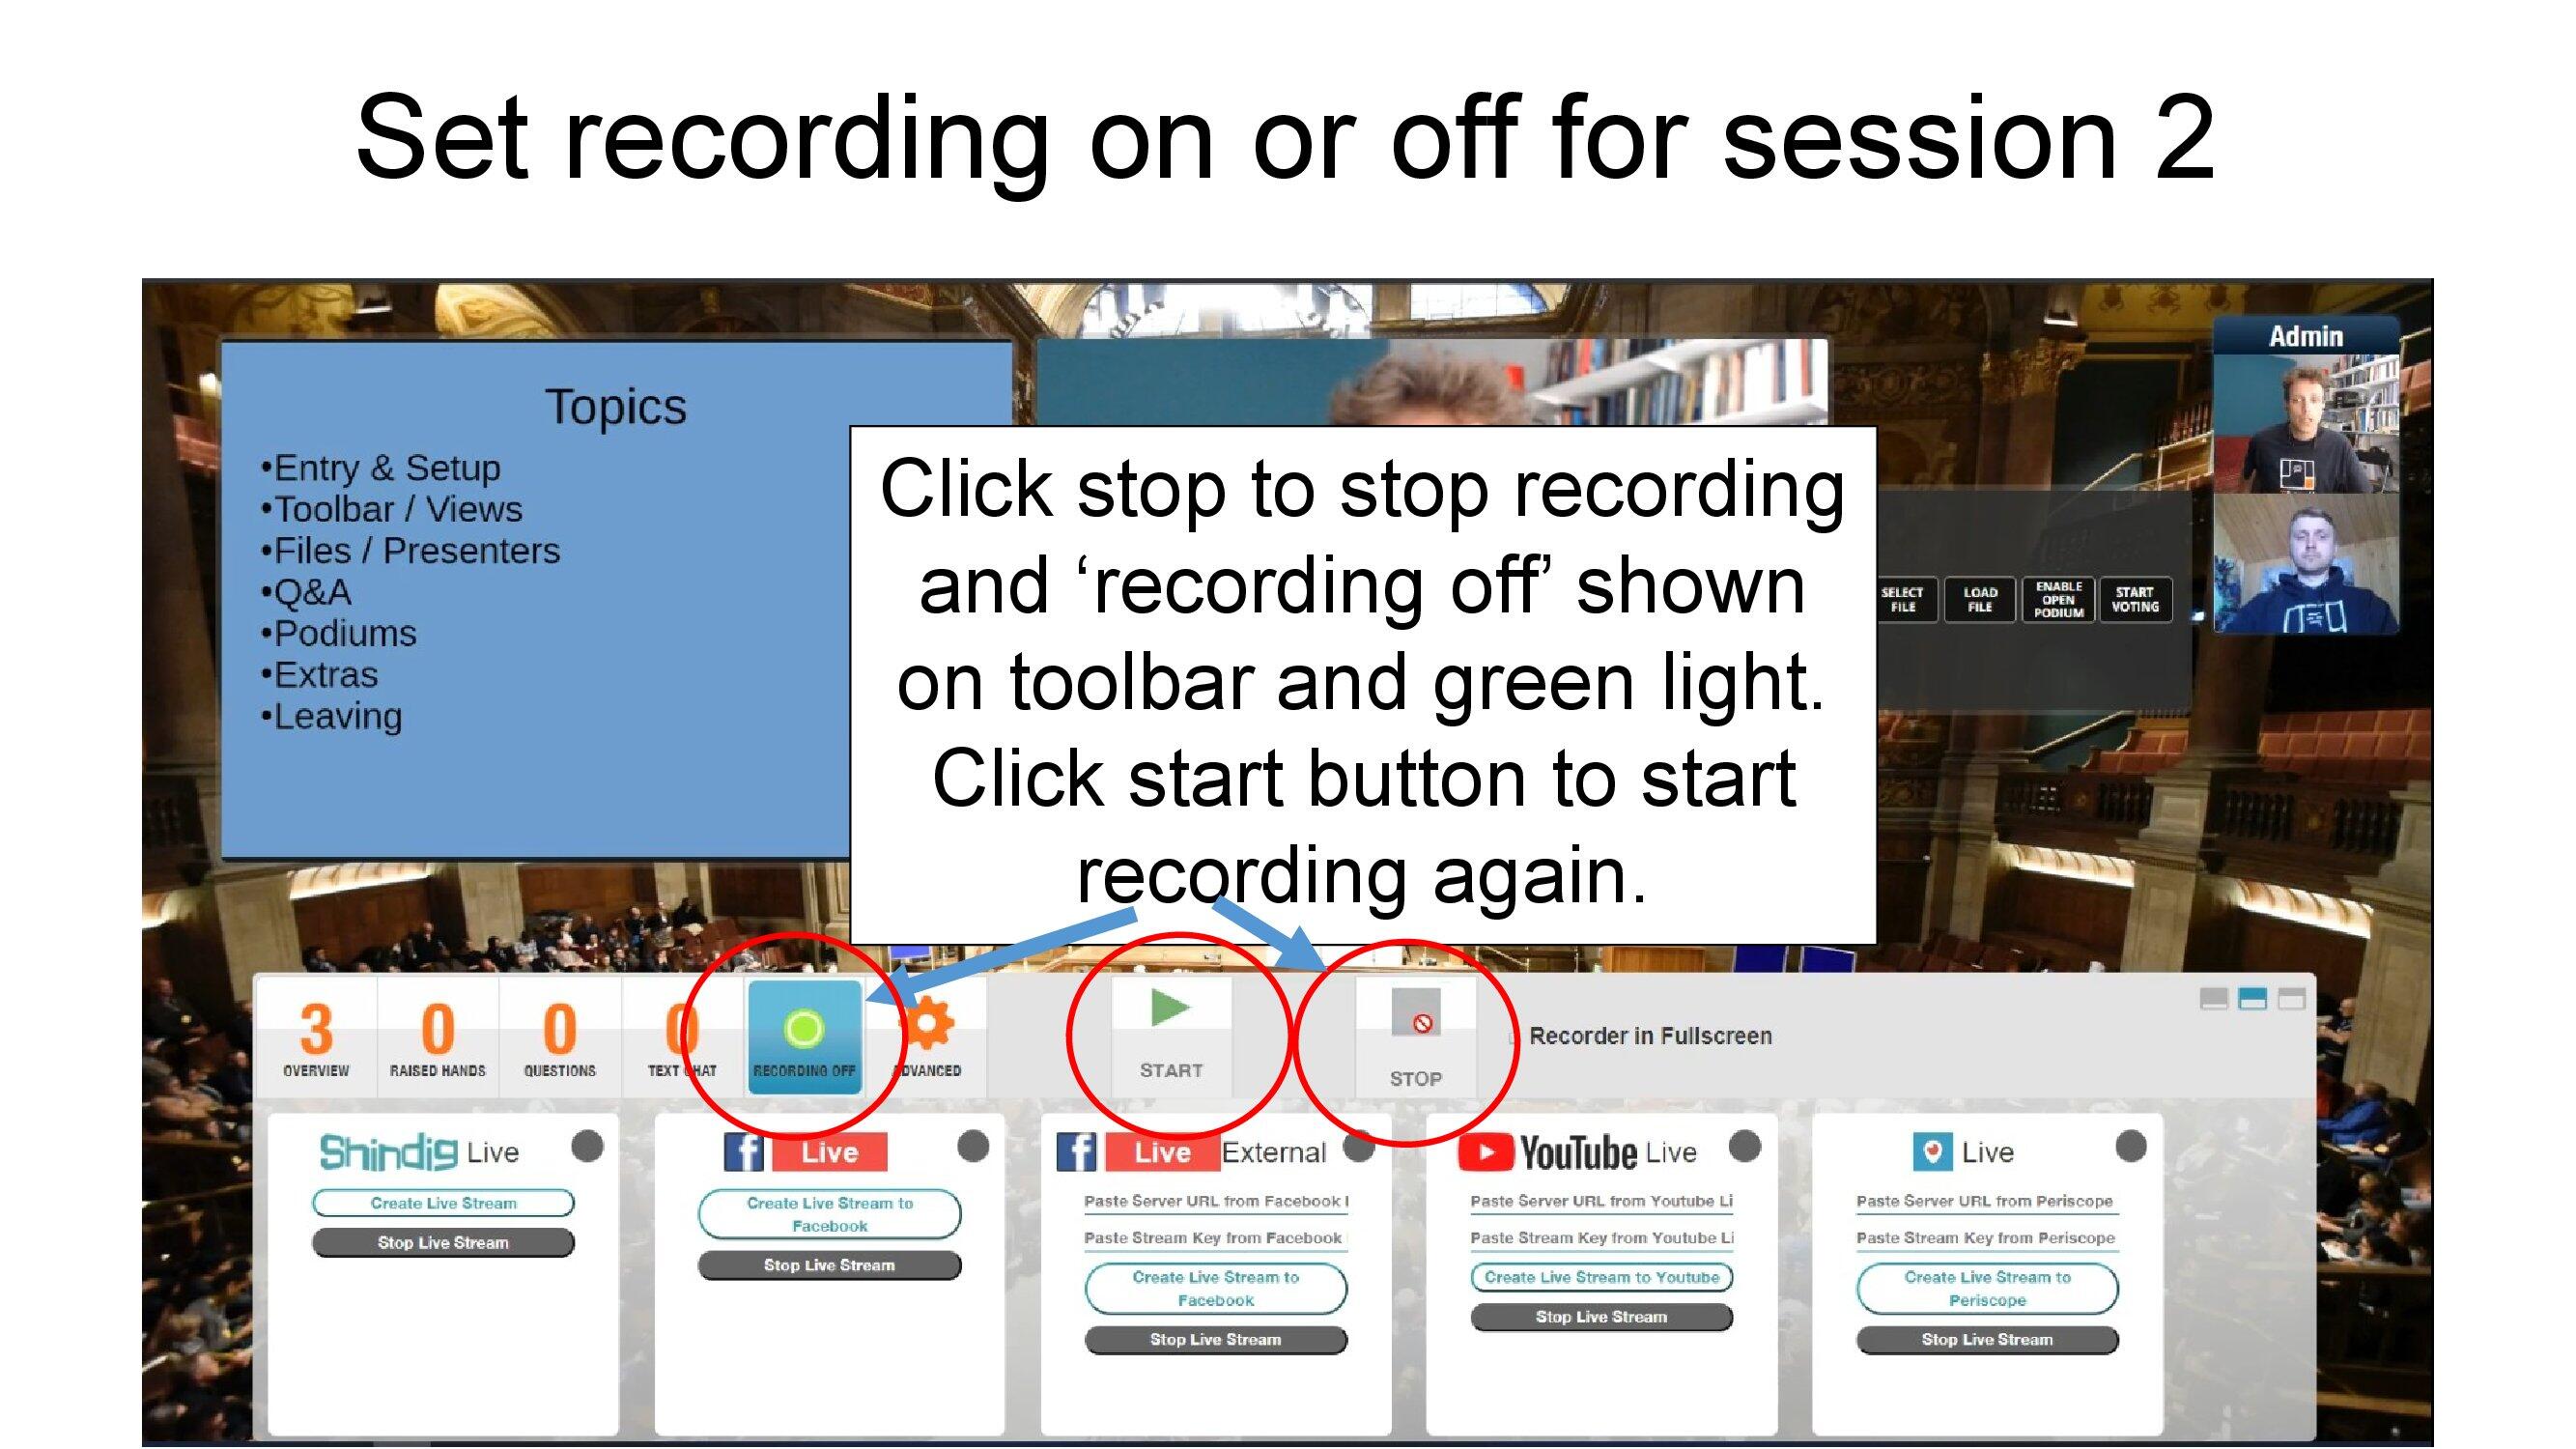
If you are recording the session, you do not need to take any action in the interface, but you should clearly state to the participants that the session is being recorded for later display on the conference website, and explain who is responsible for that video (probably you) and what actions to take if anyone wishes to opt out of being in the video. Make sure you've read the conference recording policy in advance of the event.
2. Changing views
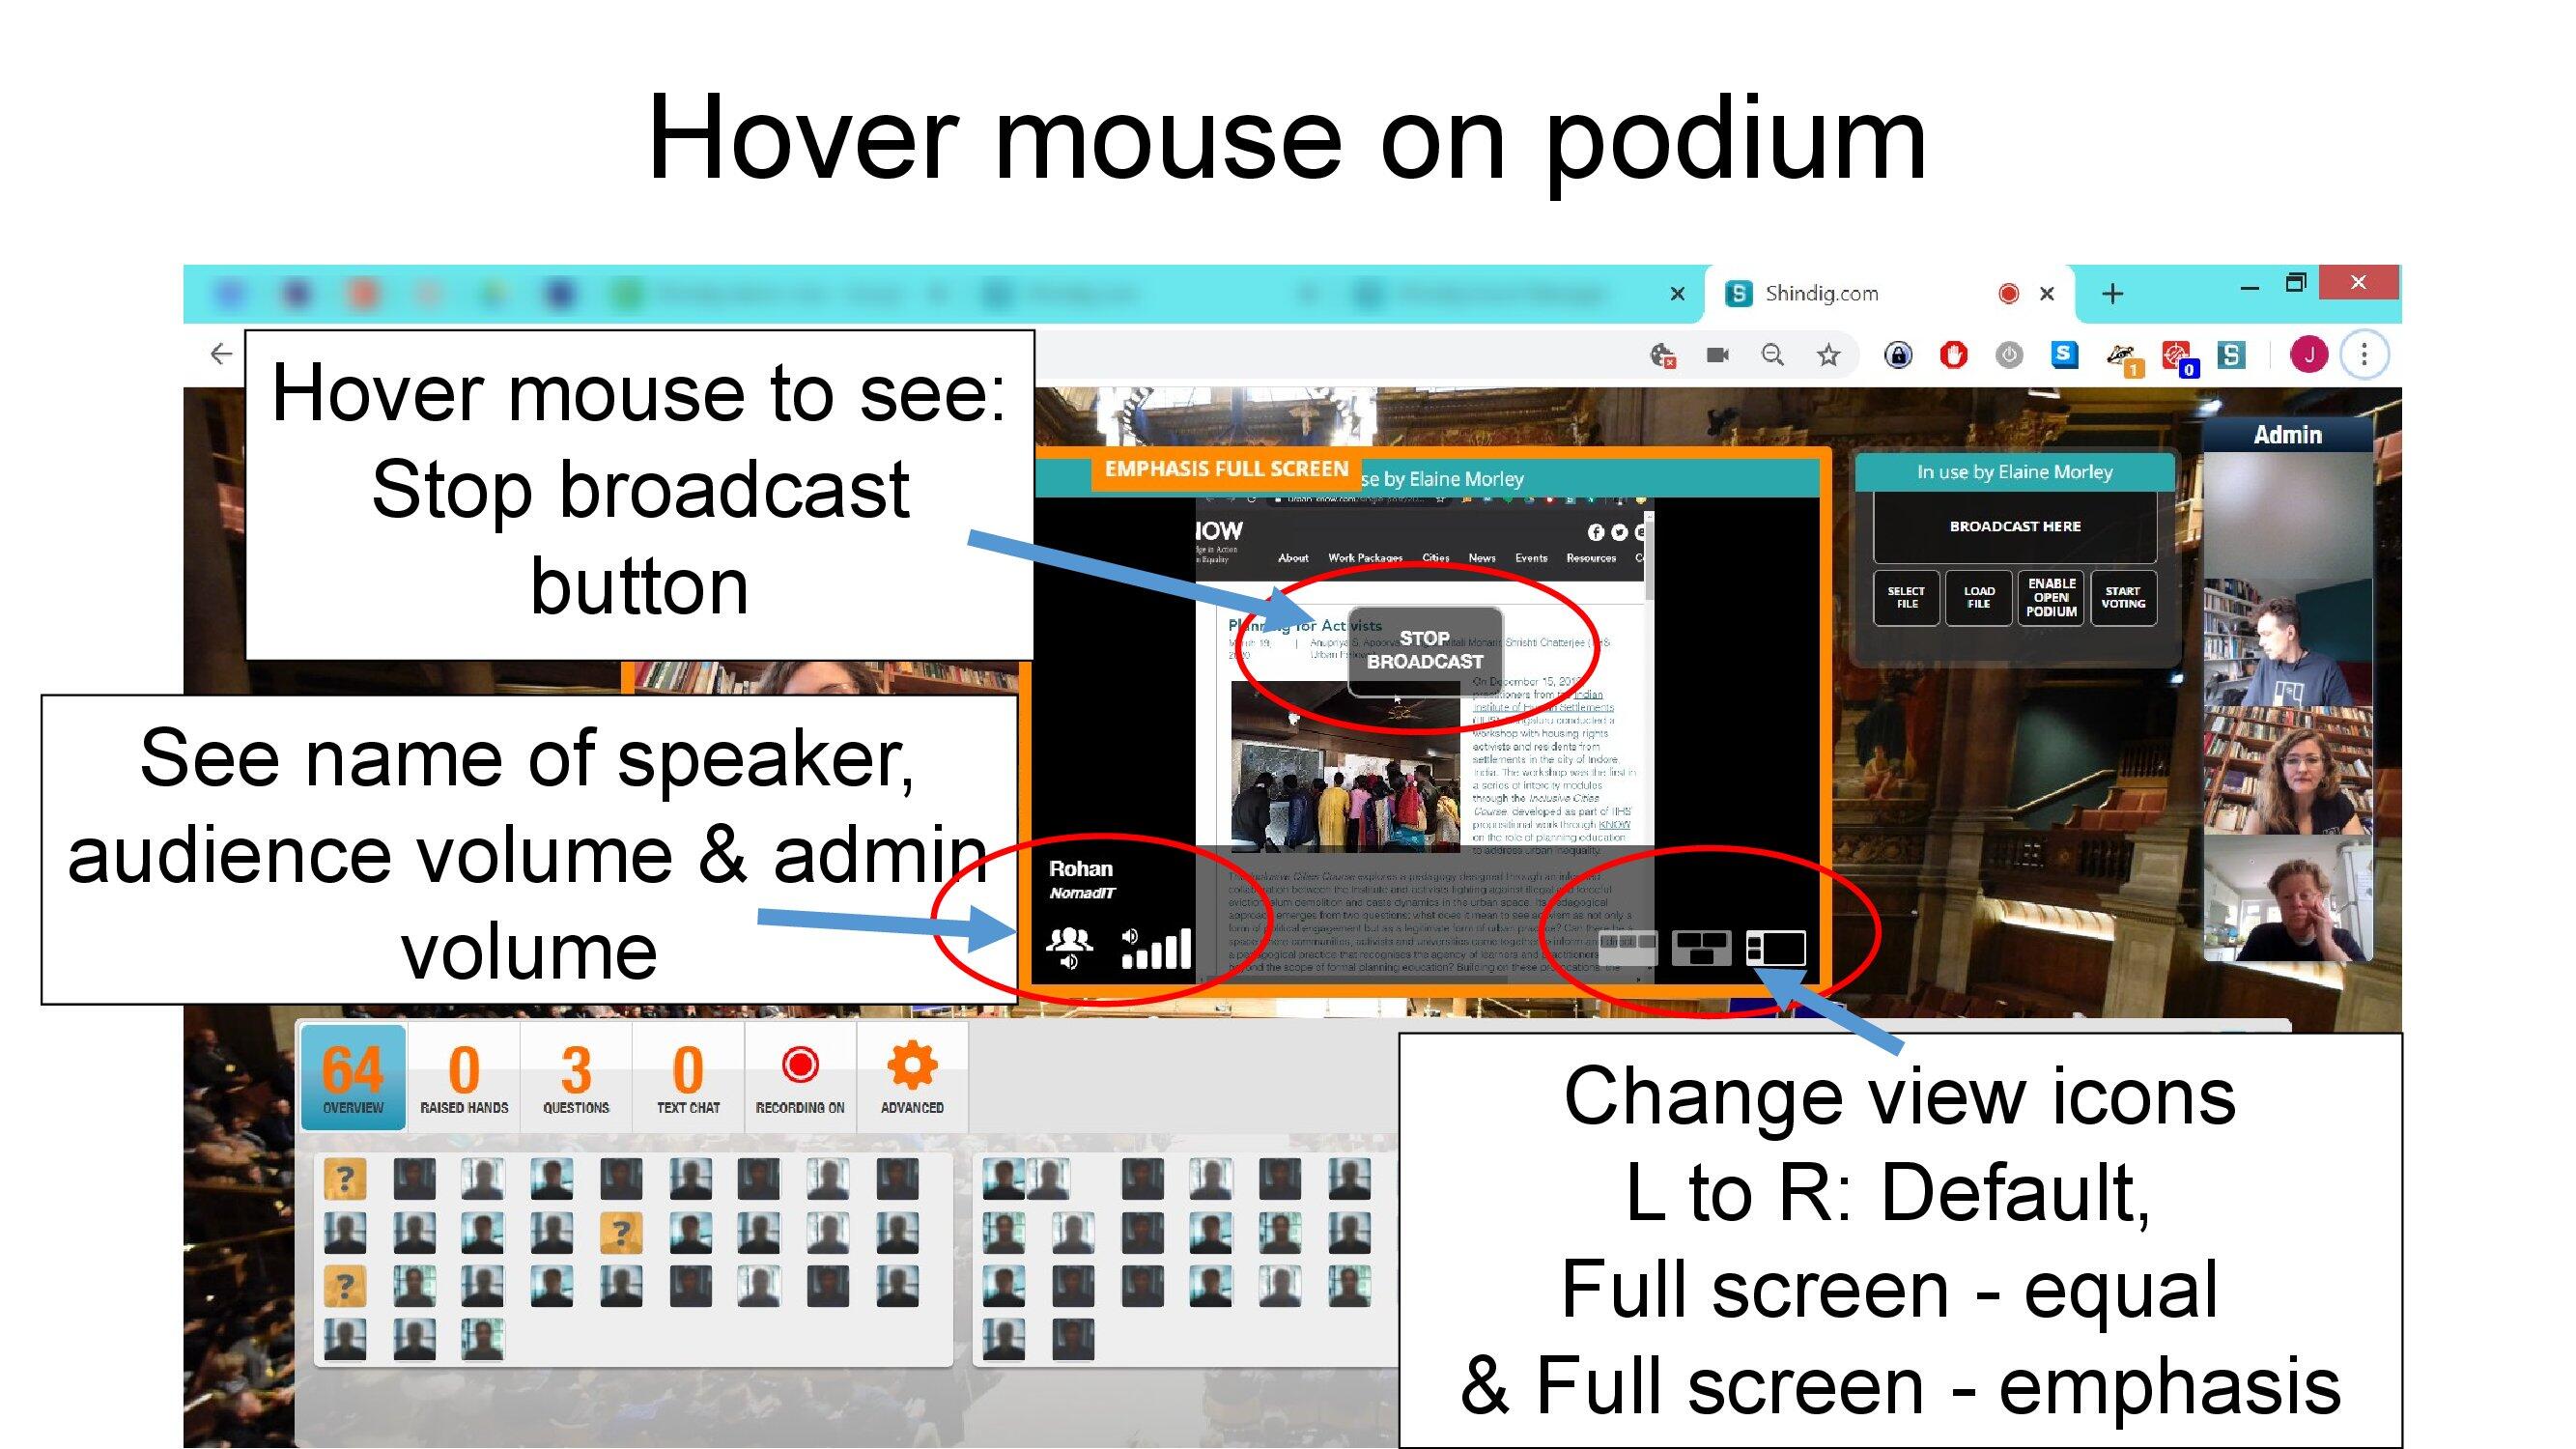
Moving your mouse over things in Shindig reveals functionality. Use the neat 3-icon toolbar available on every active podium to move between the three views.
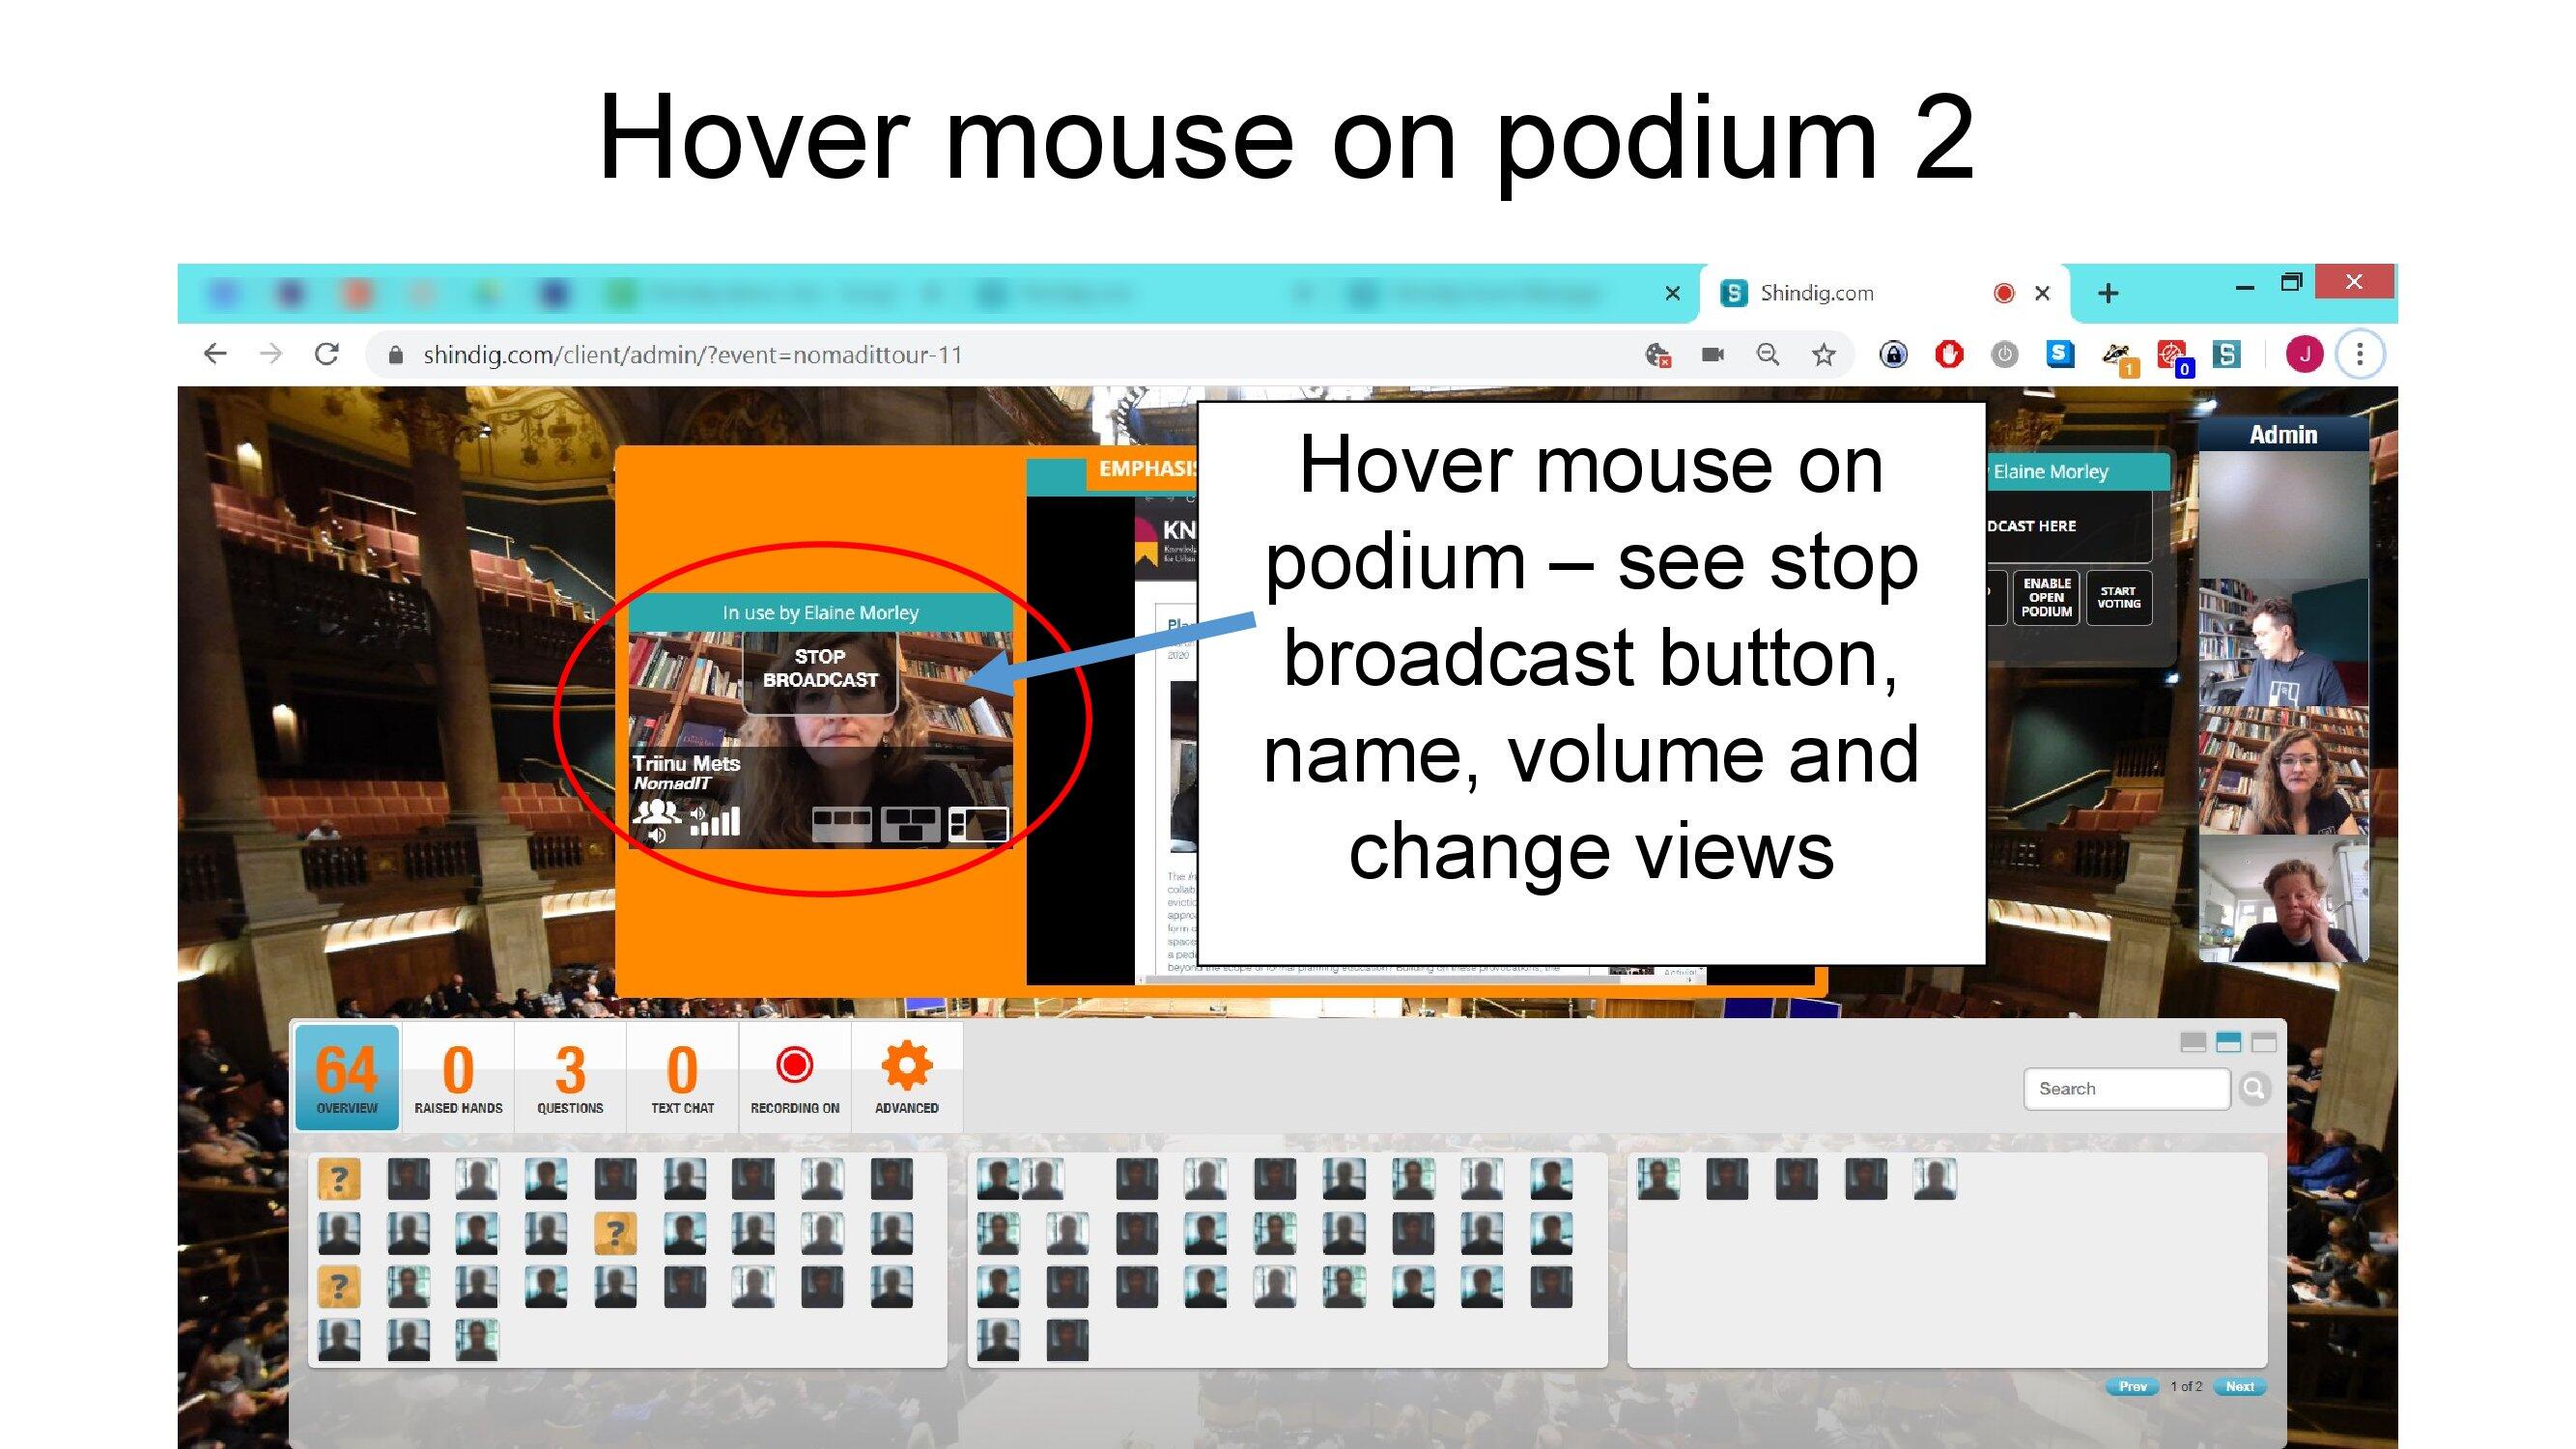
Each podium also allows for volume change (for you) and muting of that podium (for all). An admin can leave the stage by clicking 'Stop broadcast'.
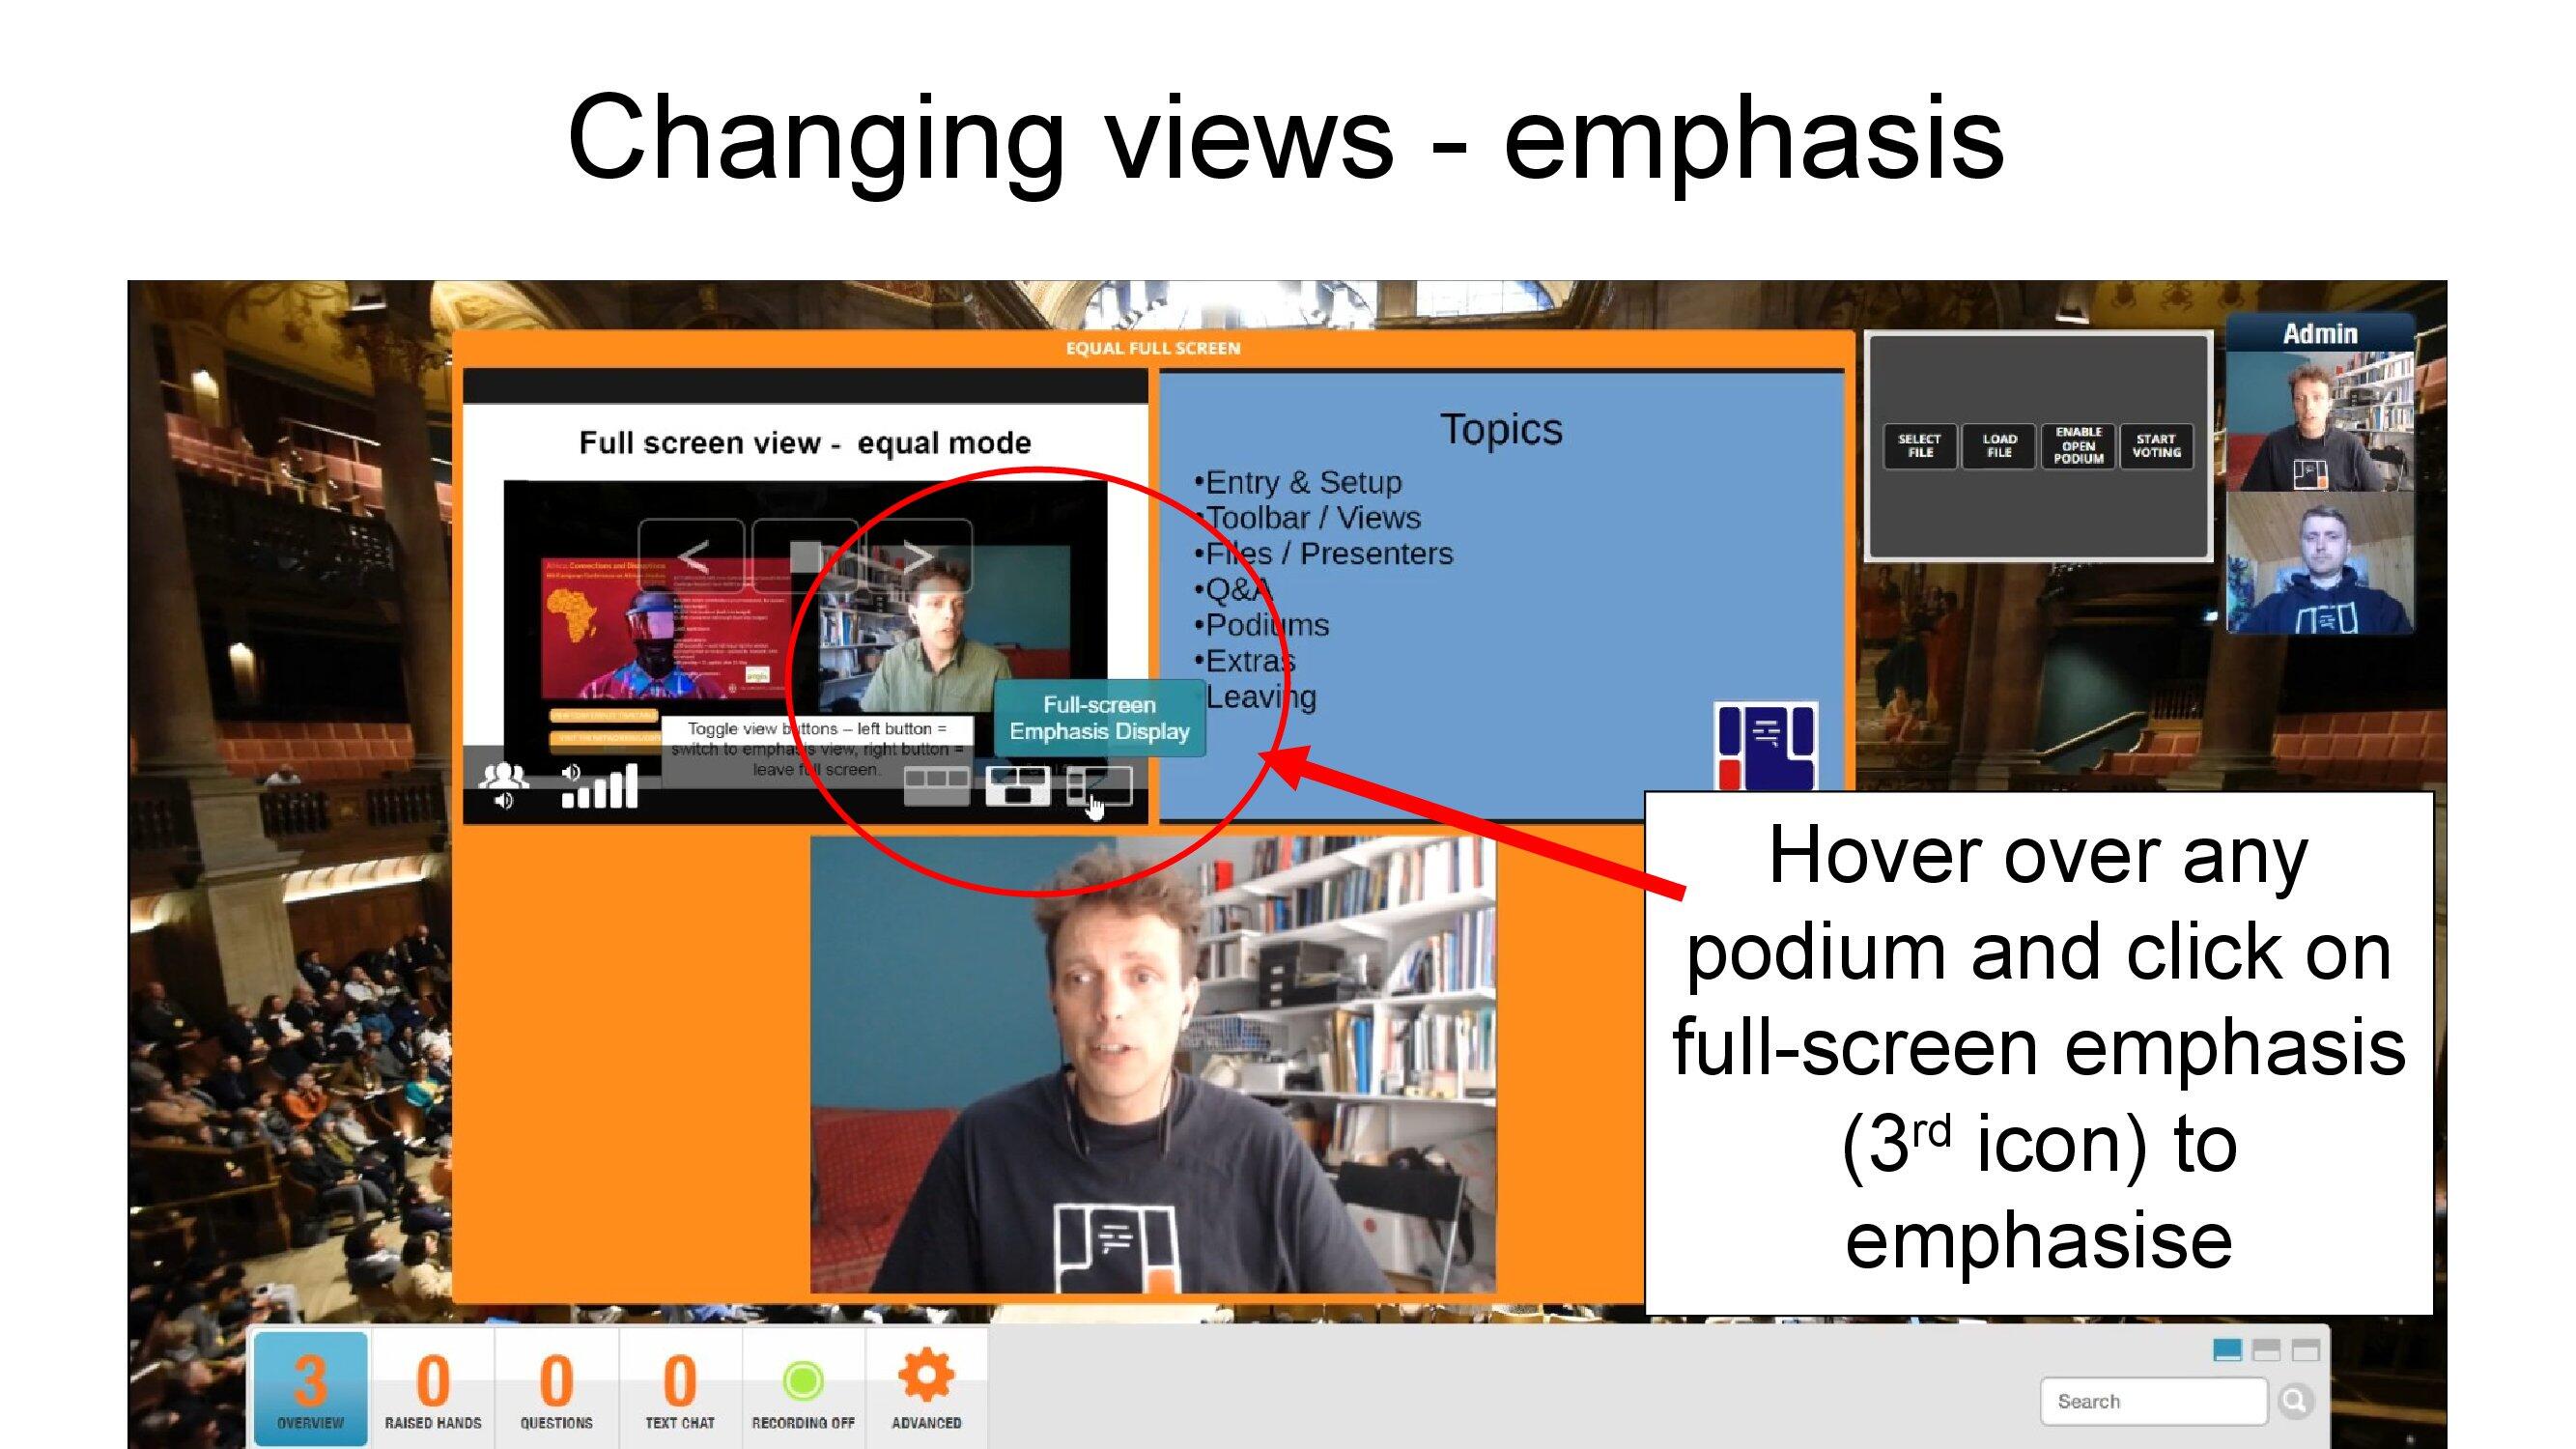
Admins control which podium can be emphasised in full screen view.
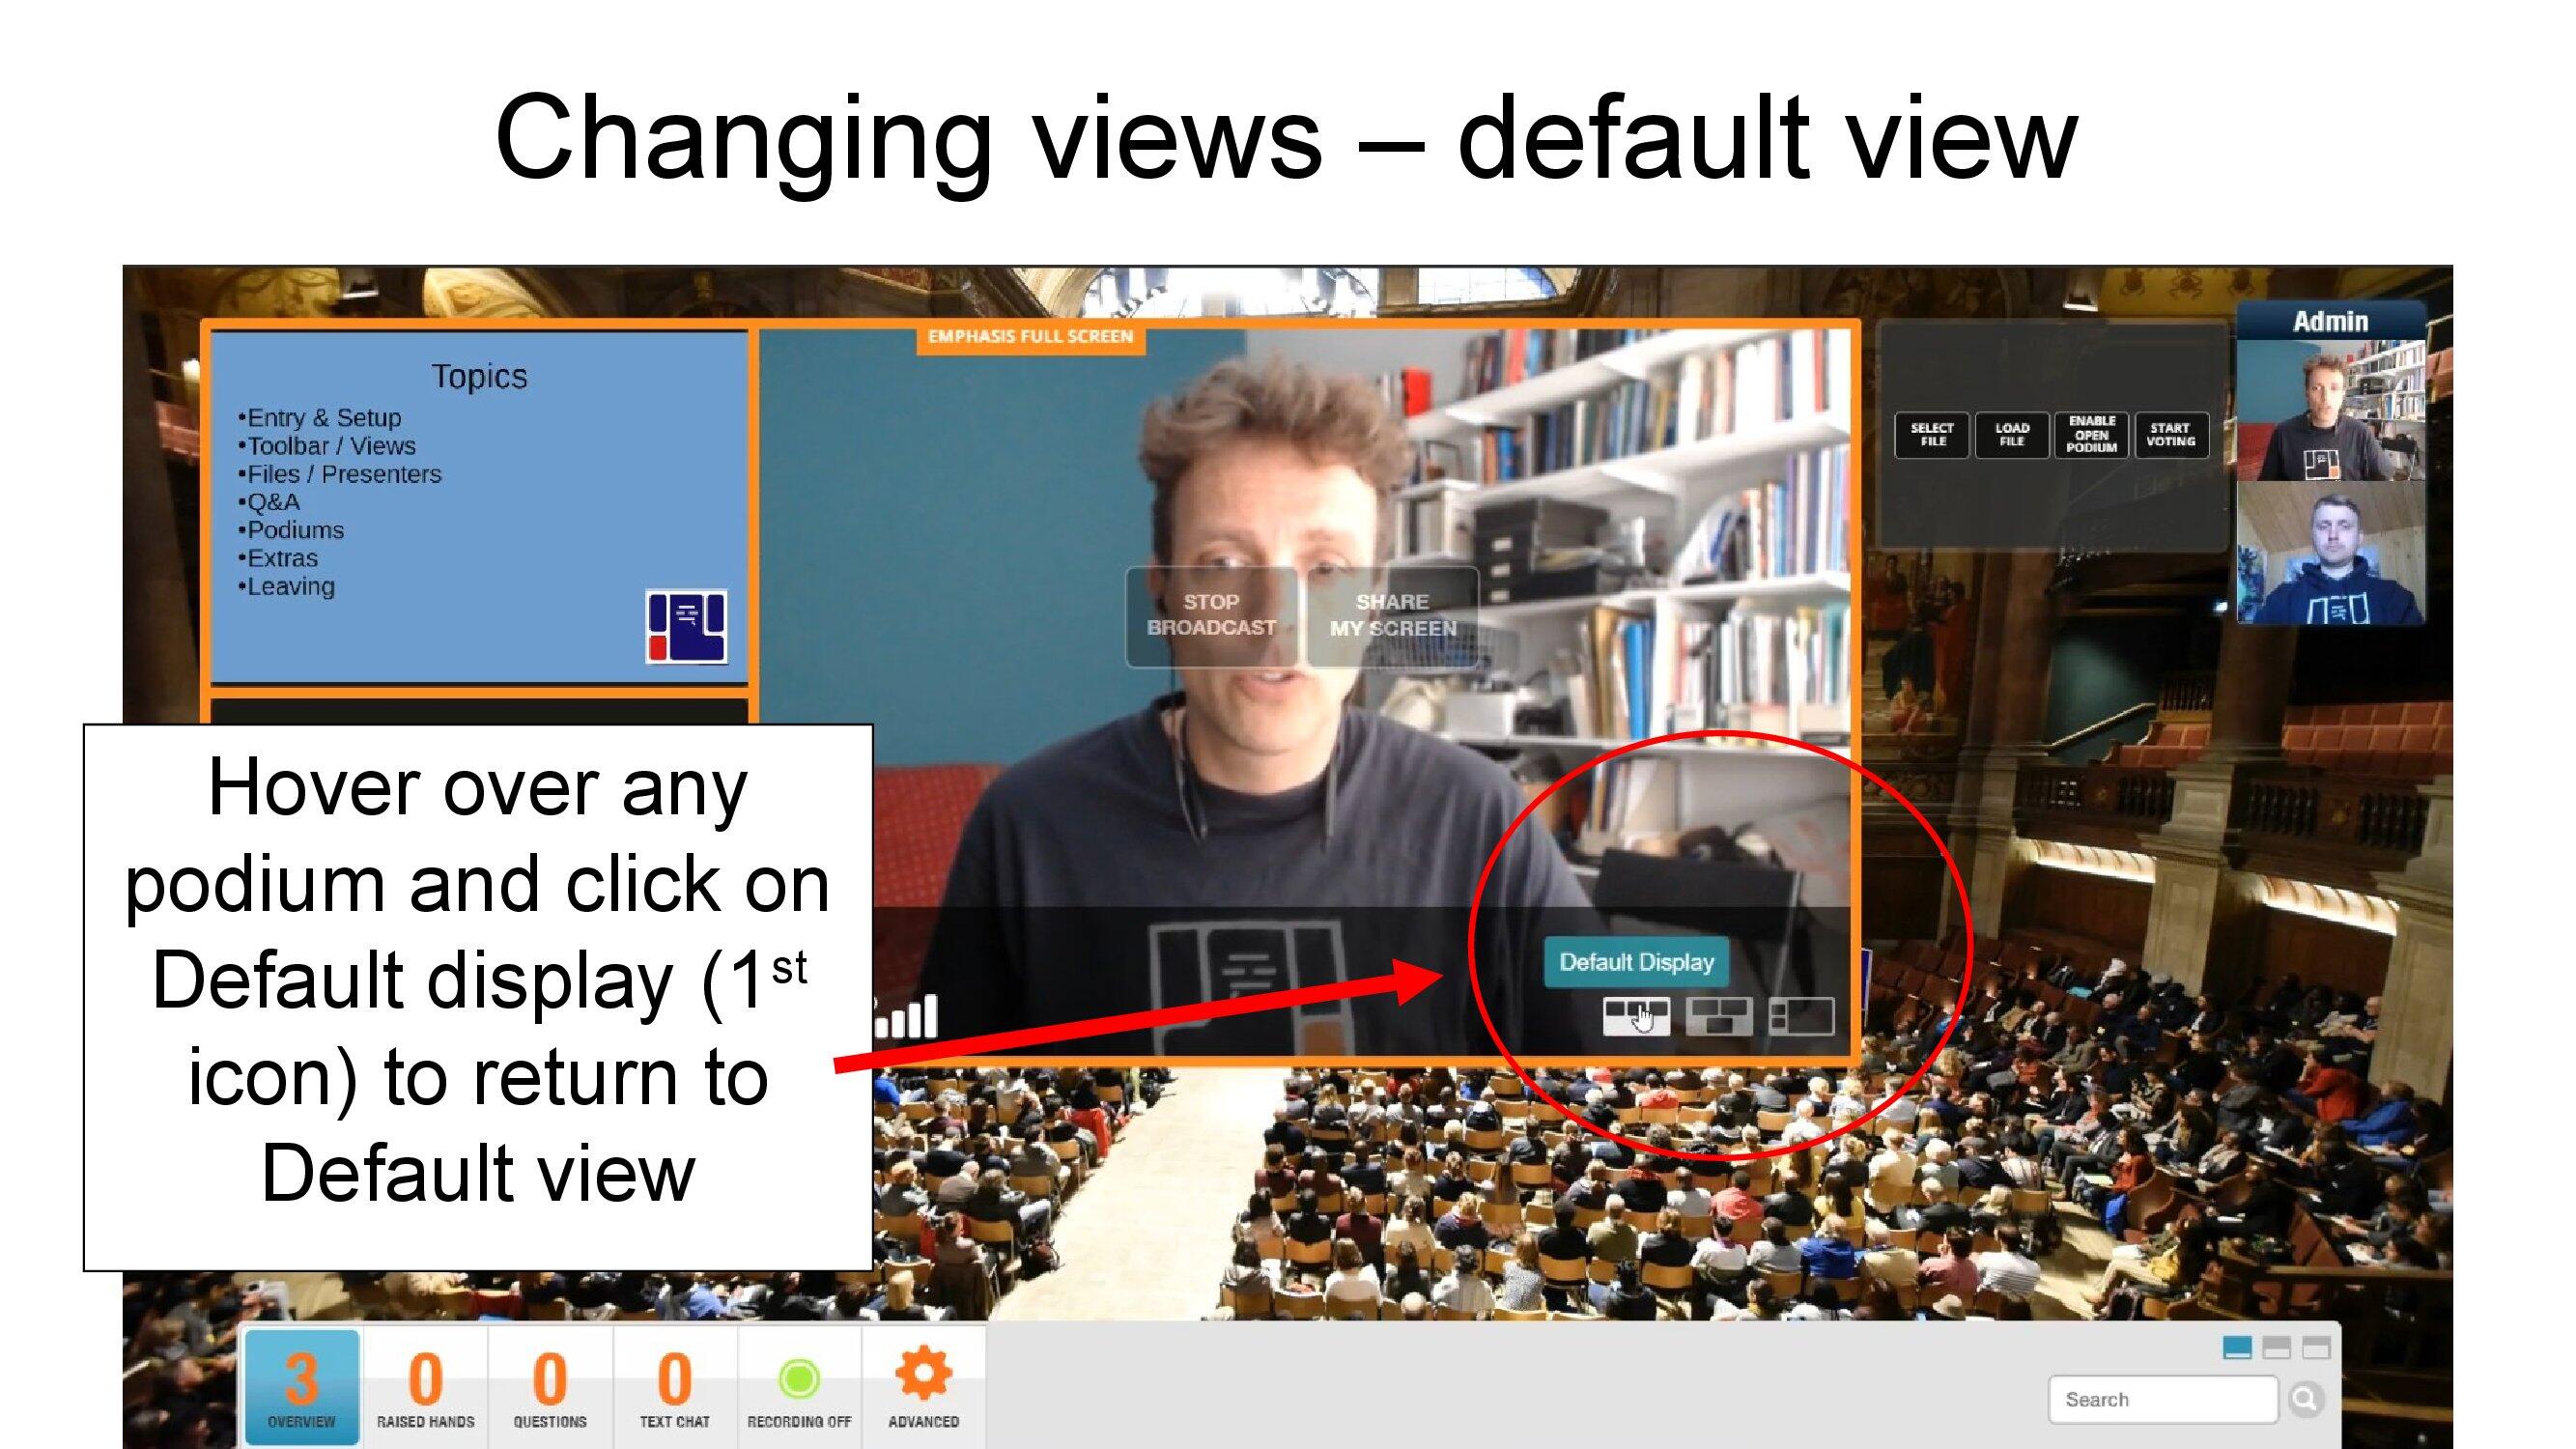
While full screen is useful when presenting, the default view (stage up top and attendee thumbnails floating below) may be preferable during the Q&A.
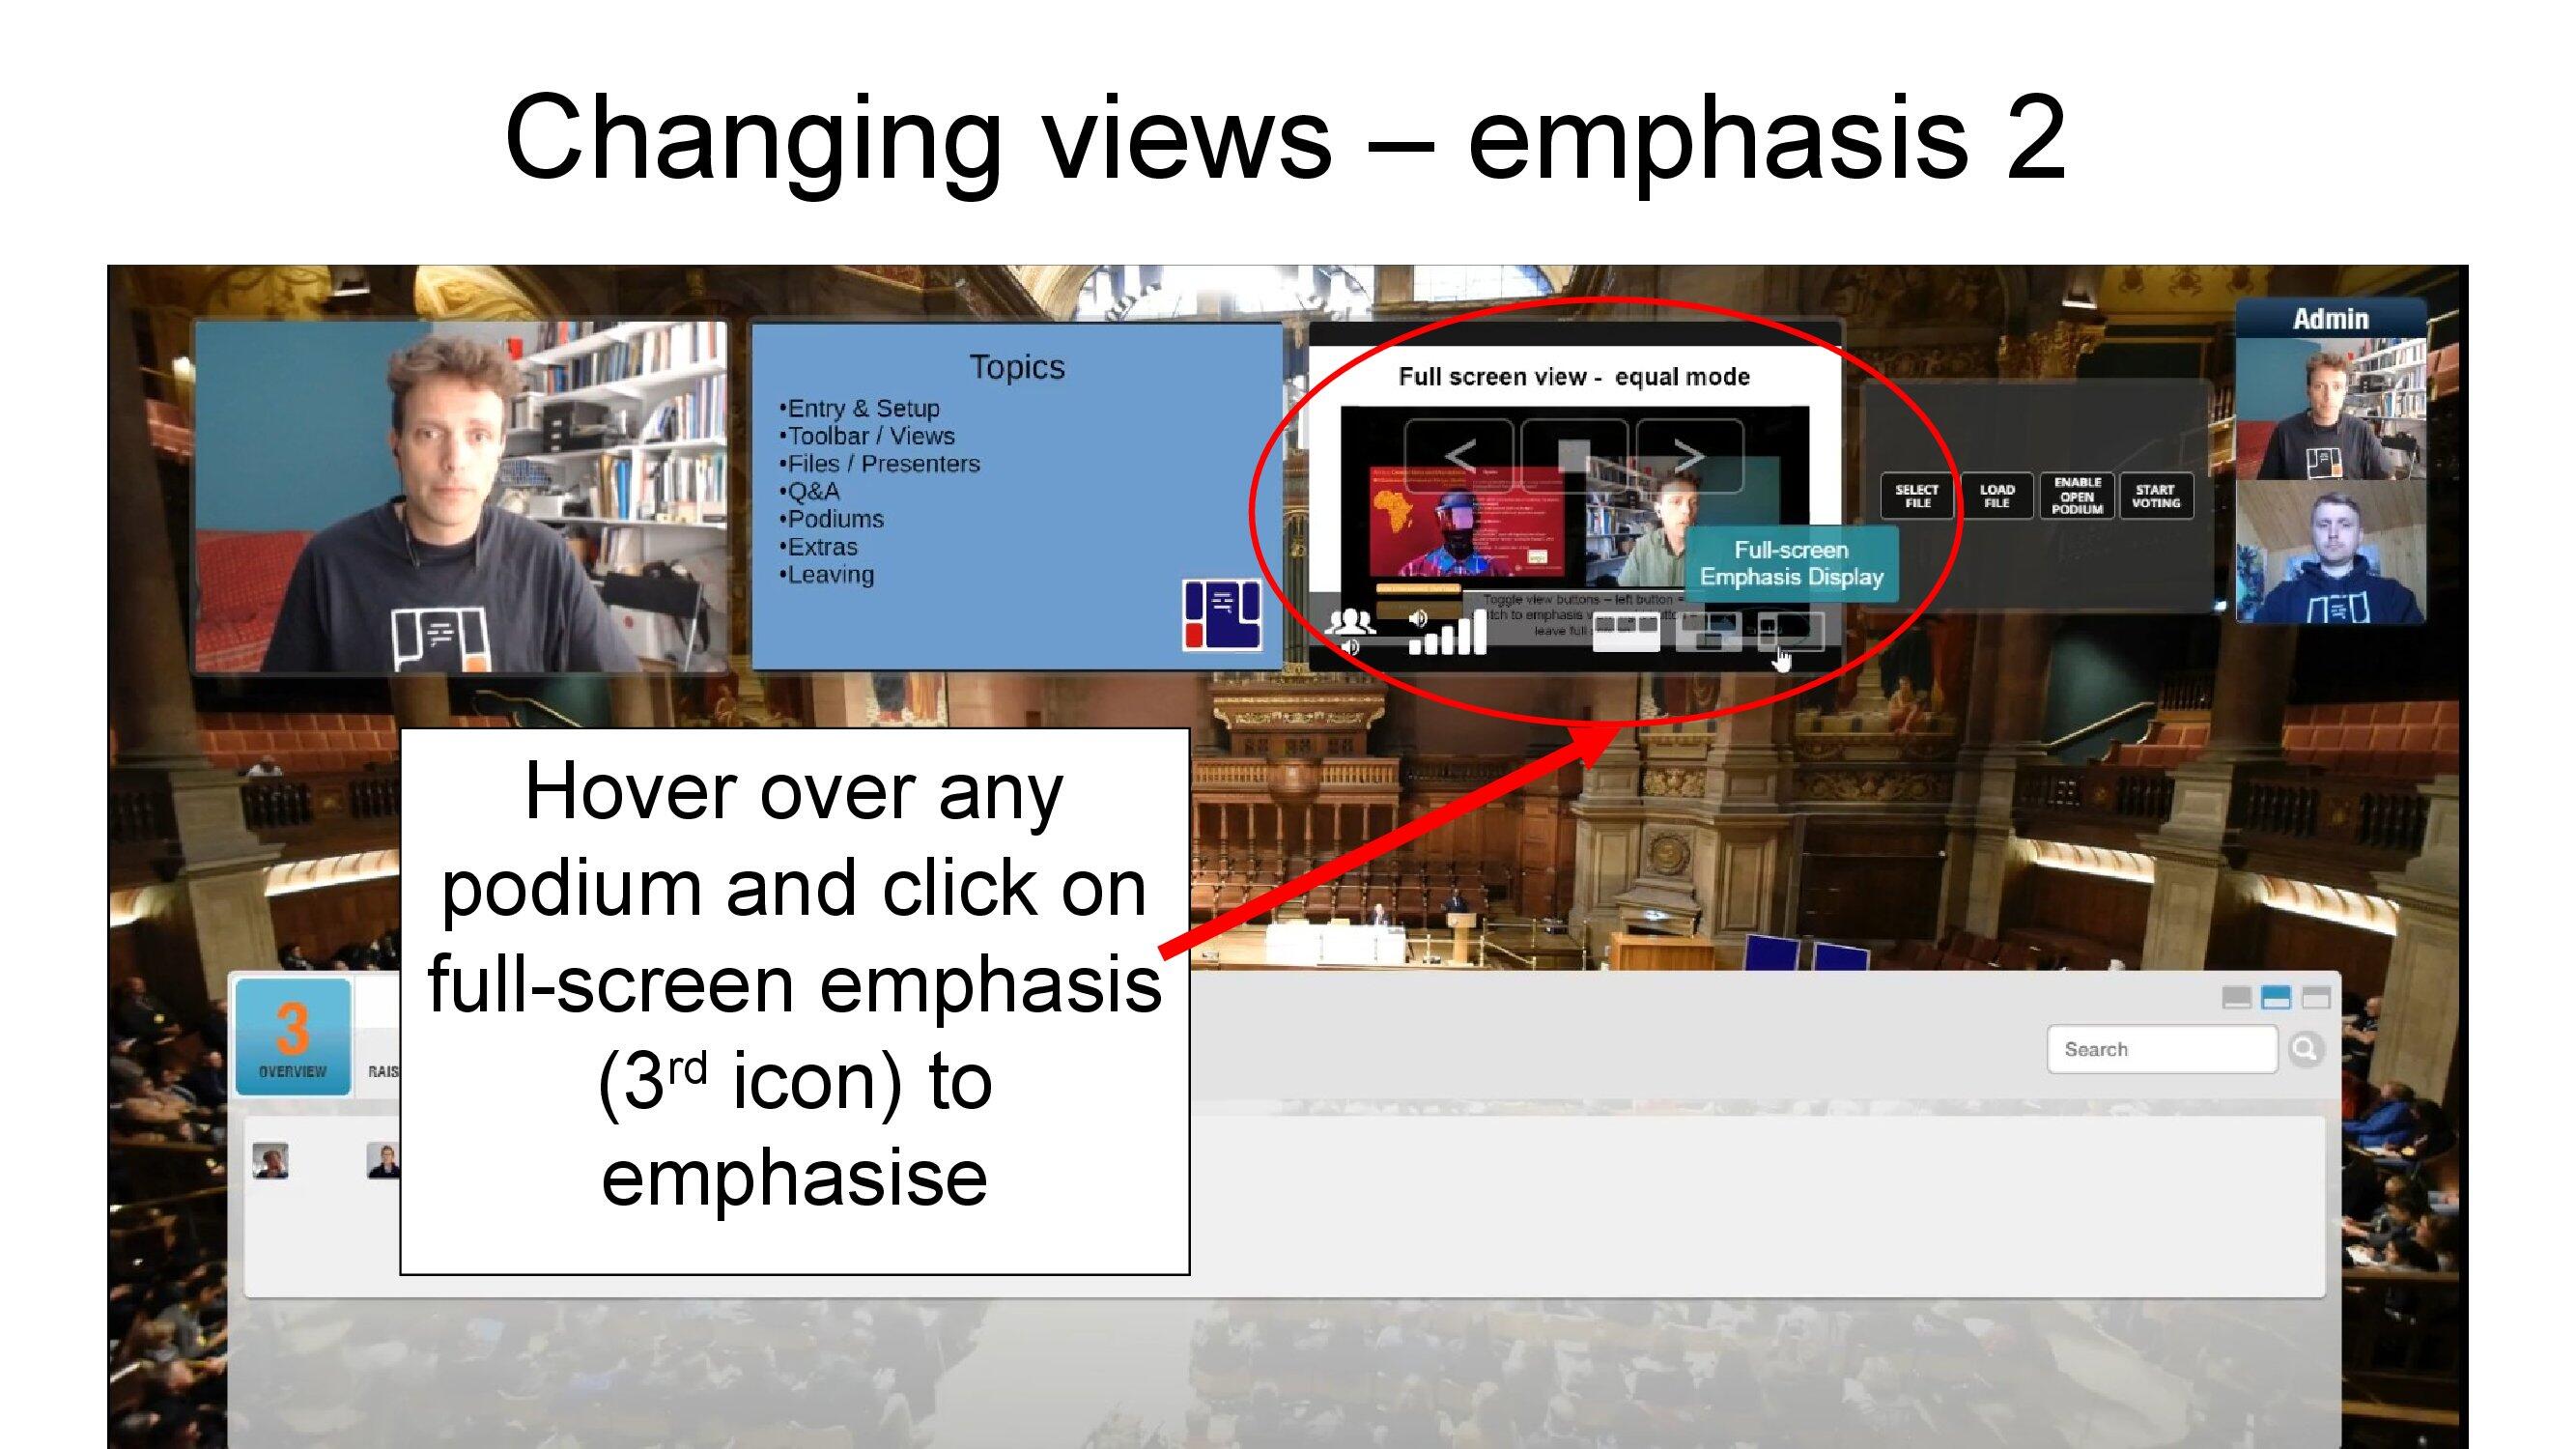
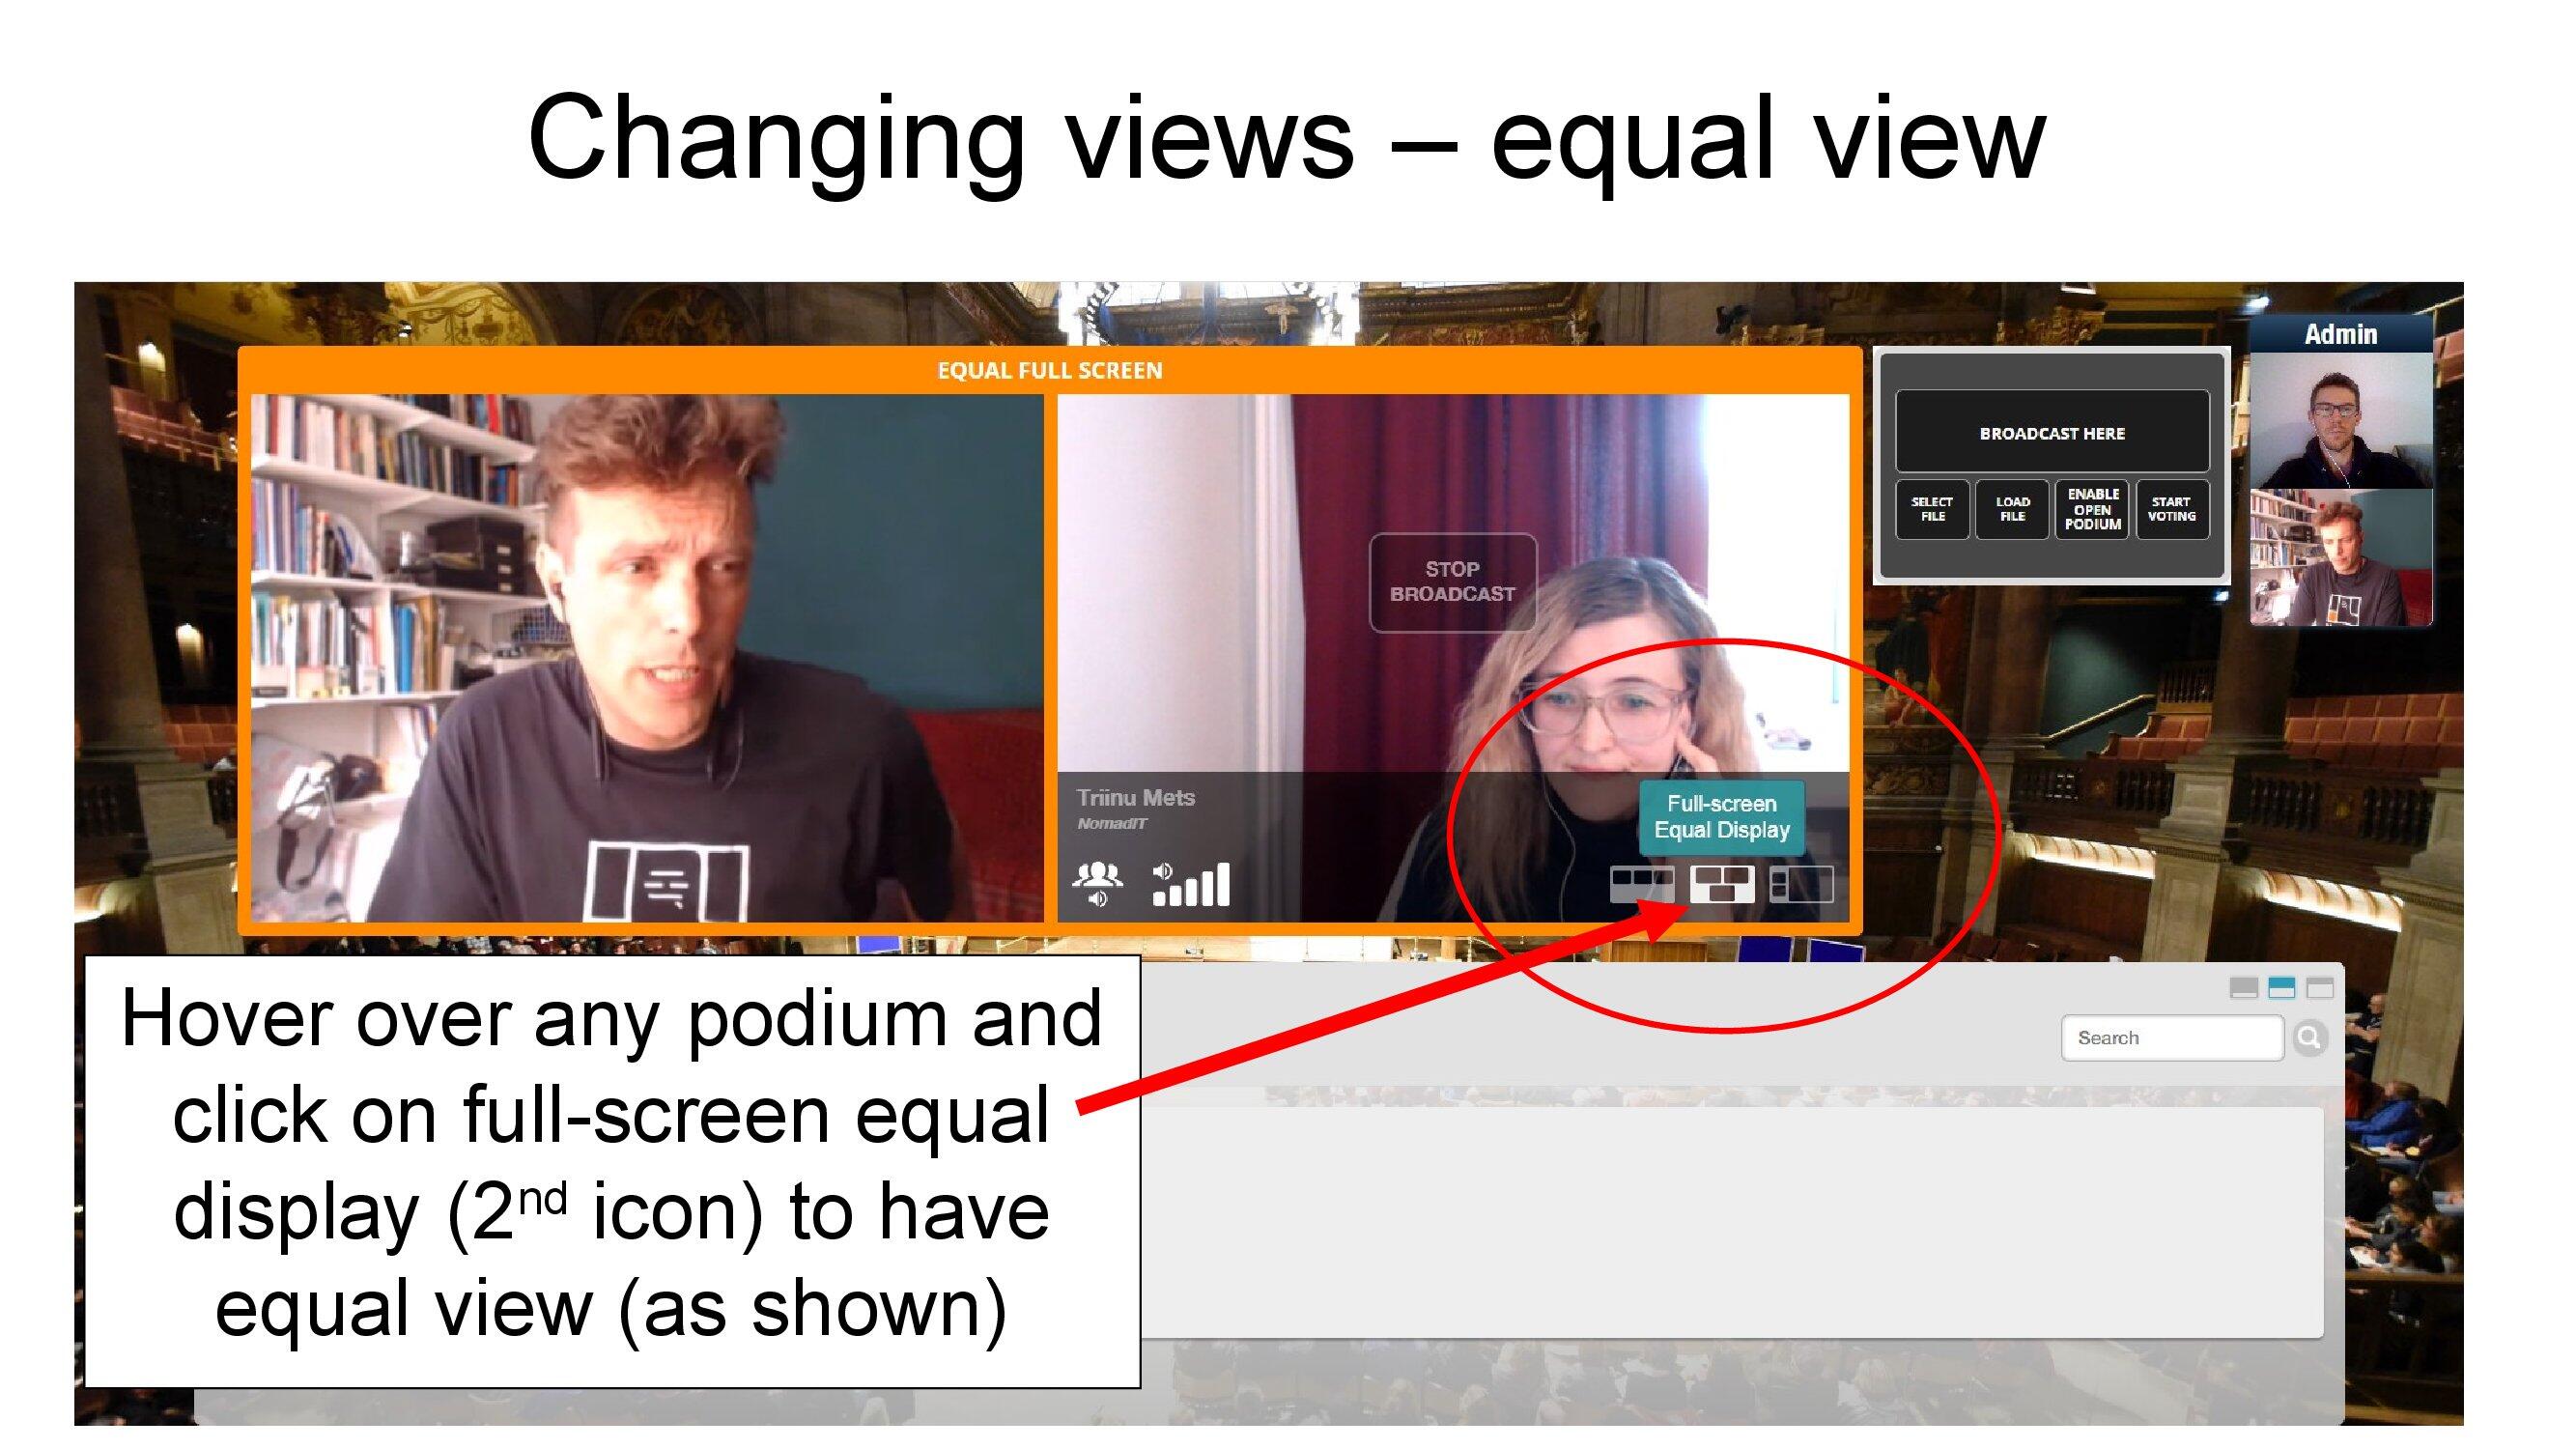
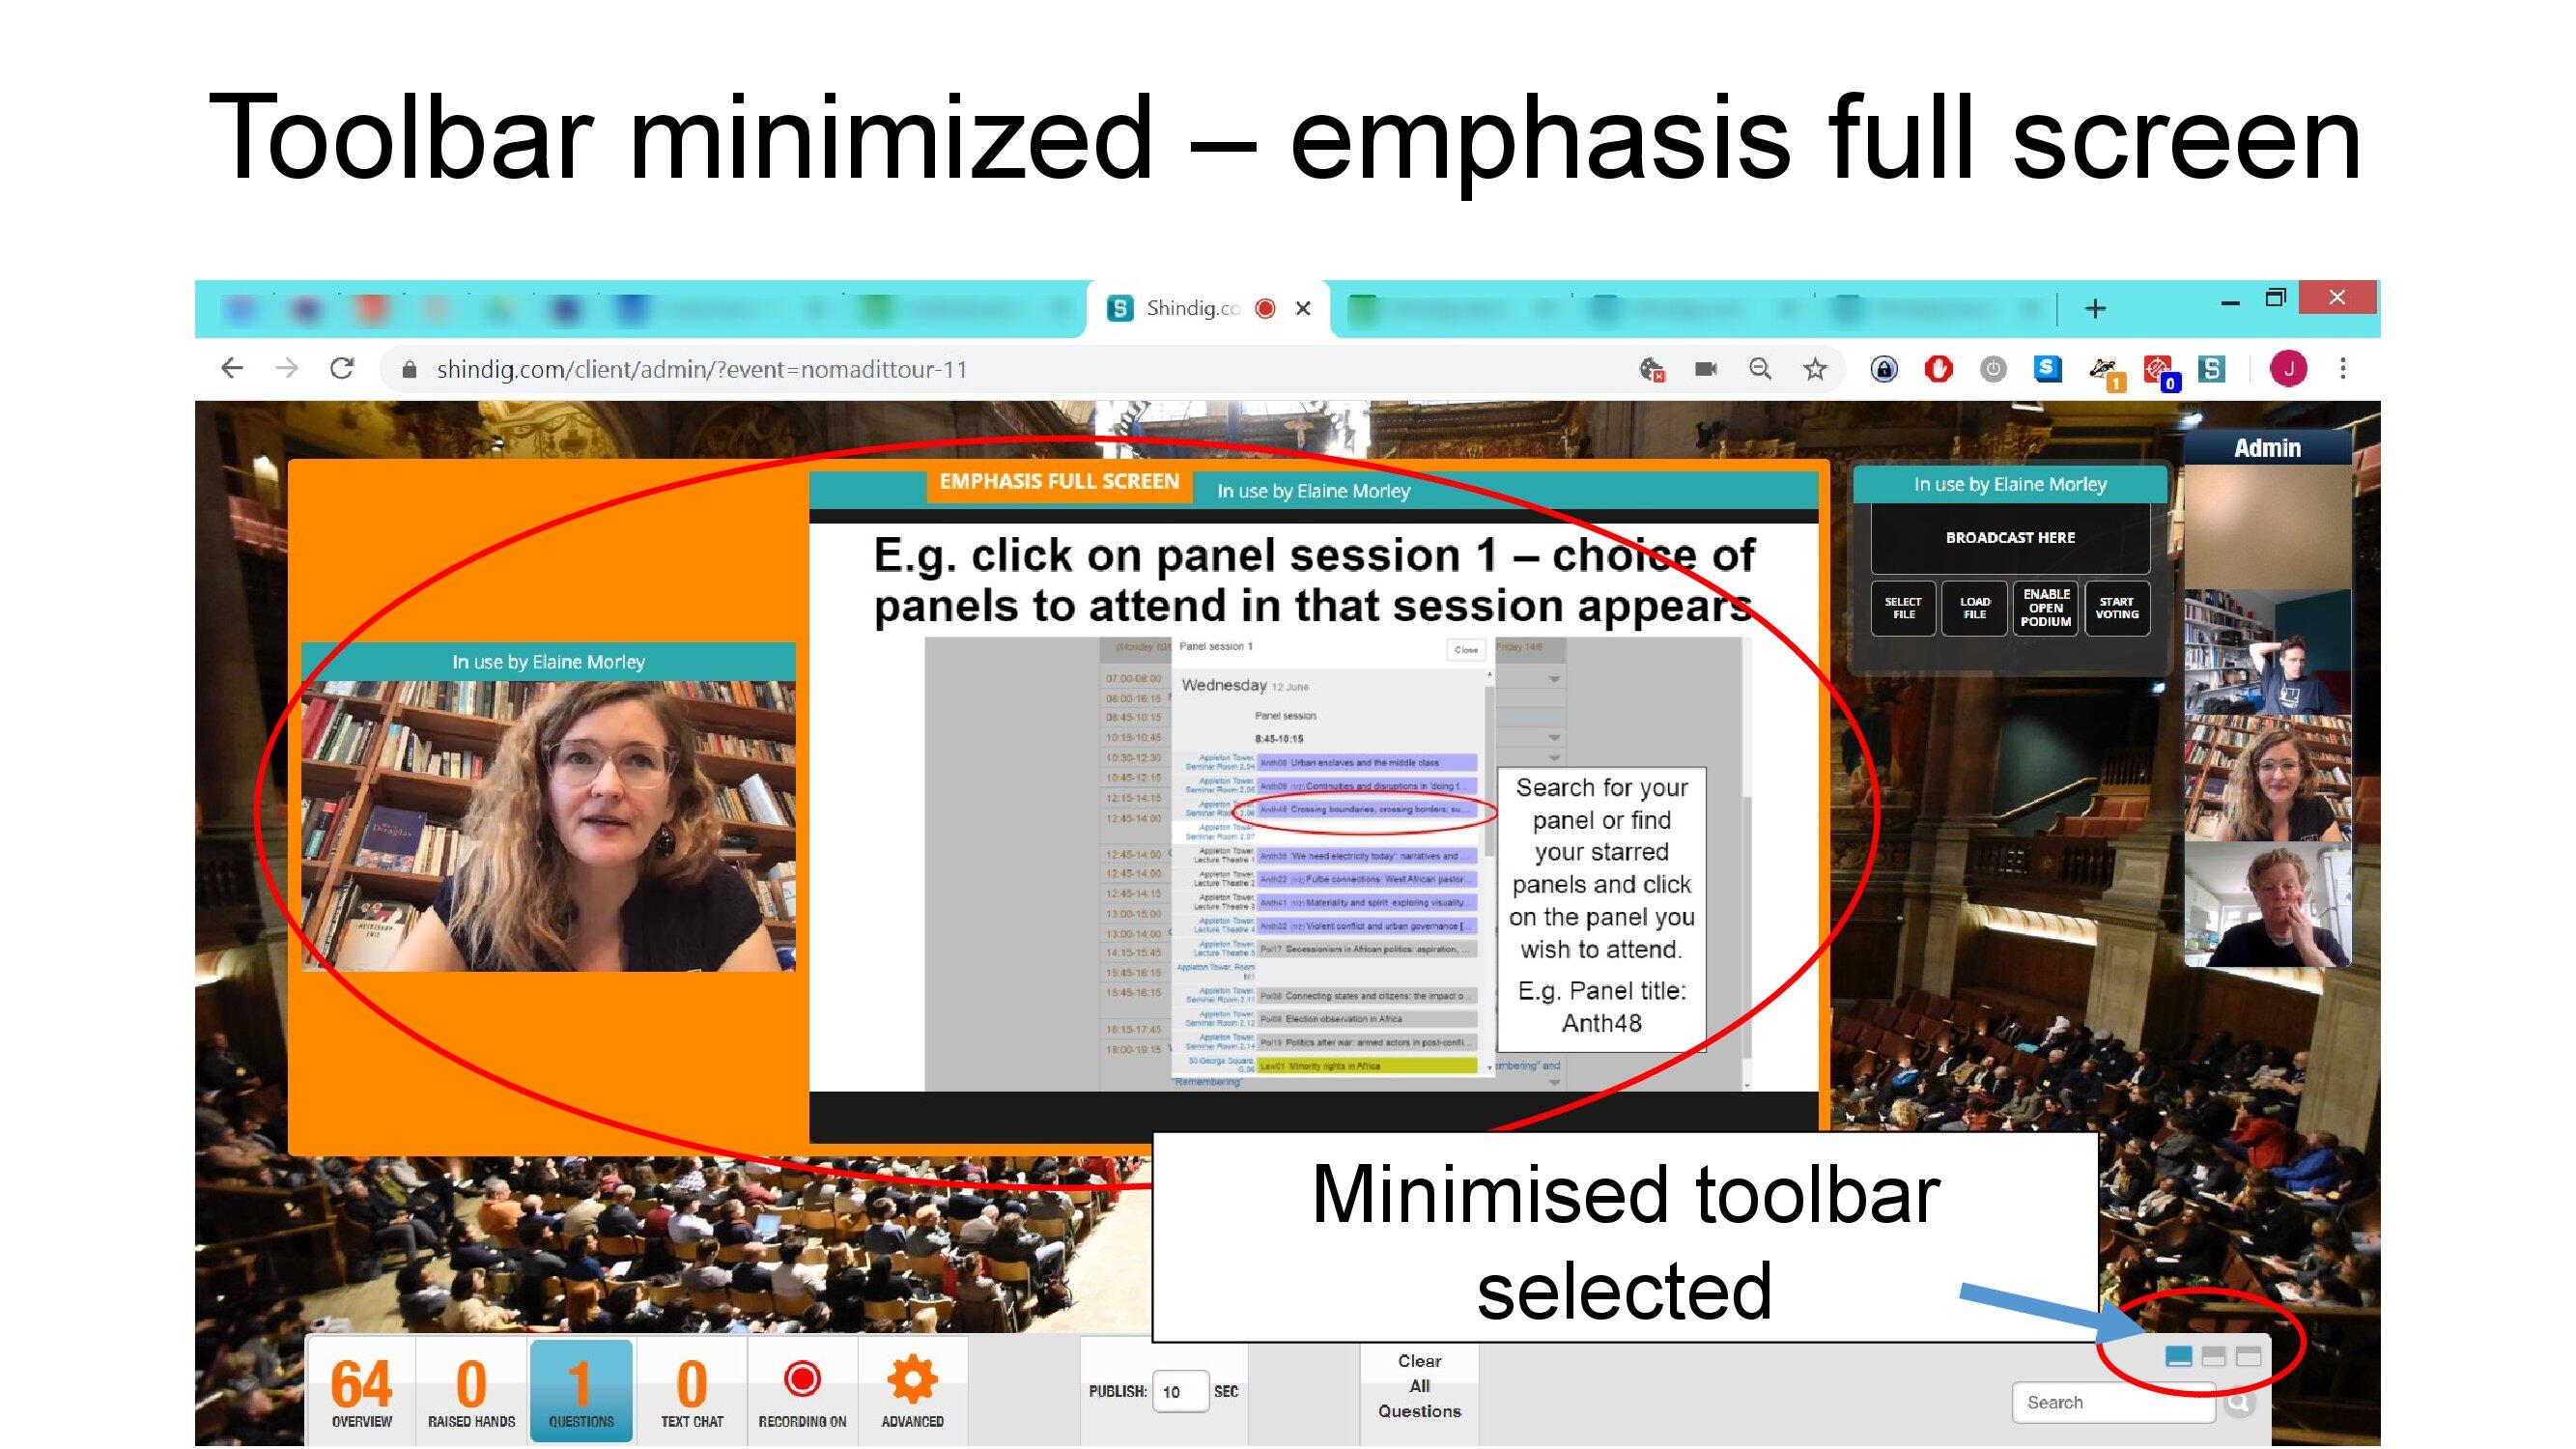
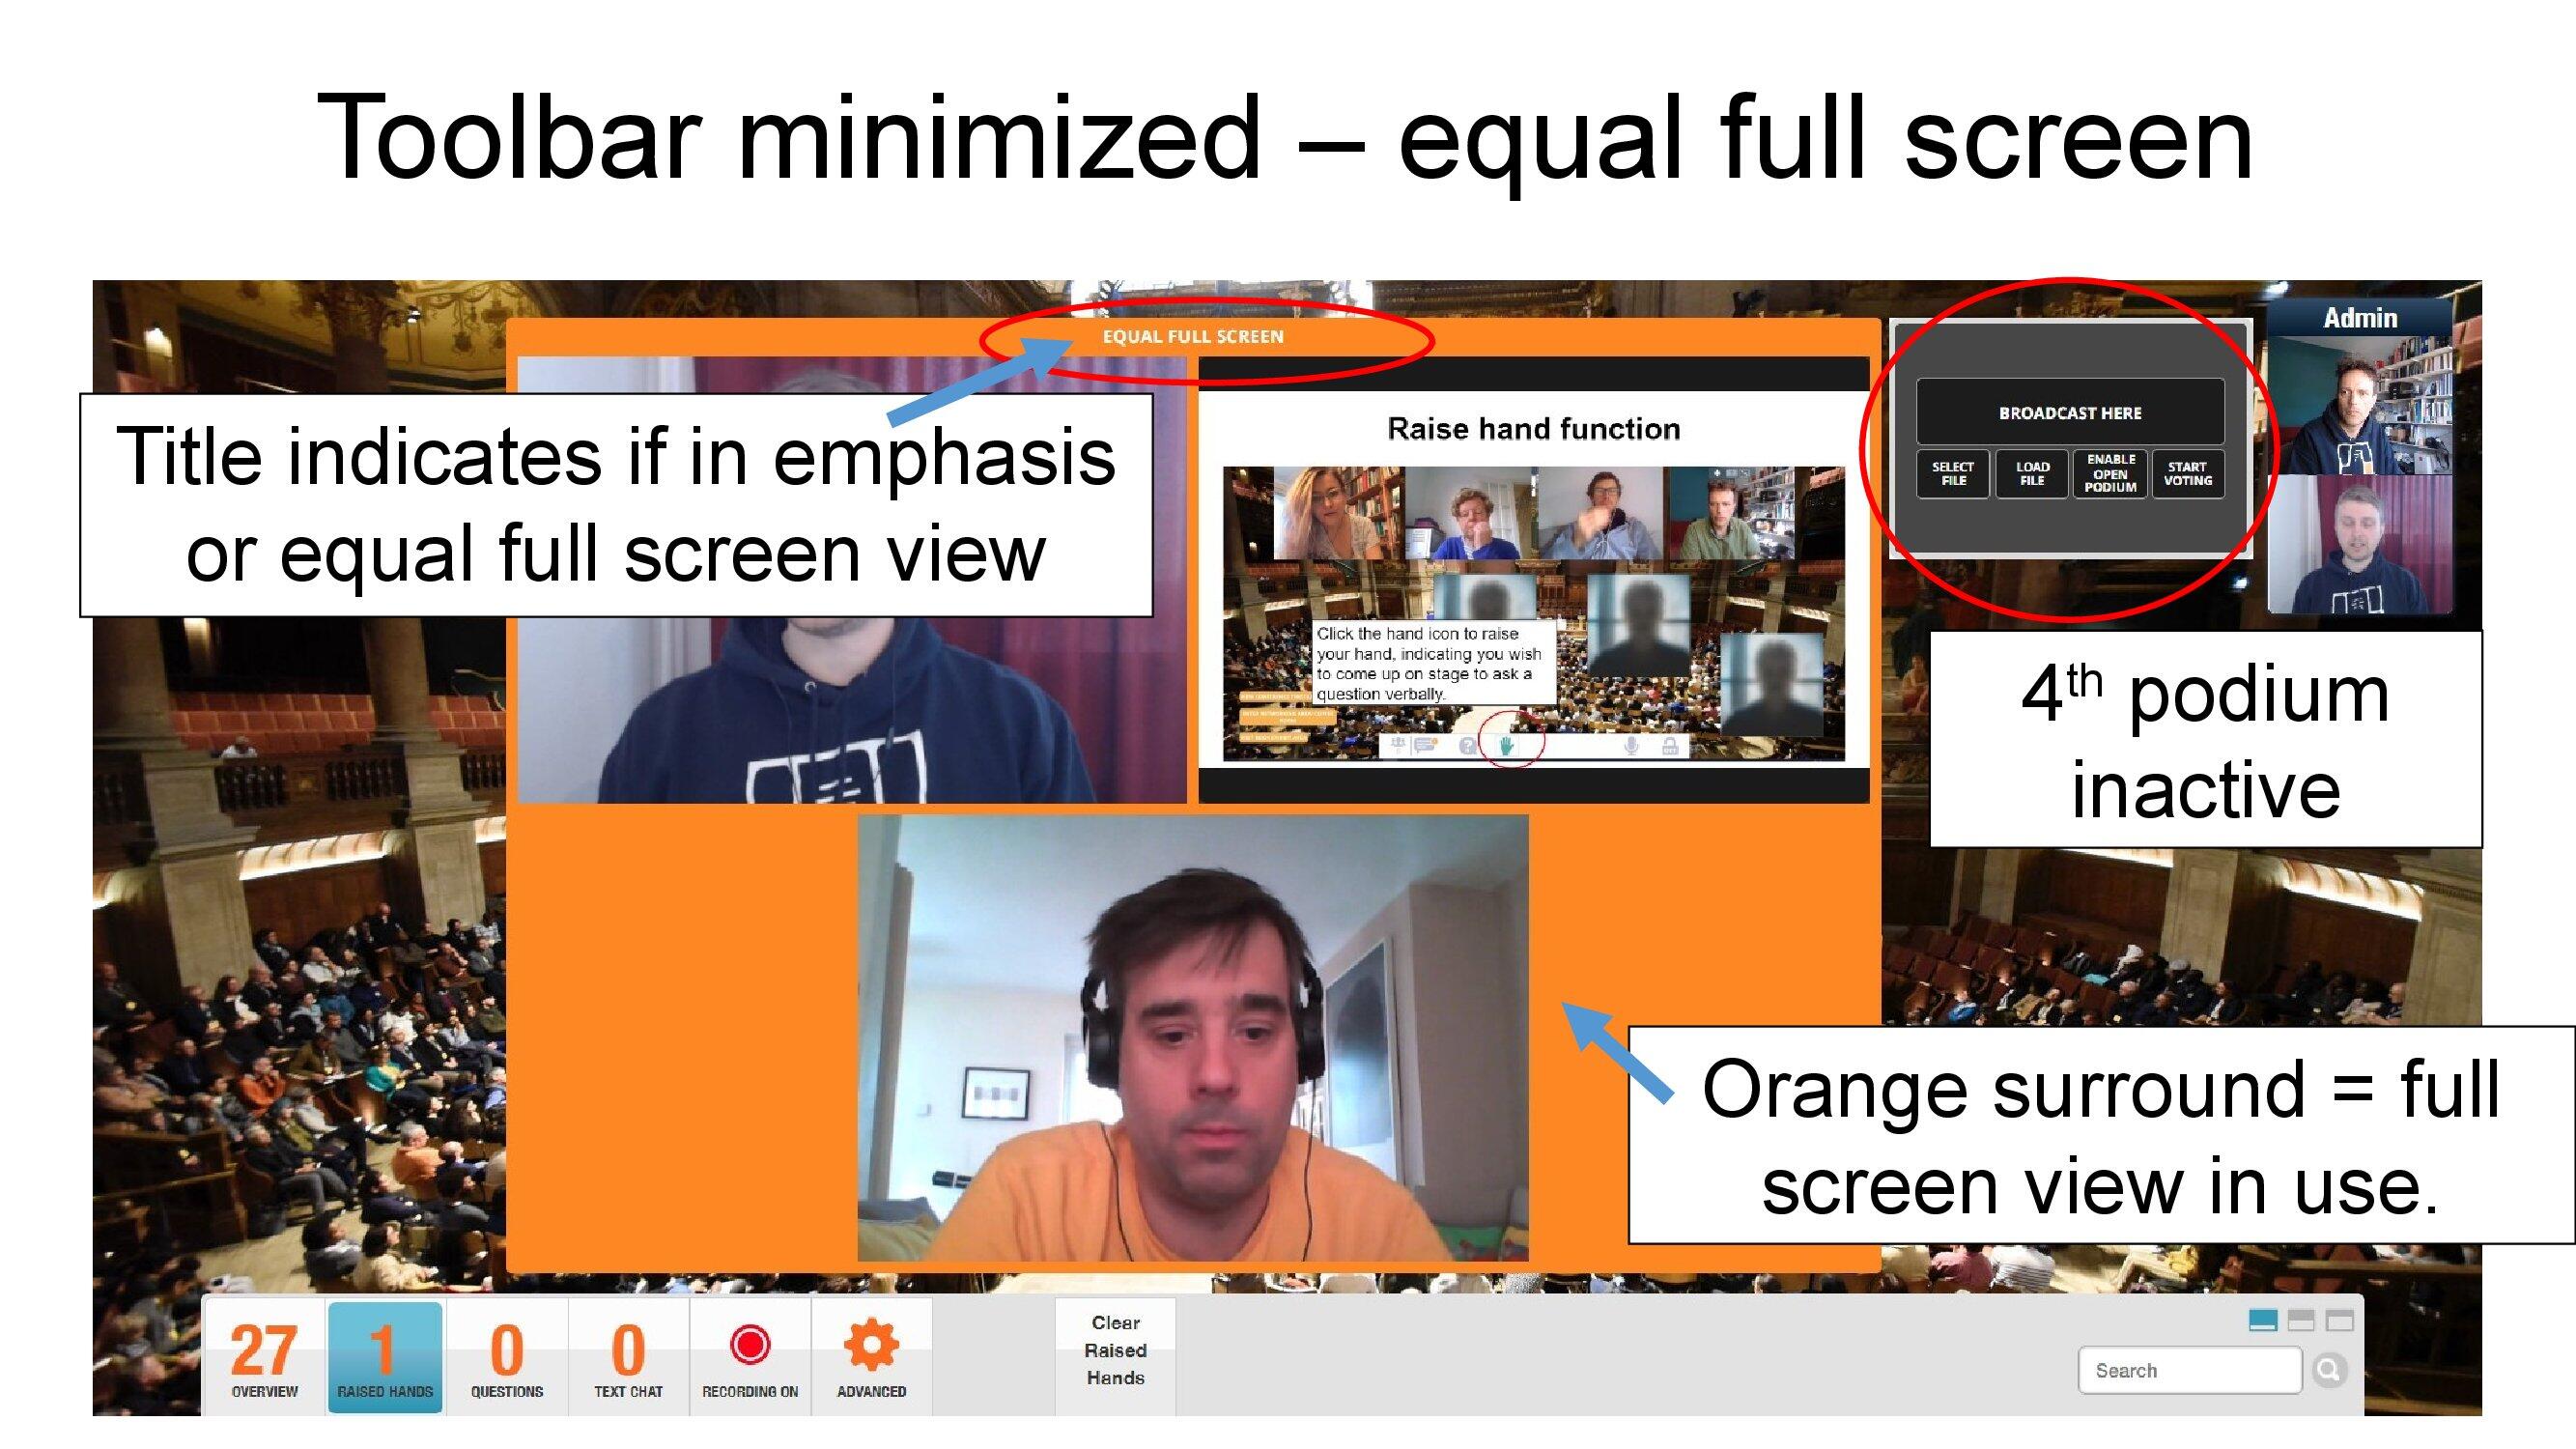
Admins can minimise their toolbar to have larger views of the podiums. However keep an eye on the number indicators for raised hands and questions.
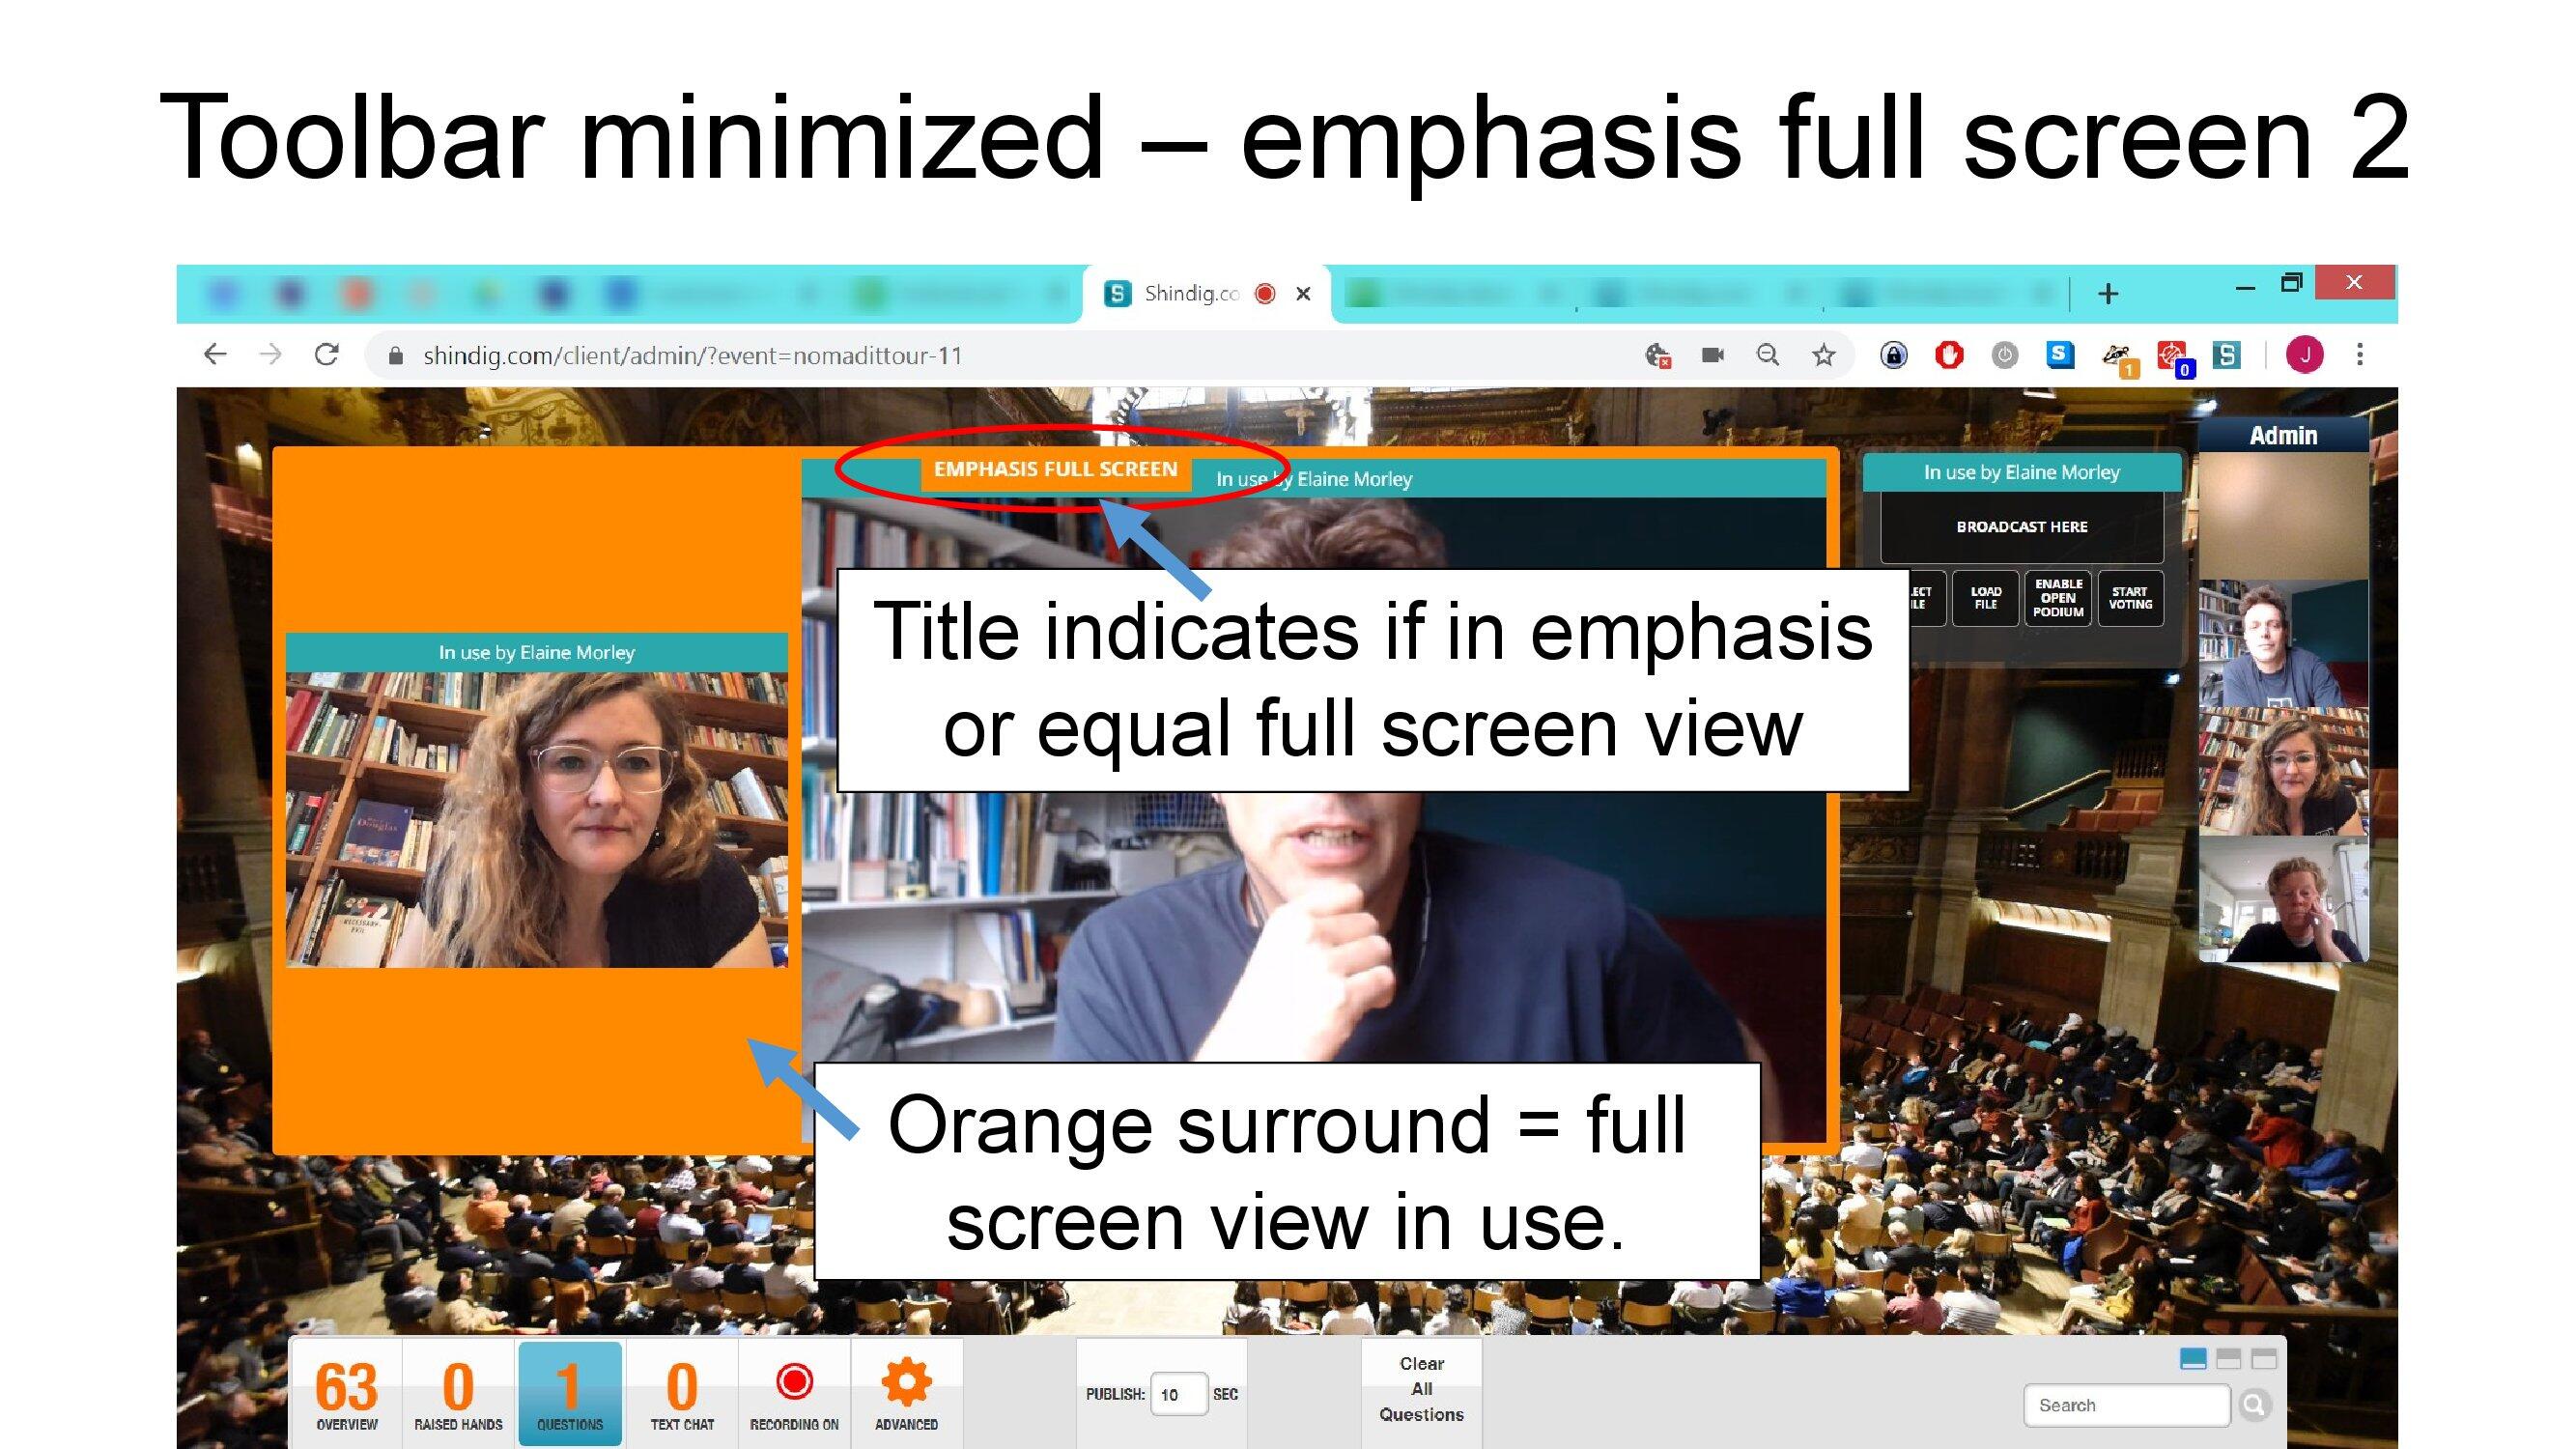
Here the number 1 in the toolbar indicates that there is a question waiting.
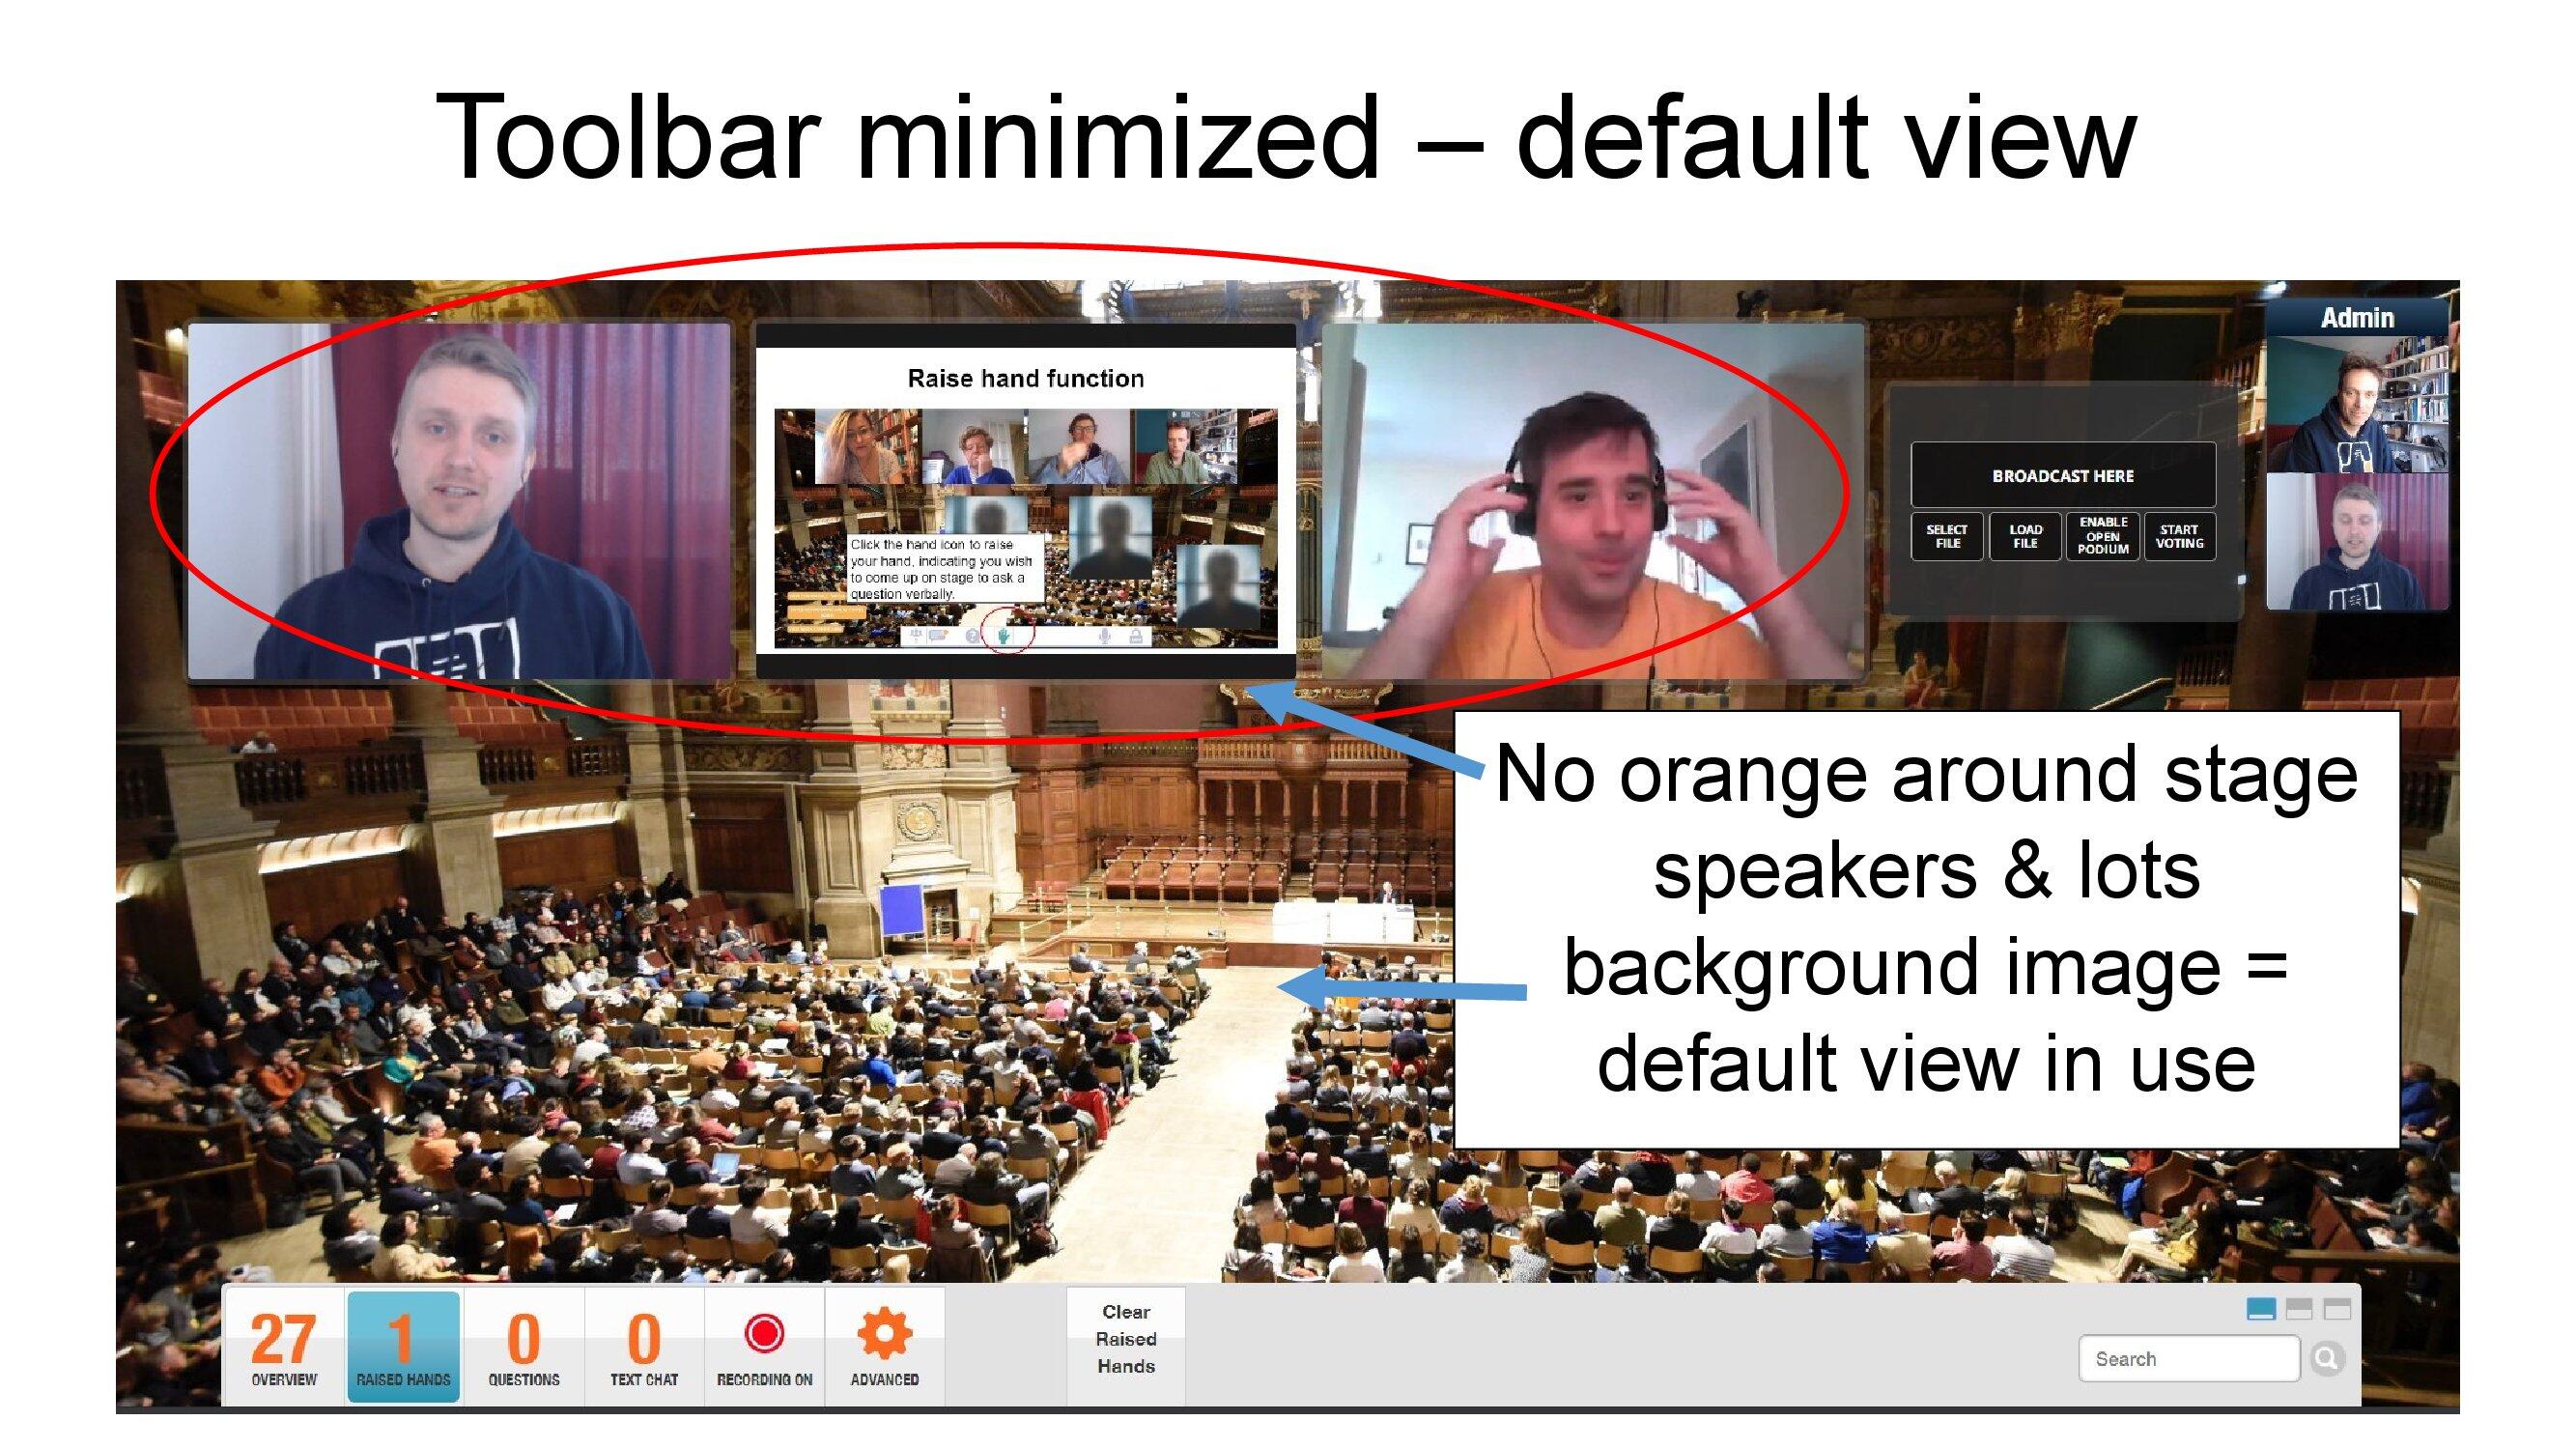
Here the number 1 indicates that an attendee has raised their hand.
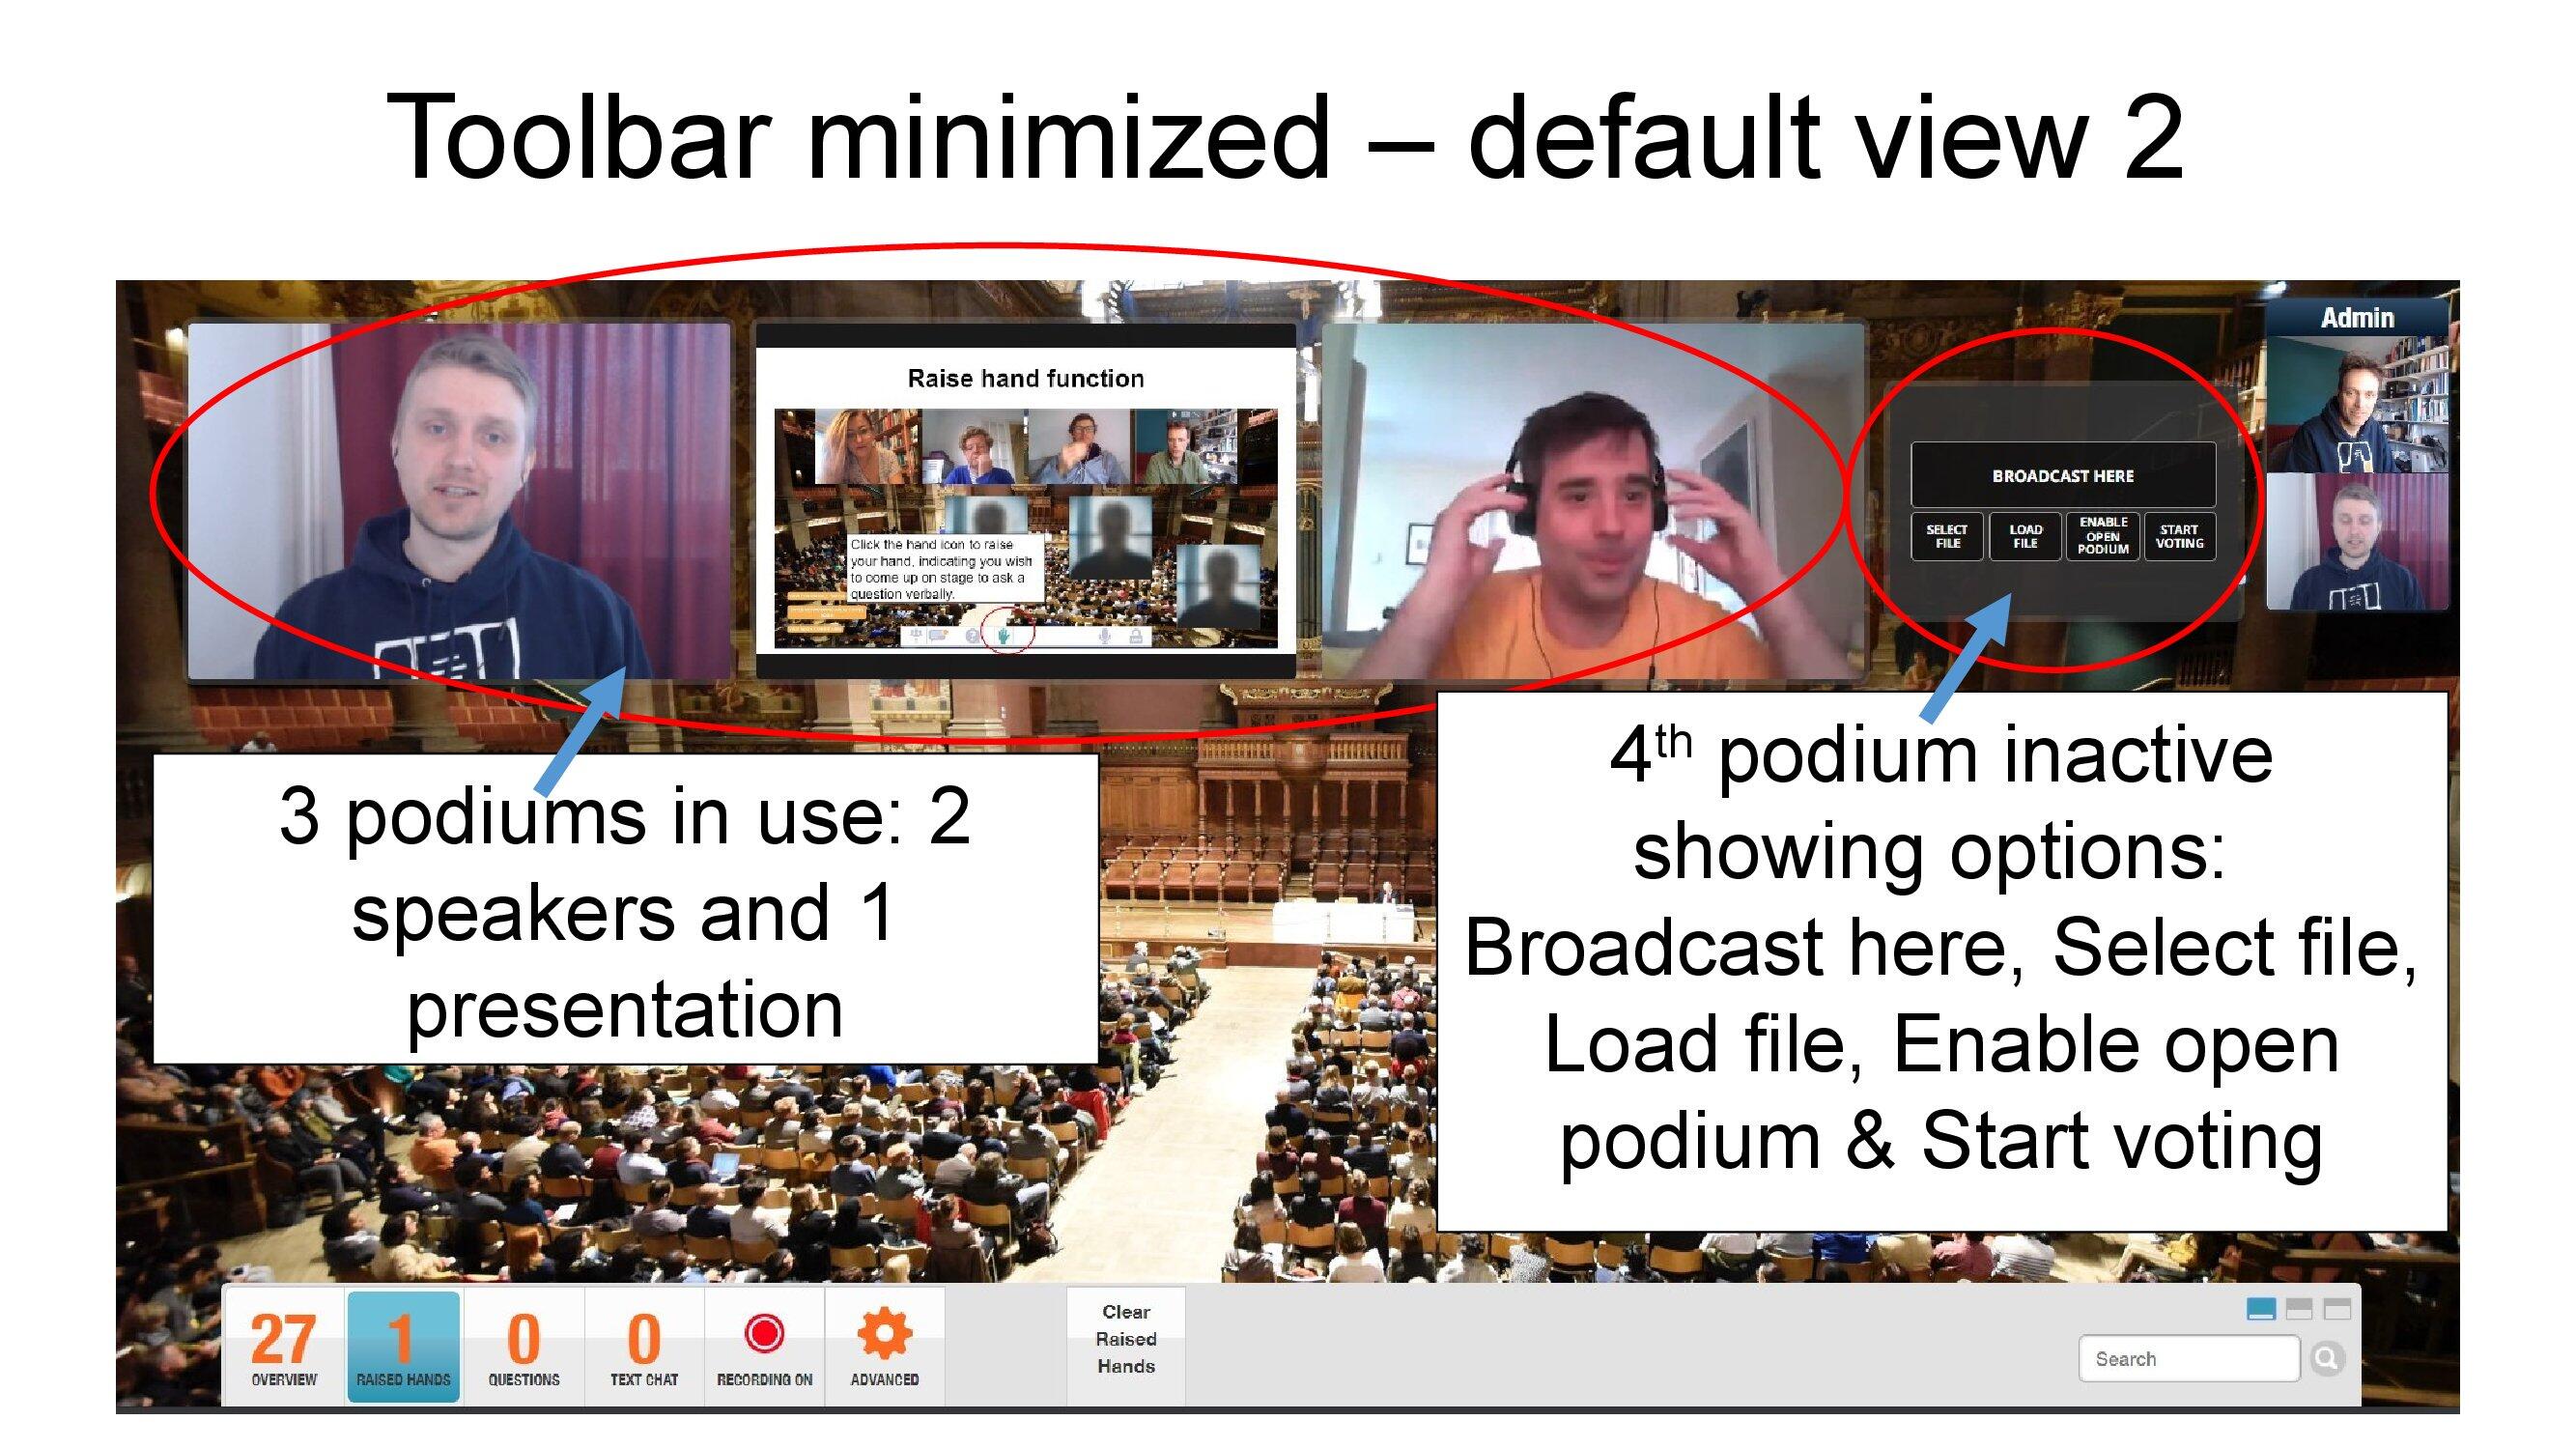
In default view there is little reason to keep your toolbar minimised, as for admins, there are no floating attendee thumbnails. (Thumbnails are in the toolbar.)
3. Presentation process
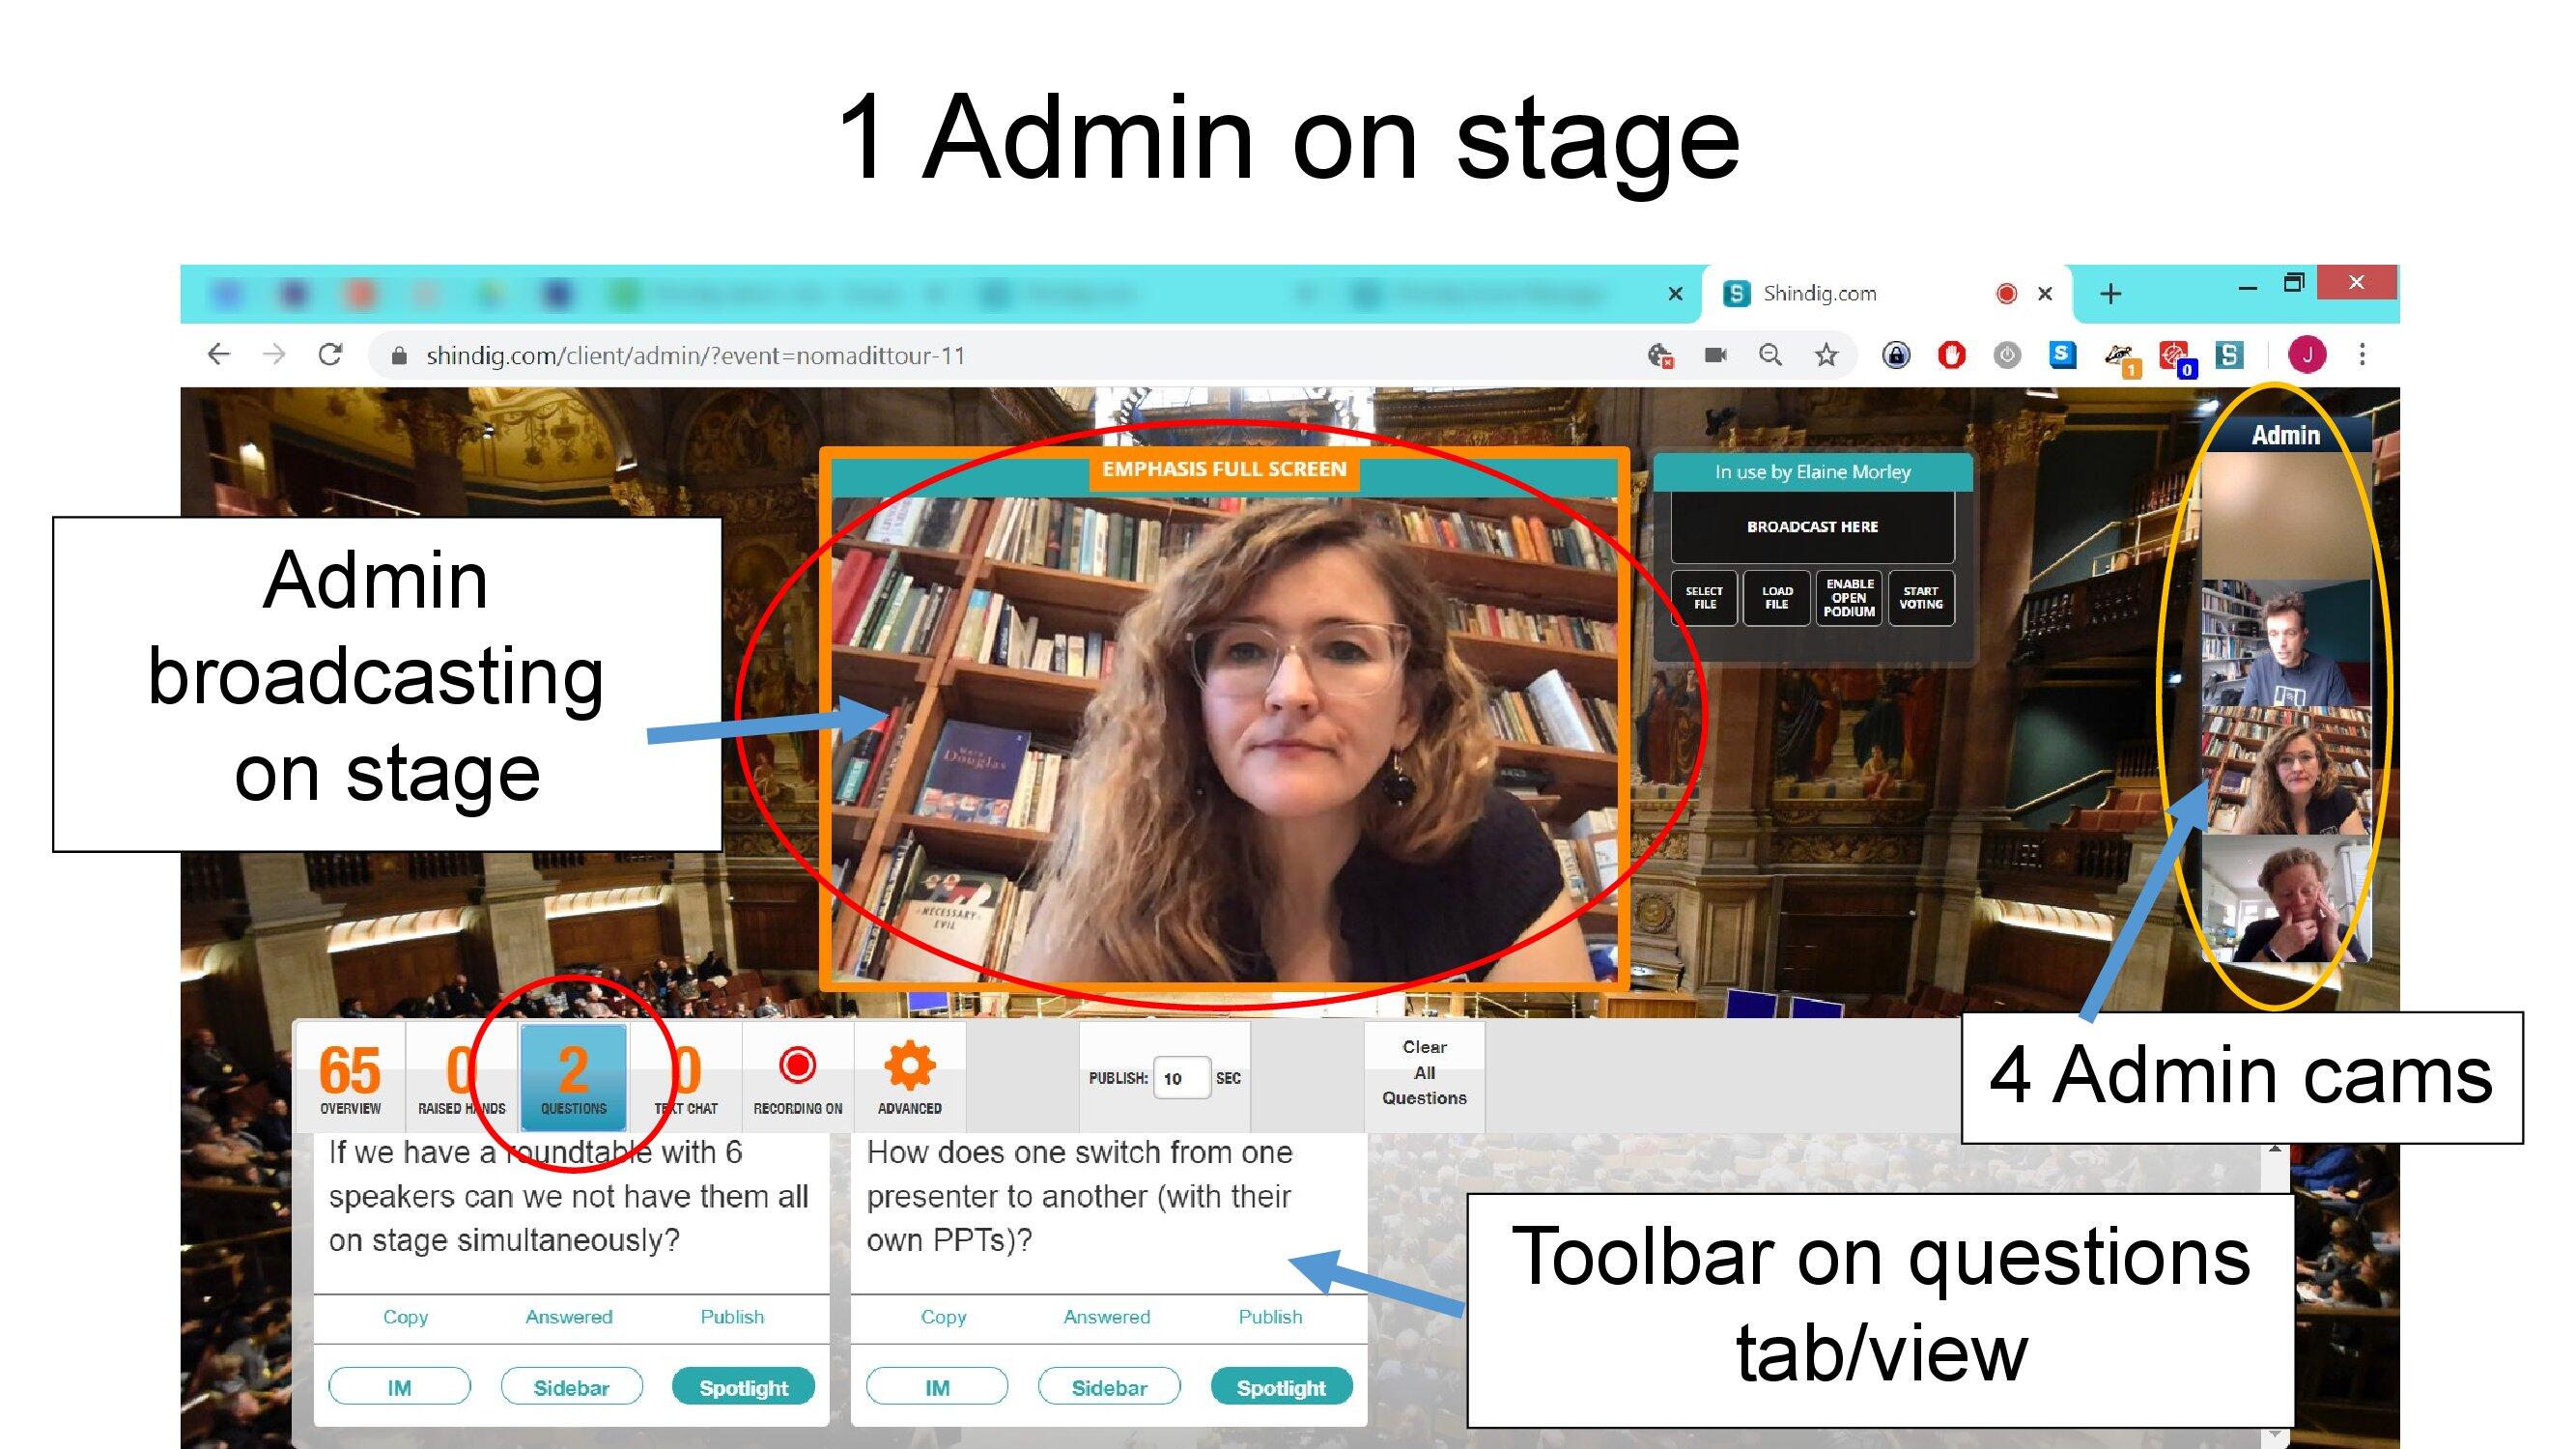
It is likely that a convenor might be on stage to introduce the next presenter.
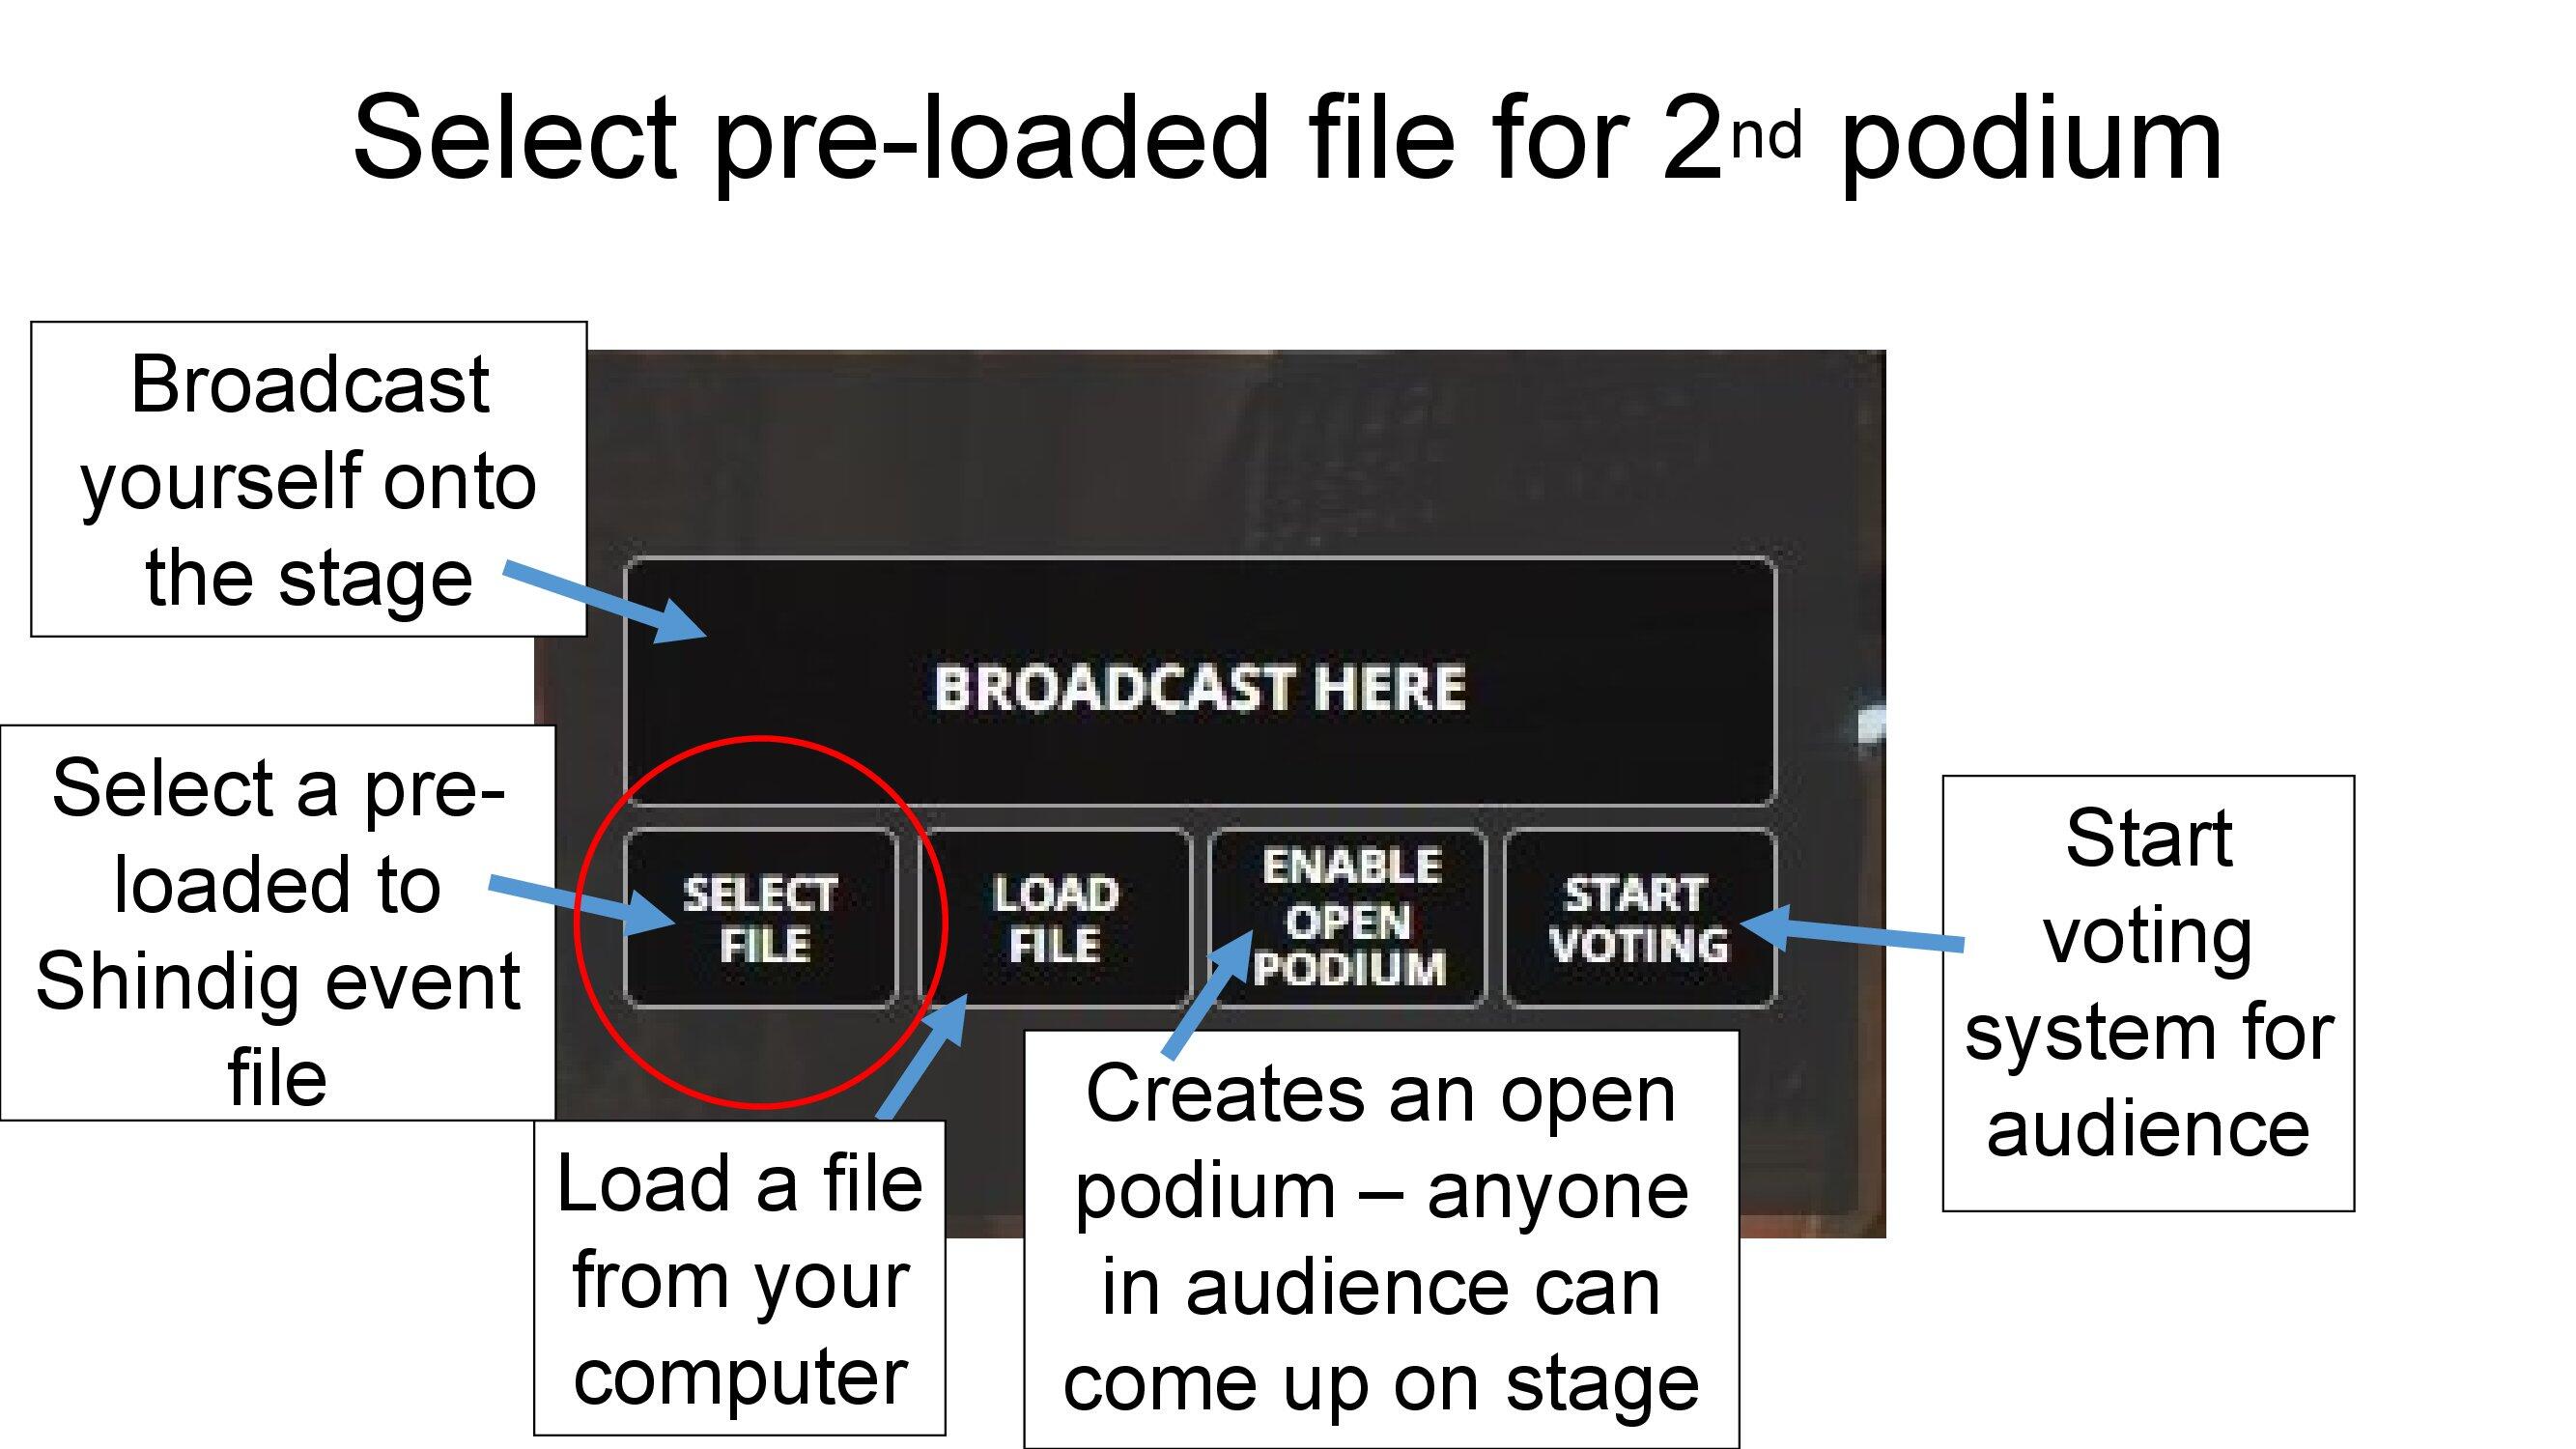
The admin can load up the presenter's slides (PDF) to a podium using Select File.
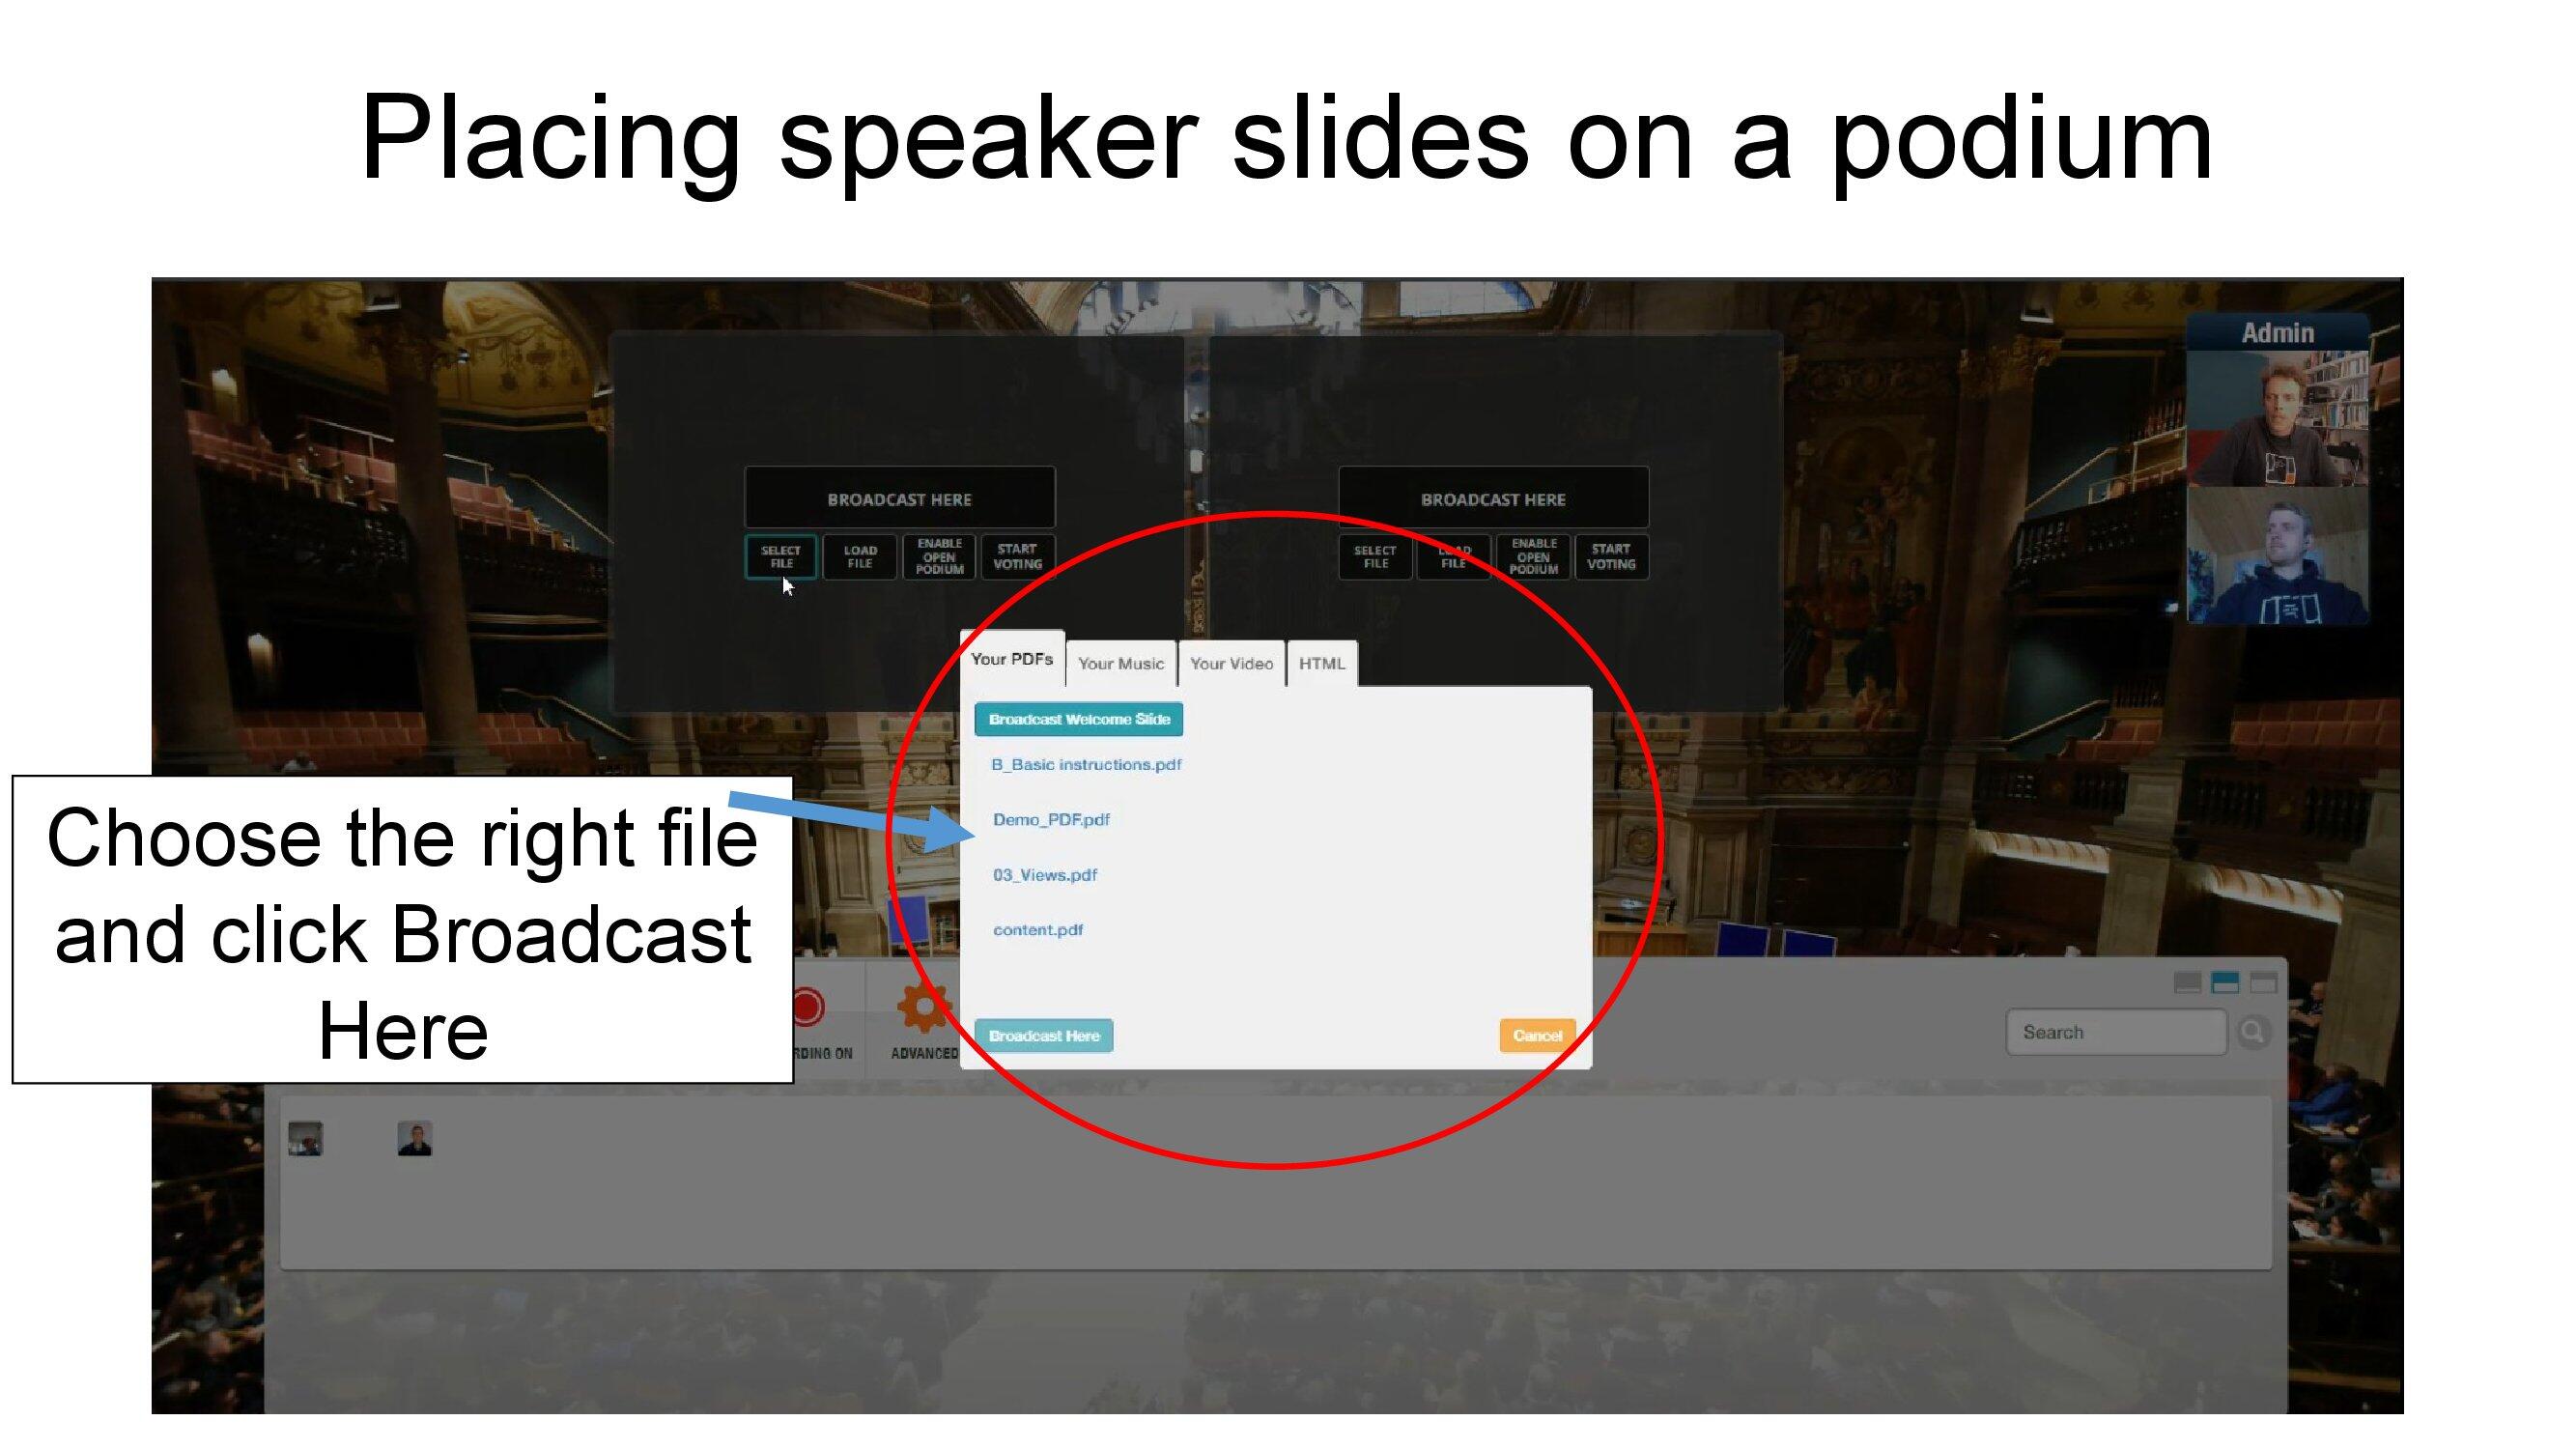
Pre-loaded files are displayed in the dialogue box, with tabs for PDFs, audio and video.
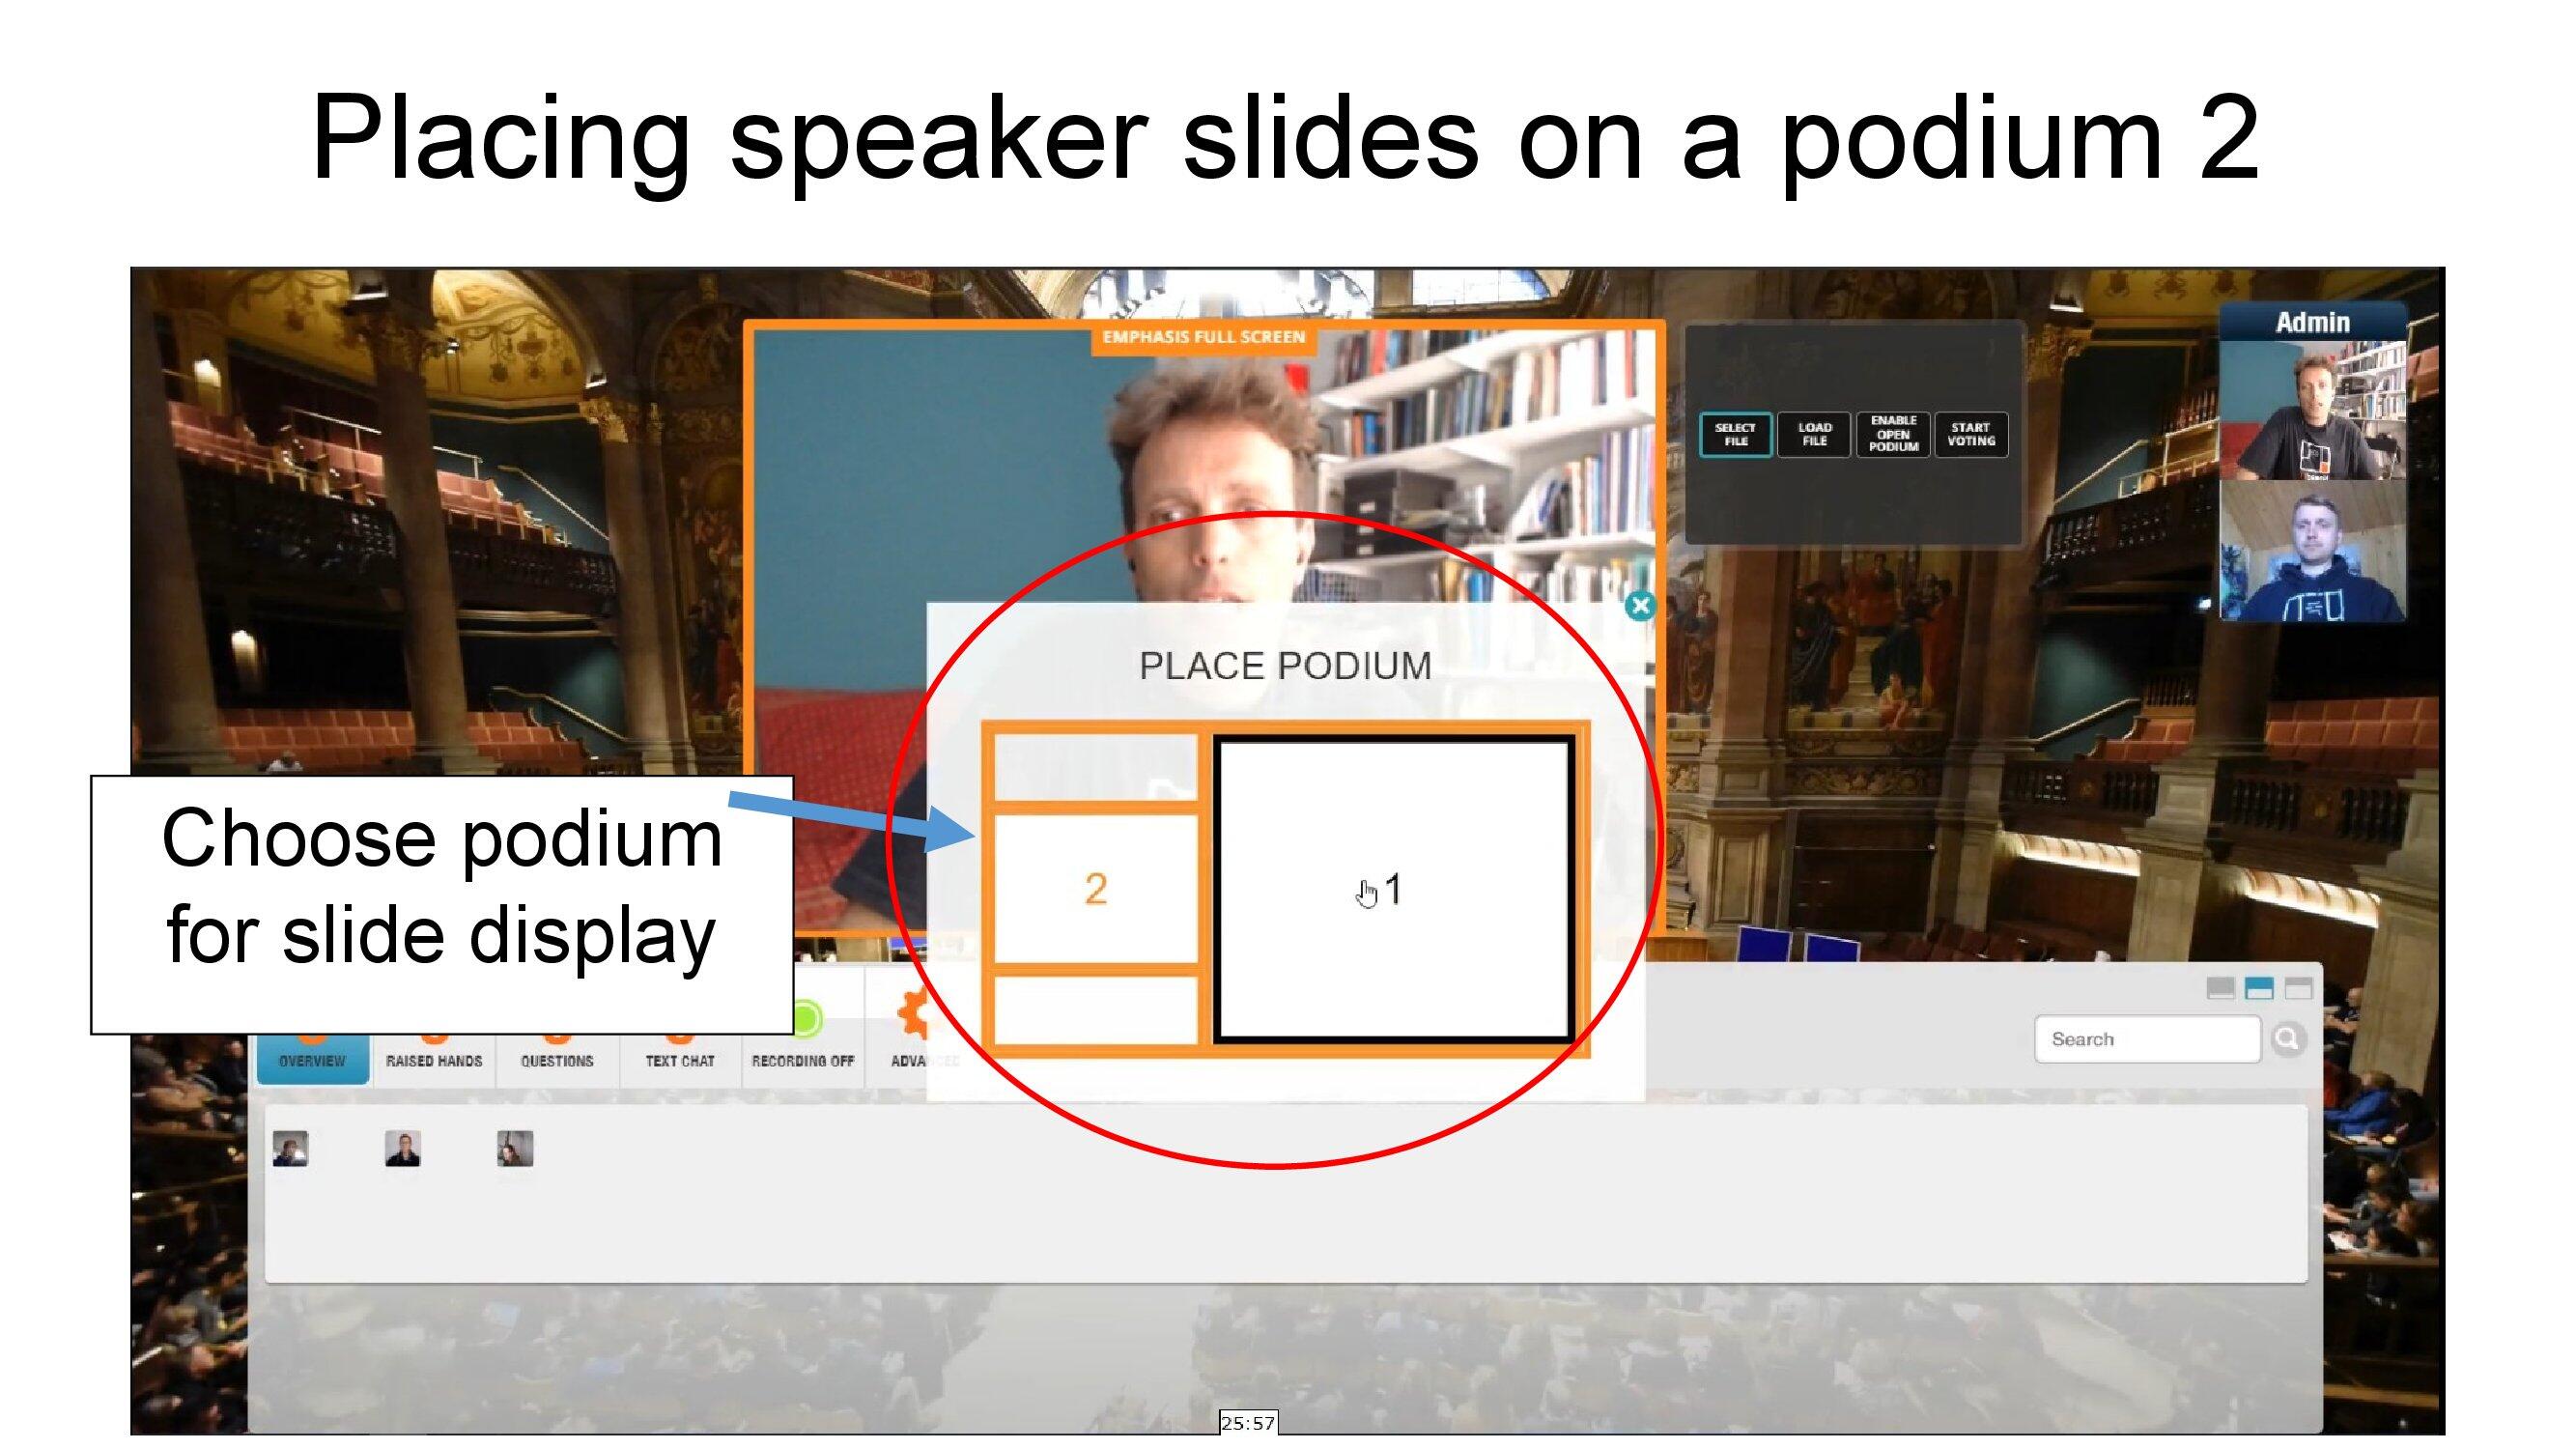
Slides are best when their podium is emphasised.
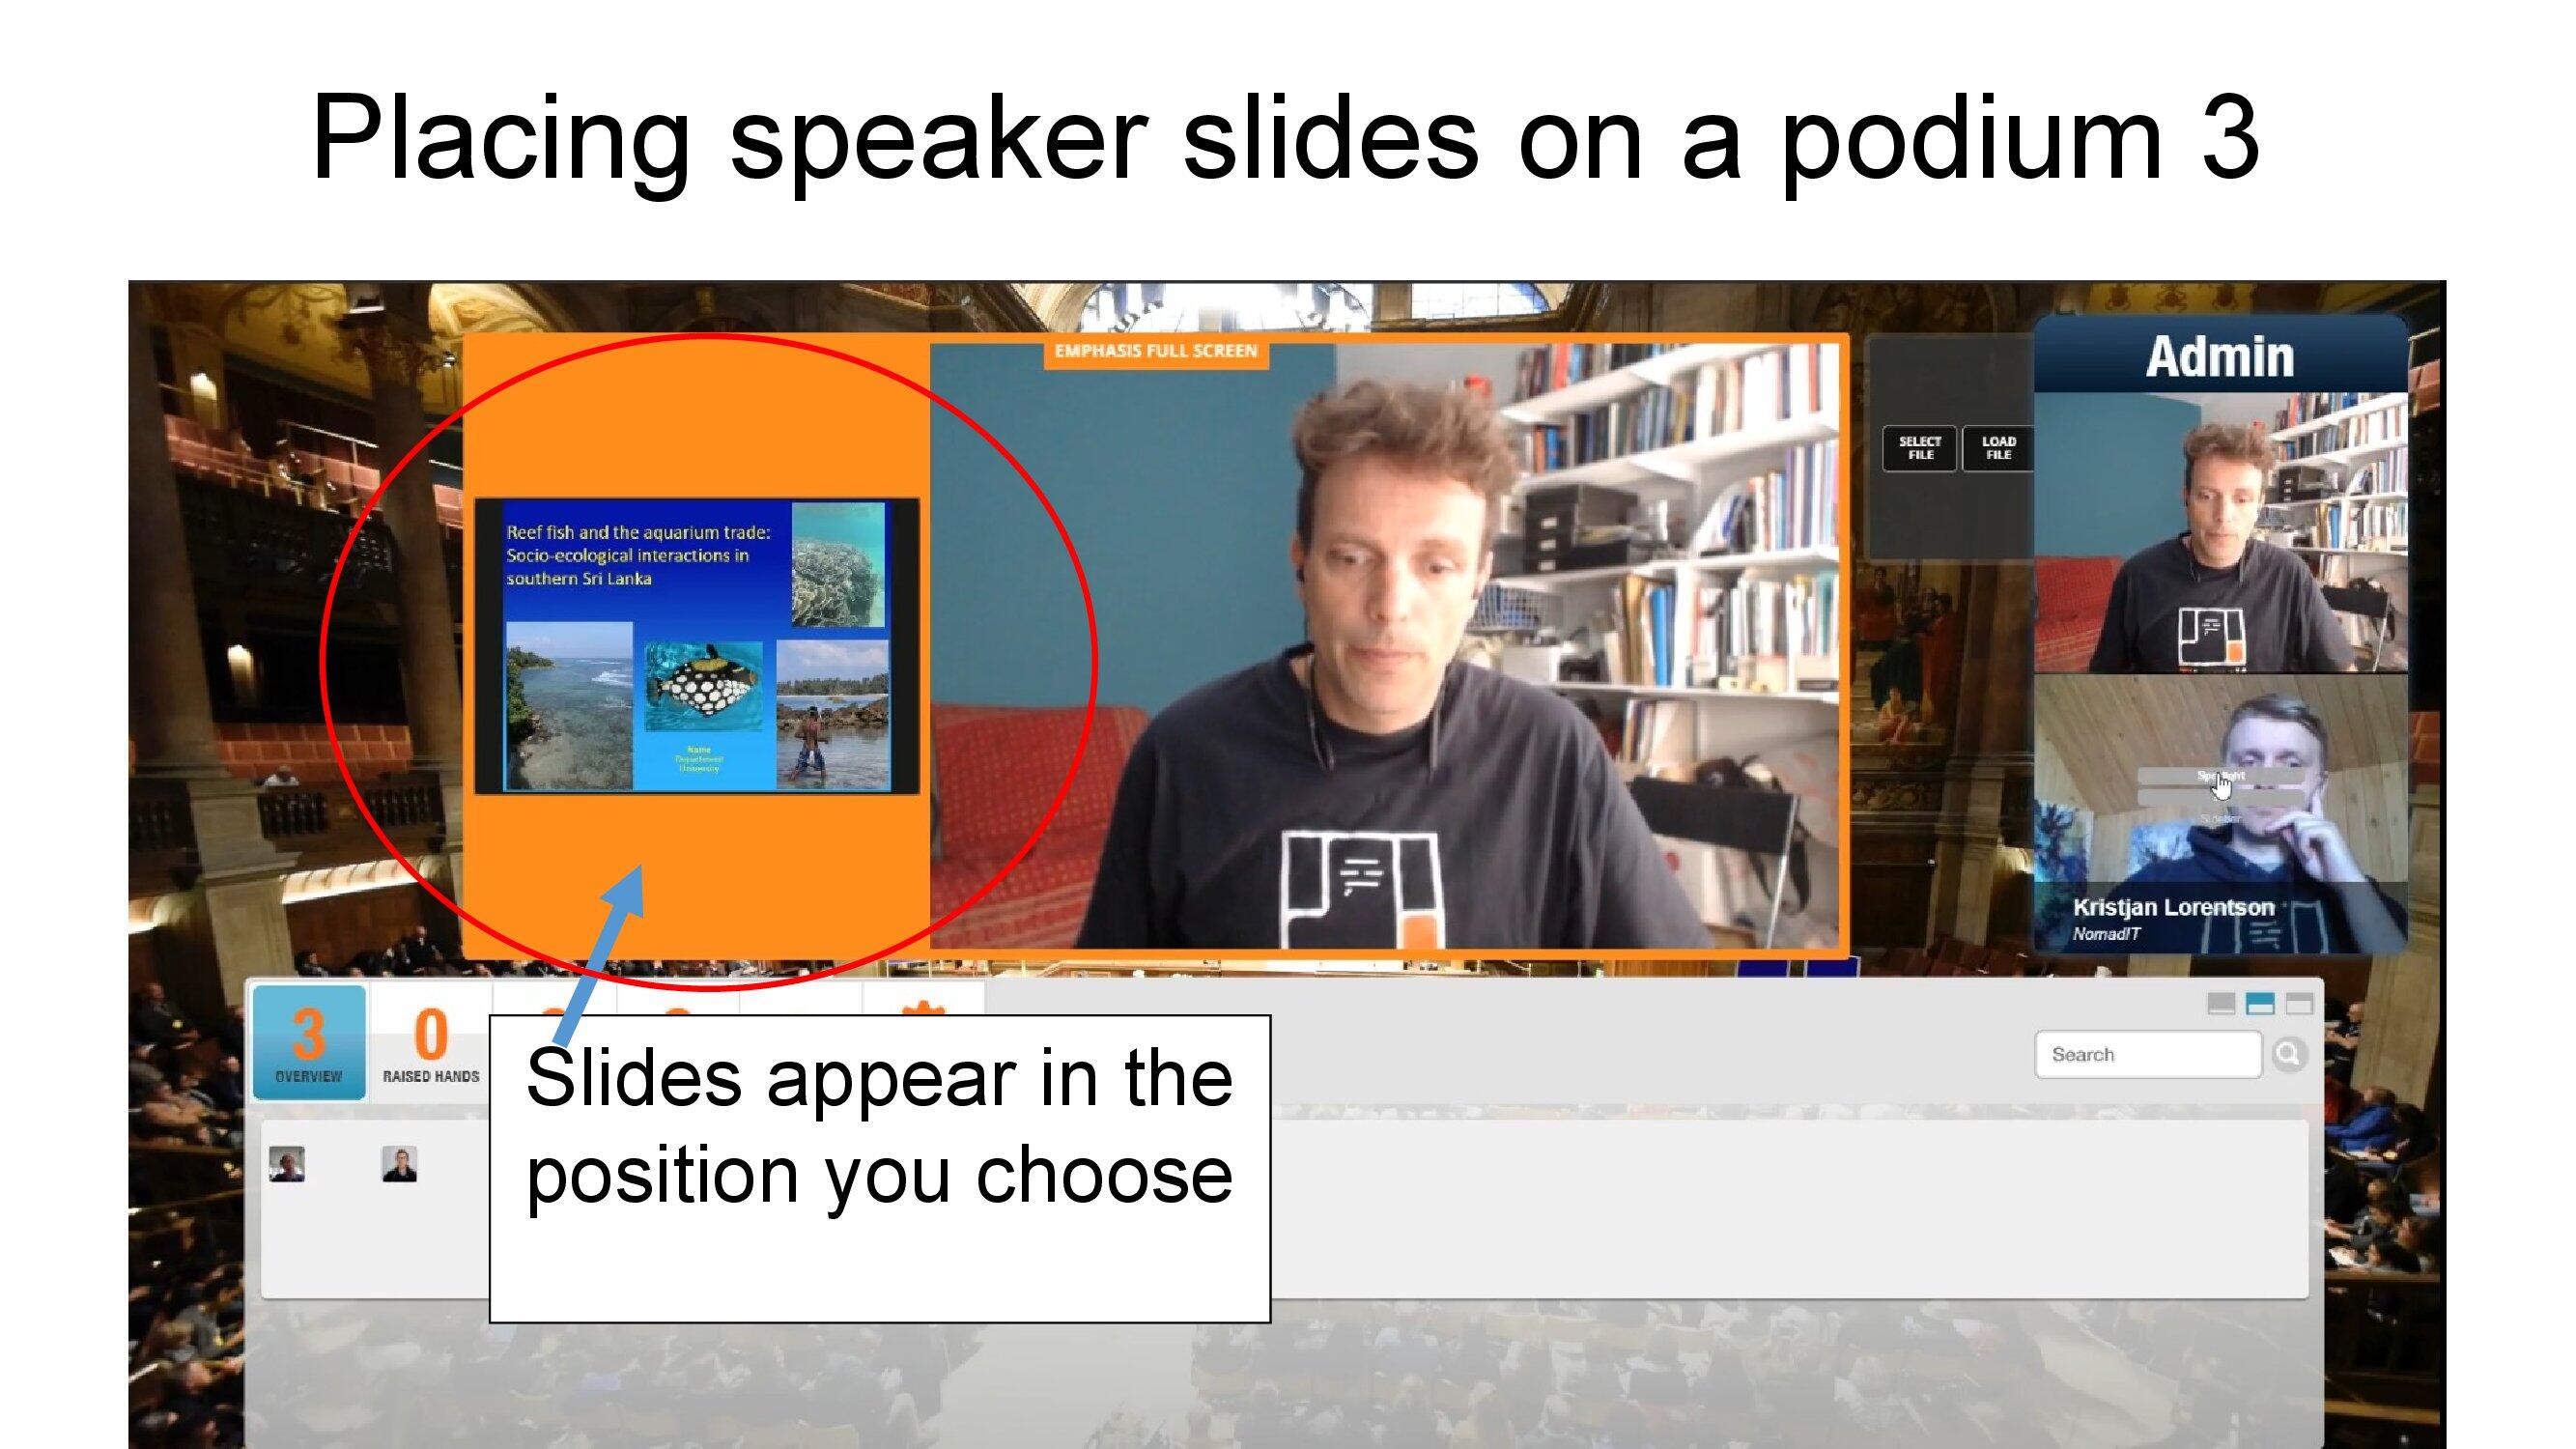
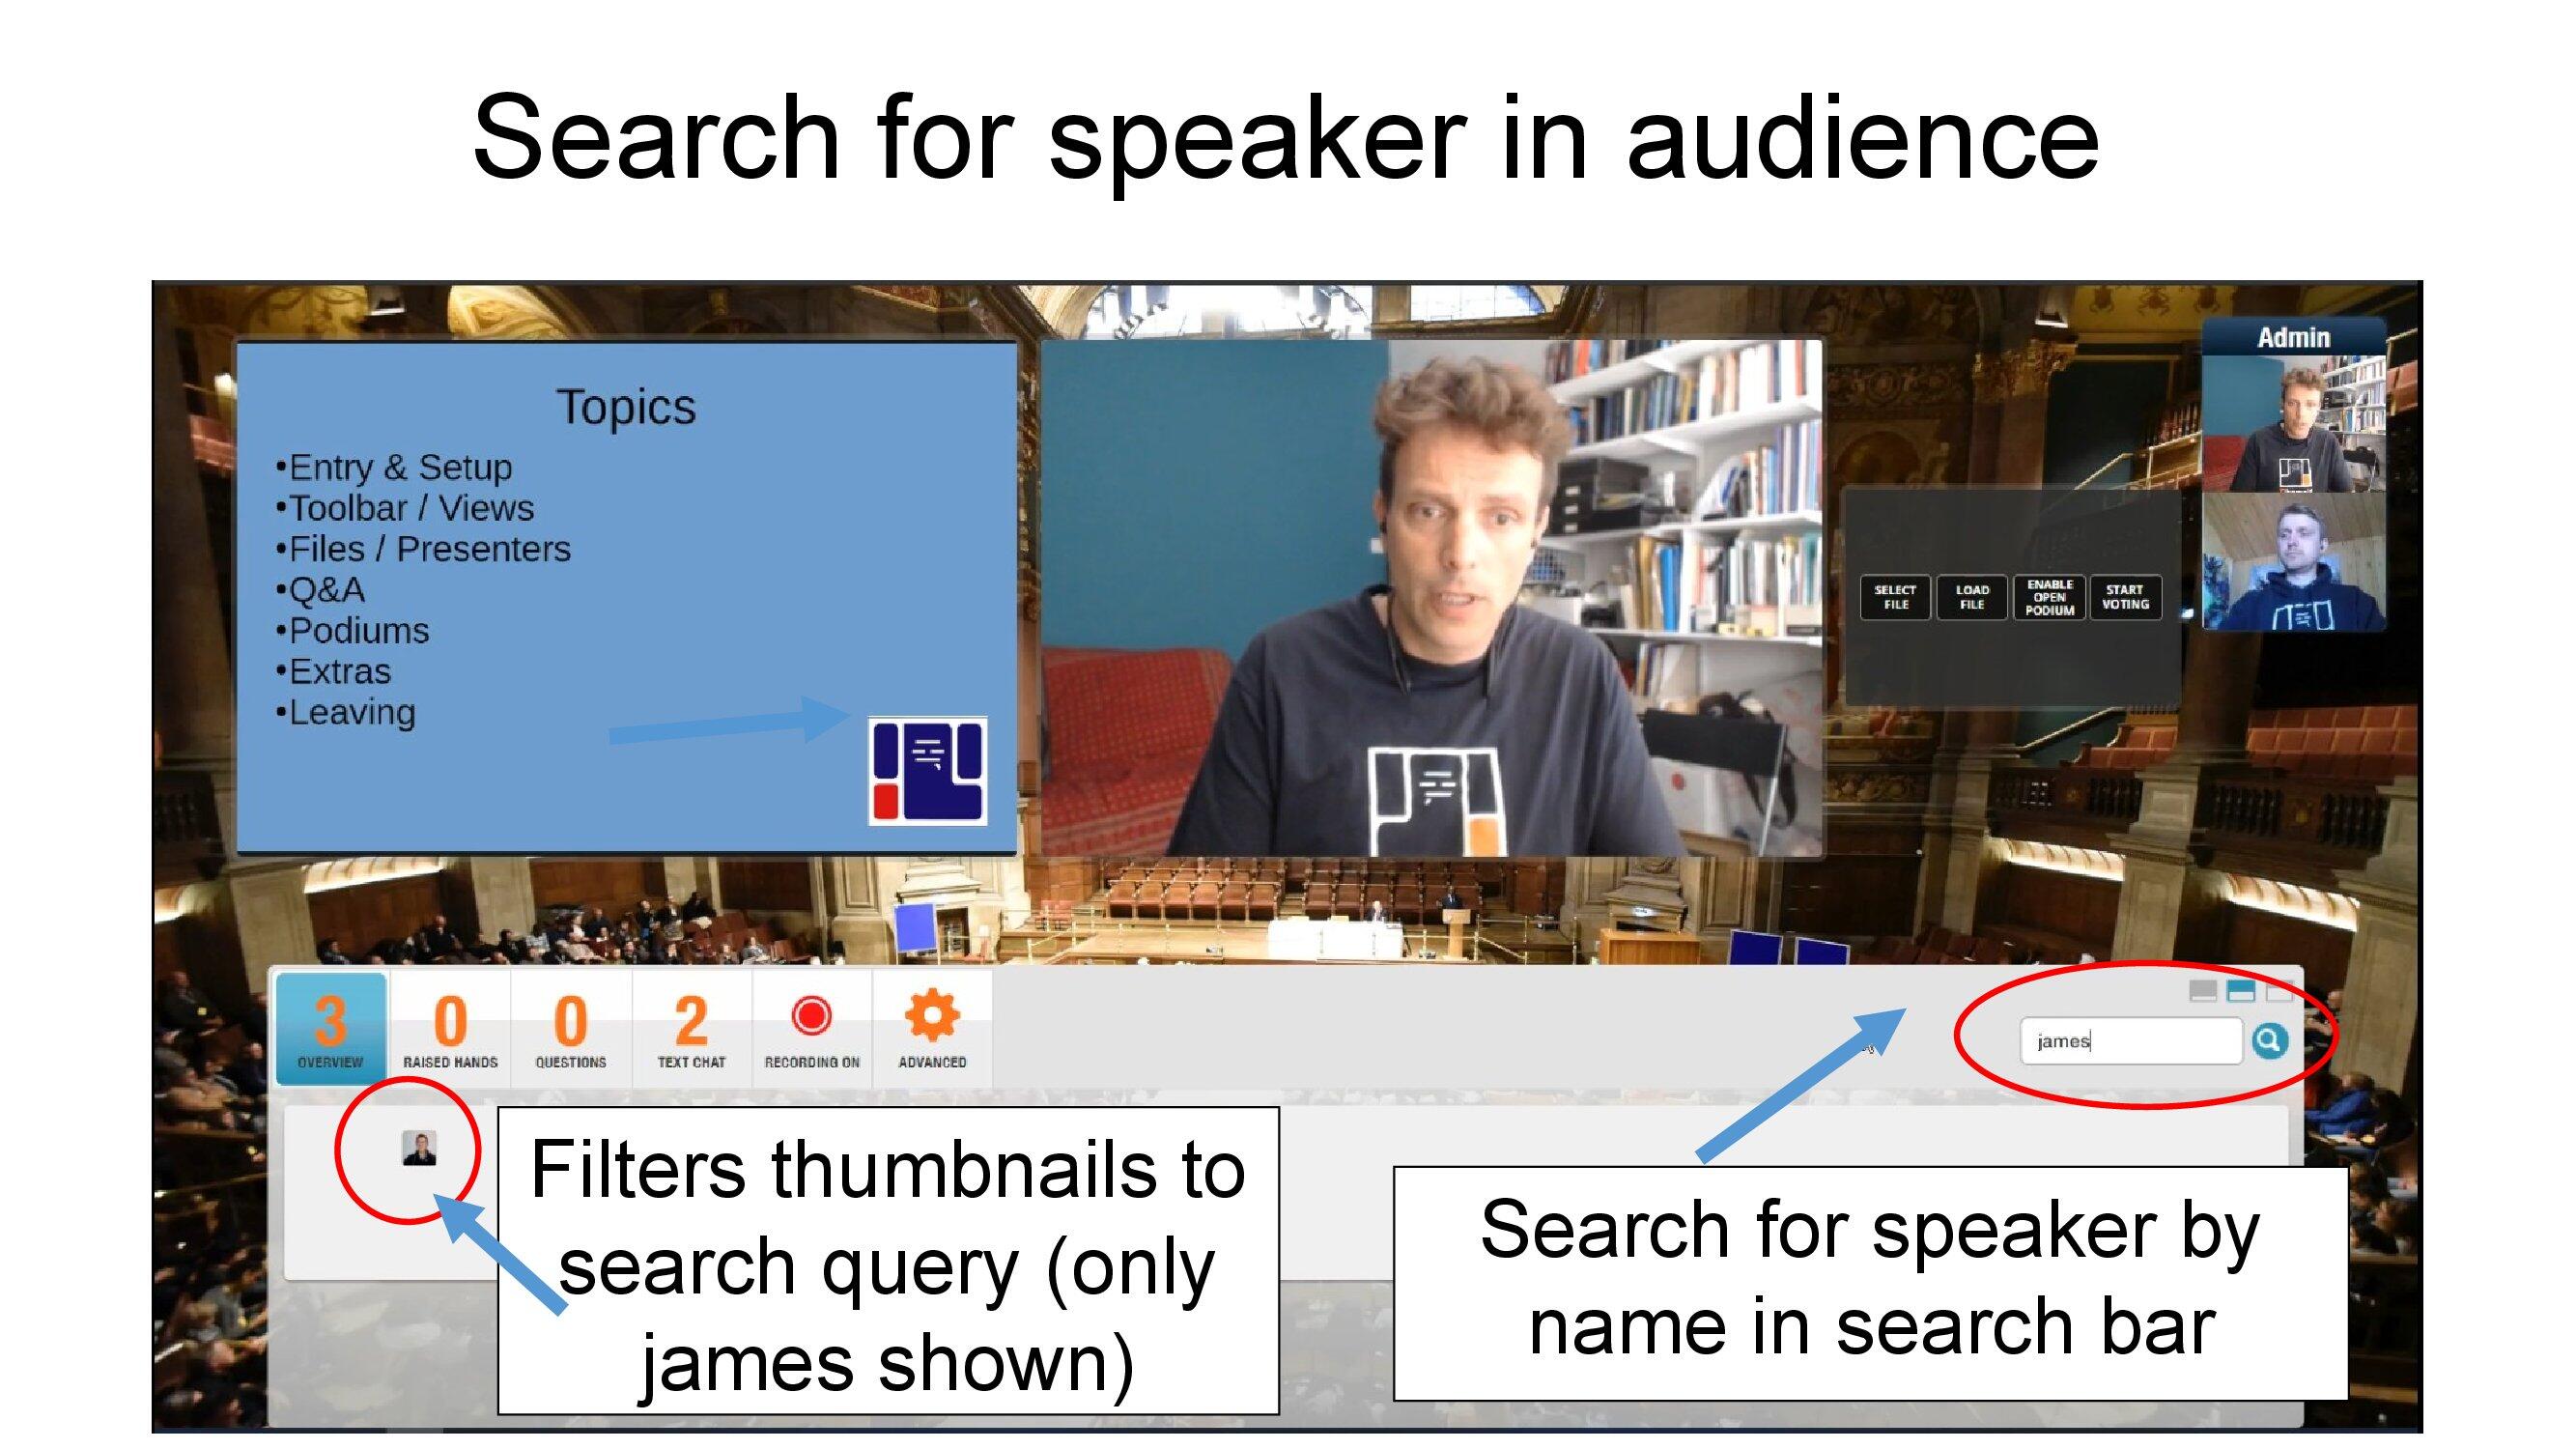
To bring up a presenter, locate them in the attendee thumbnails
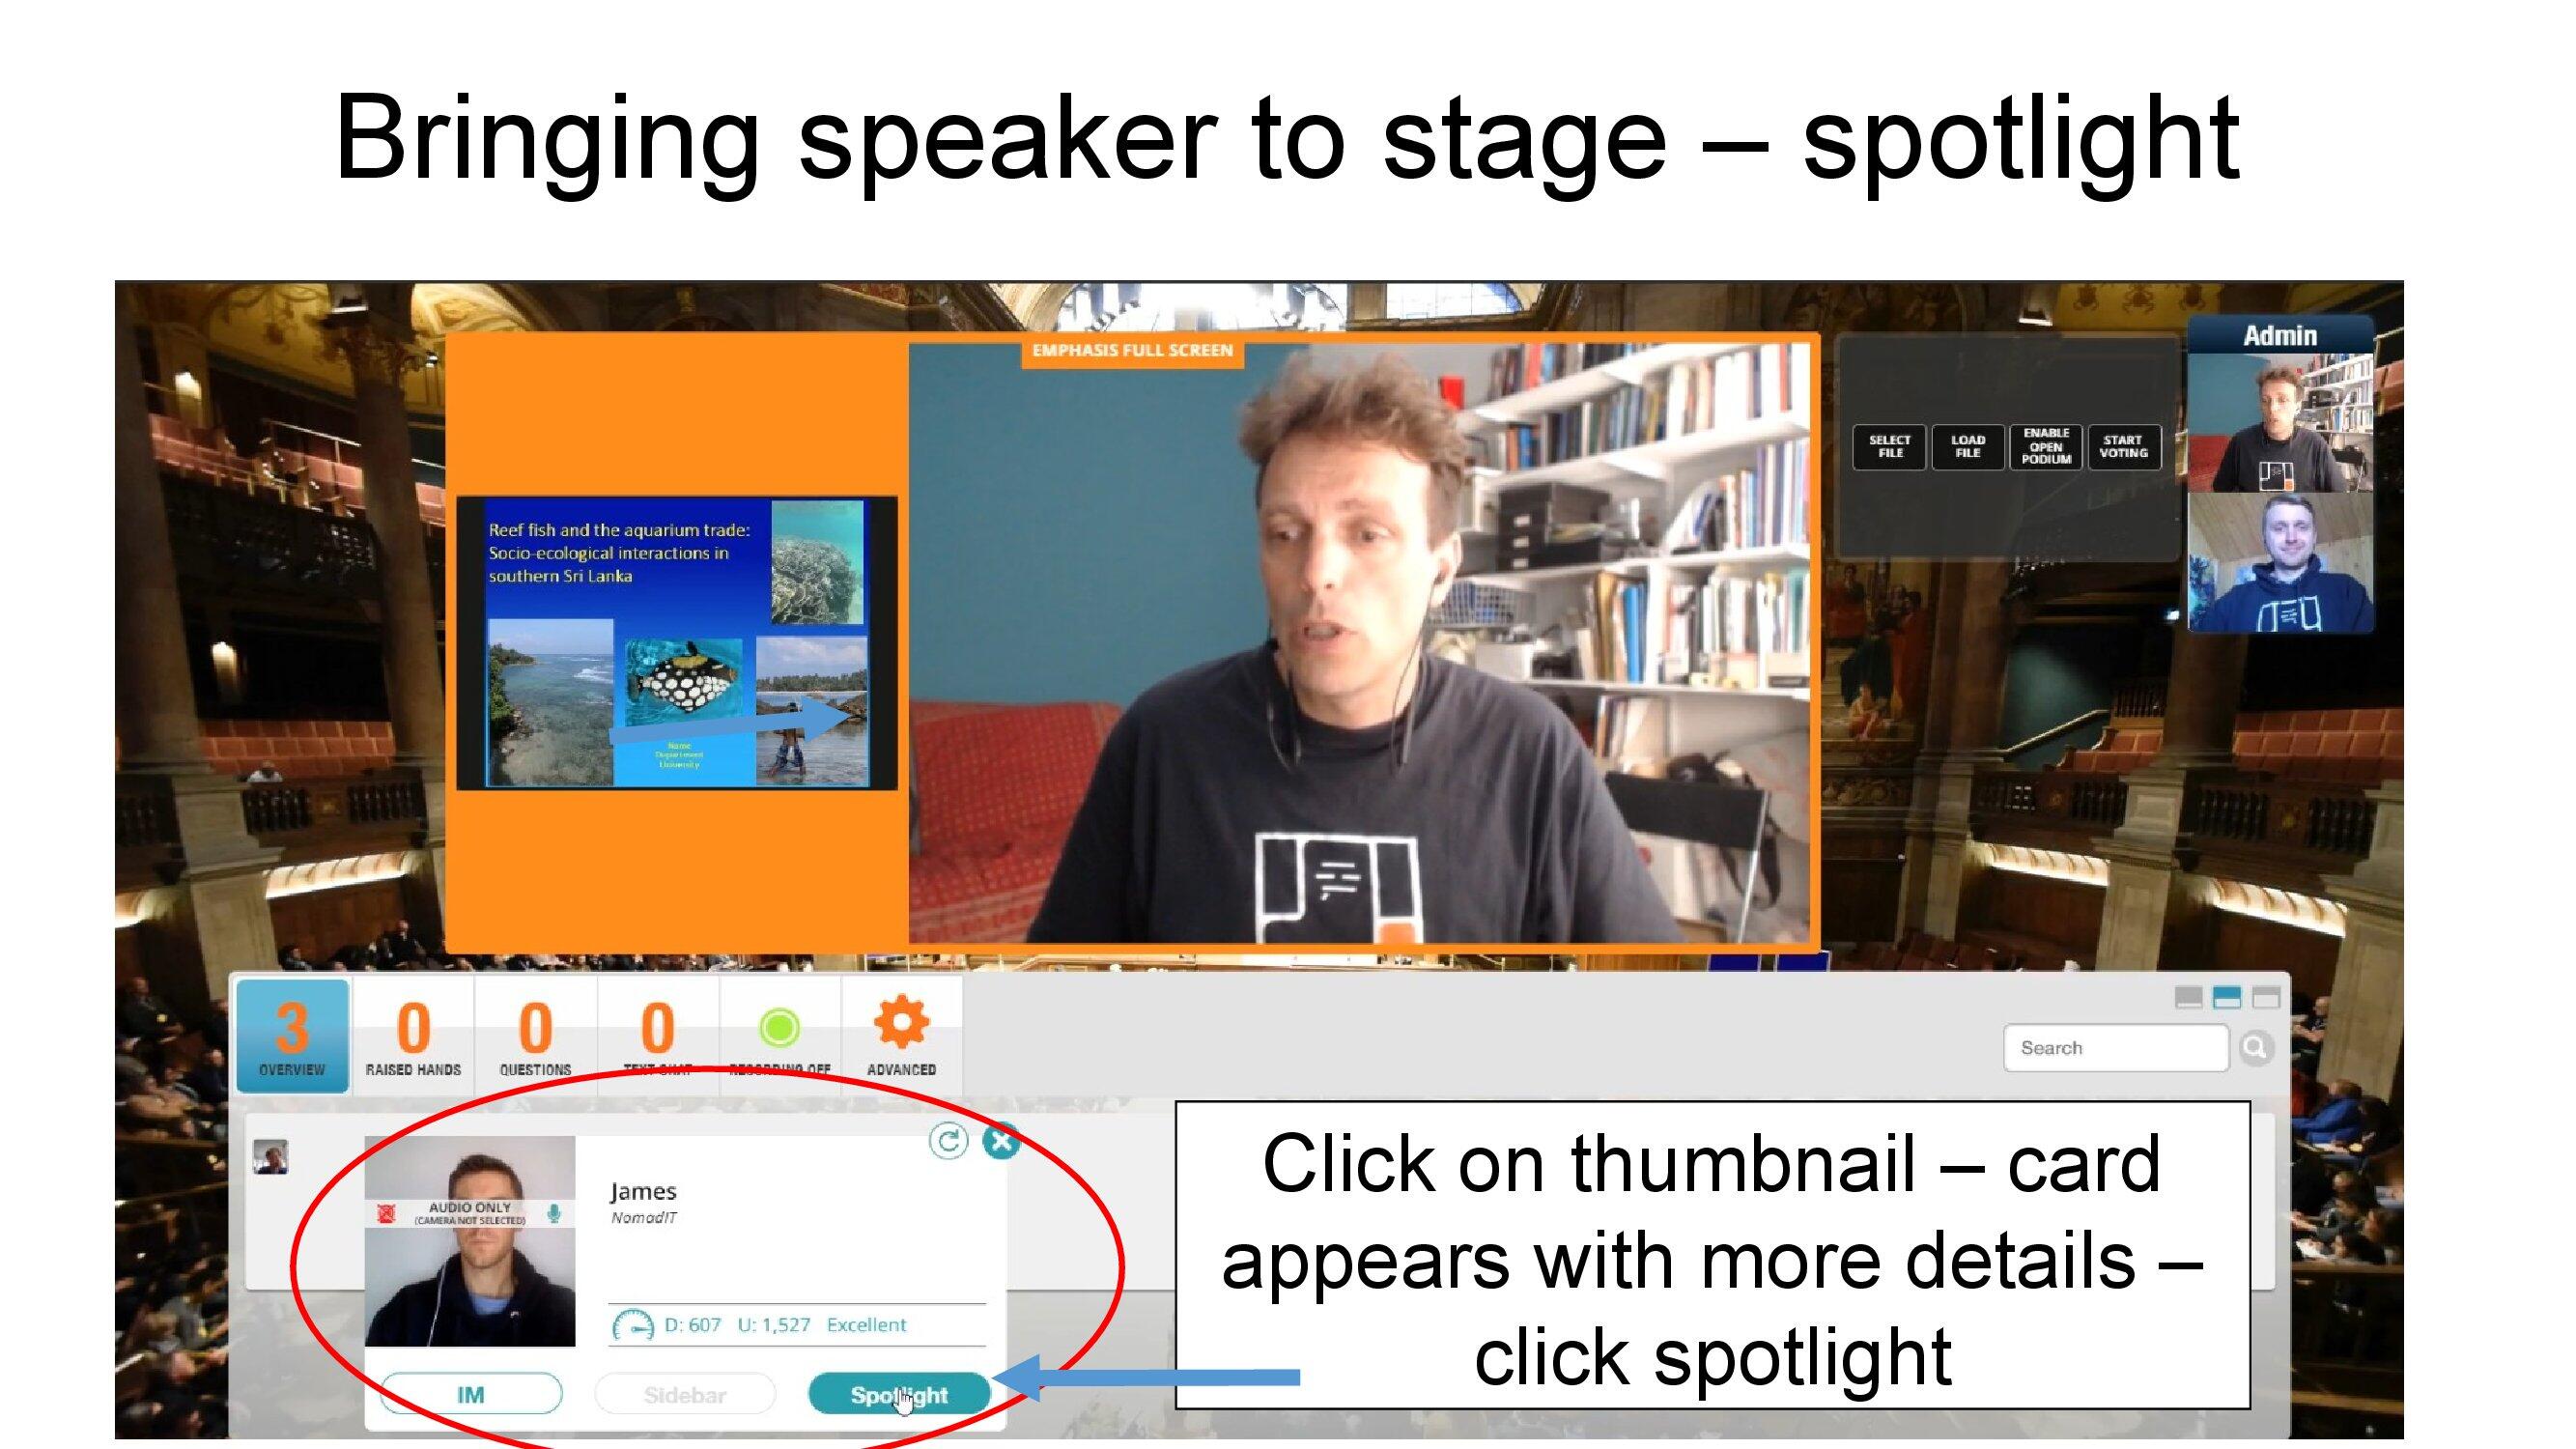
Spotlight the presenter to a podium.
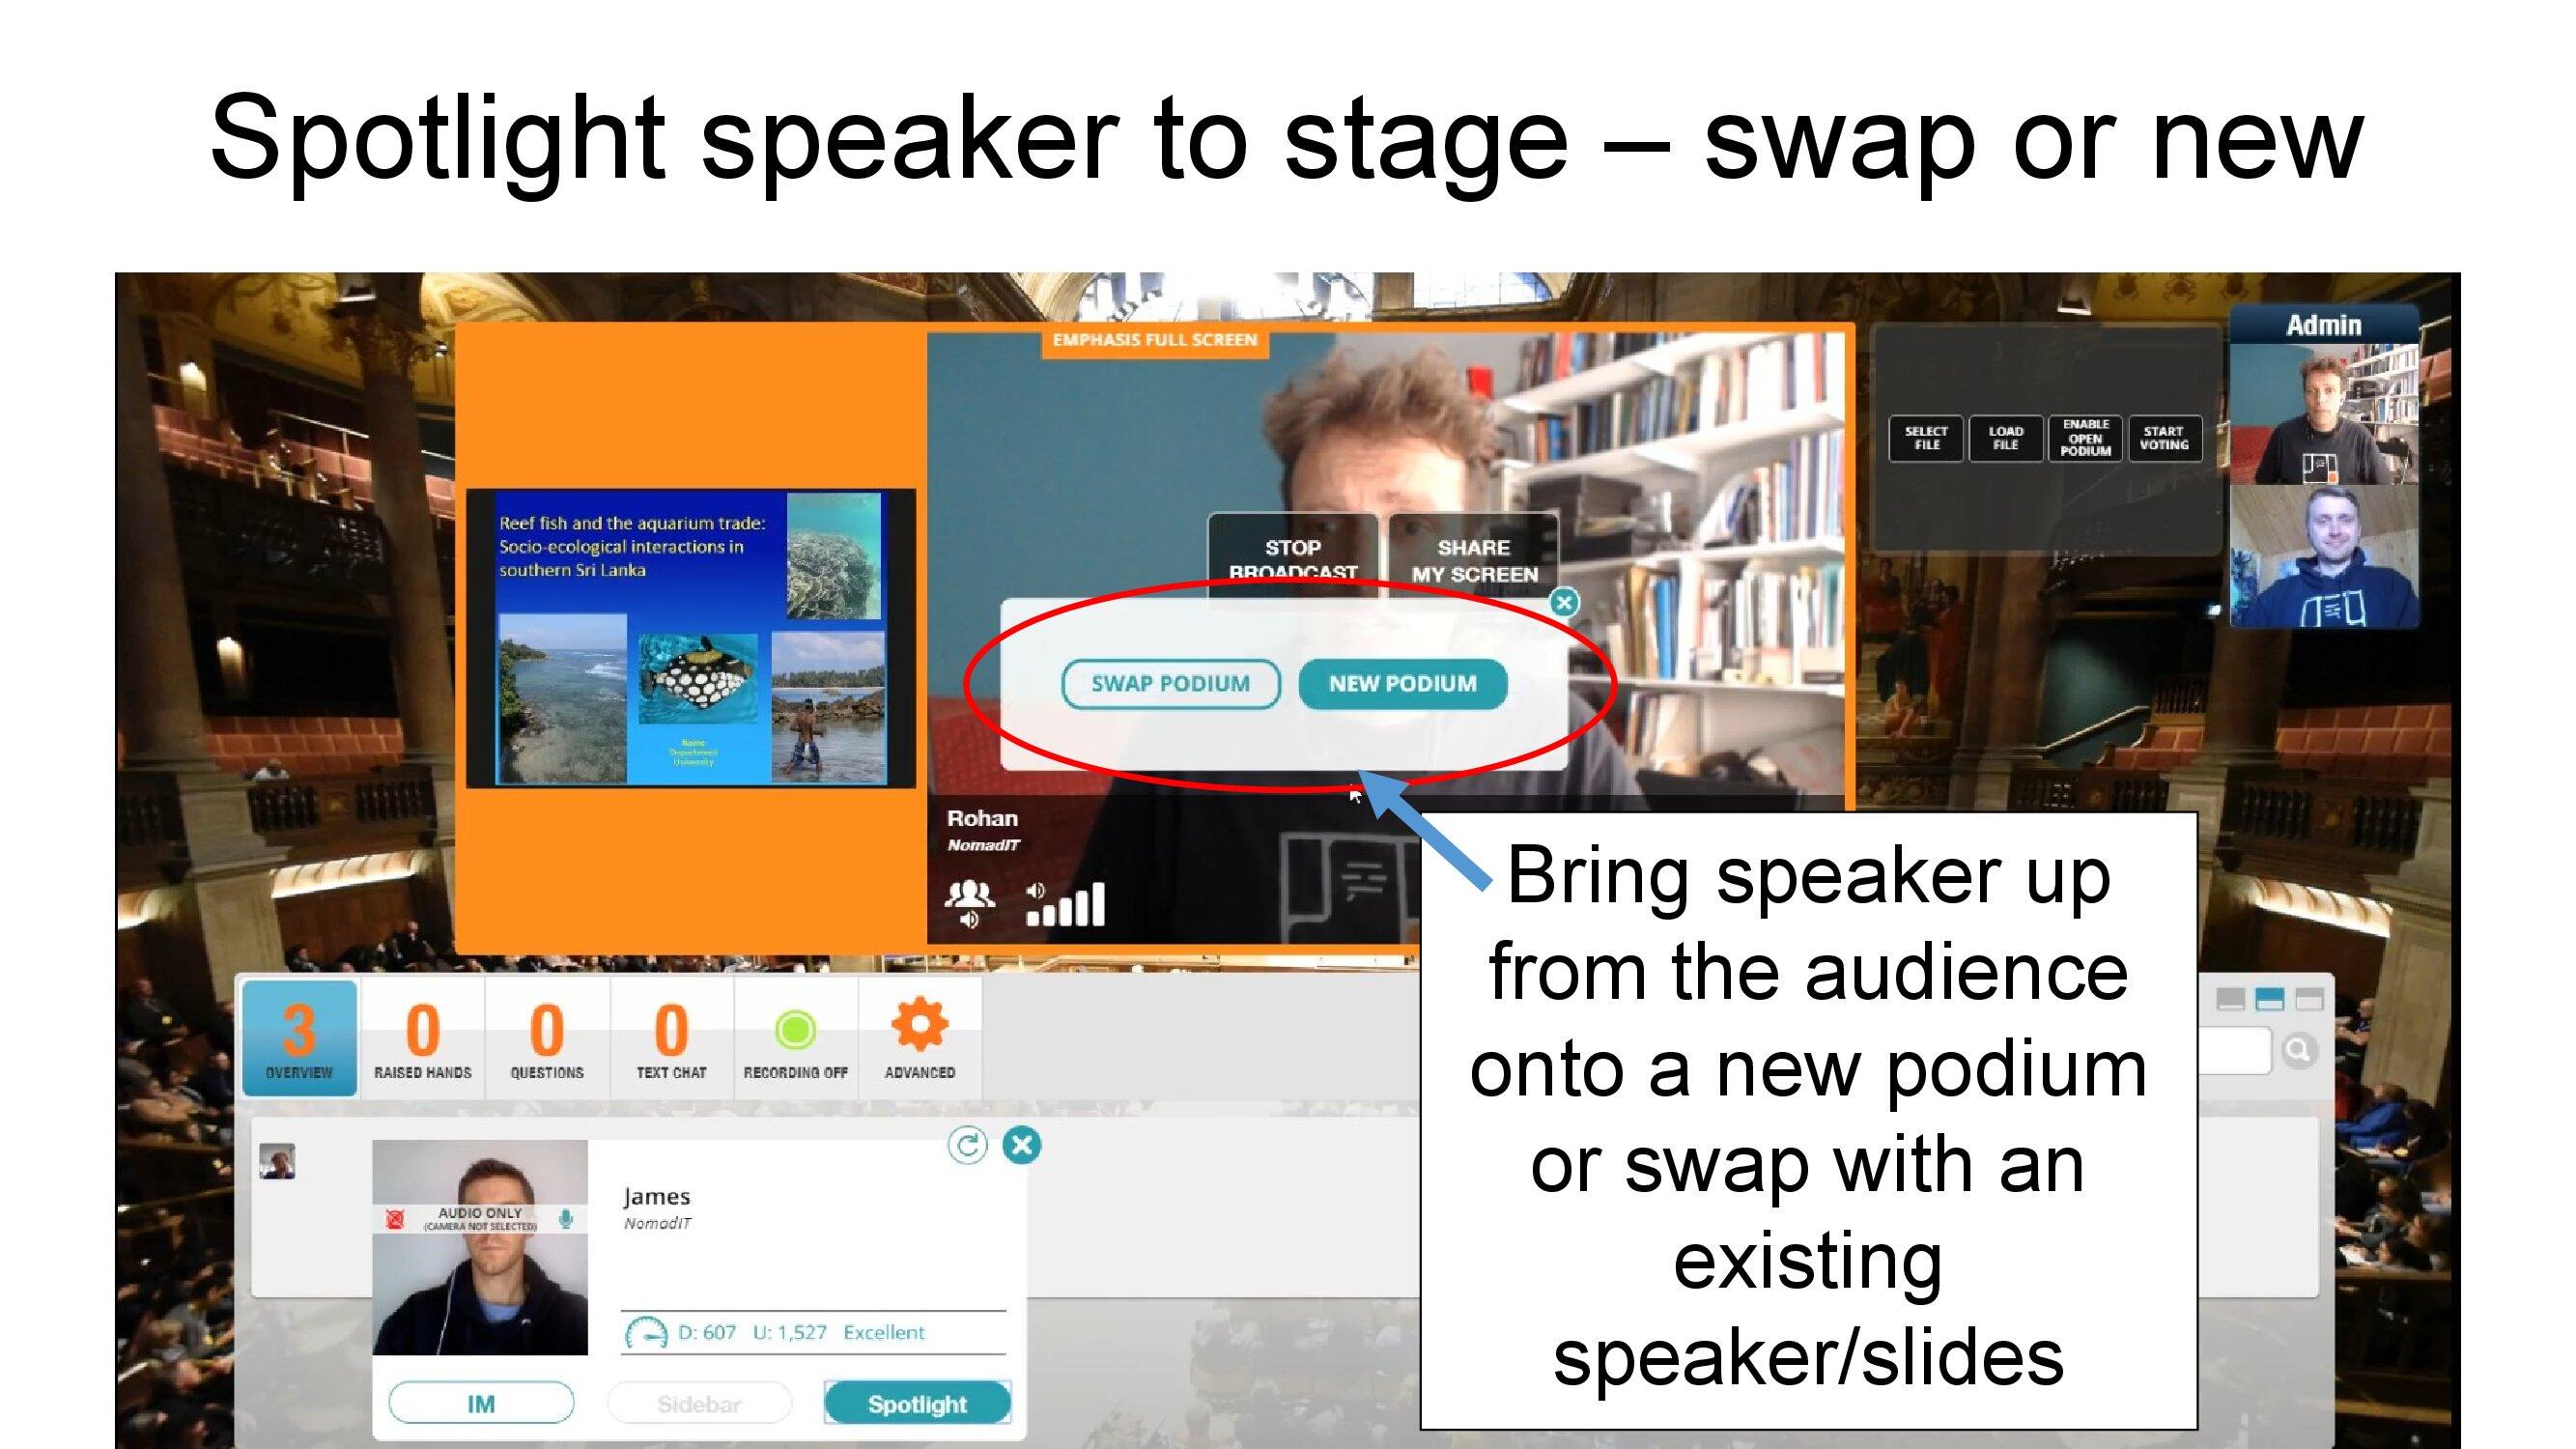
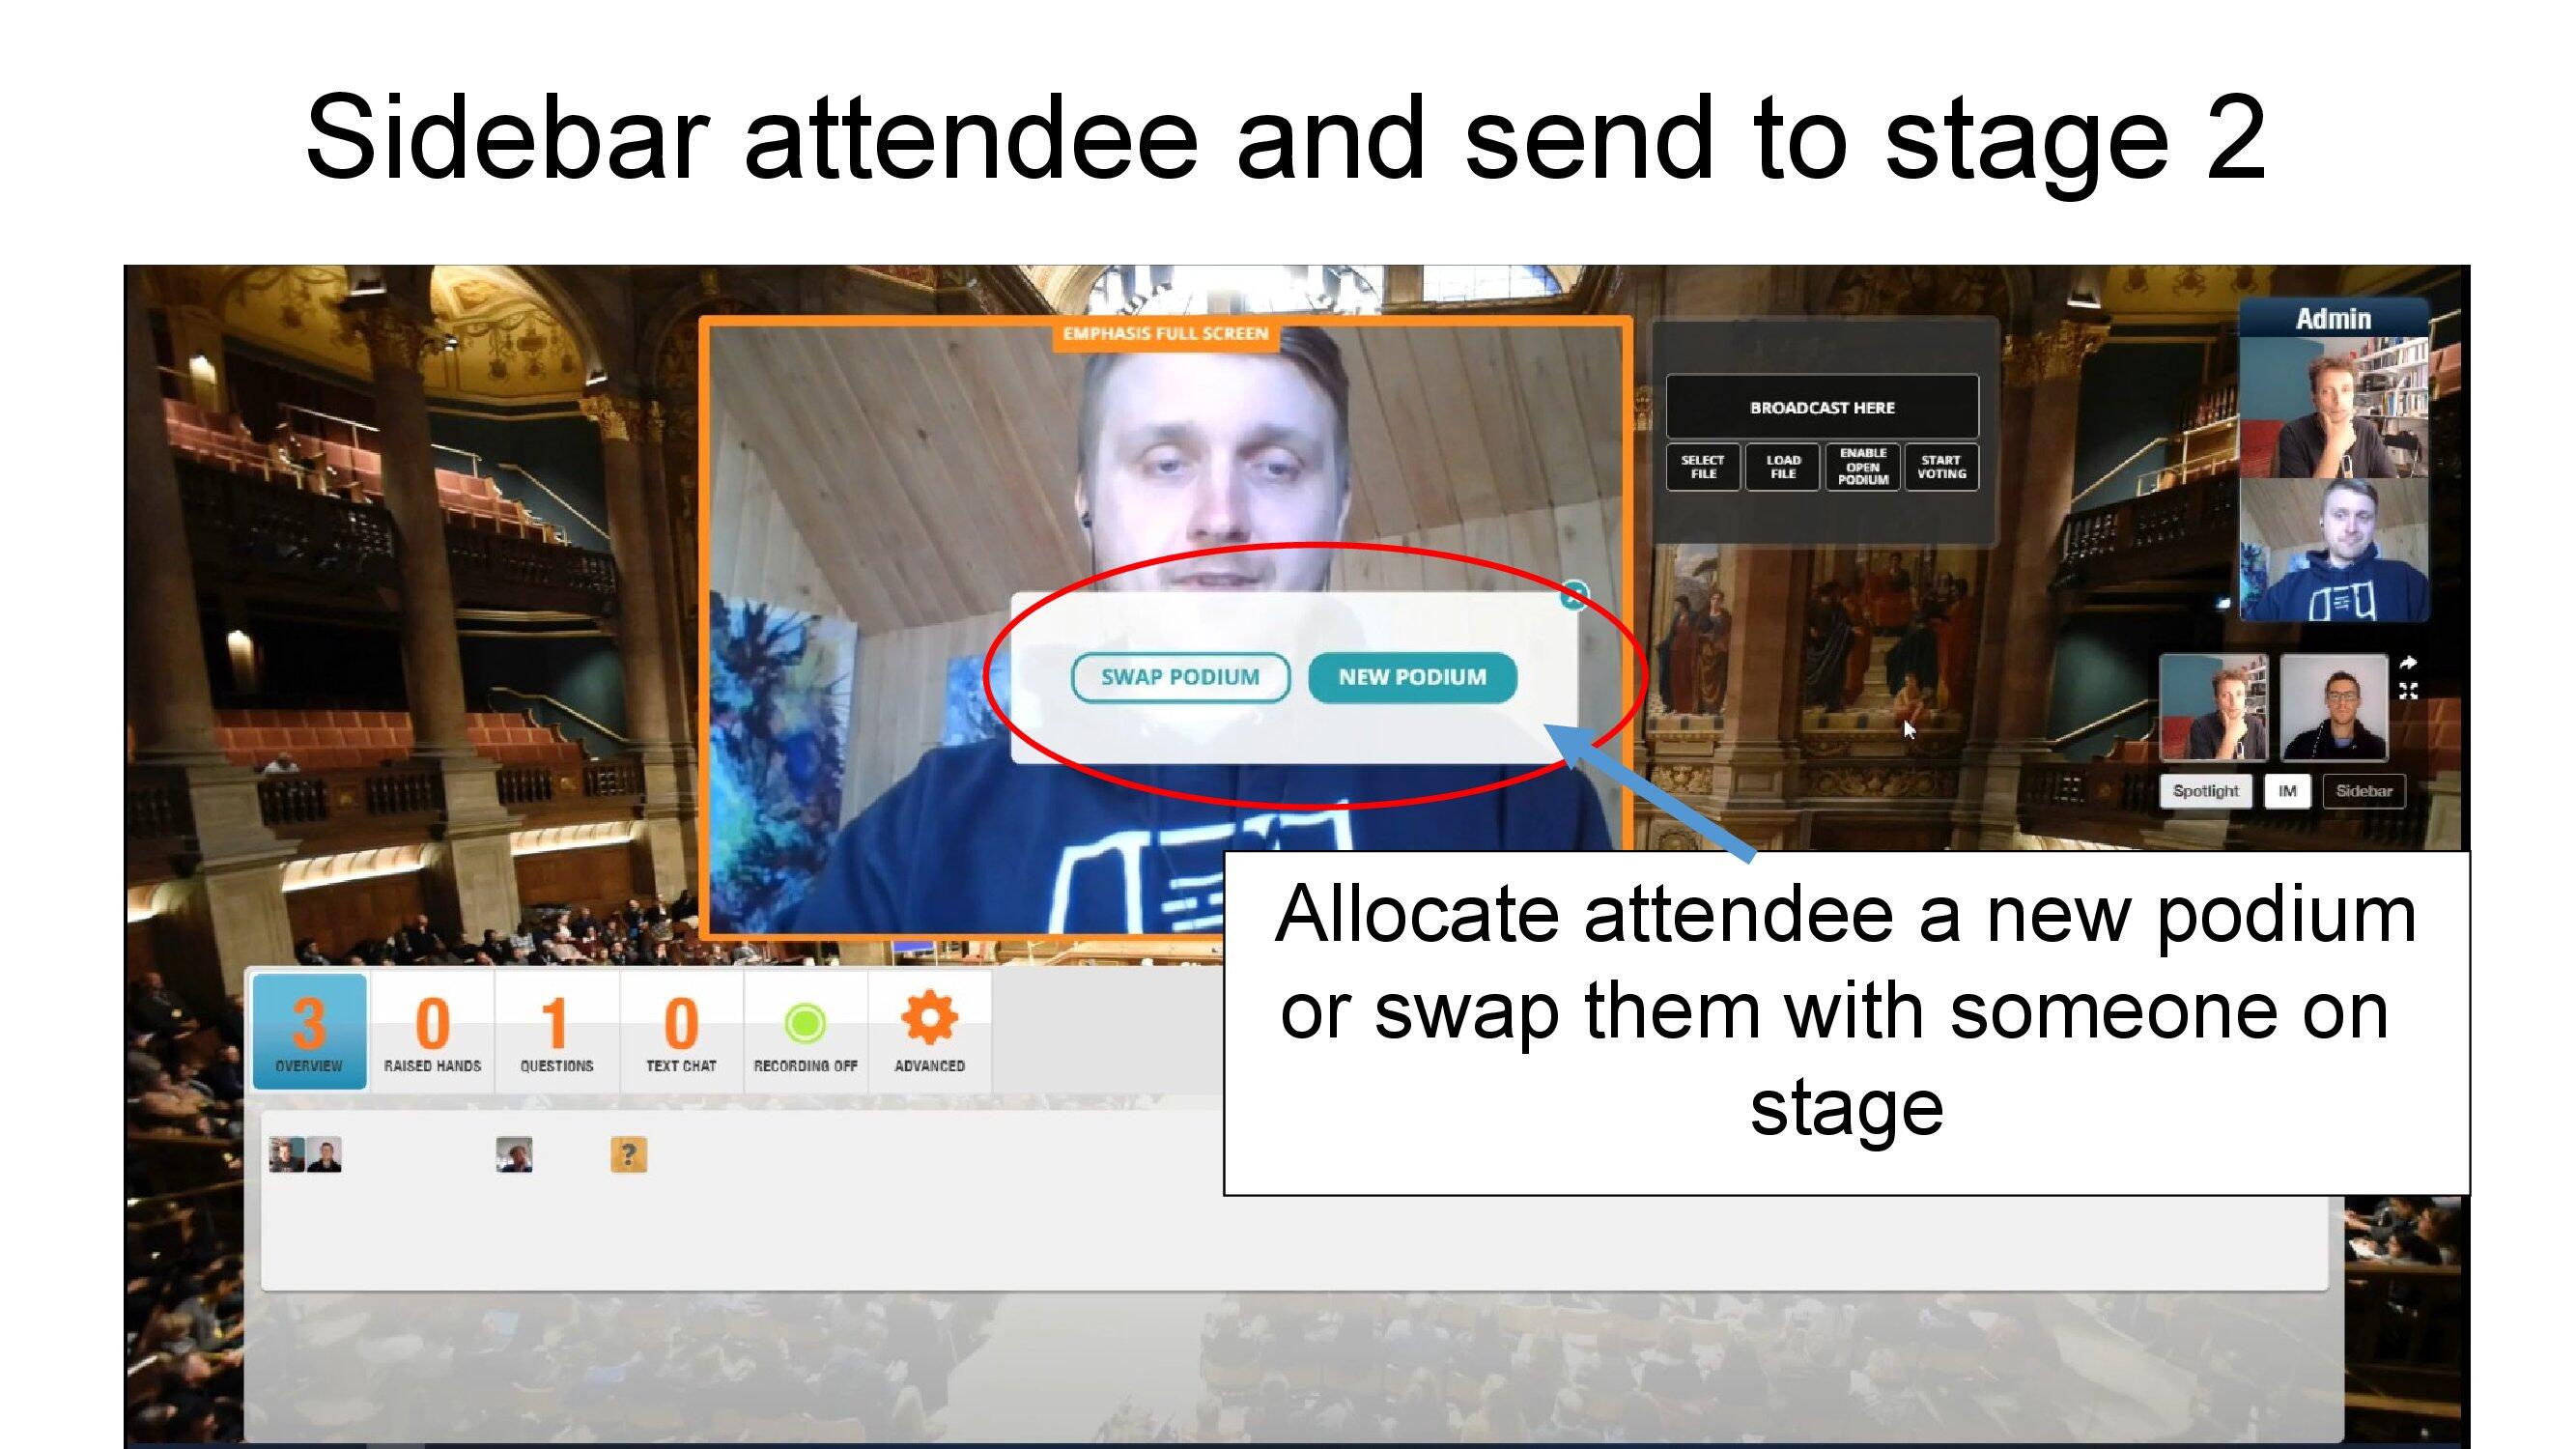
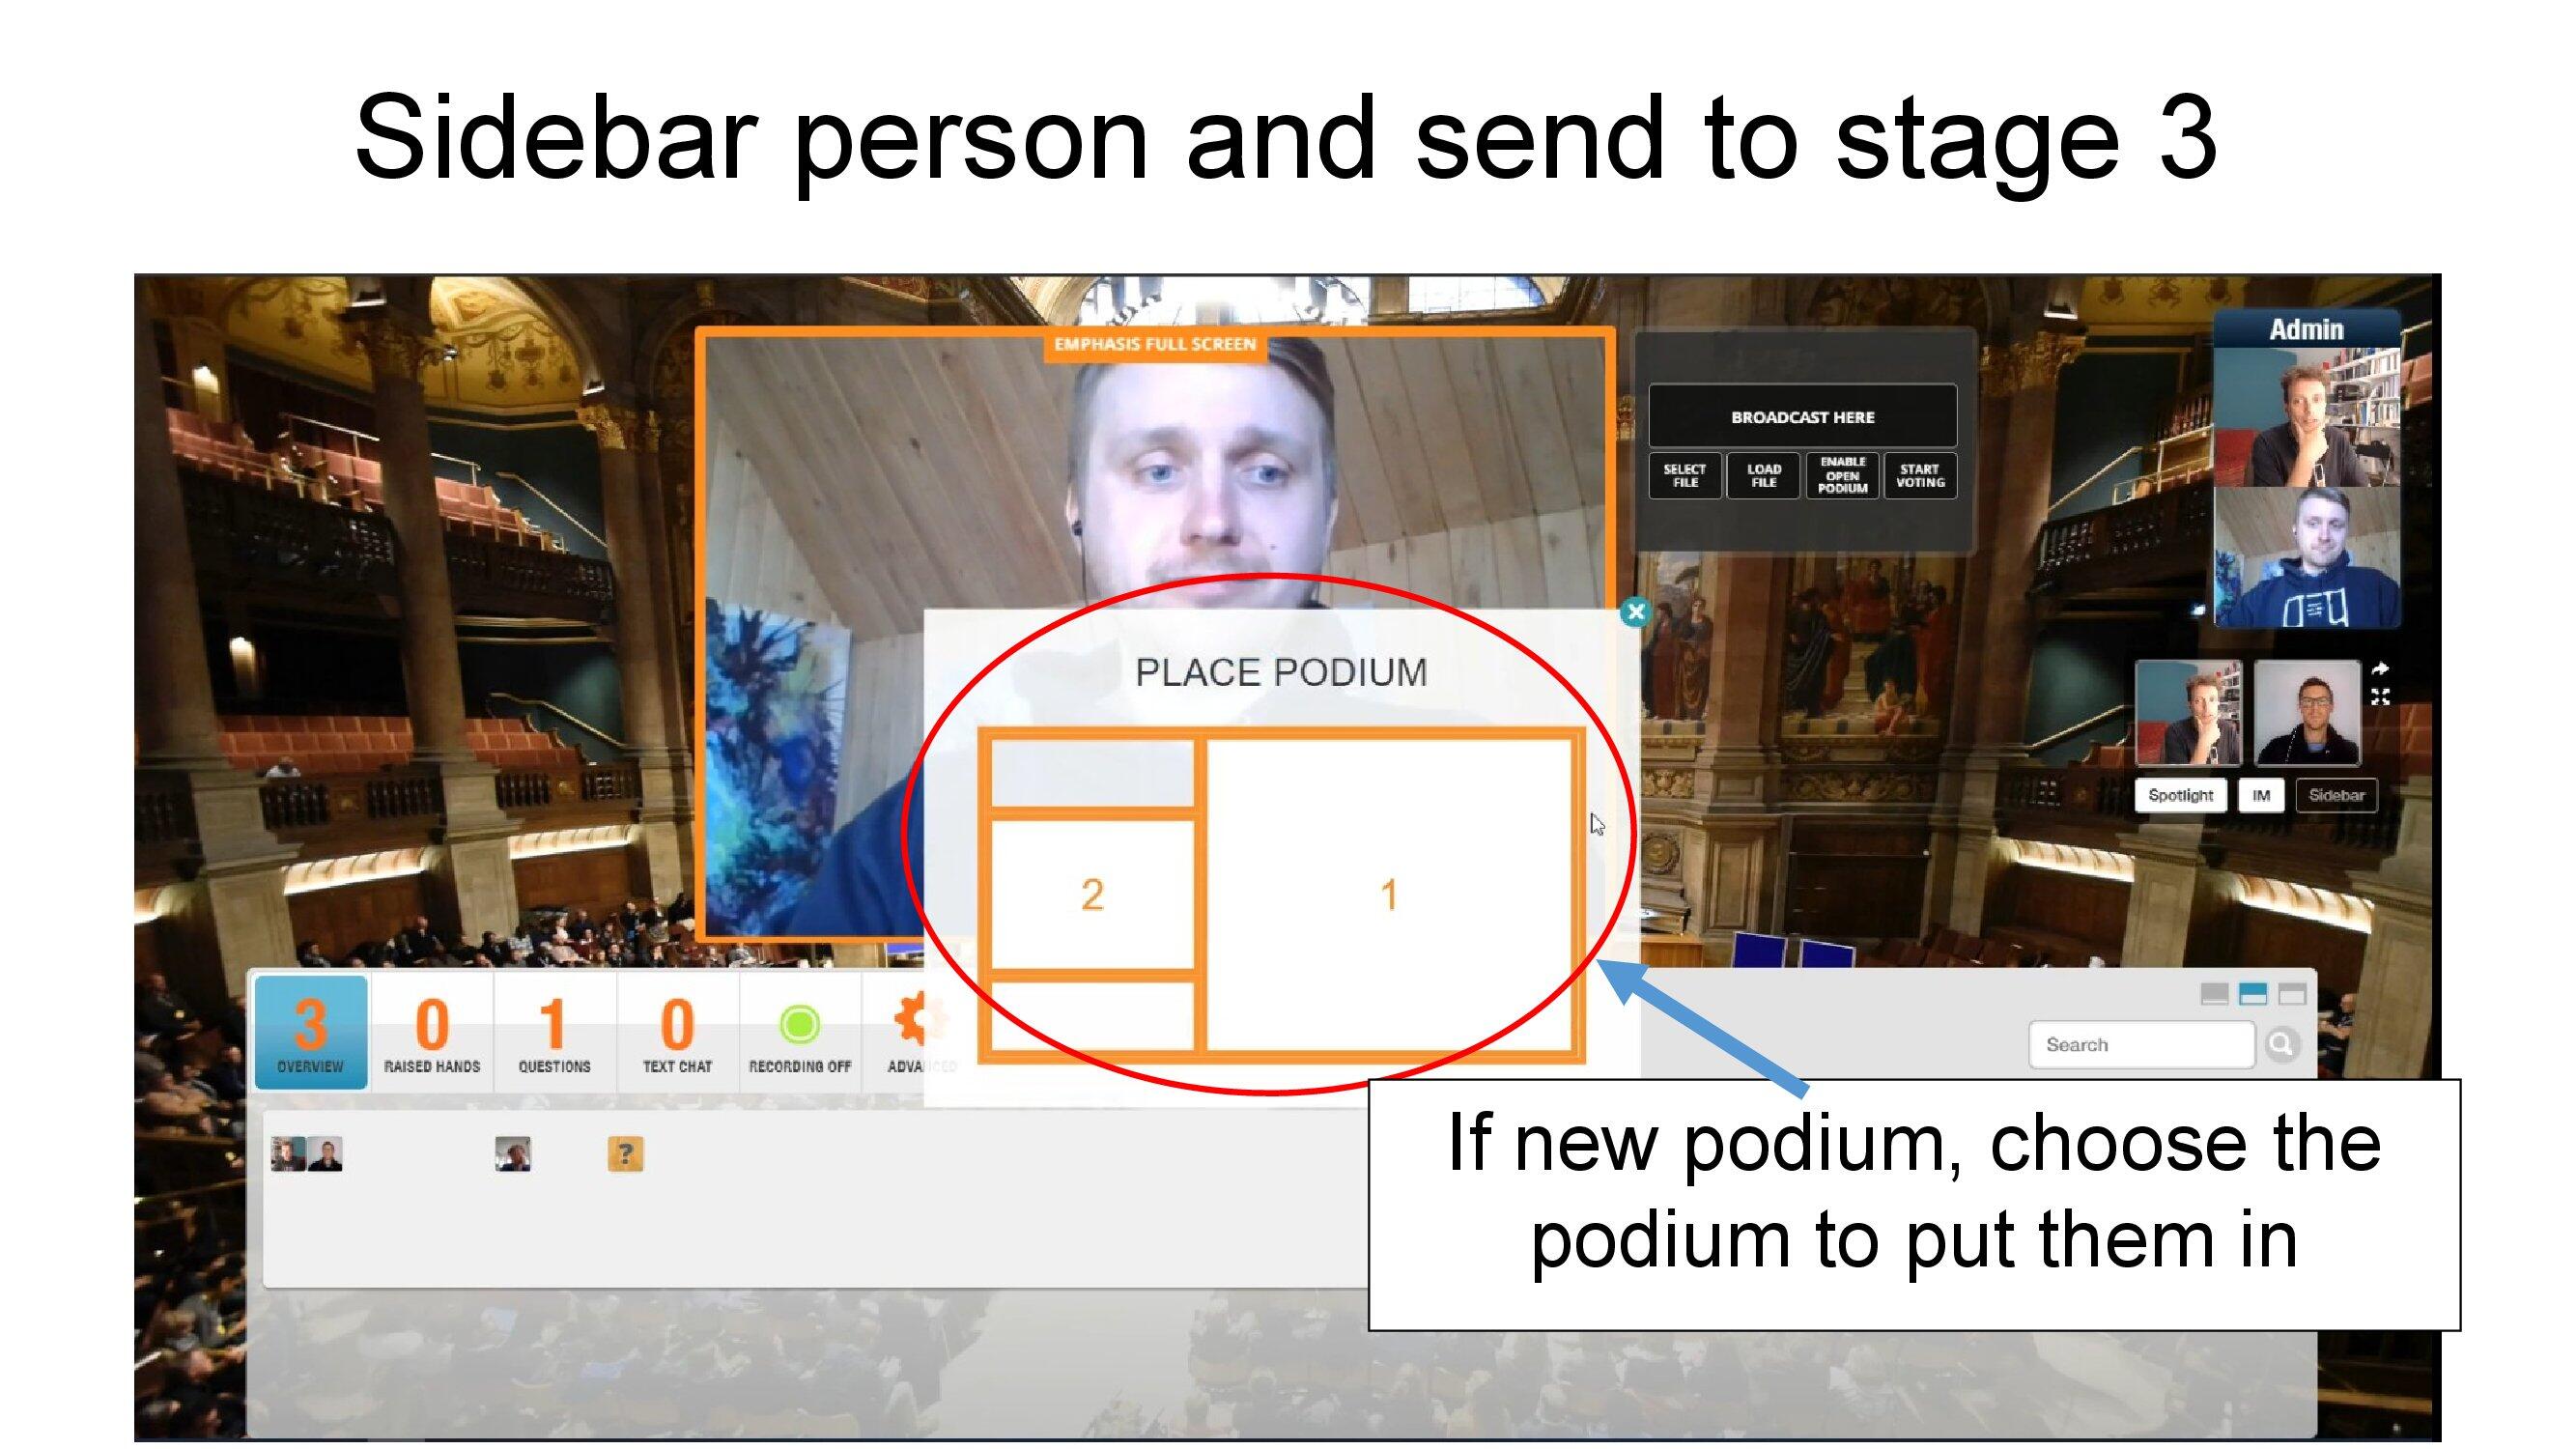
Select which podium - swapping will replace a podium content with the presenter.
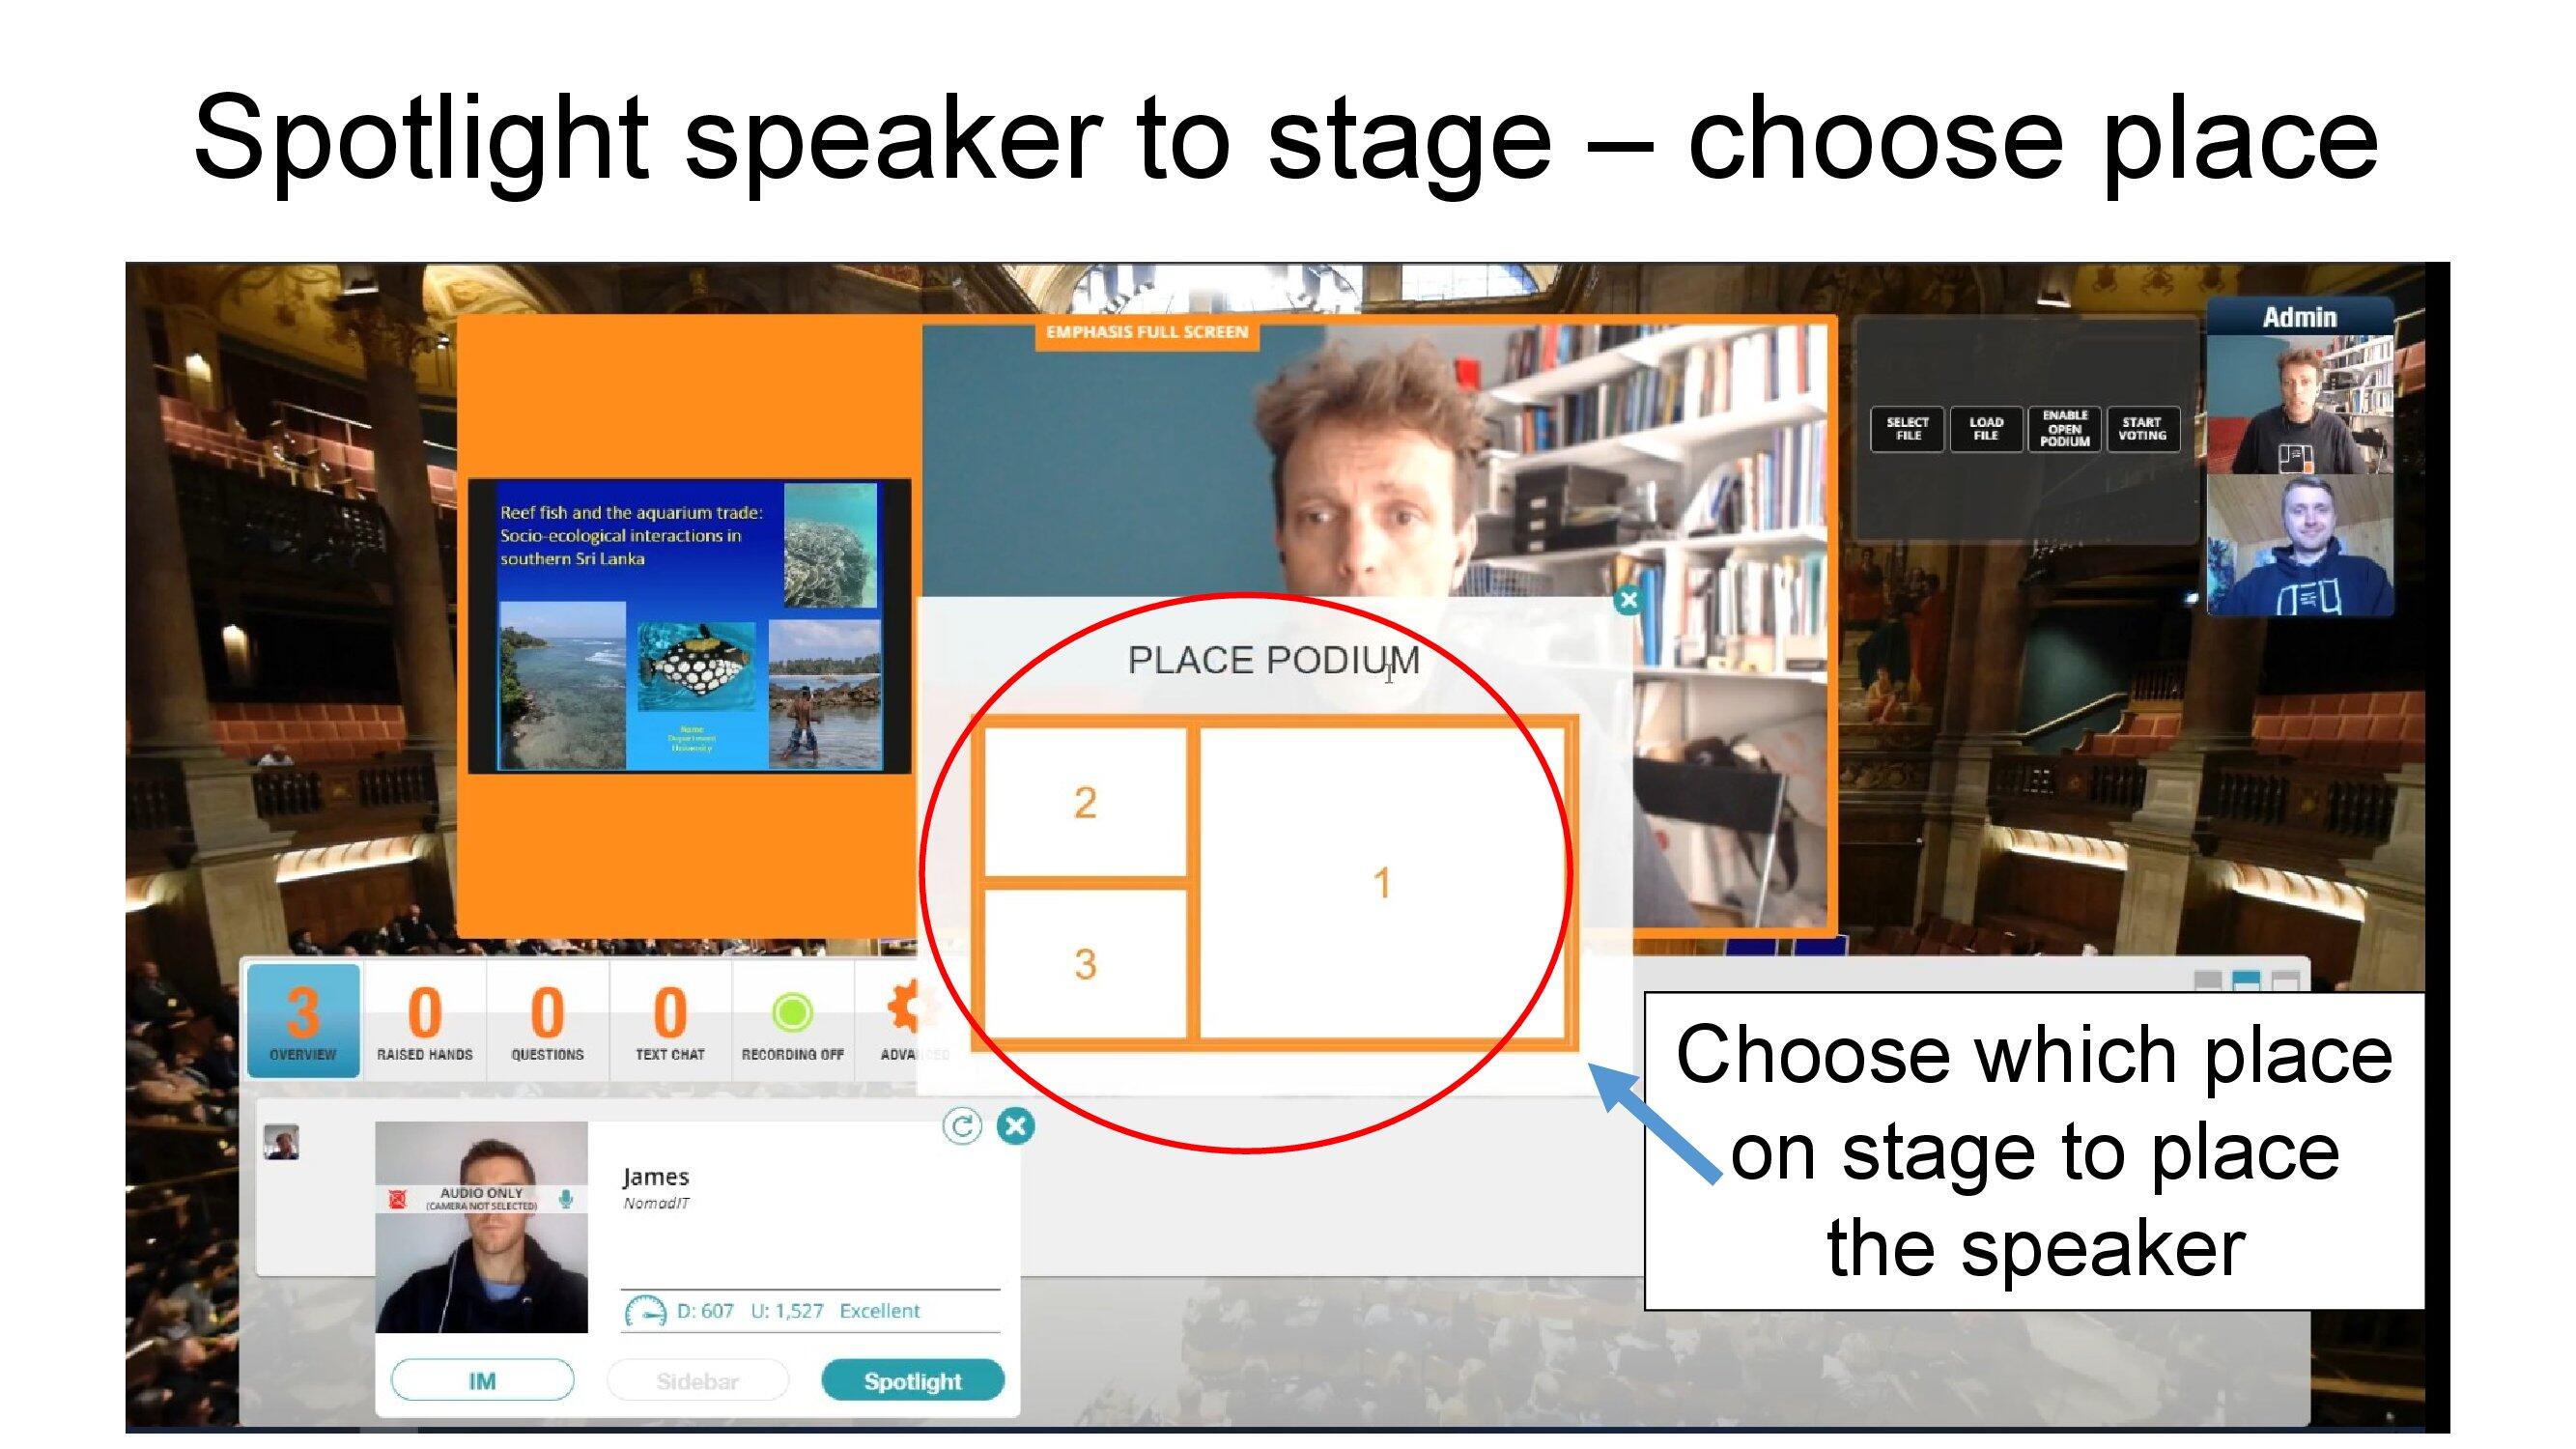
When the speaker first joins the stage and introduces their presentation, it might be nice if they are emphasised.
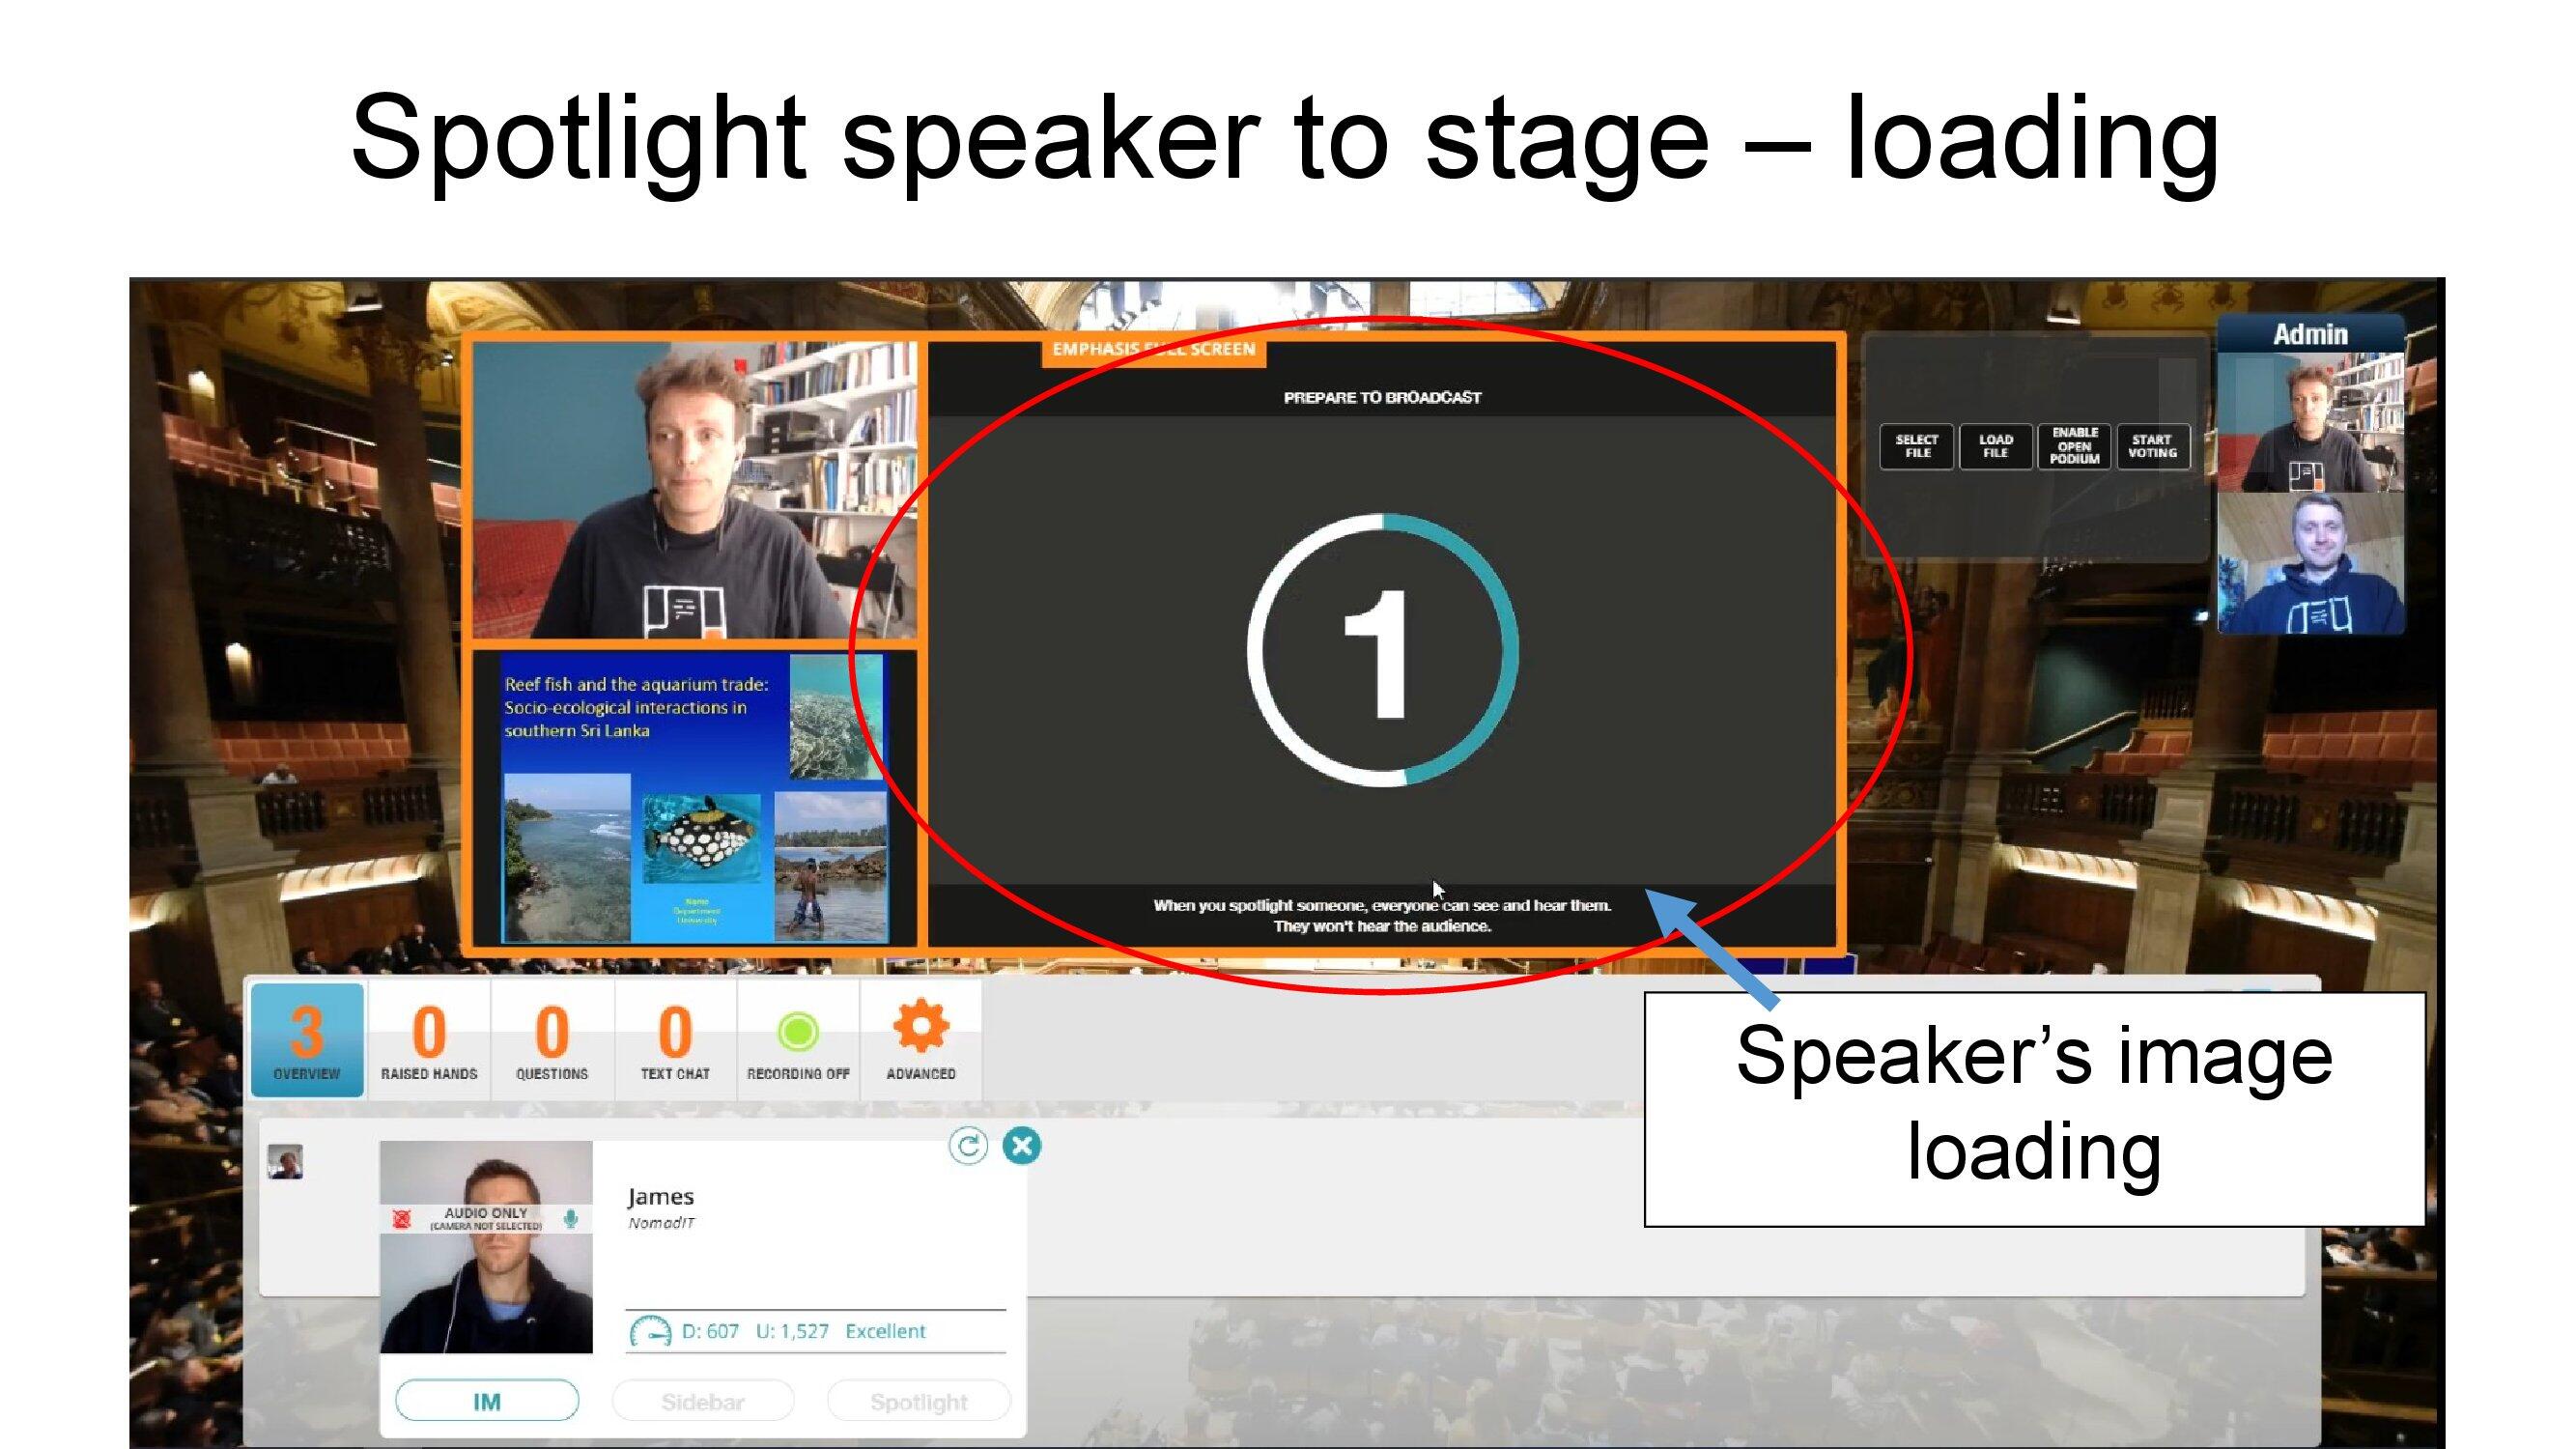
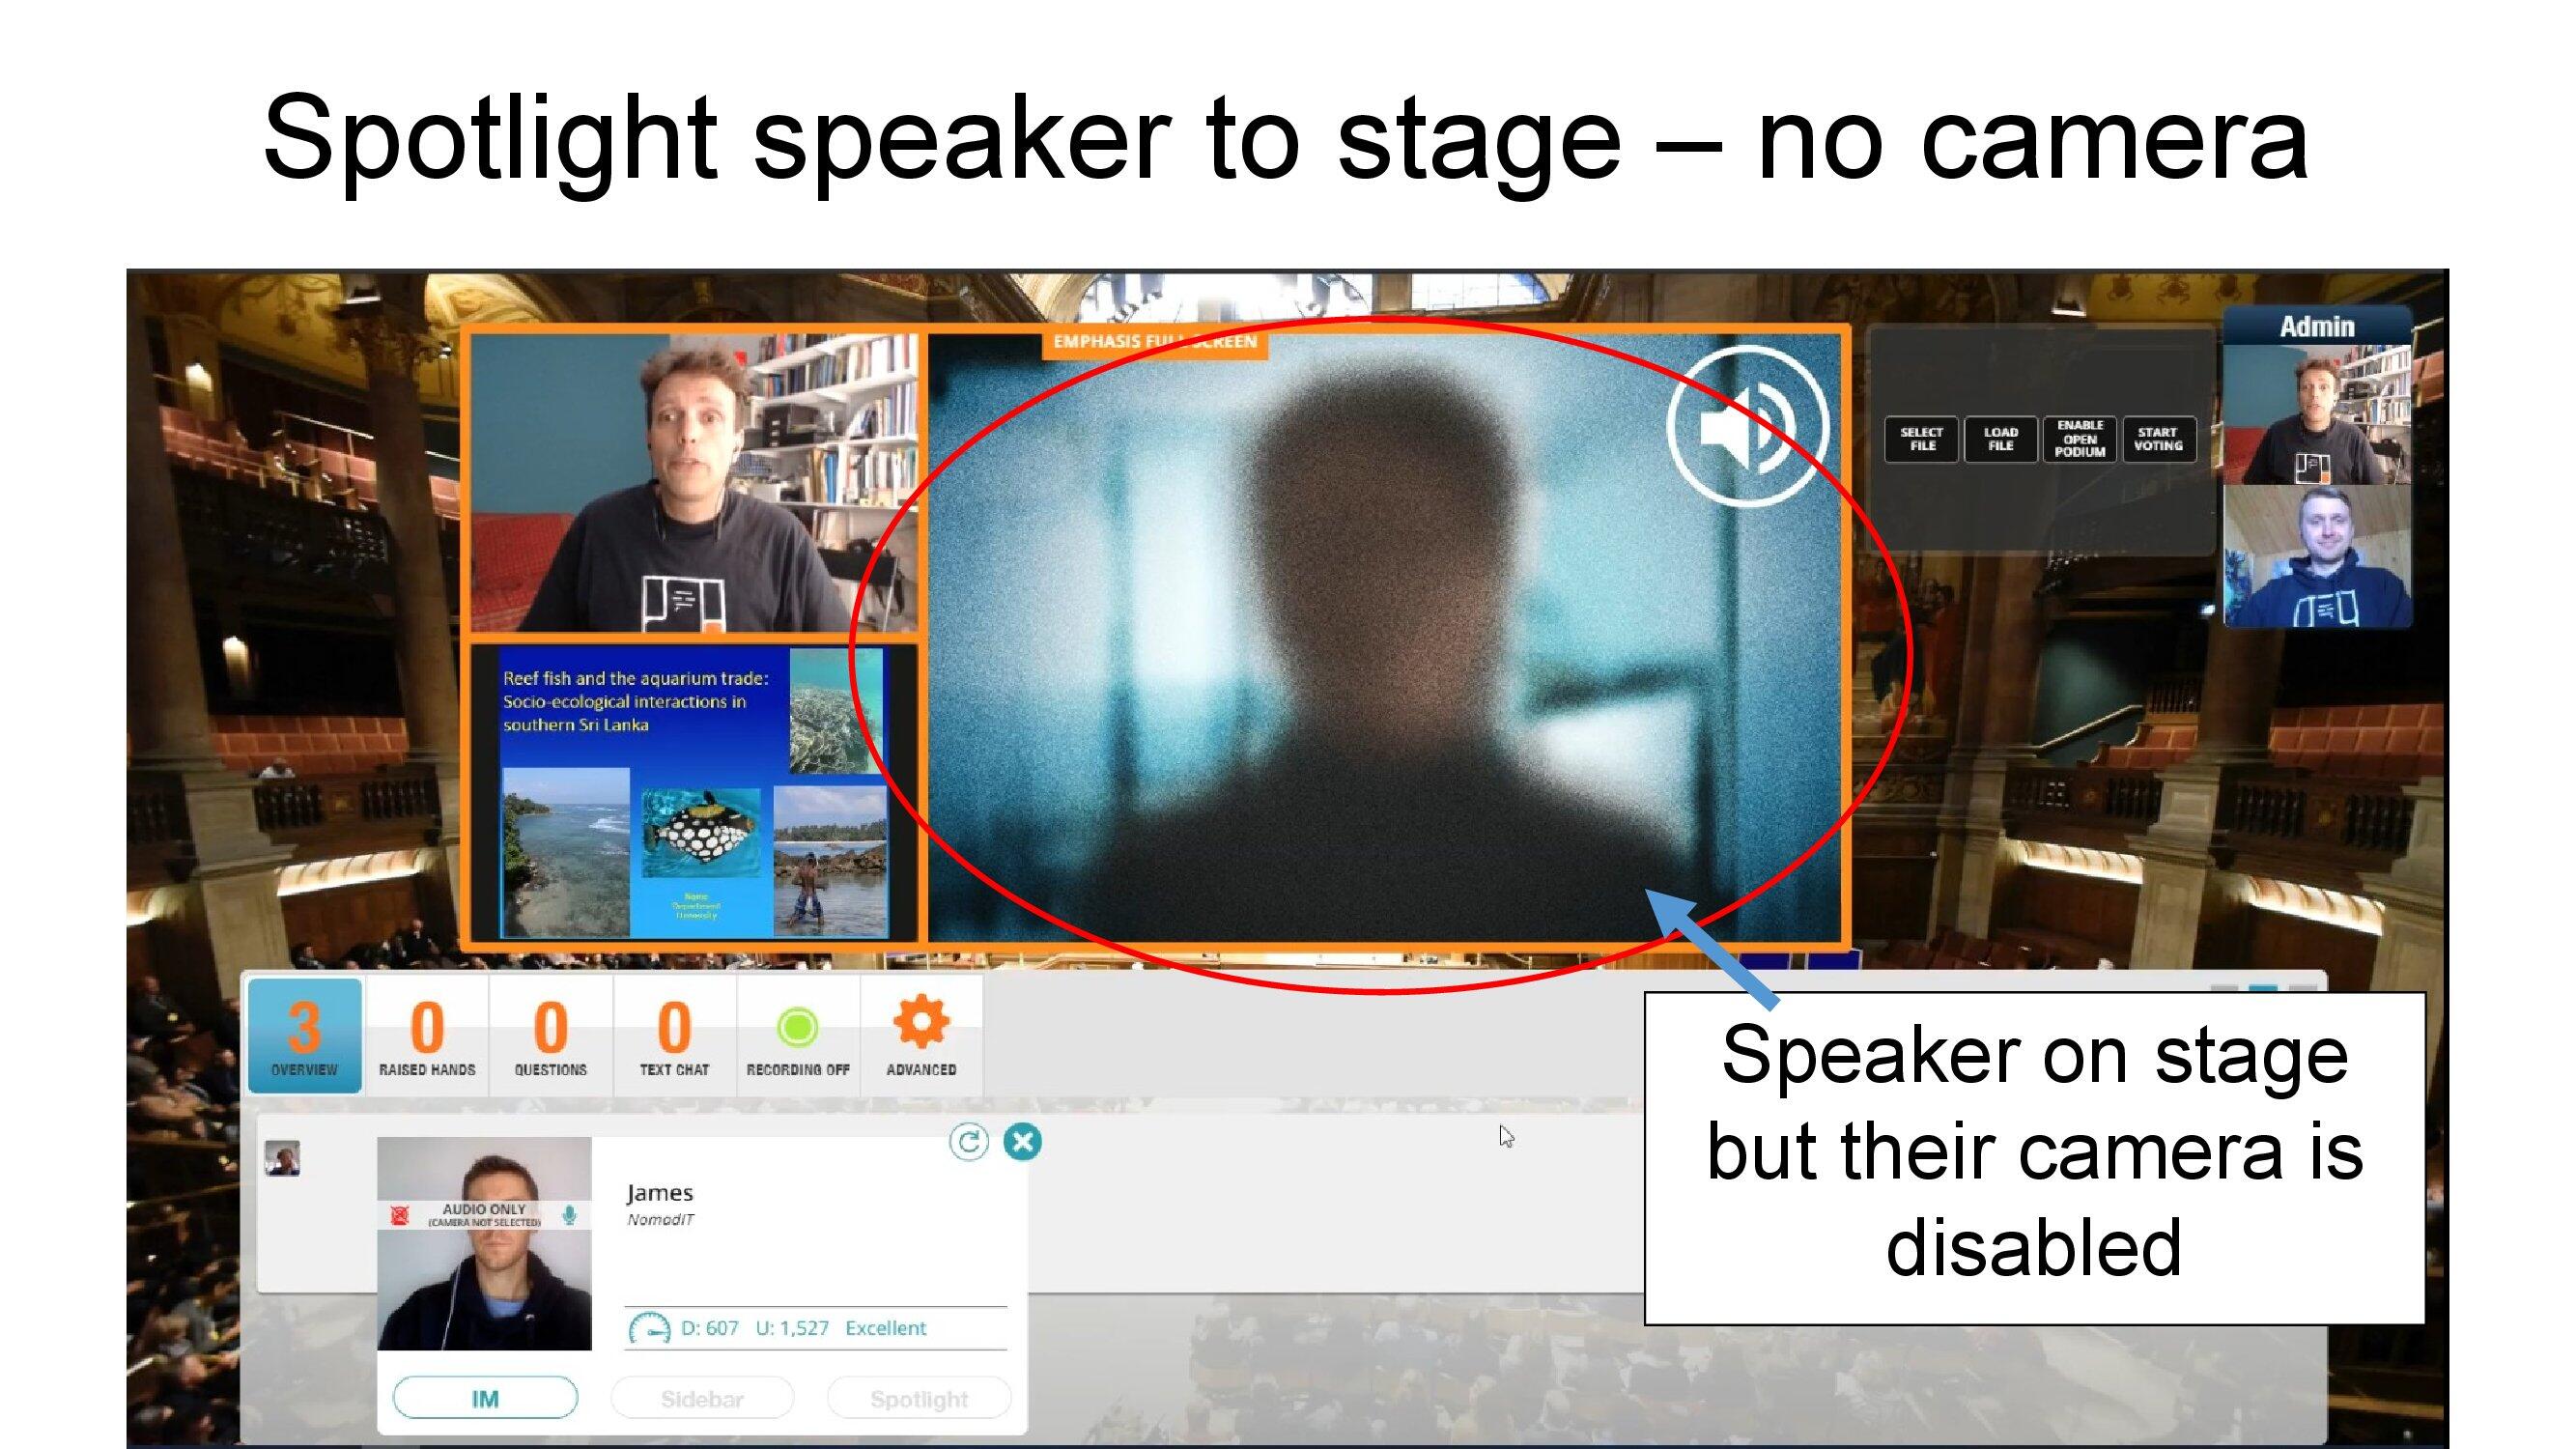
If the podium displays a frosted image, this may be due to the person's camera being switched off or bandwidth issues. First say hello and establish whether 2-way audtio communication is working.
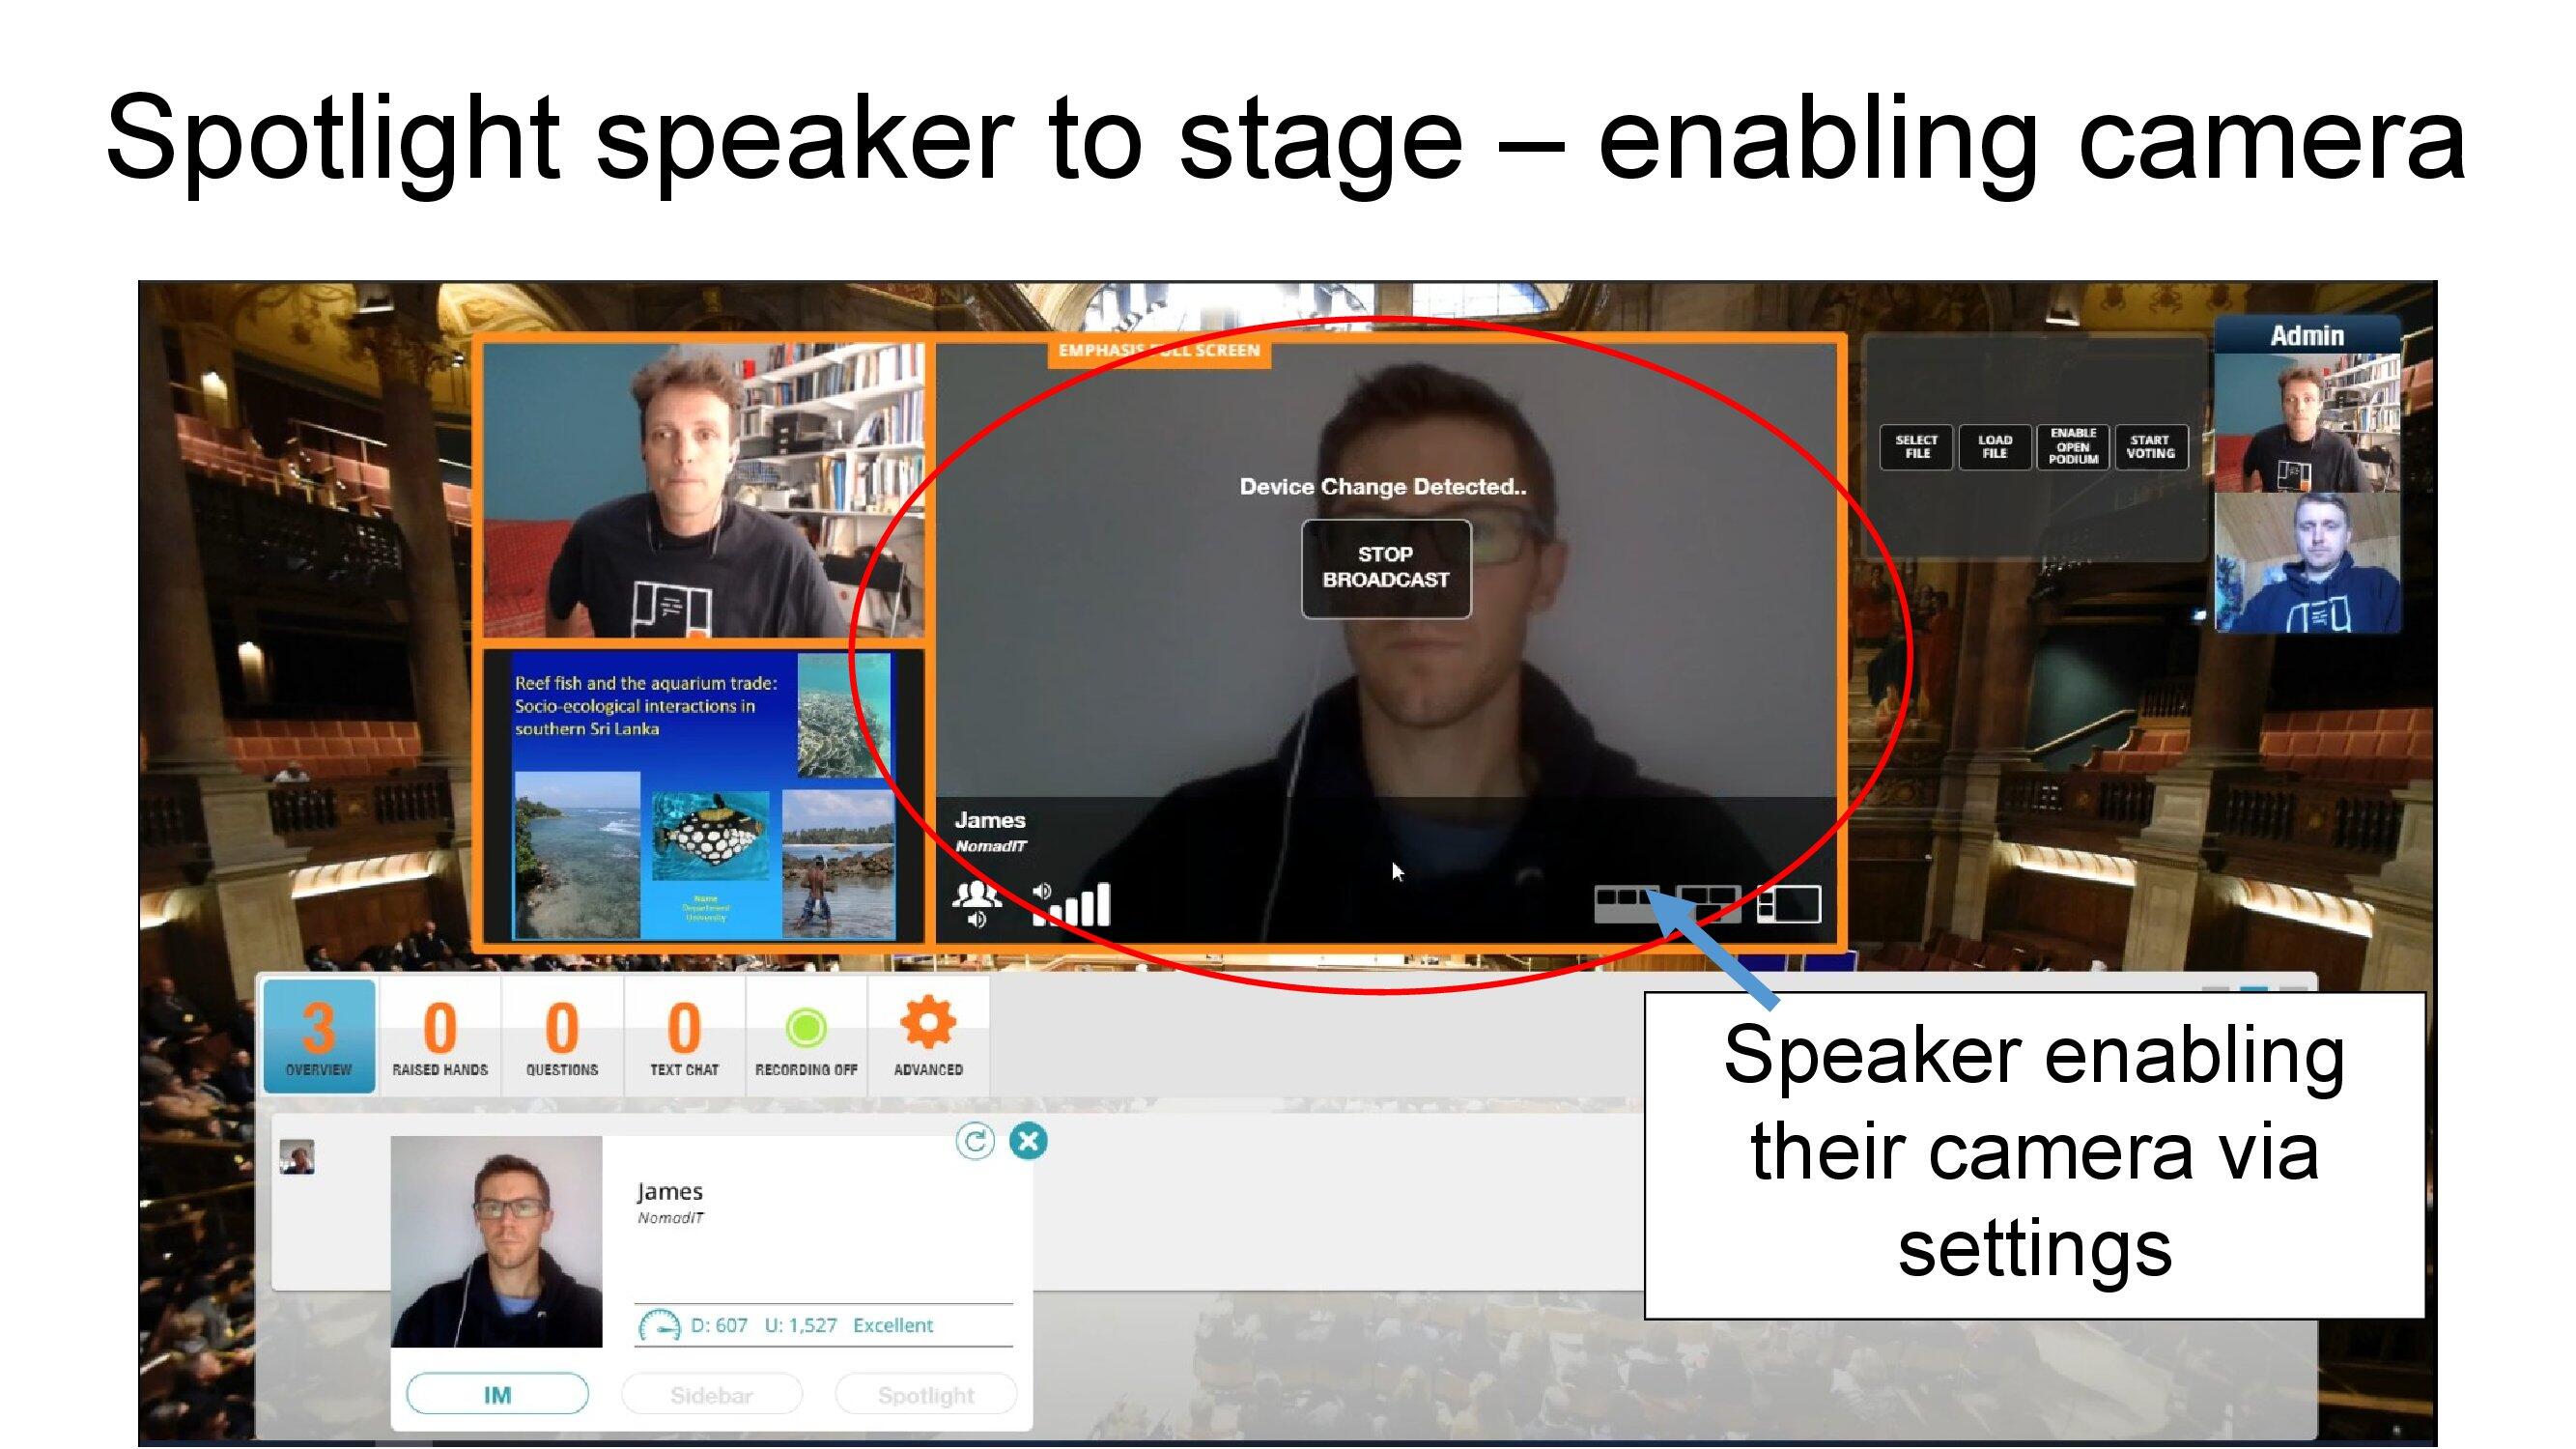
If audio is fine, direct the presenter to the cog icon top left of their screen to turn on their camera (or adjust the setting).
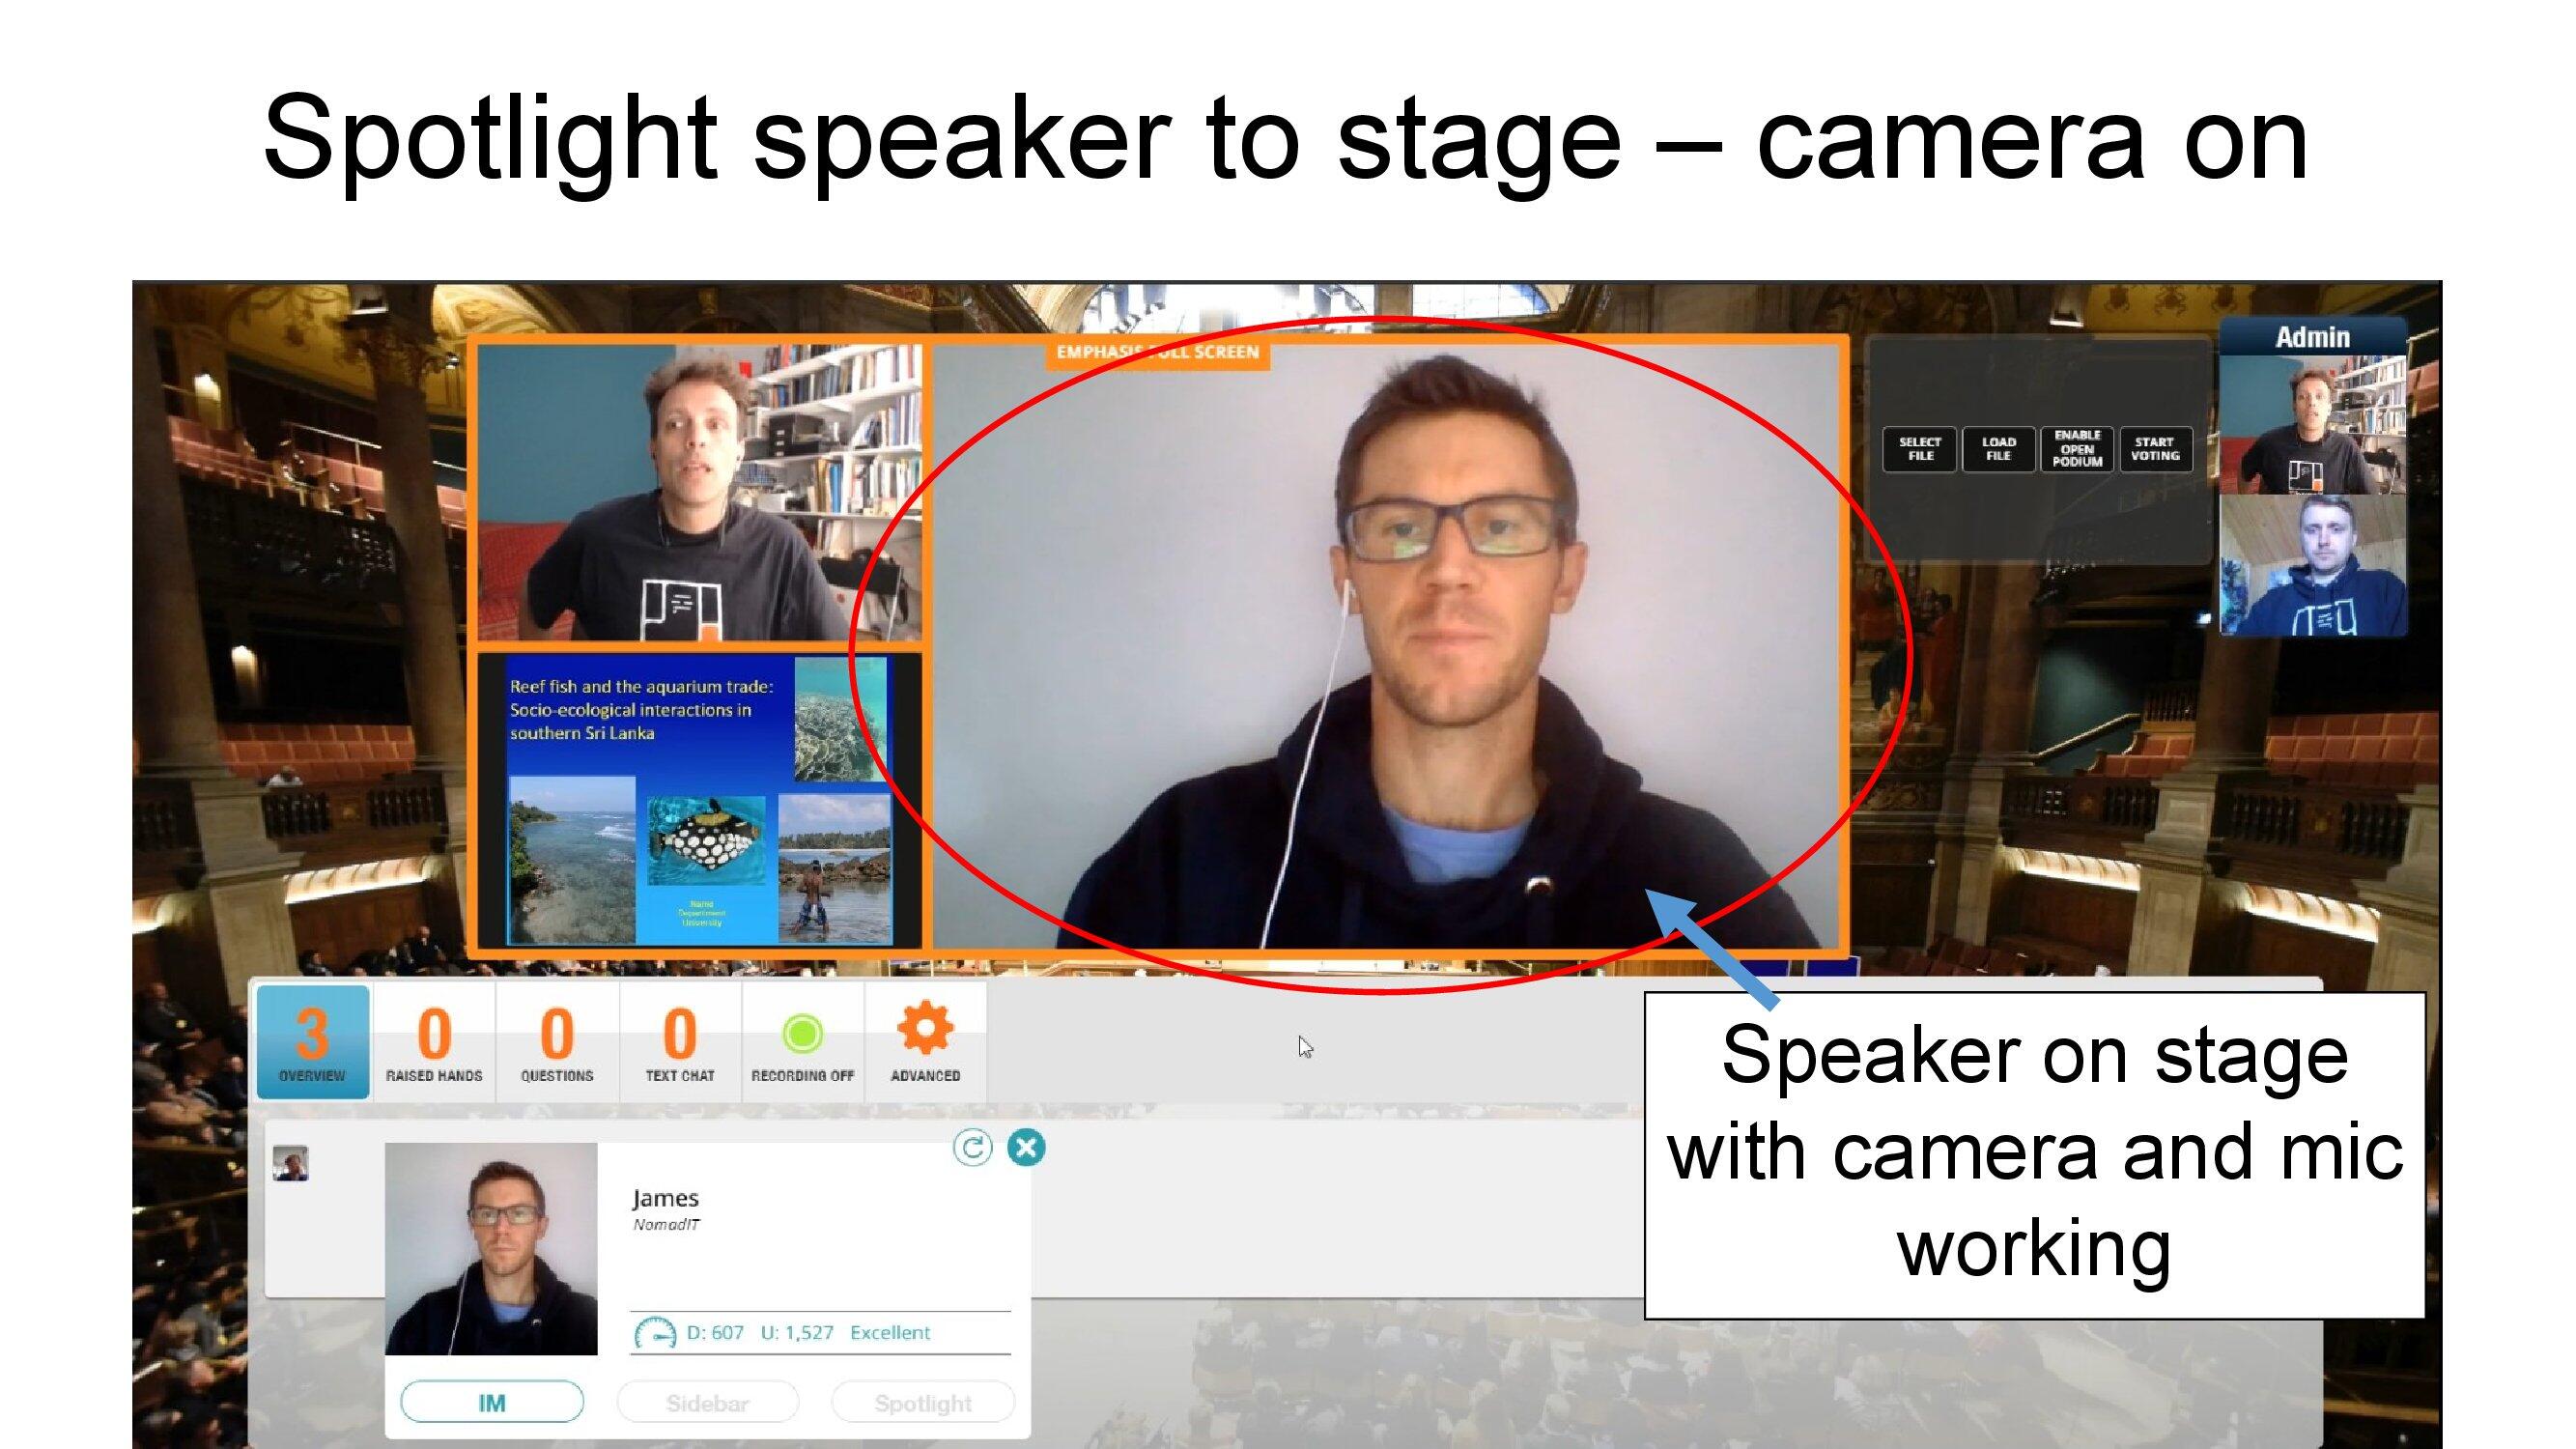
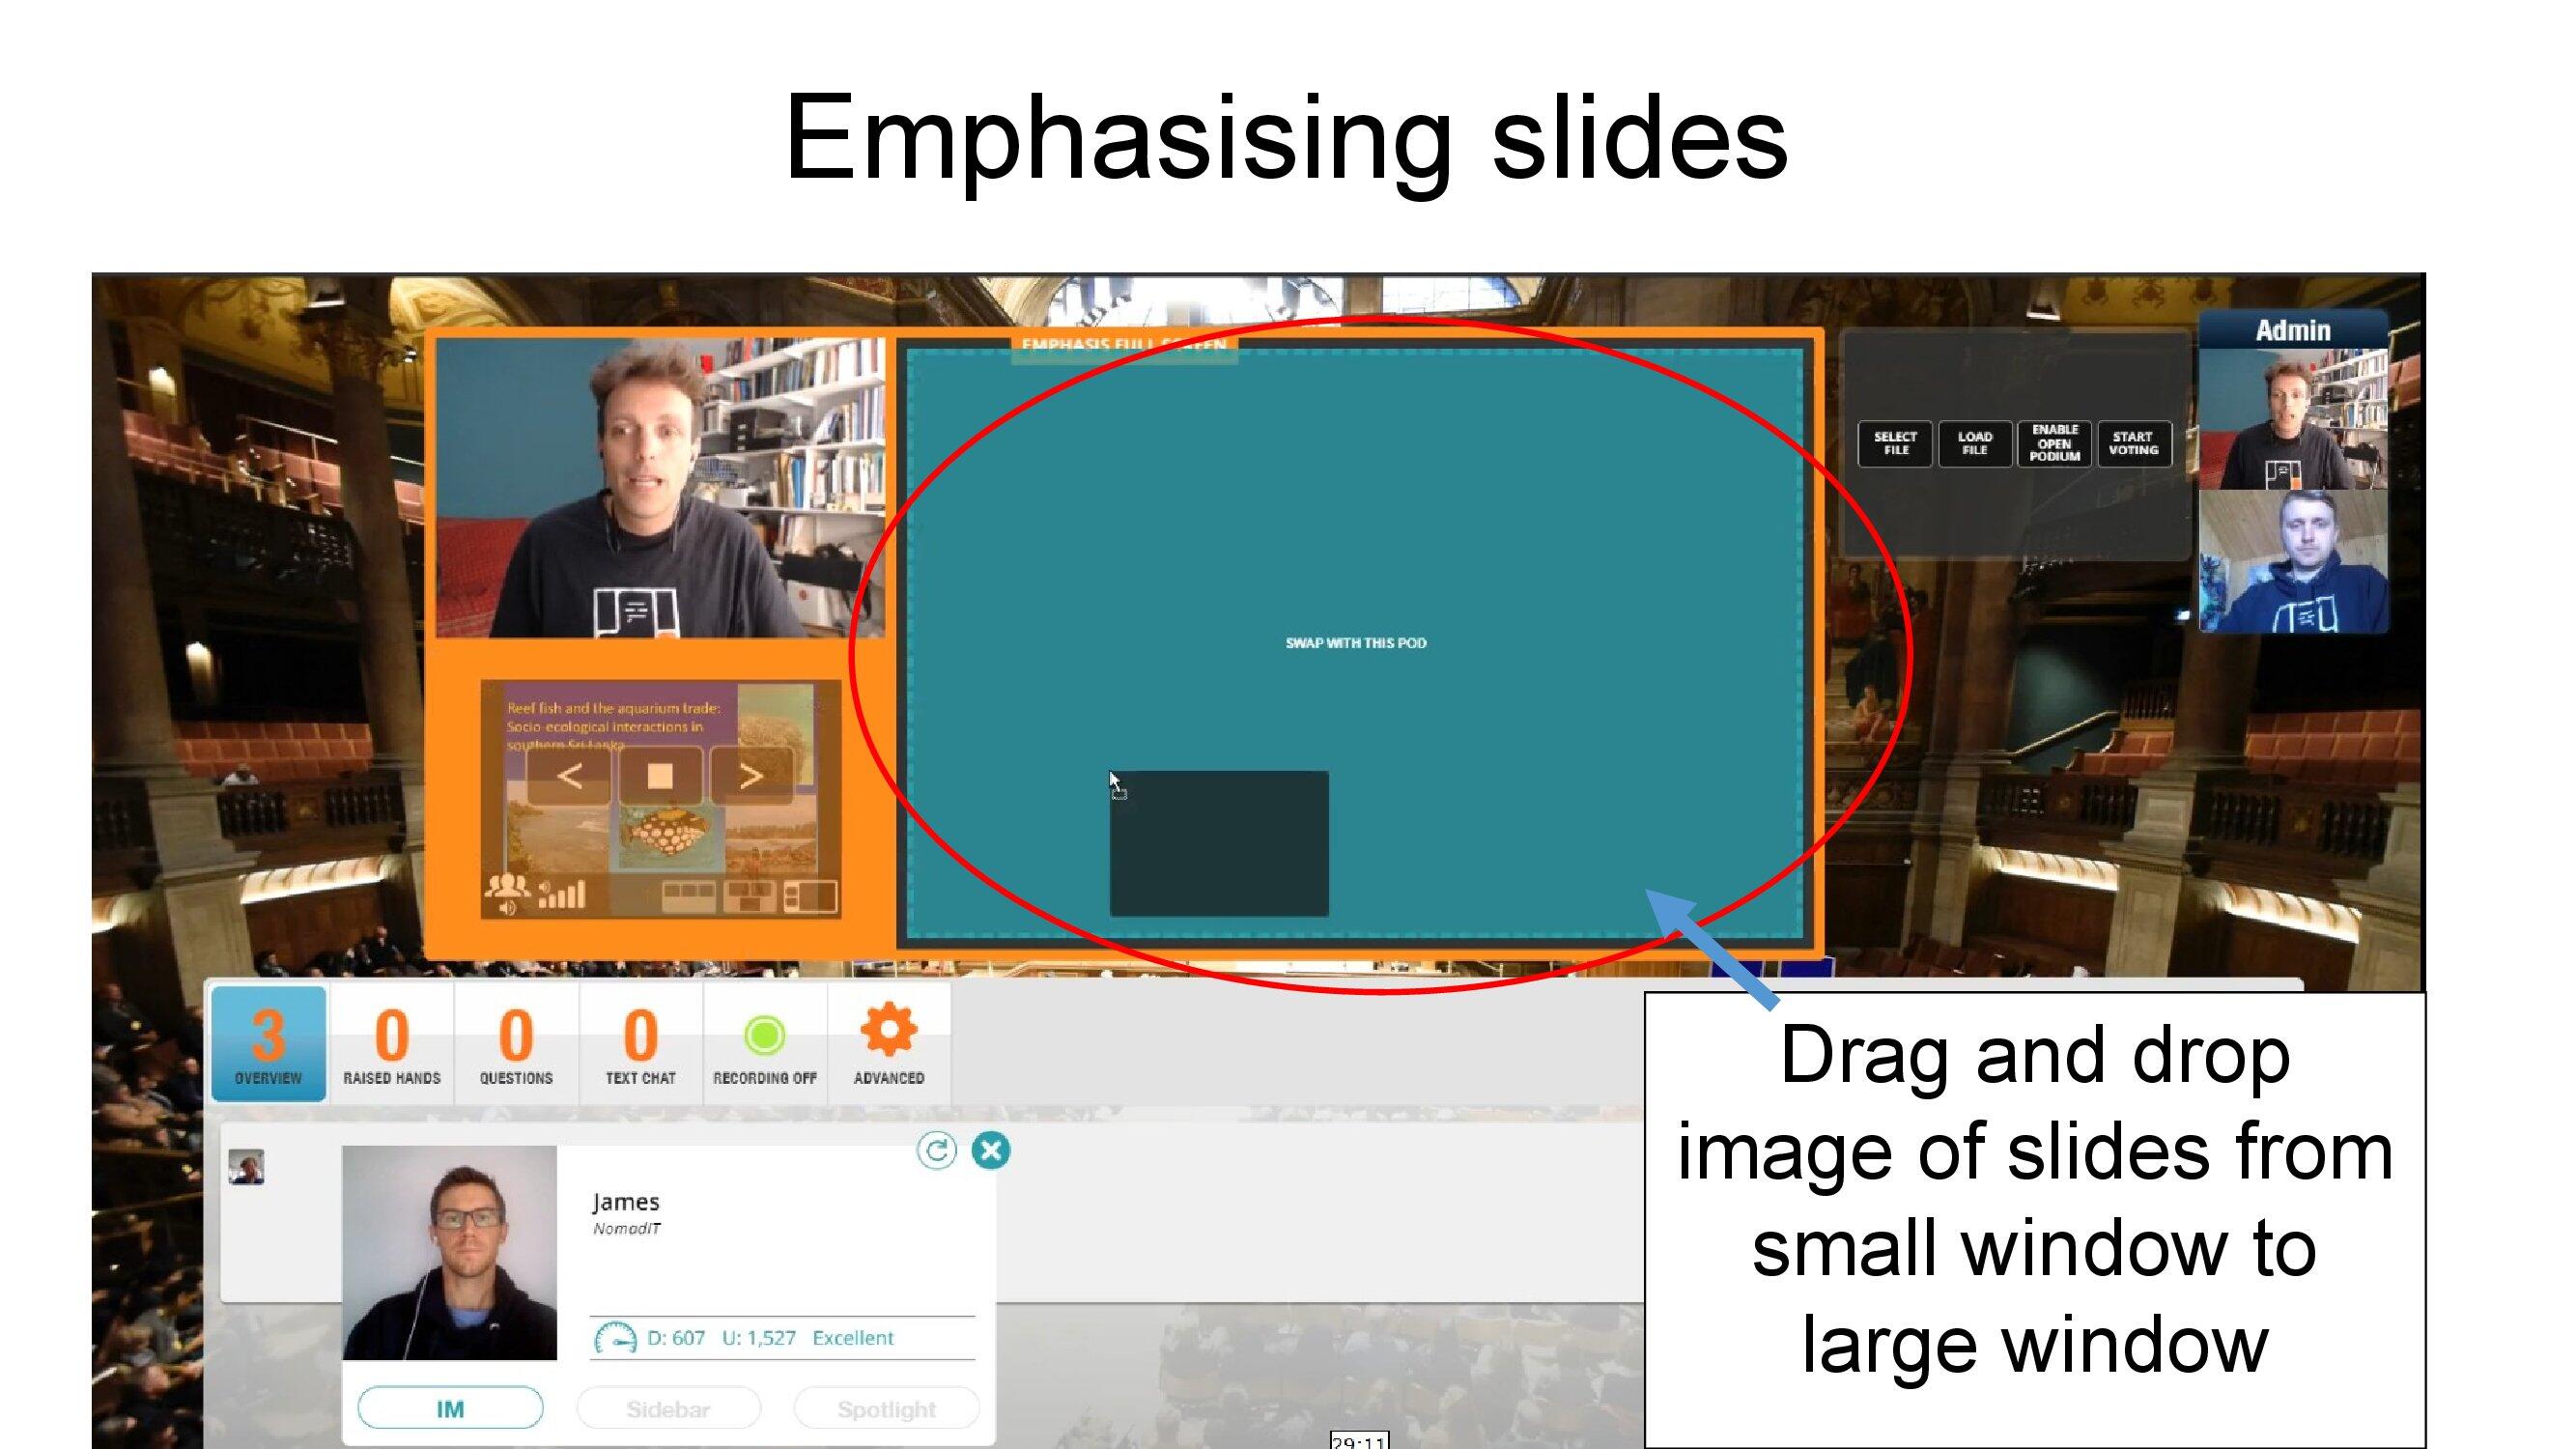
Once the presenter begins to address their slides, we'd suggest emphasising the slides. This can be done either by using the 3-icon toolbar or drag and drop.
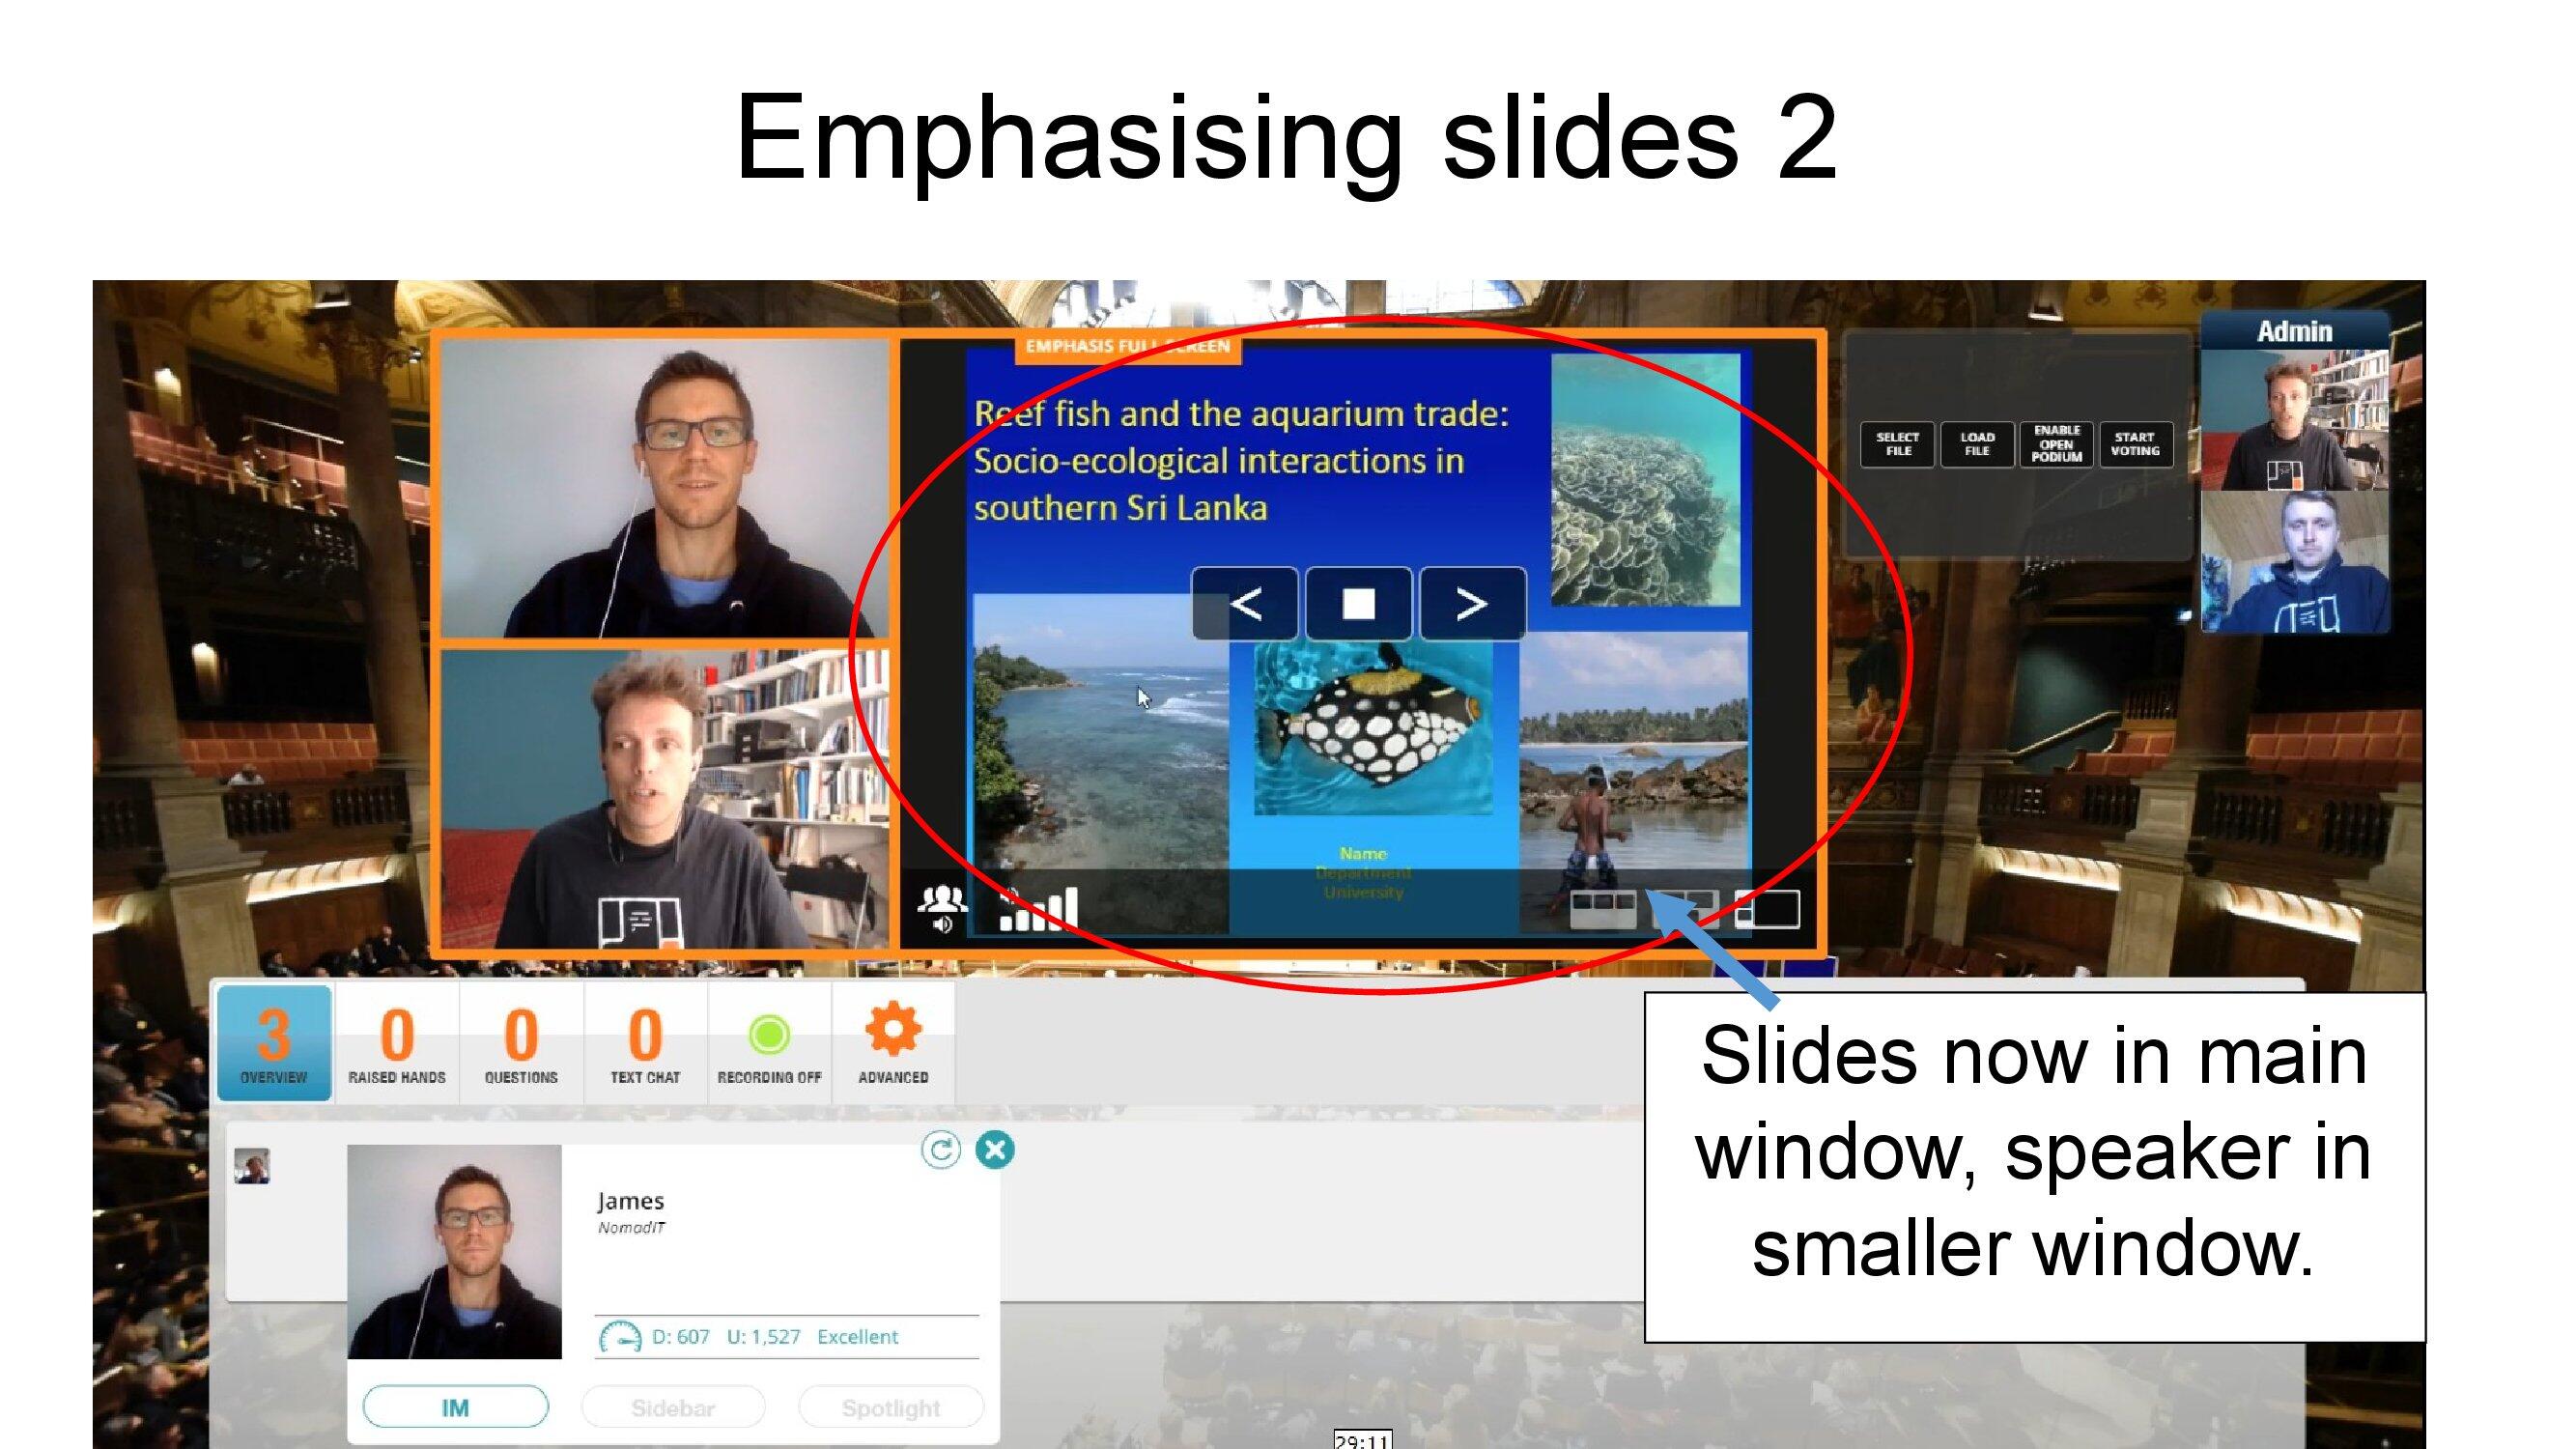
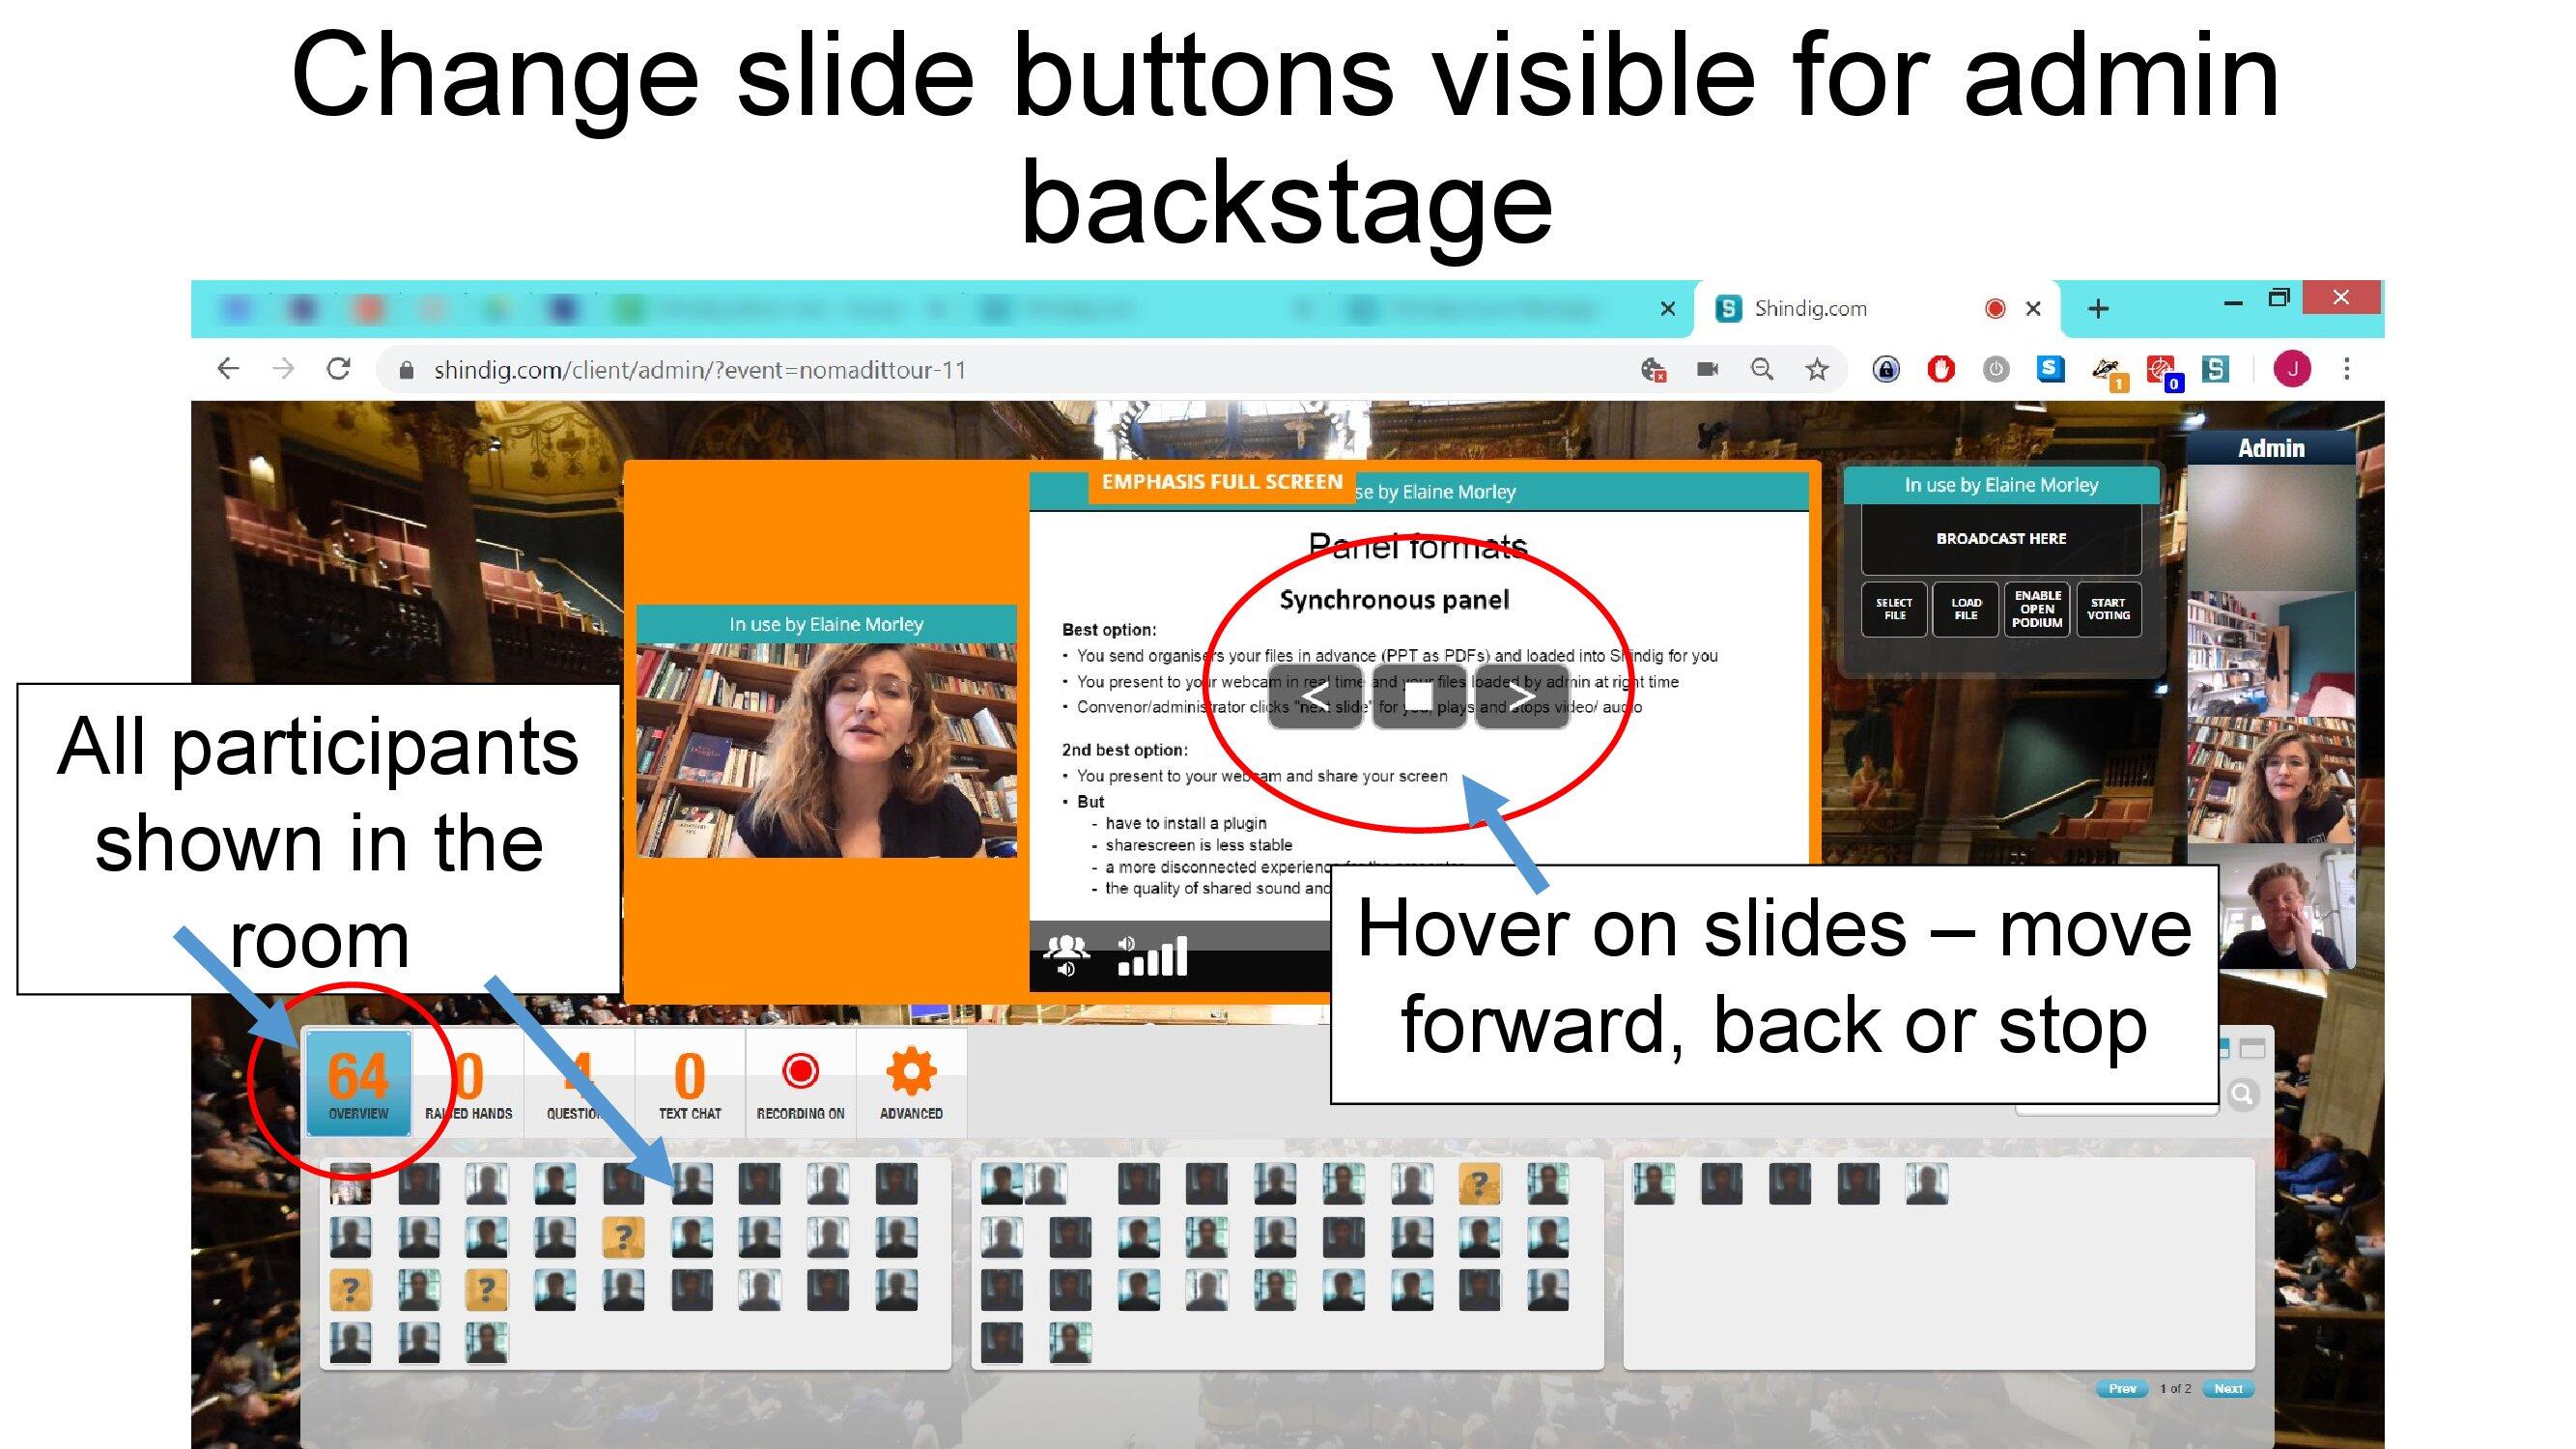
This image shows presenter and convenor on stage with slides emphasised. Mousing over the slide podium displays the 'Next slide' control.
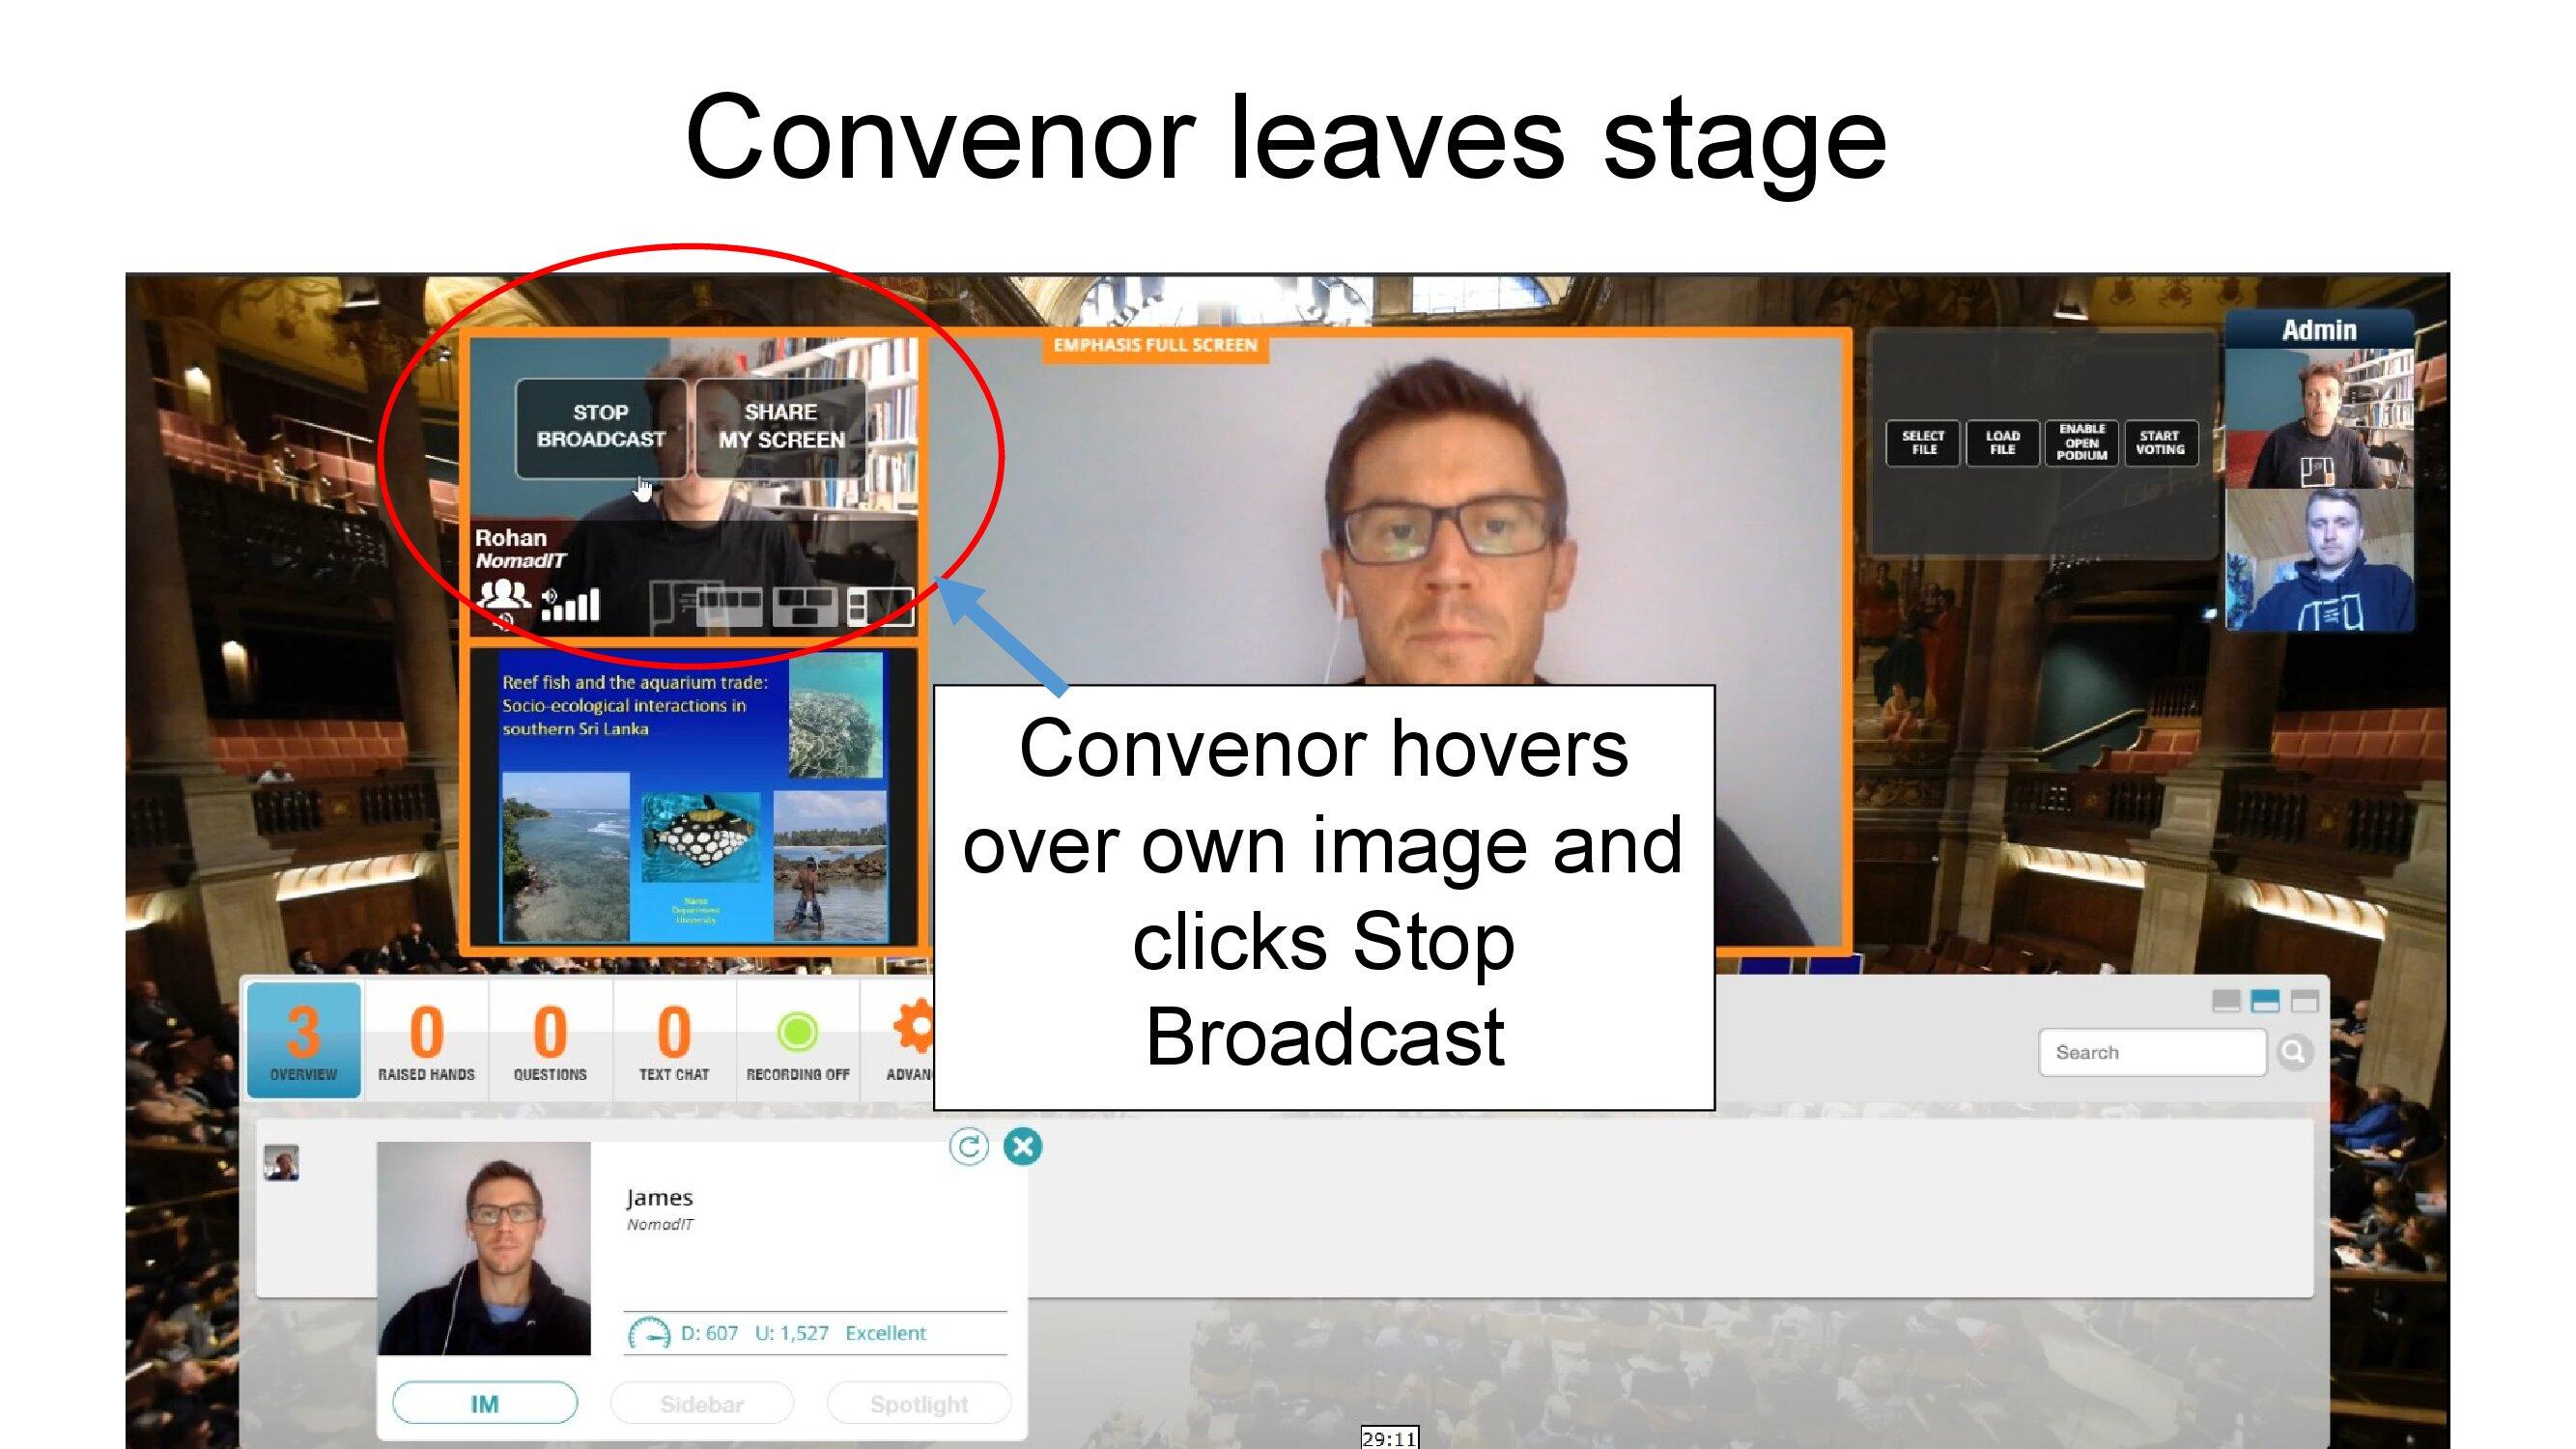
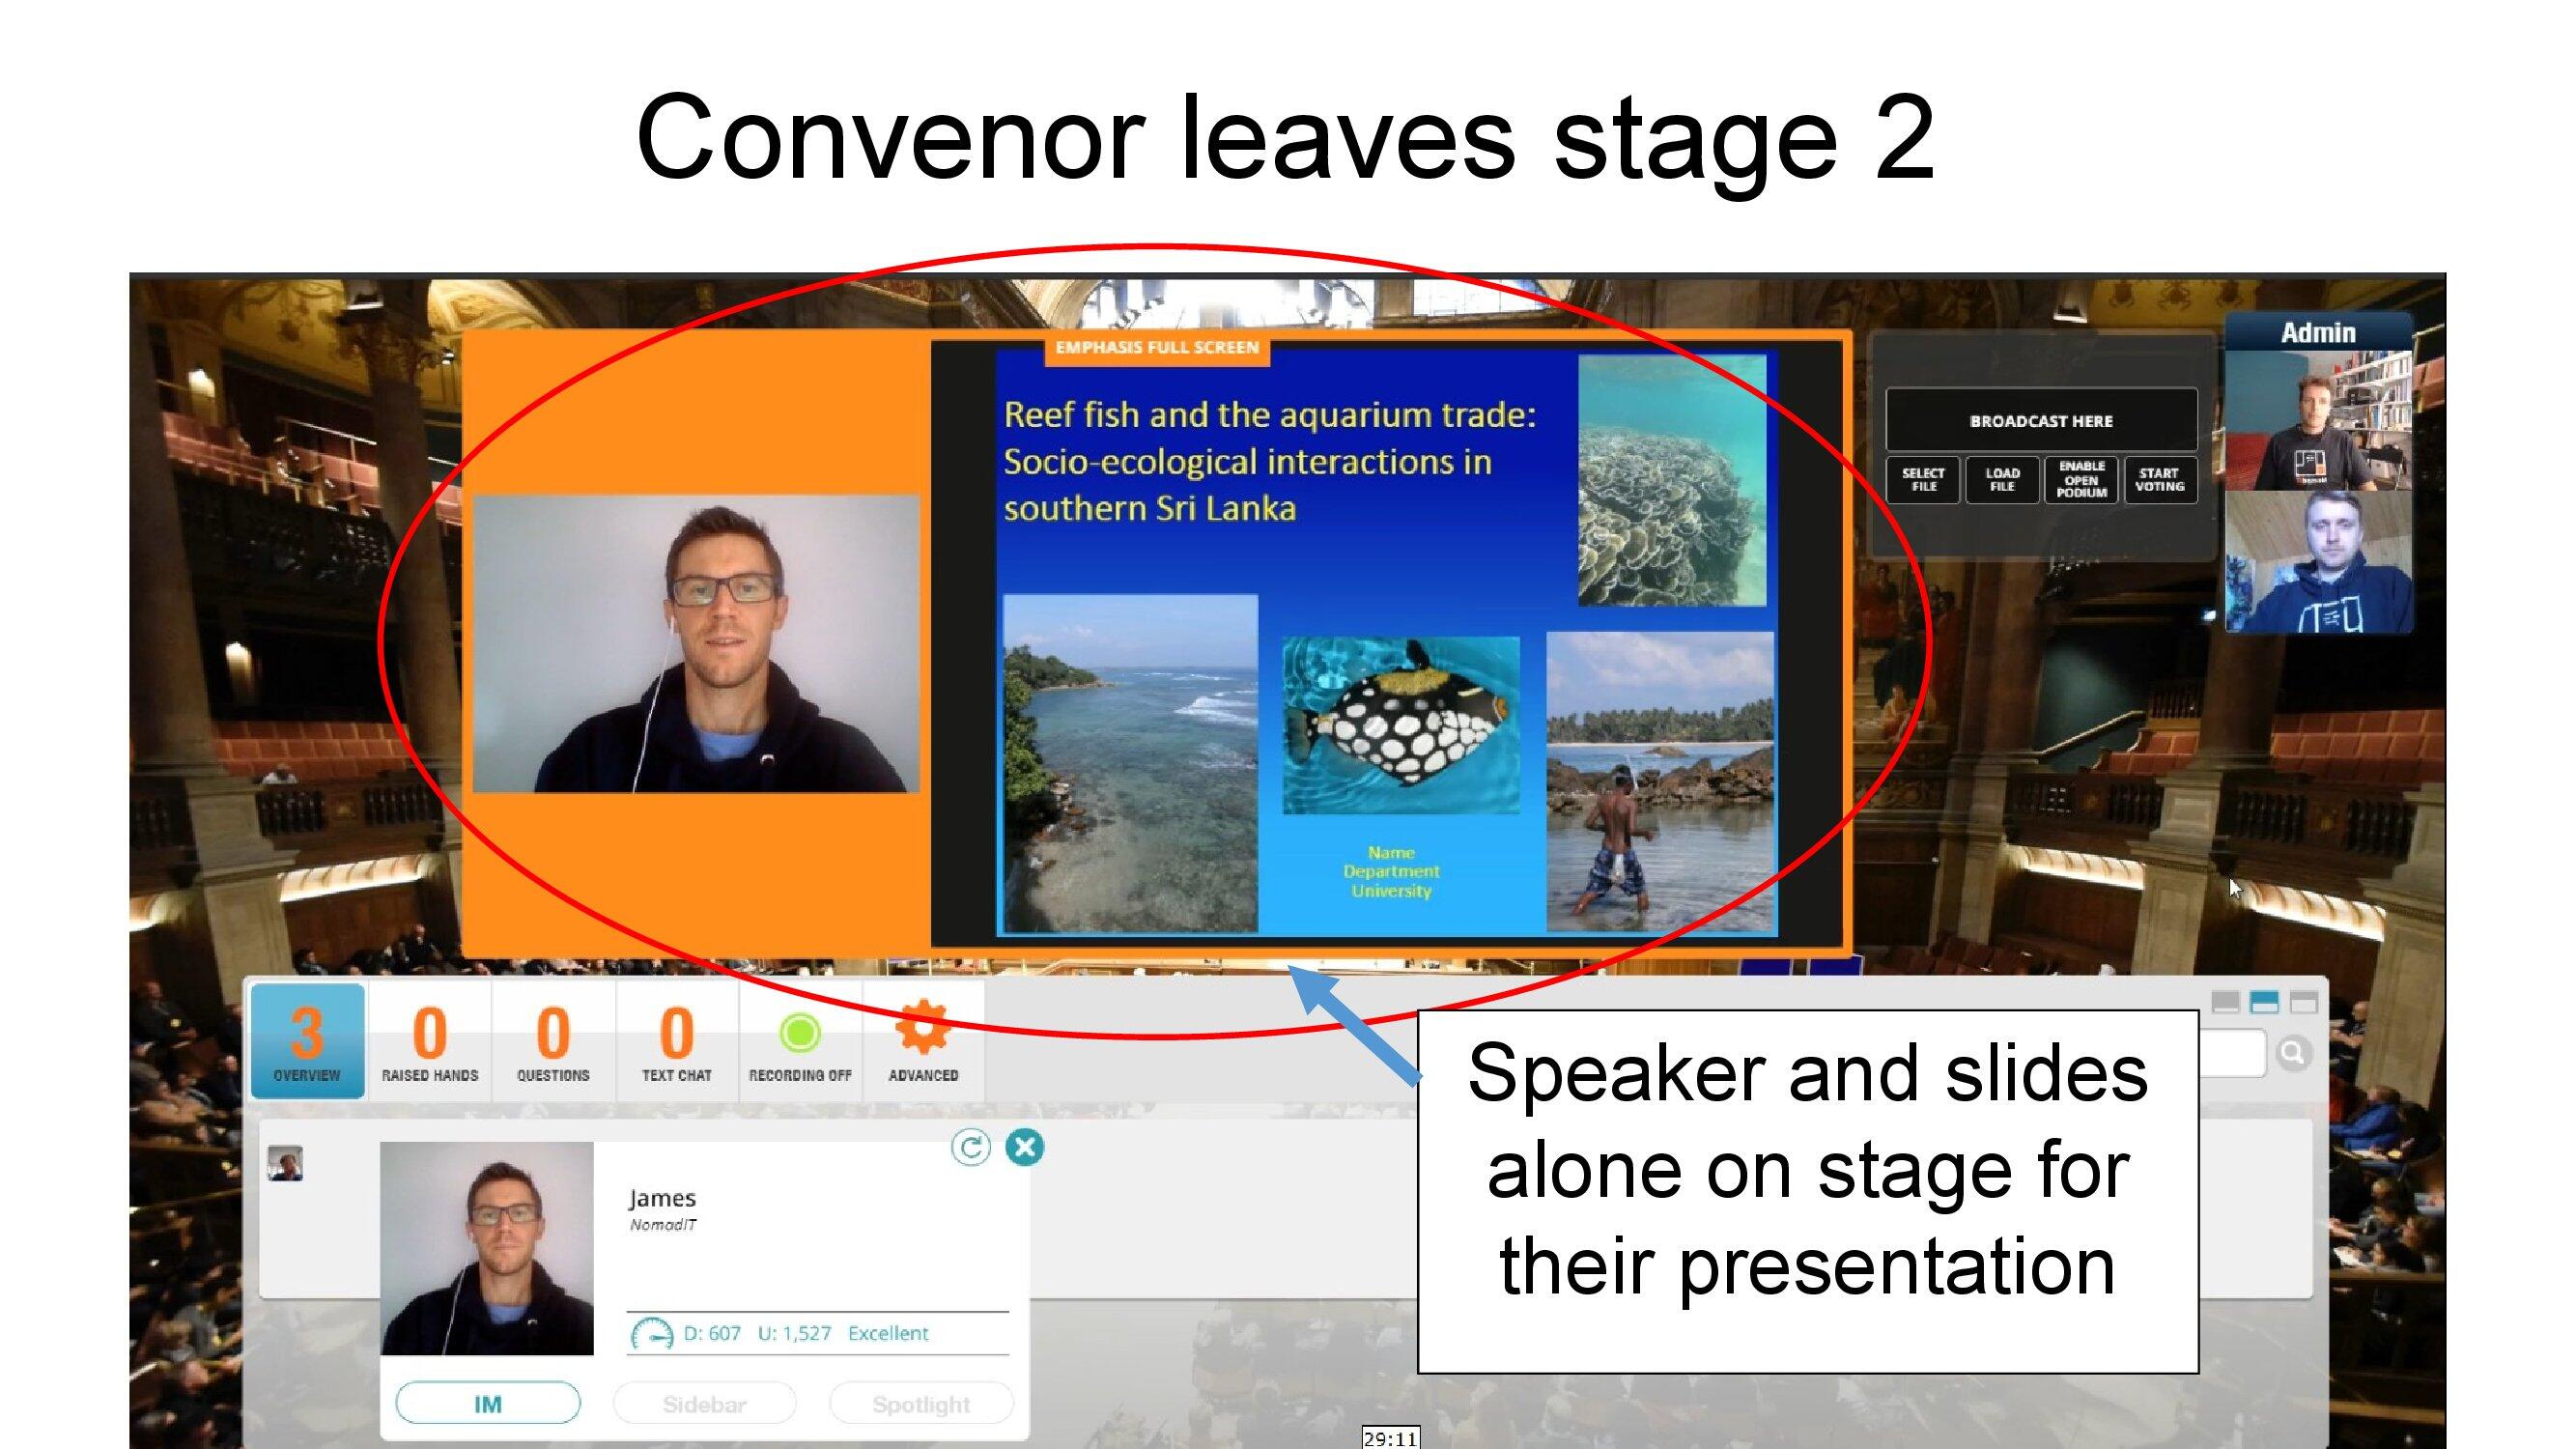
With the presentation commencing the convenor can remove themselves from the stage.
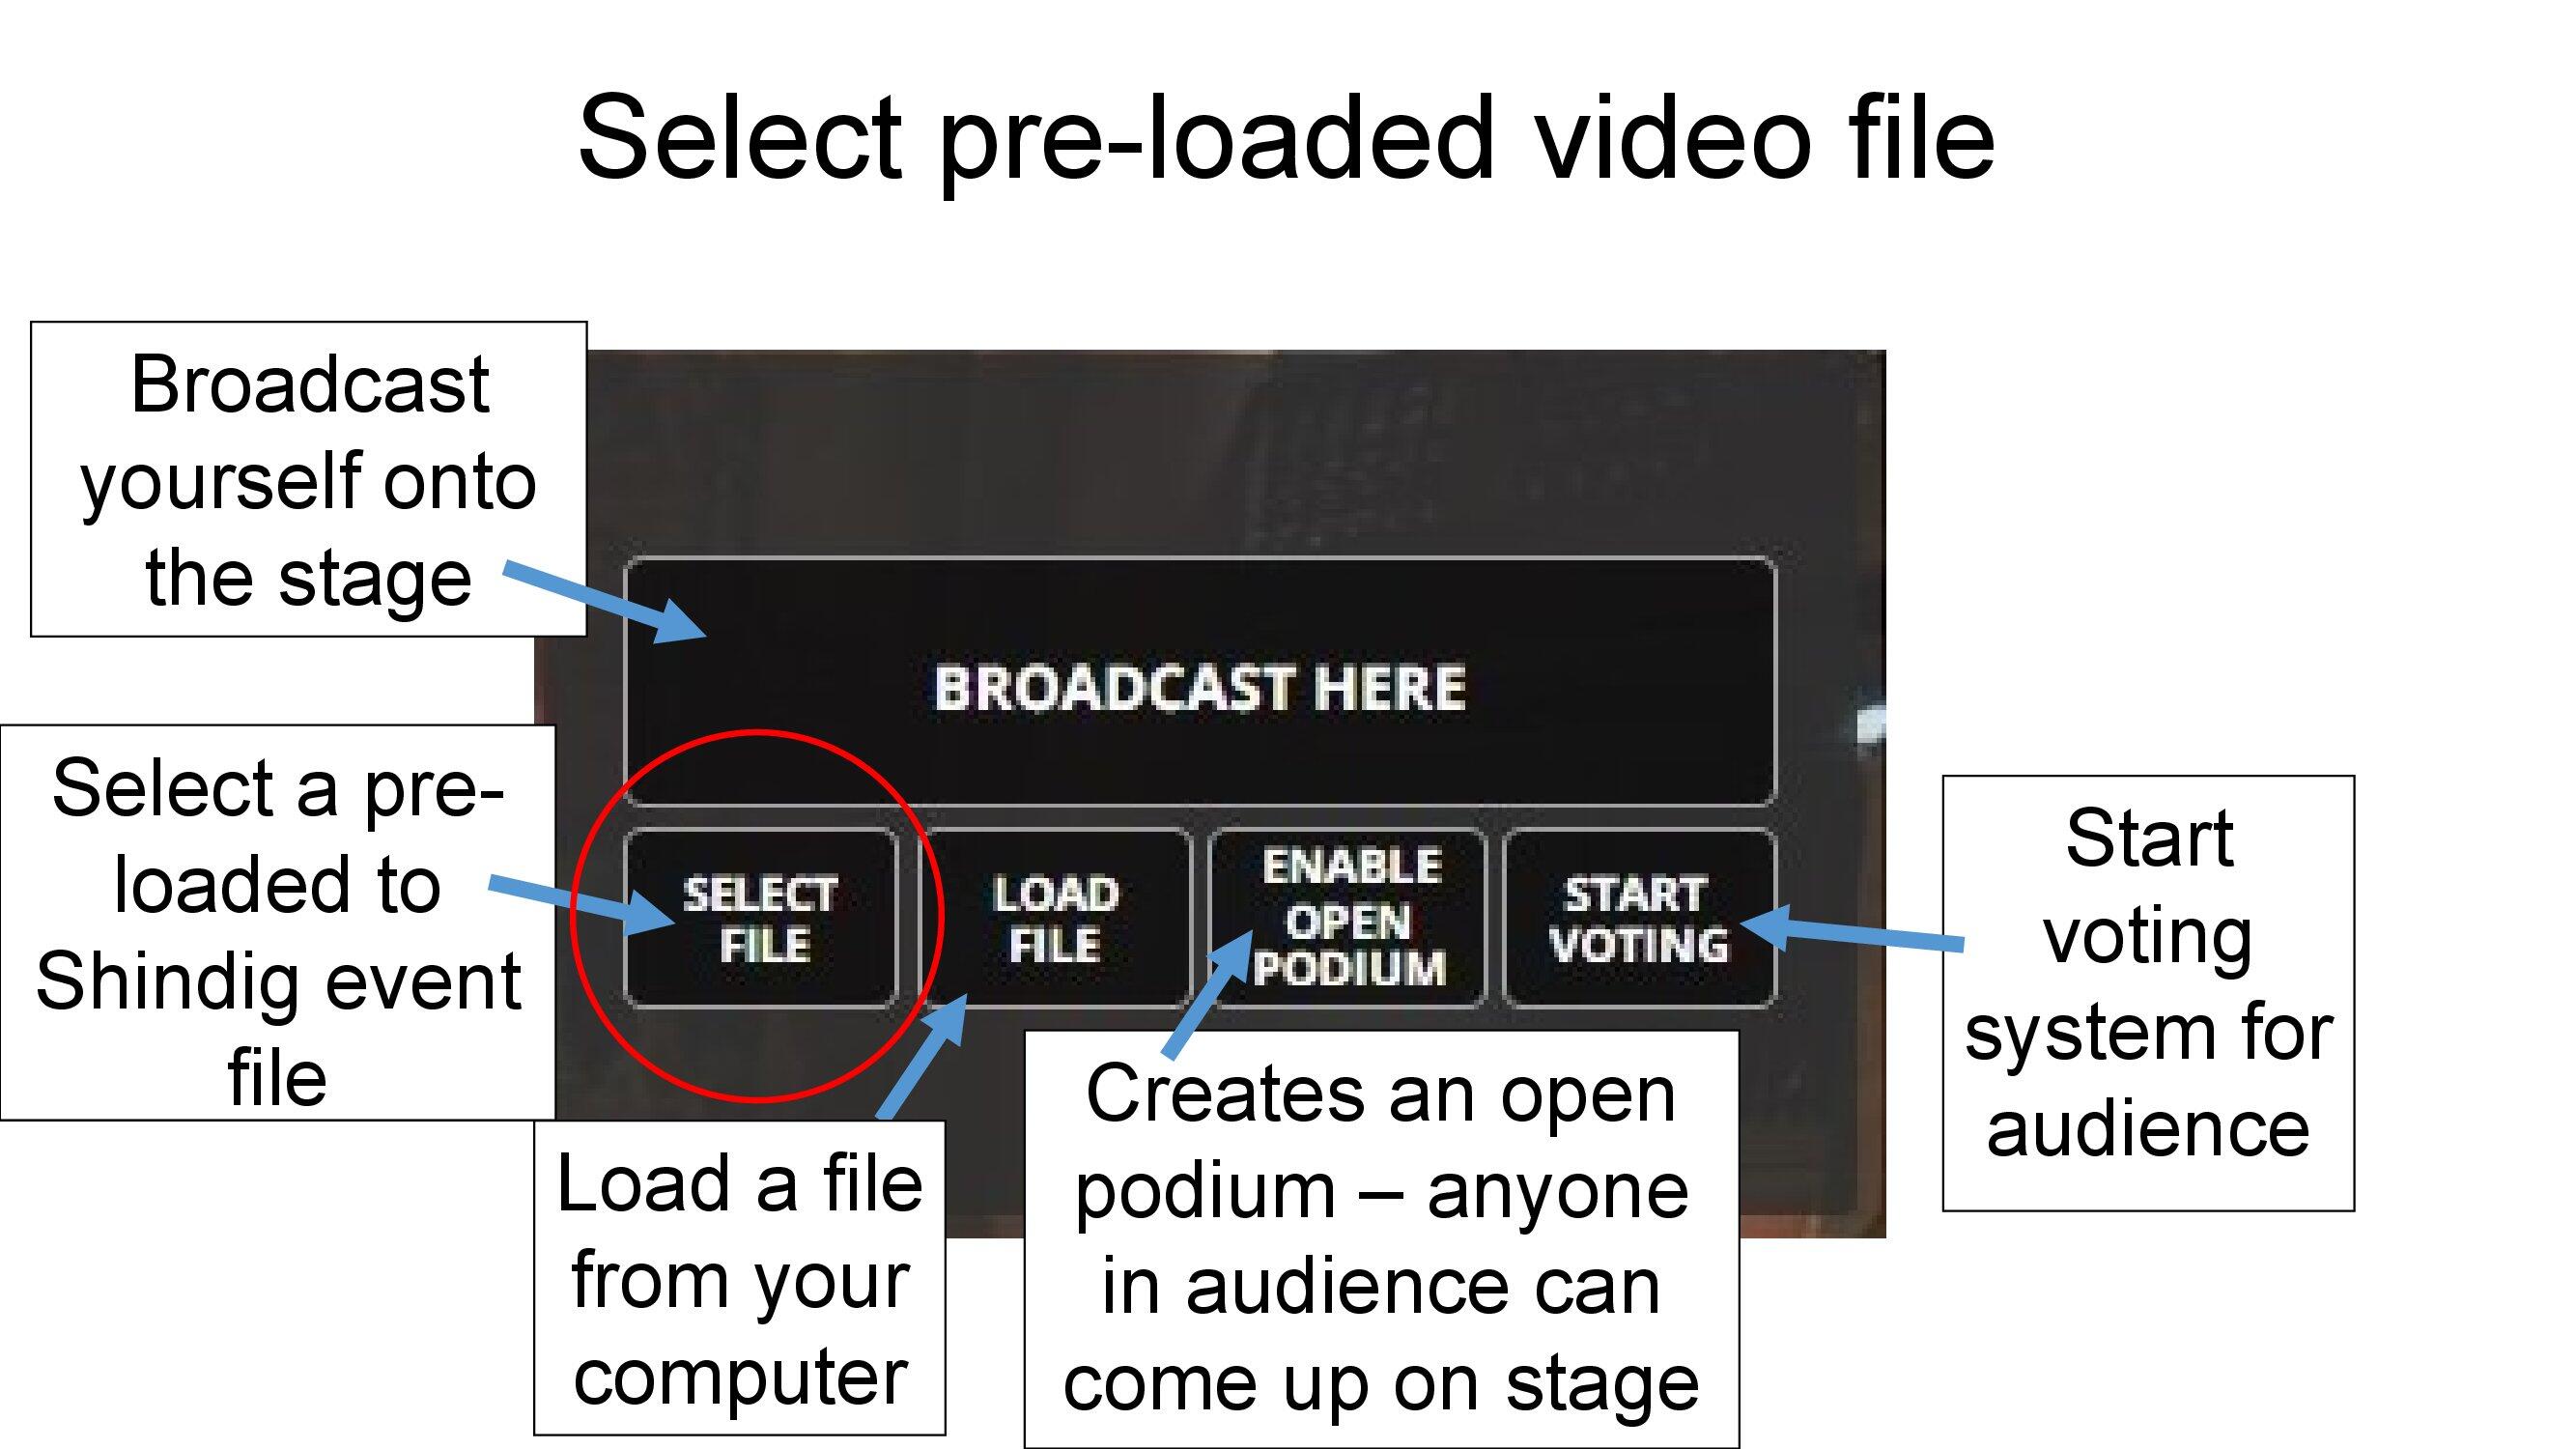
If the presenter has requested a video file, you can use Select file to display it on a podium.
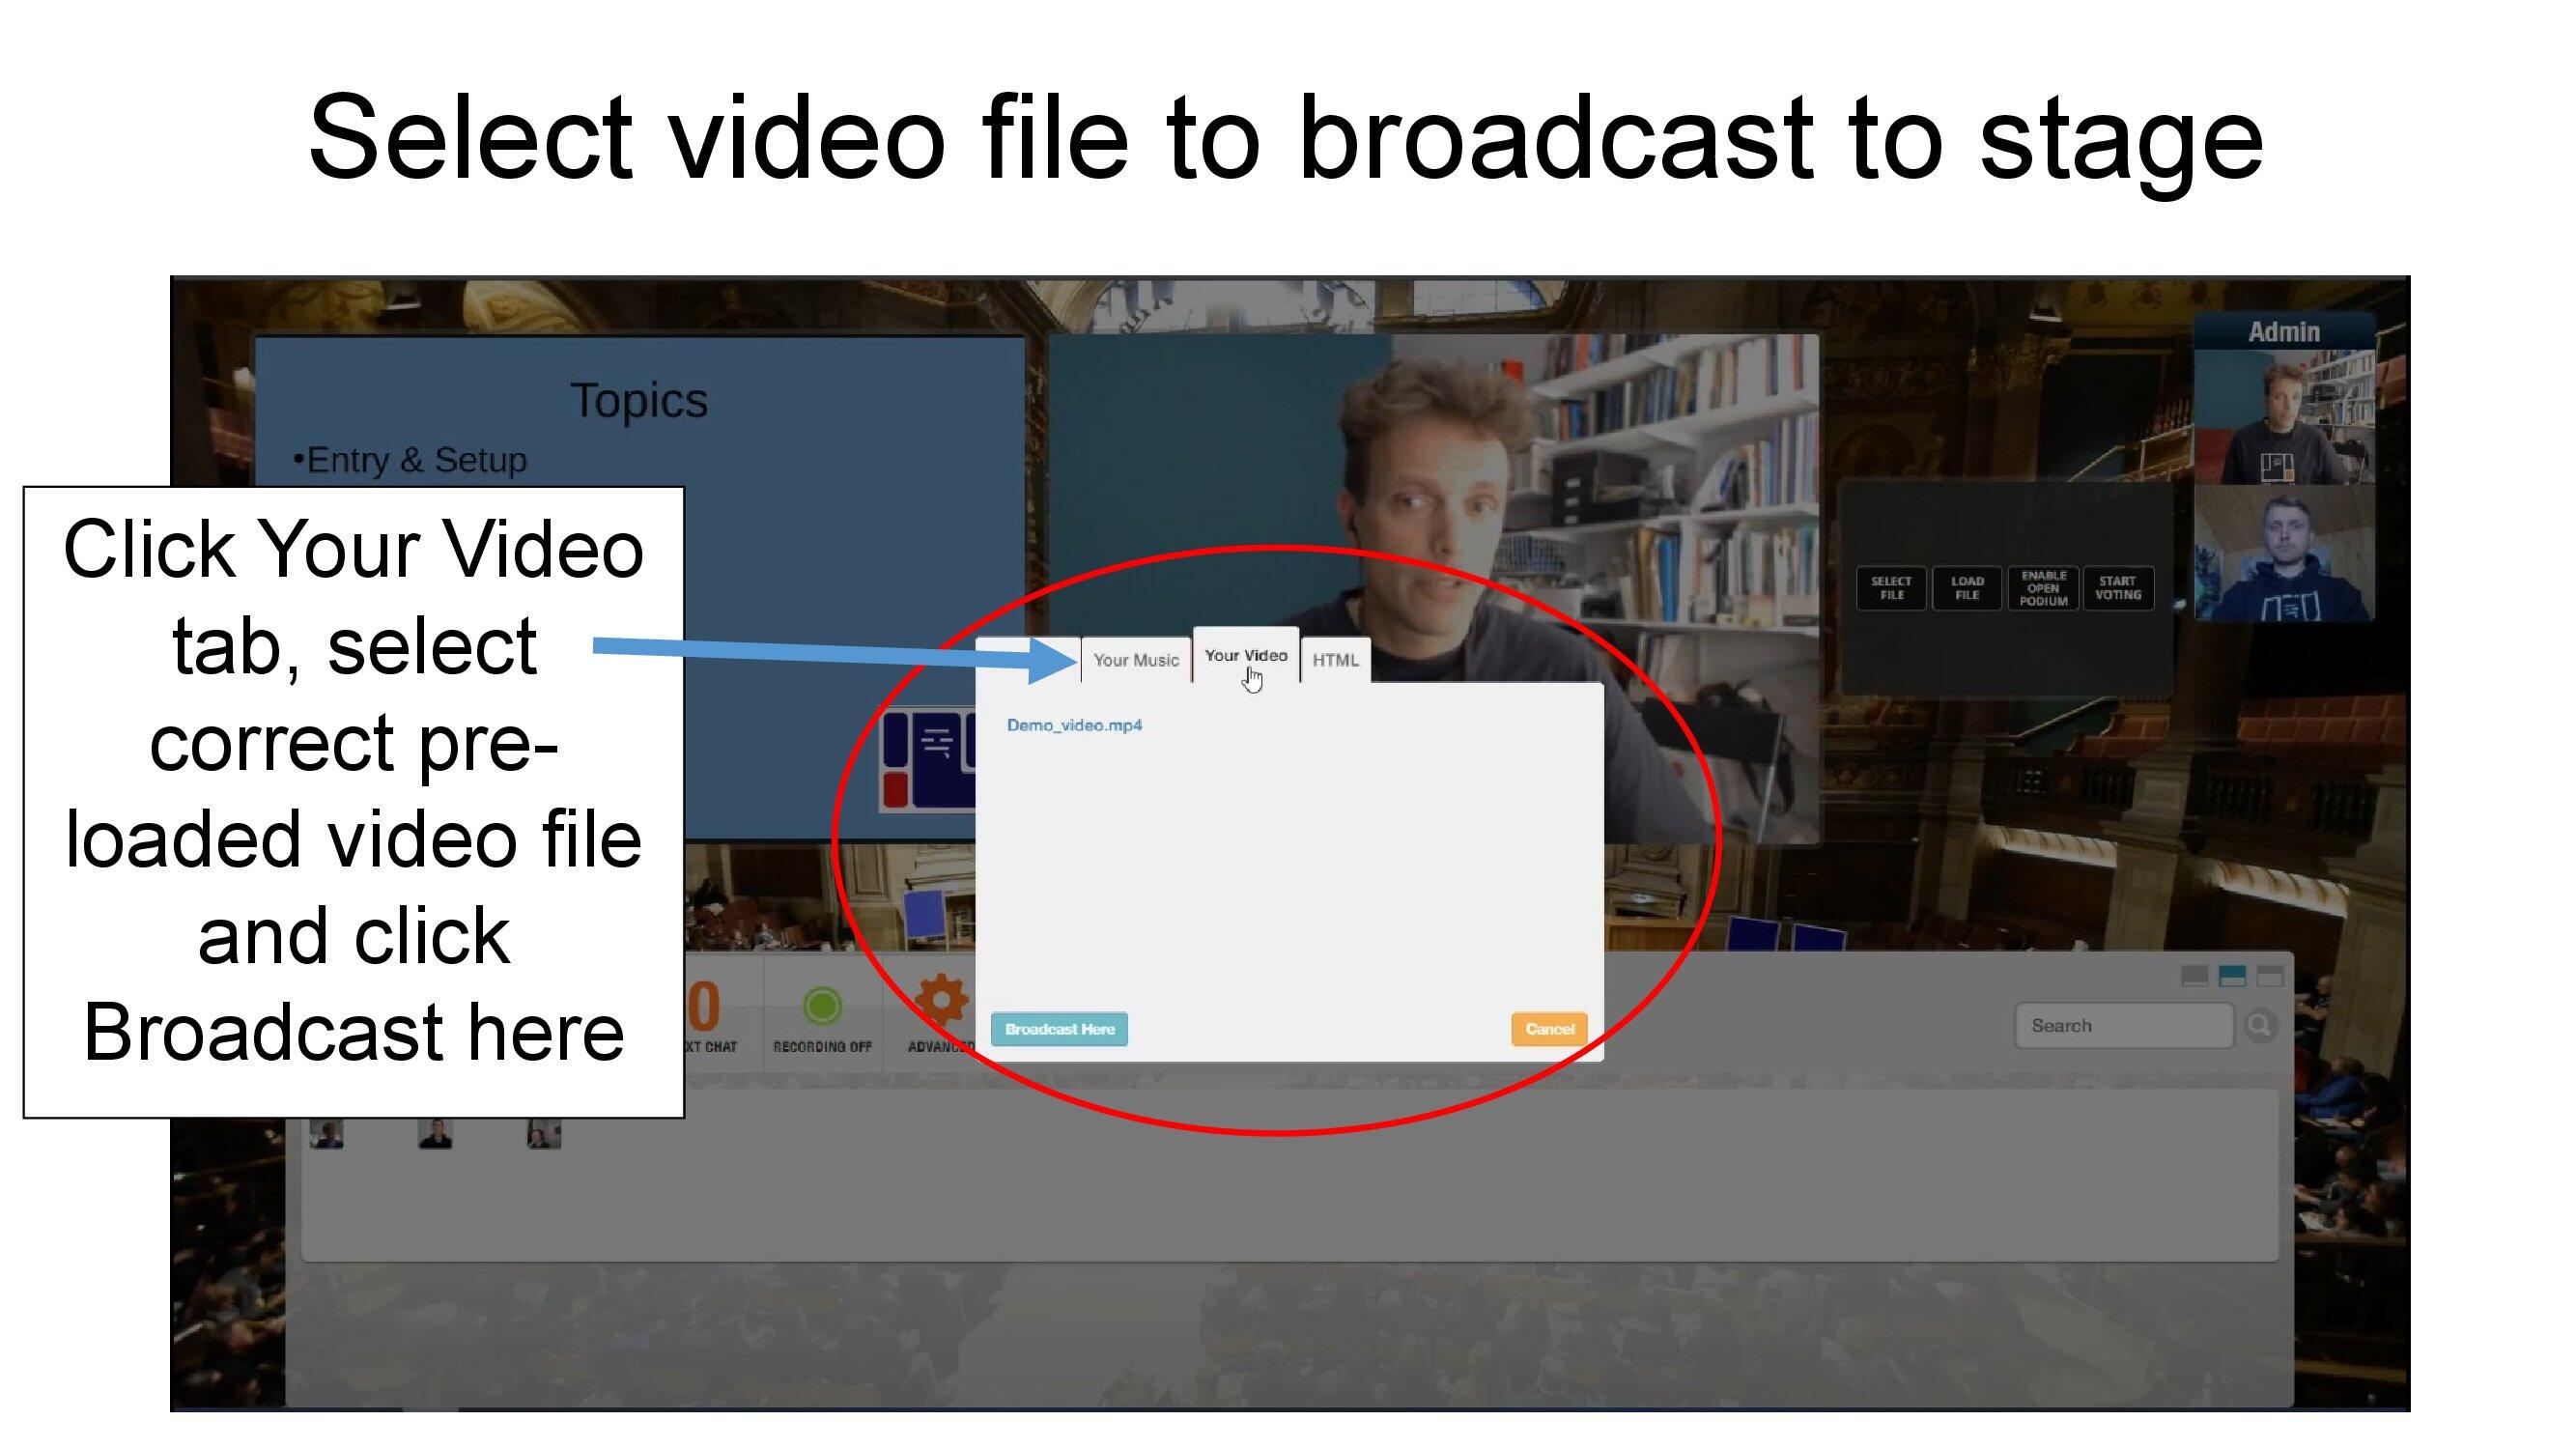
Click the video tab in the dialogue of pre-loaded files.
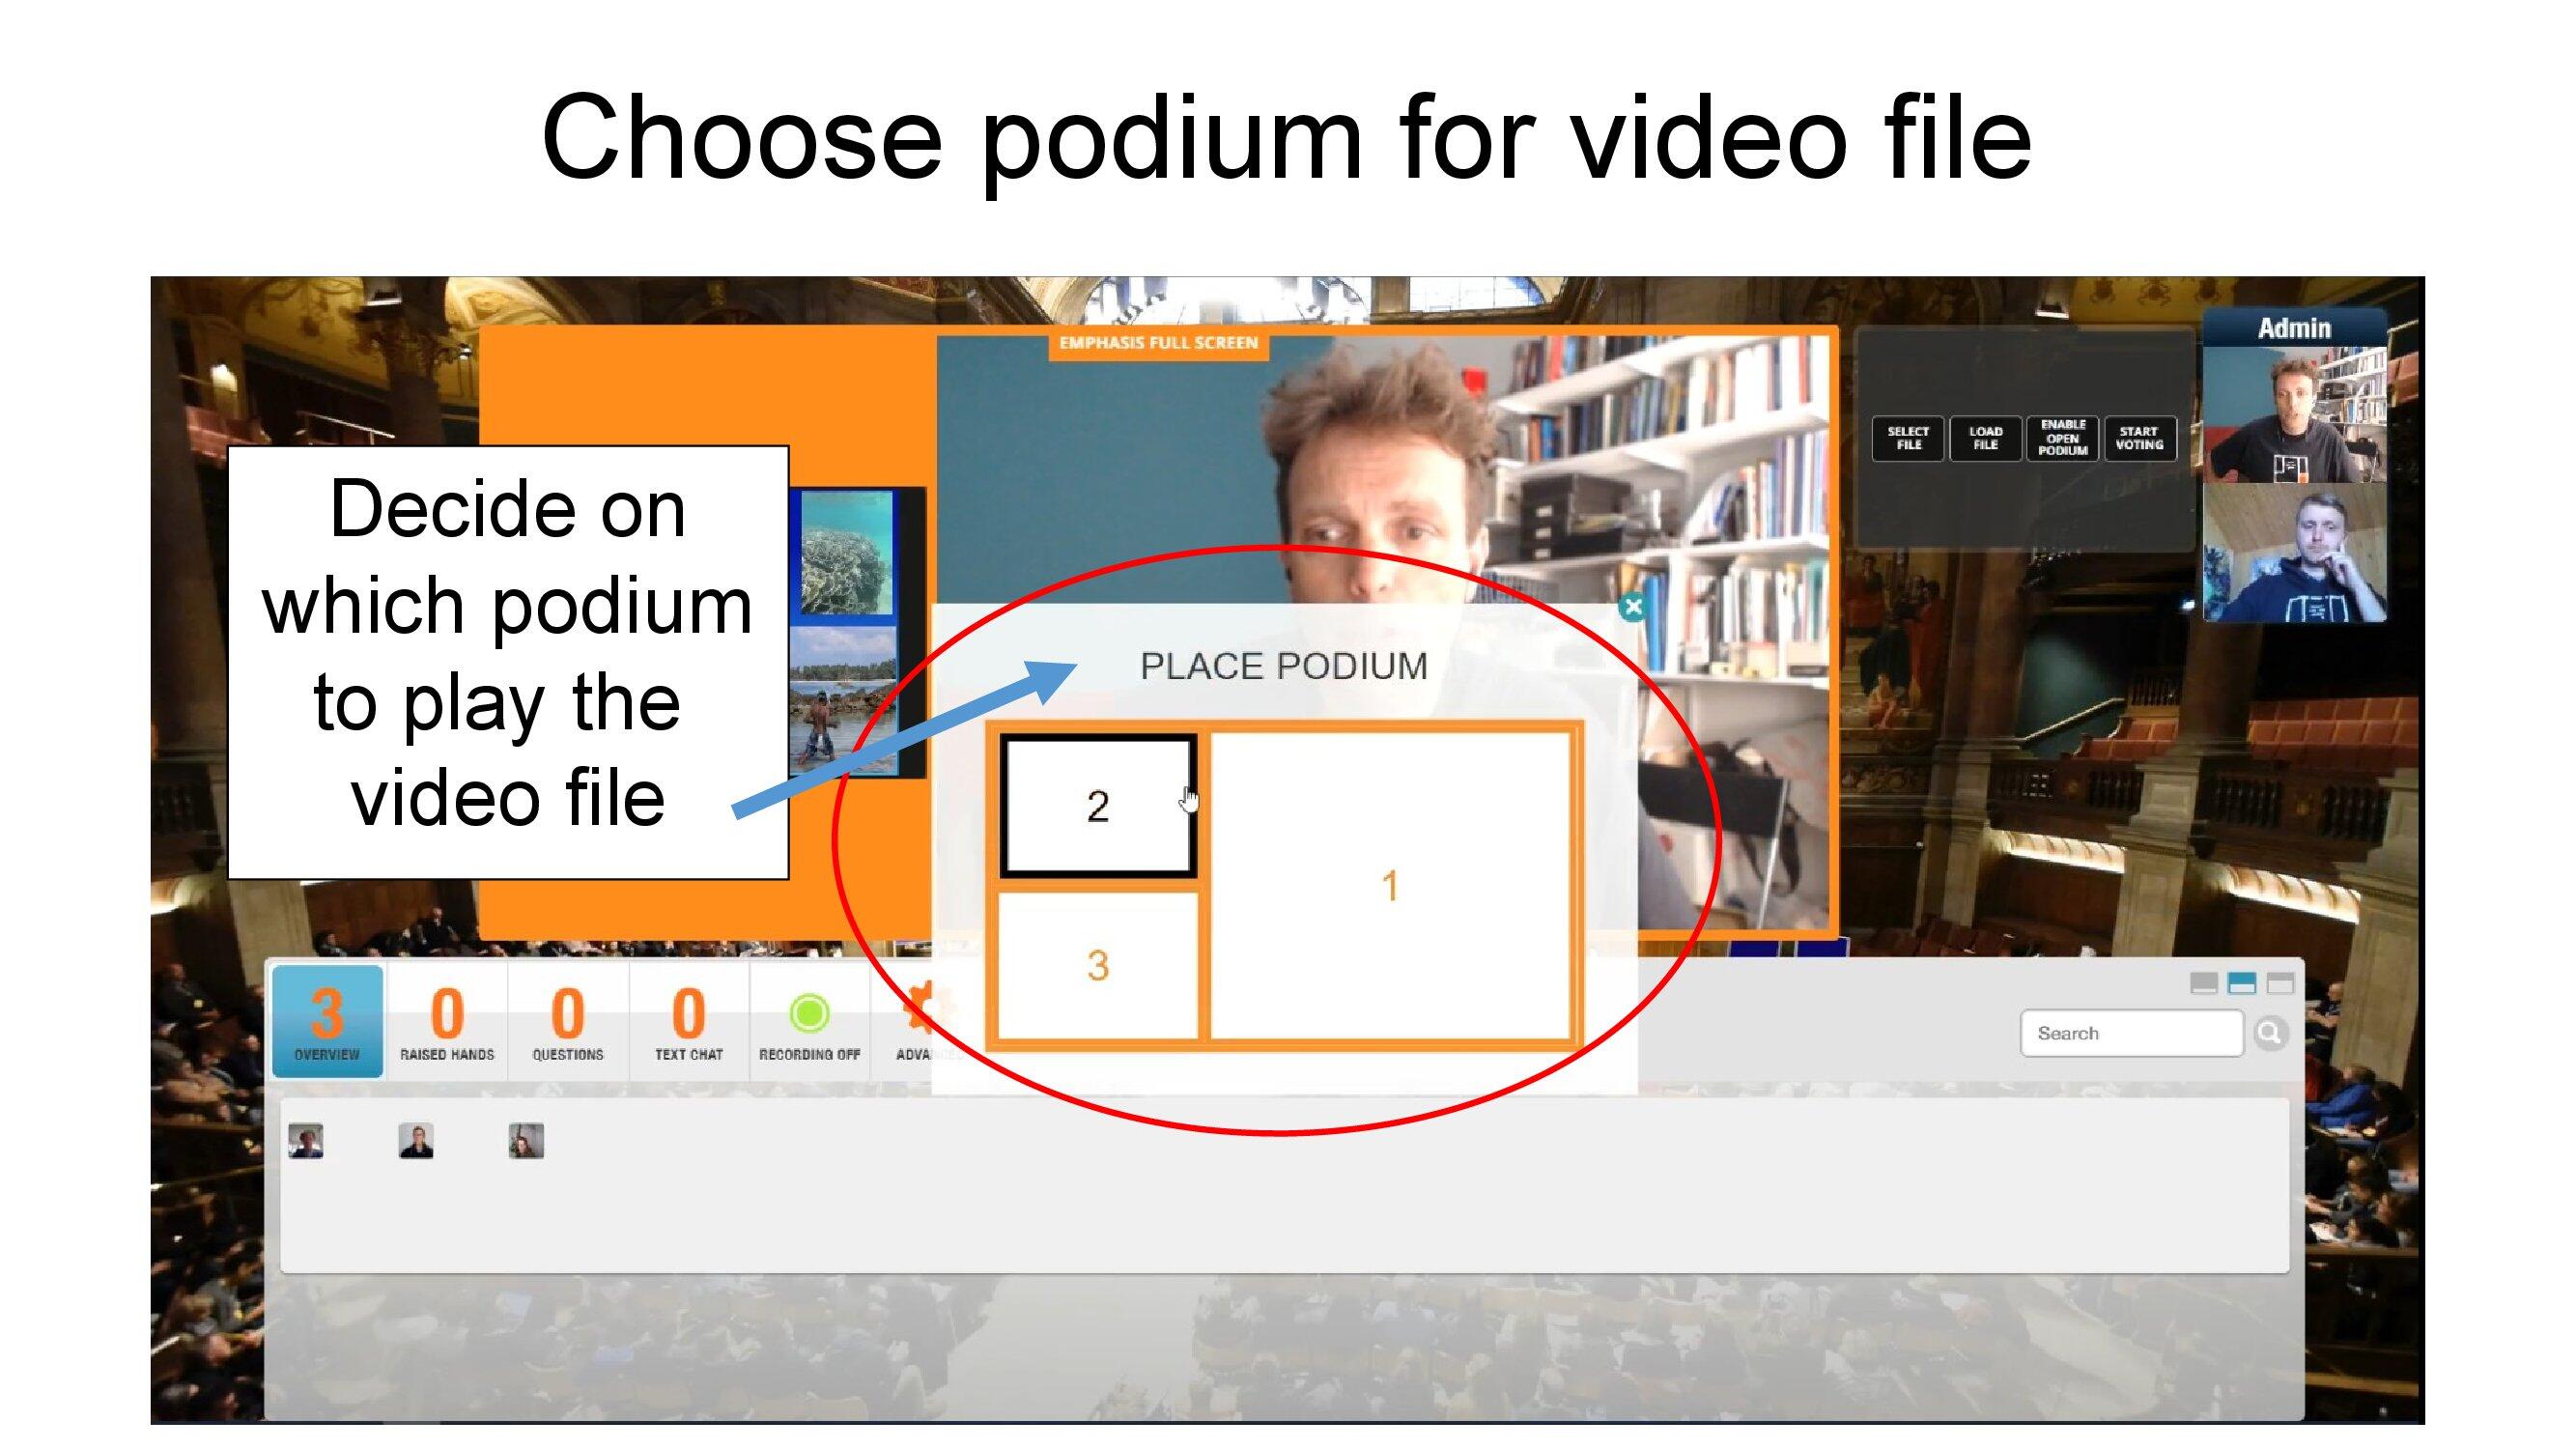
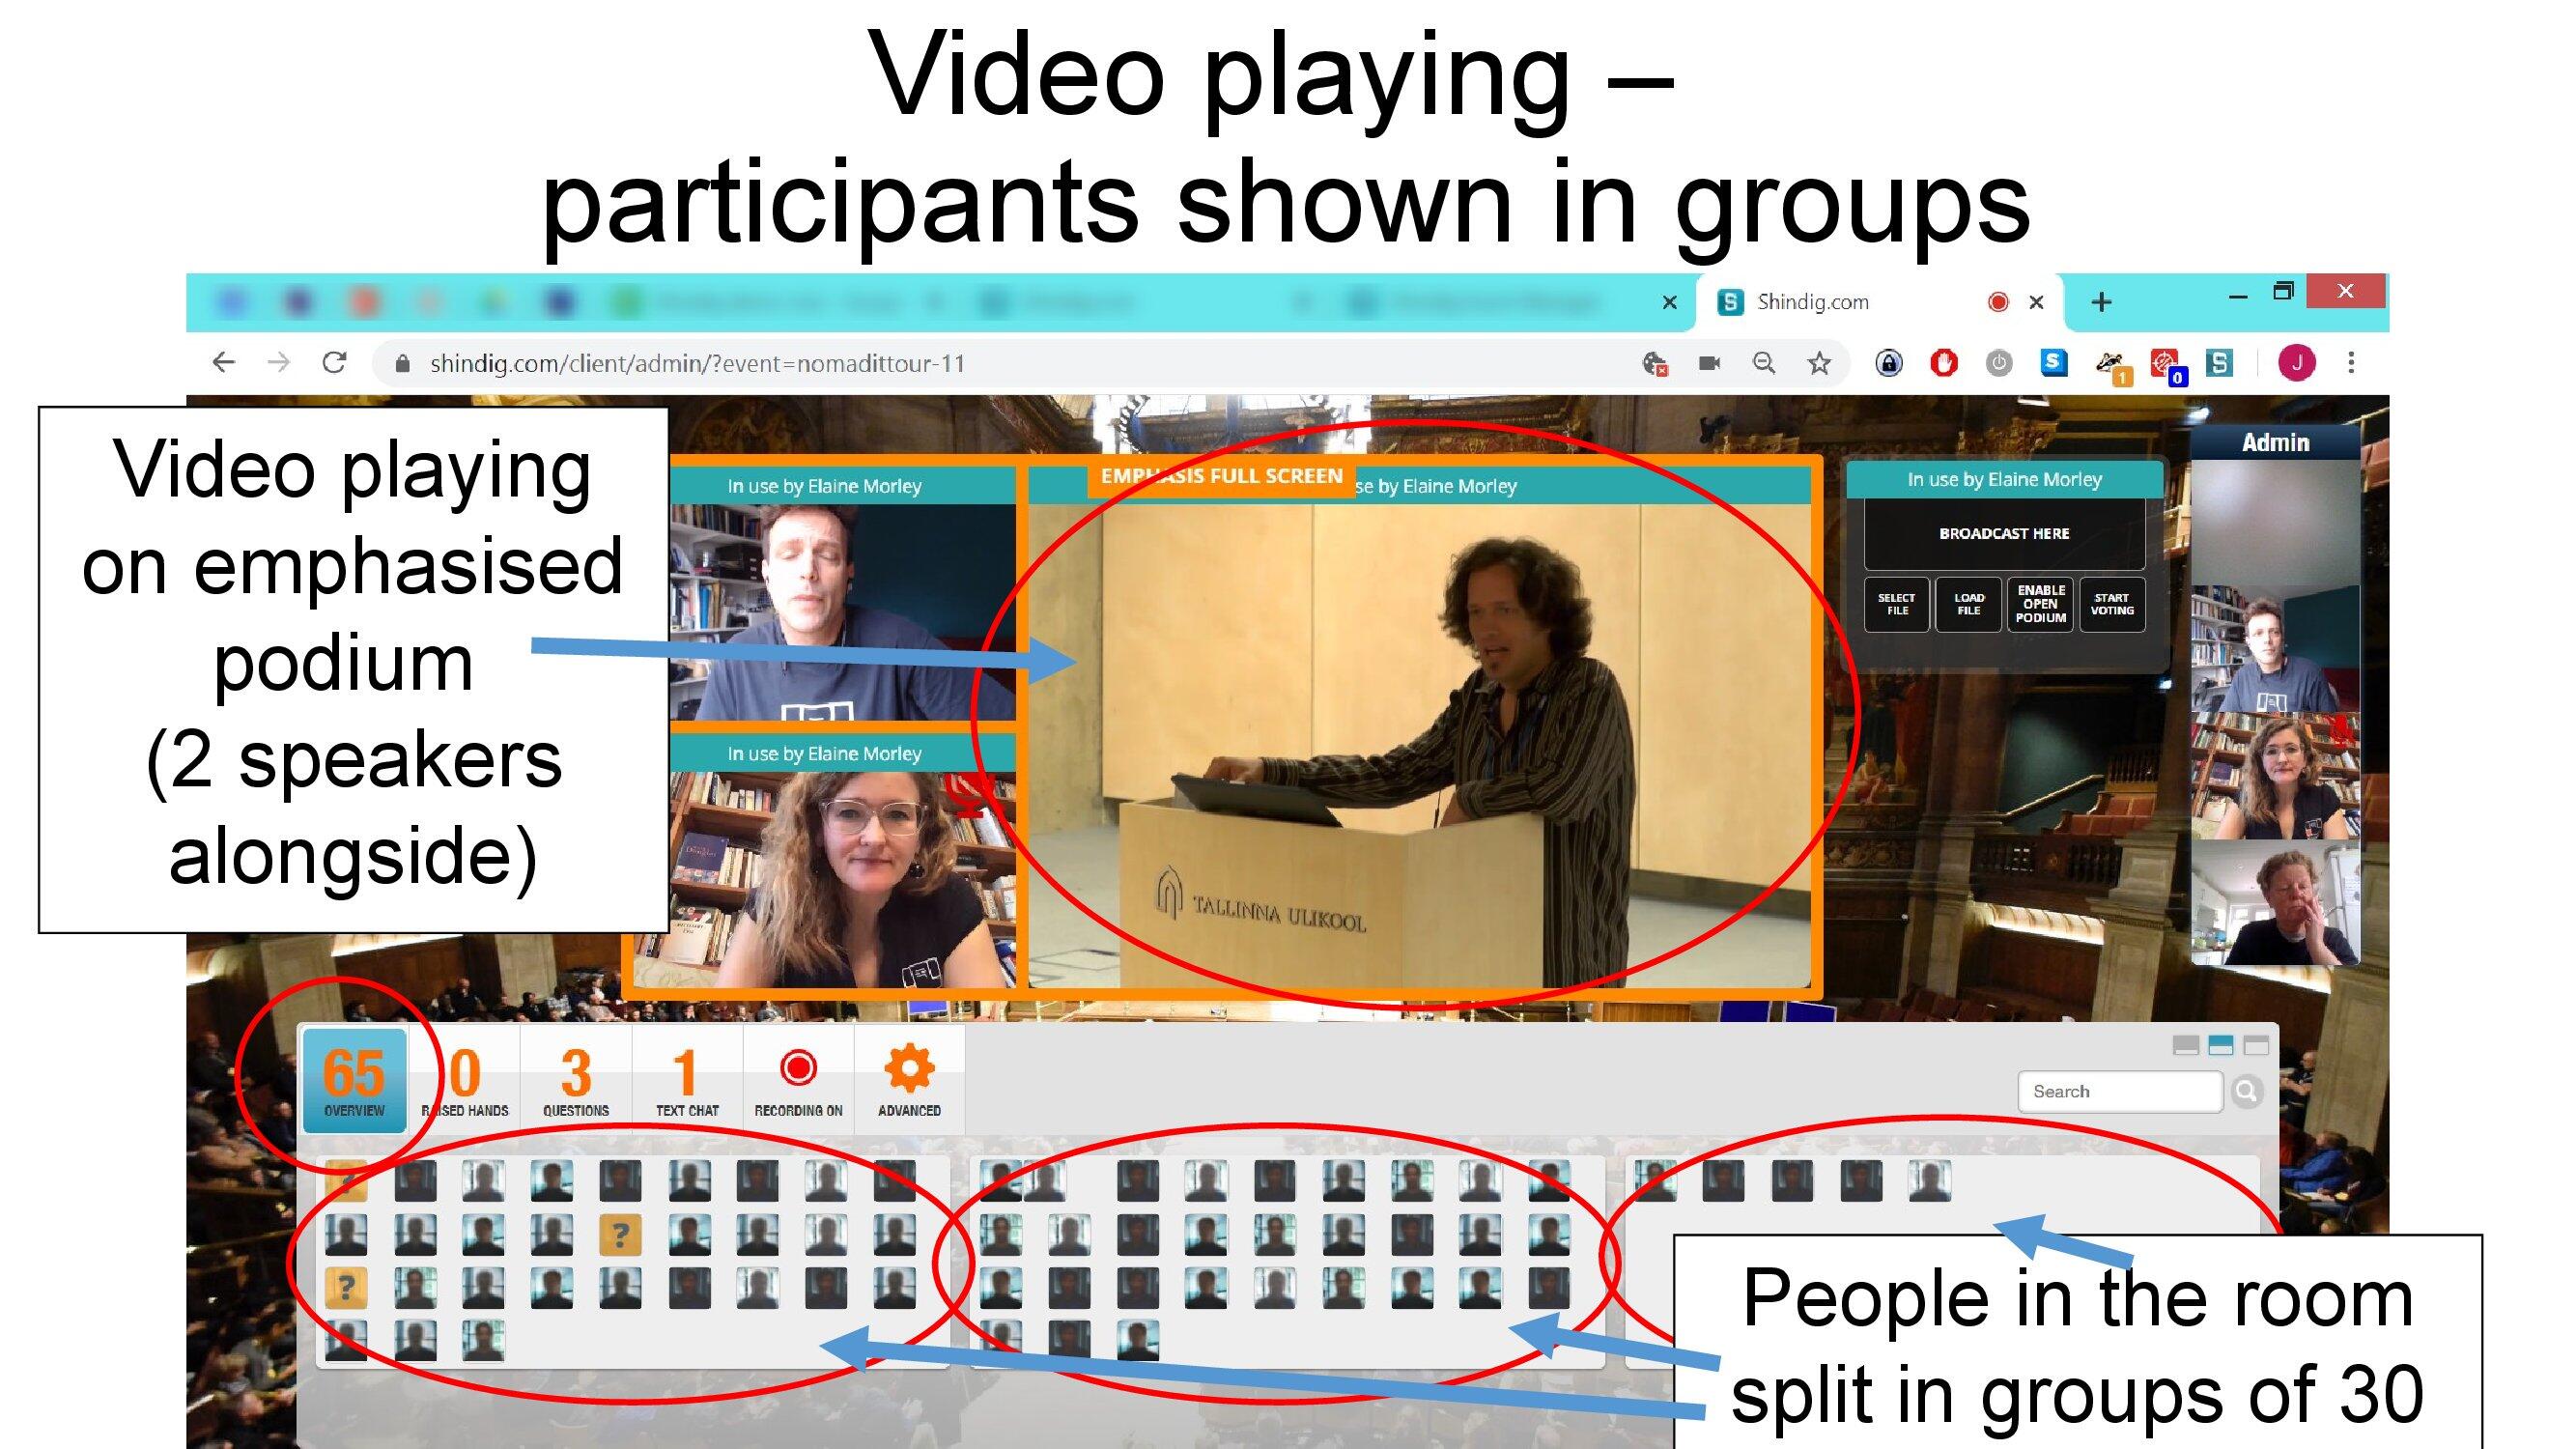
Now emphasise the video.
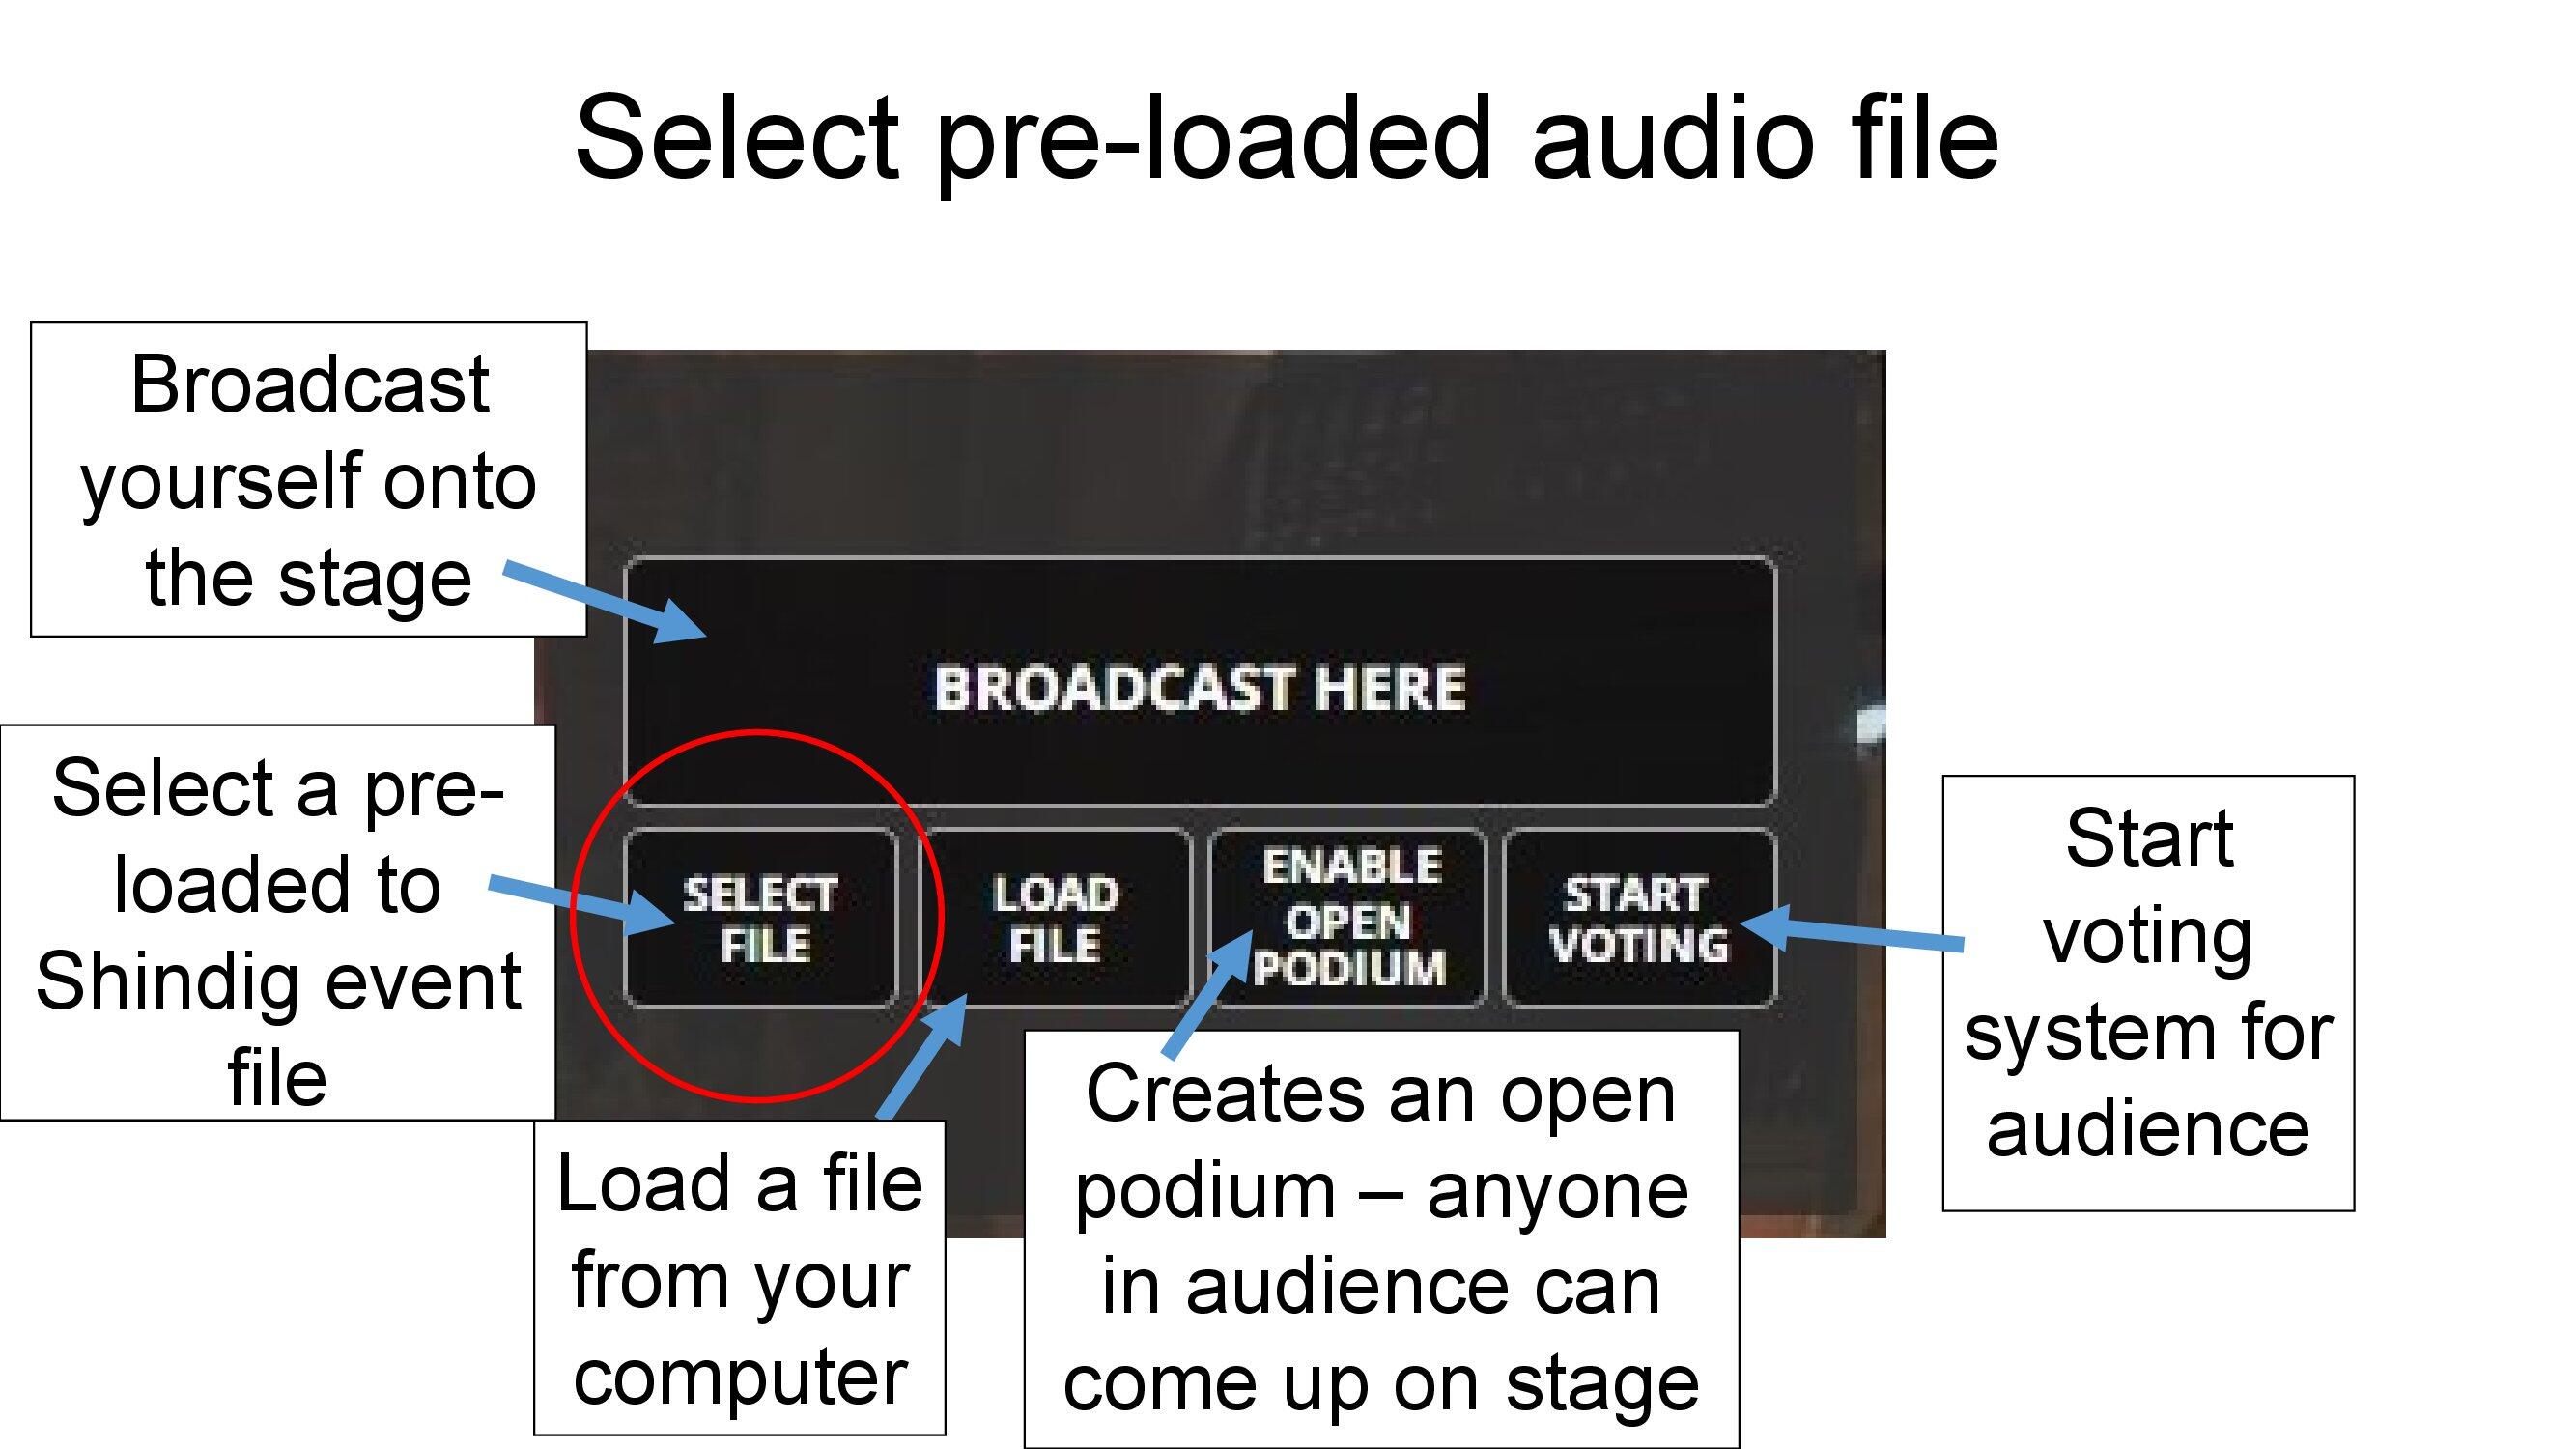
If the presenter requests an audio file, use Select File to place this on a podium.
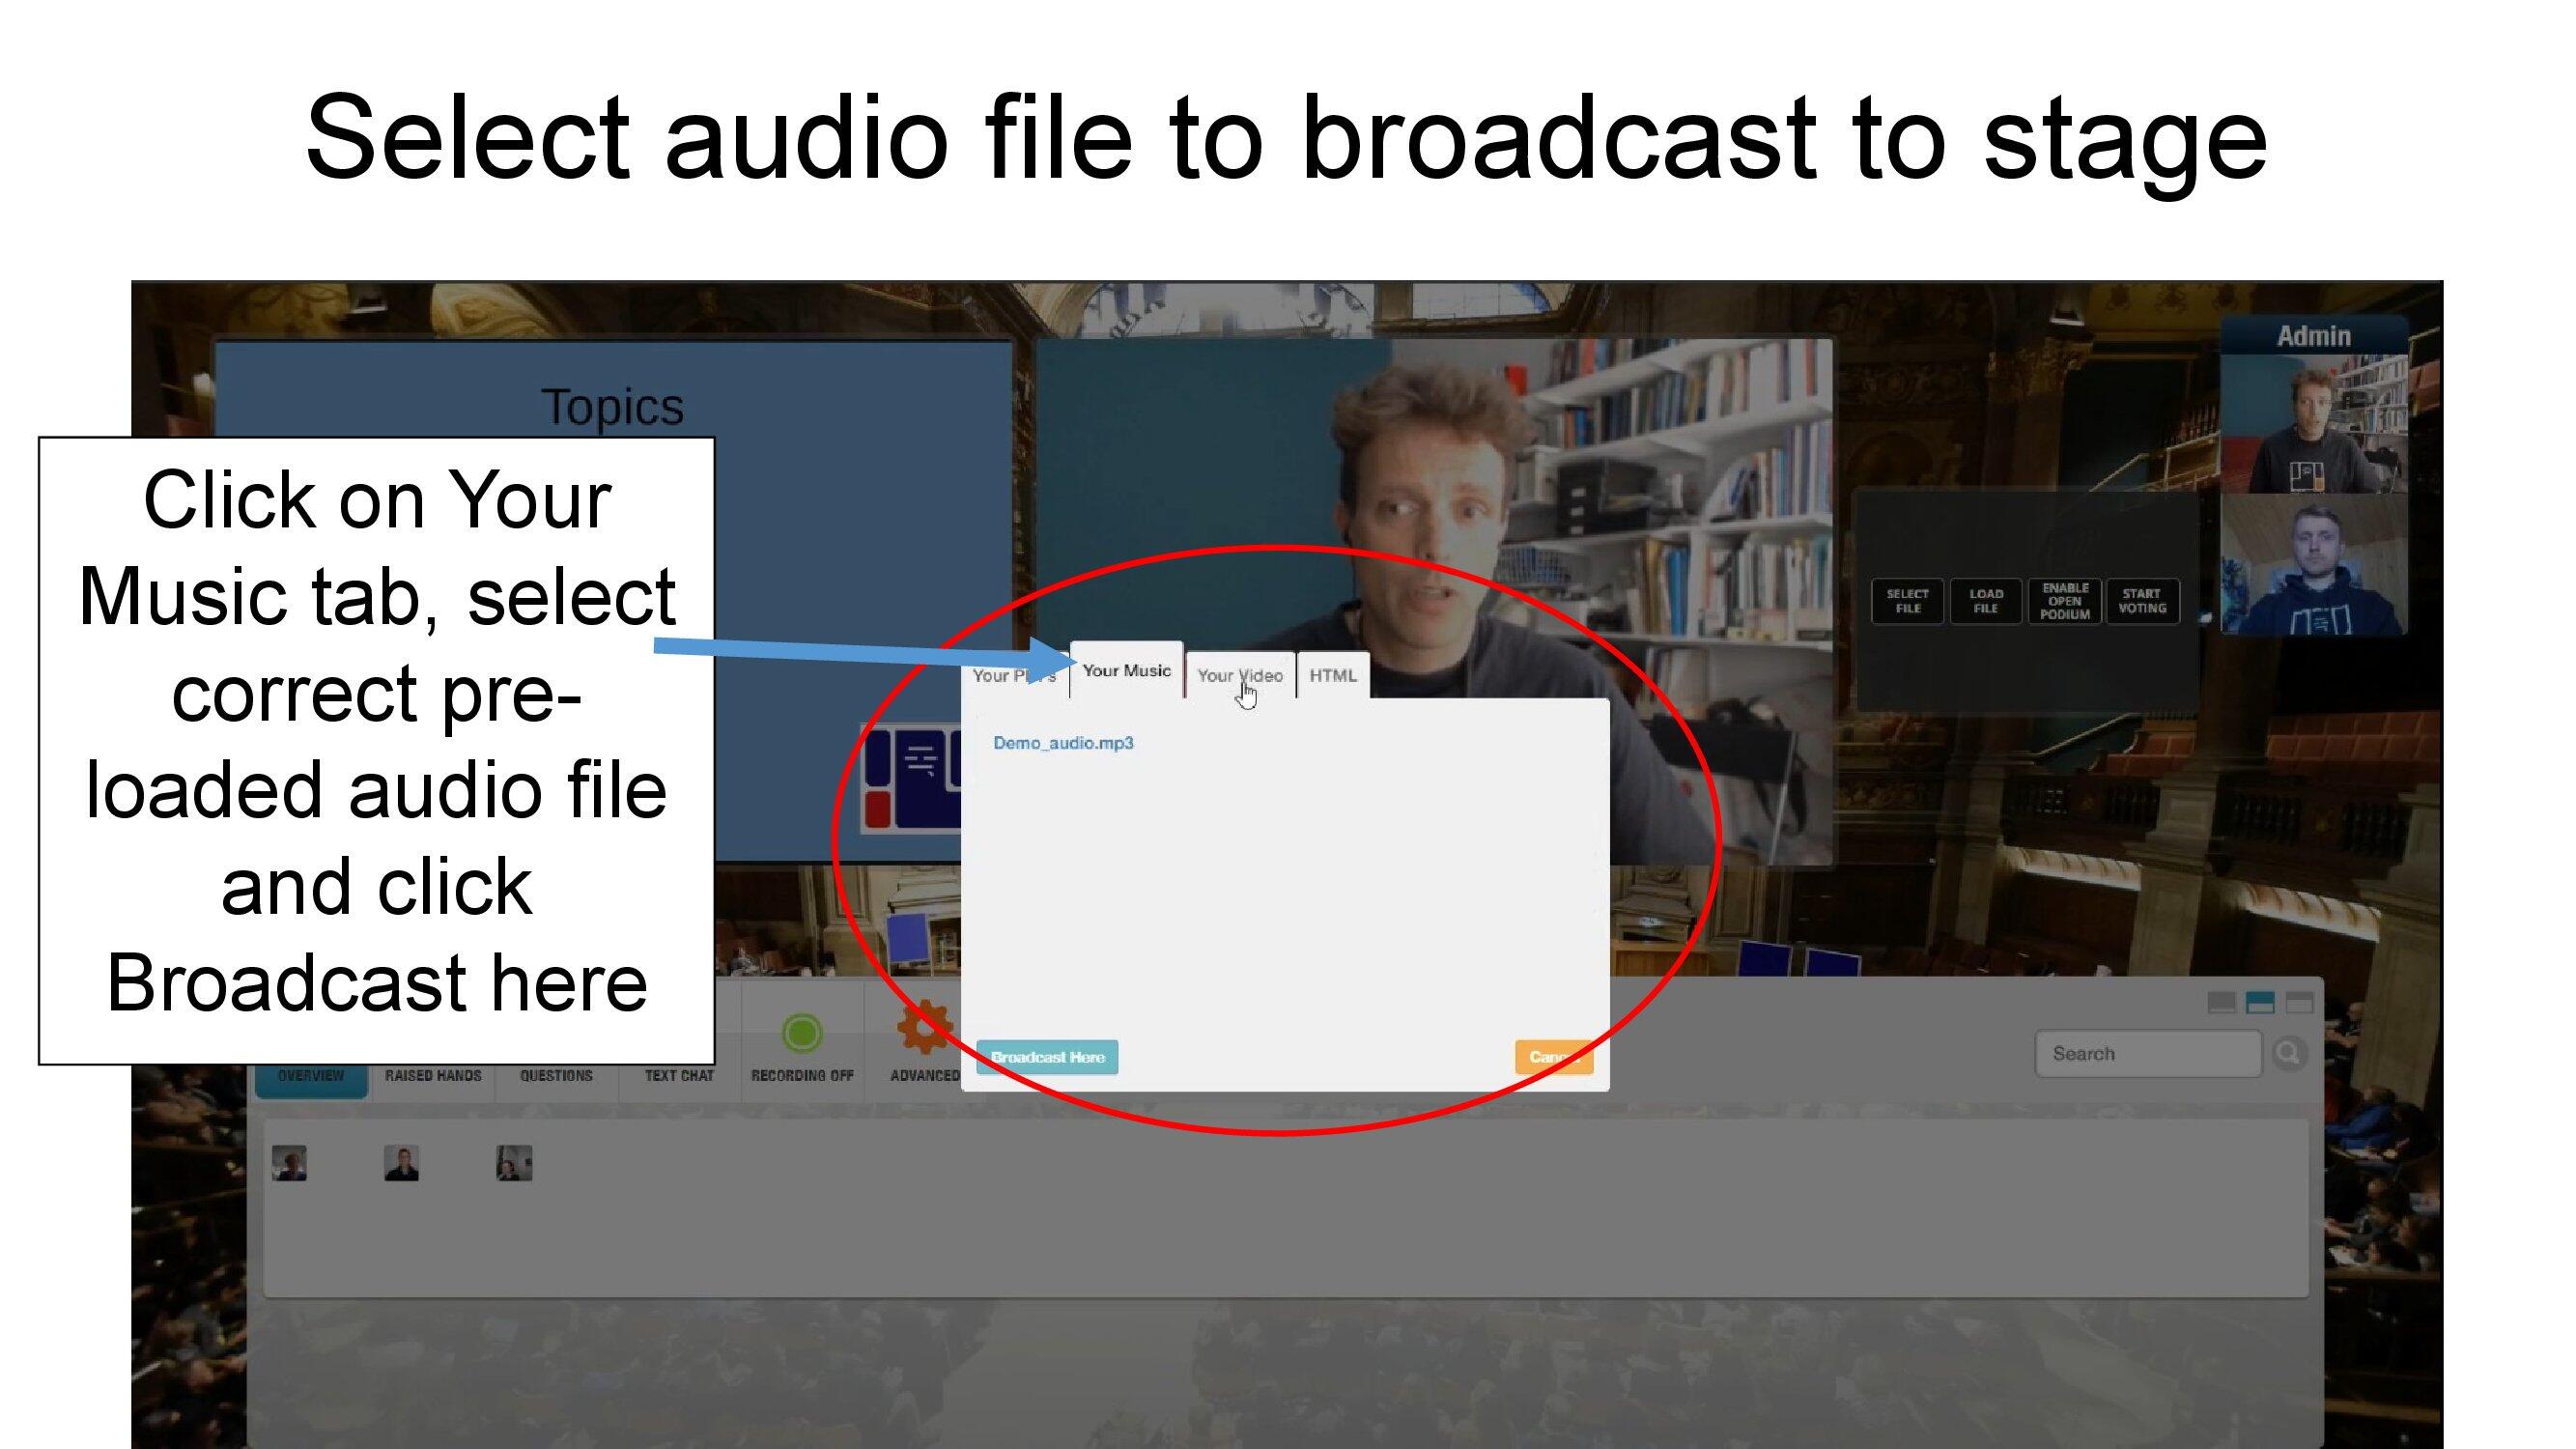
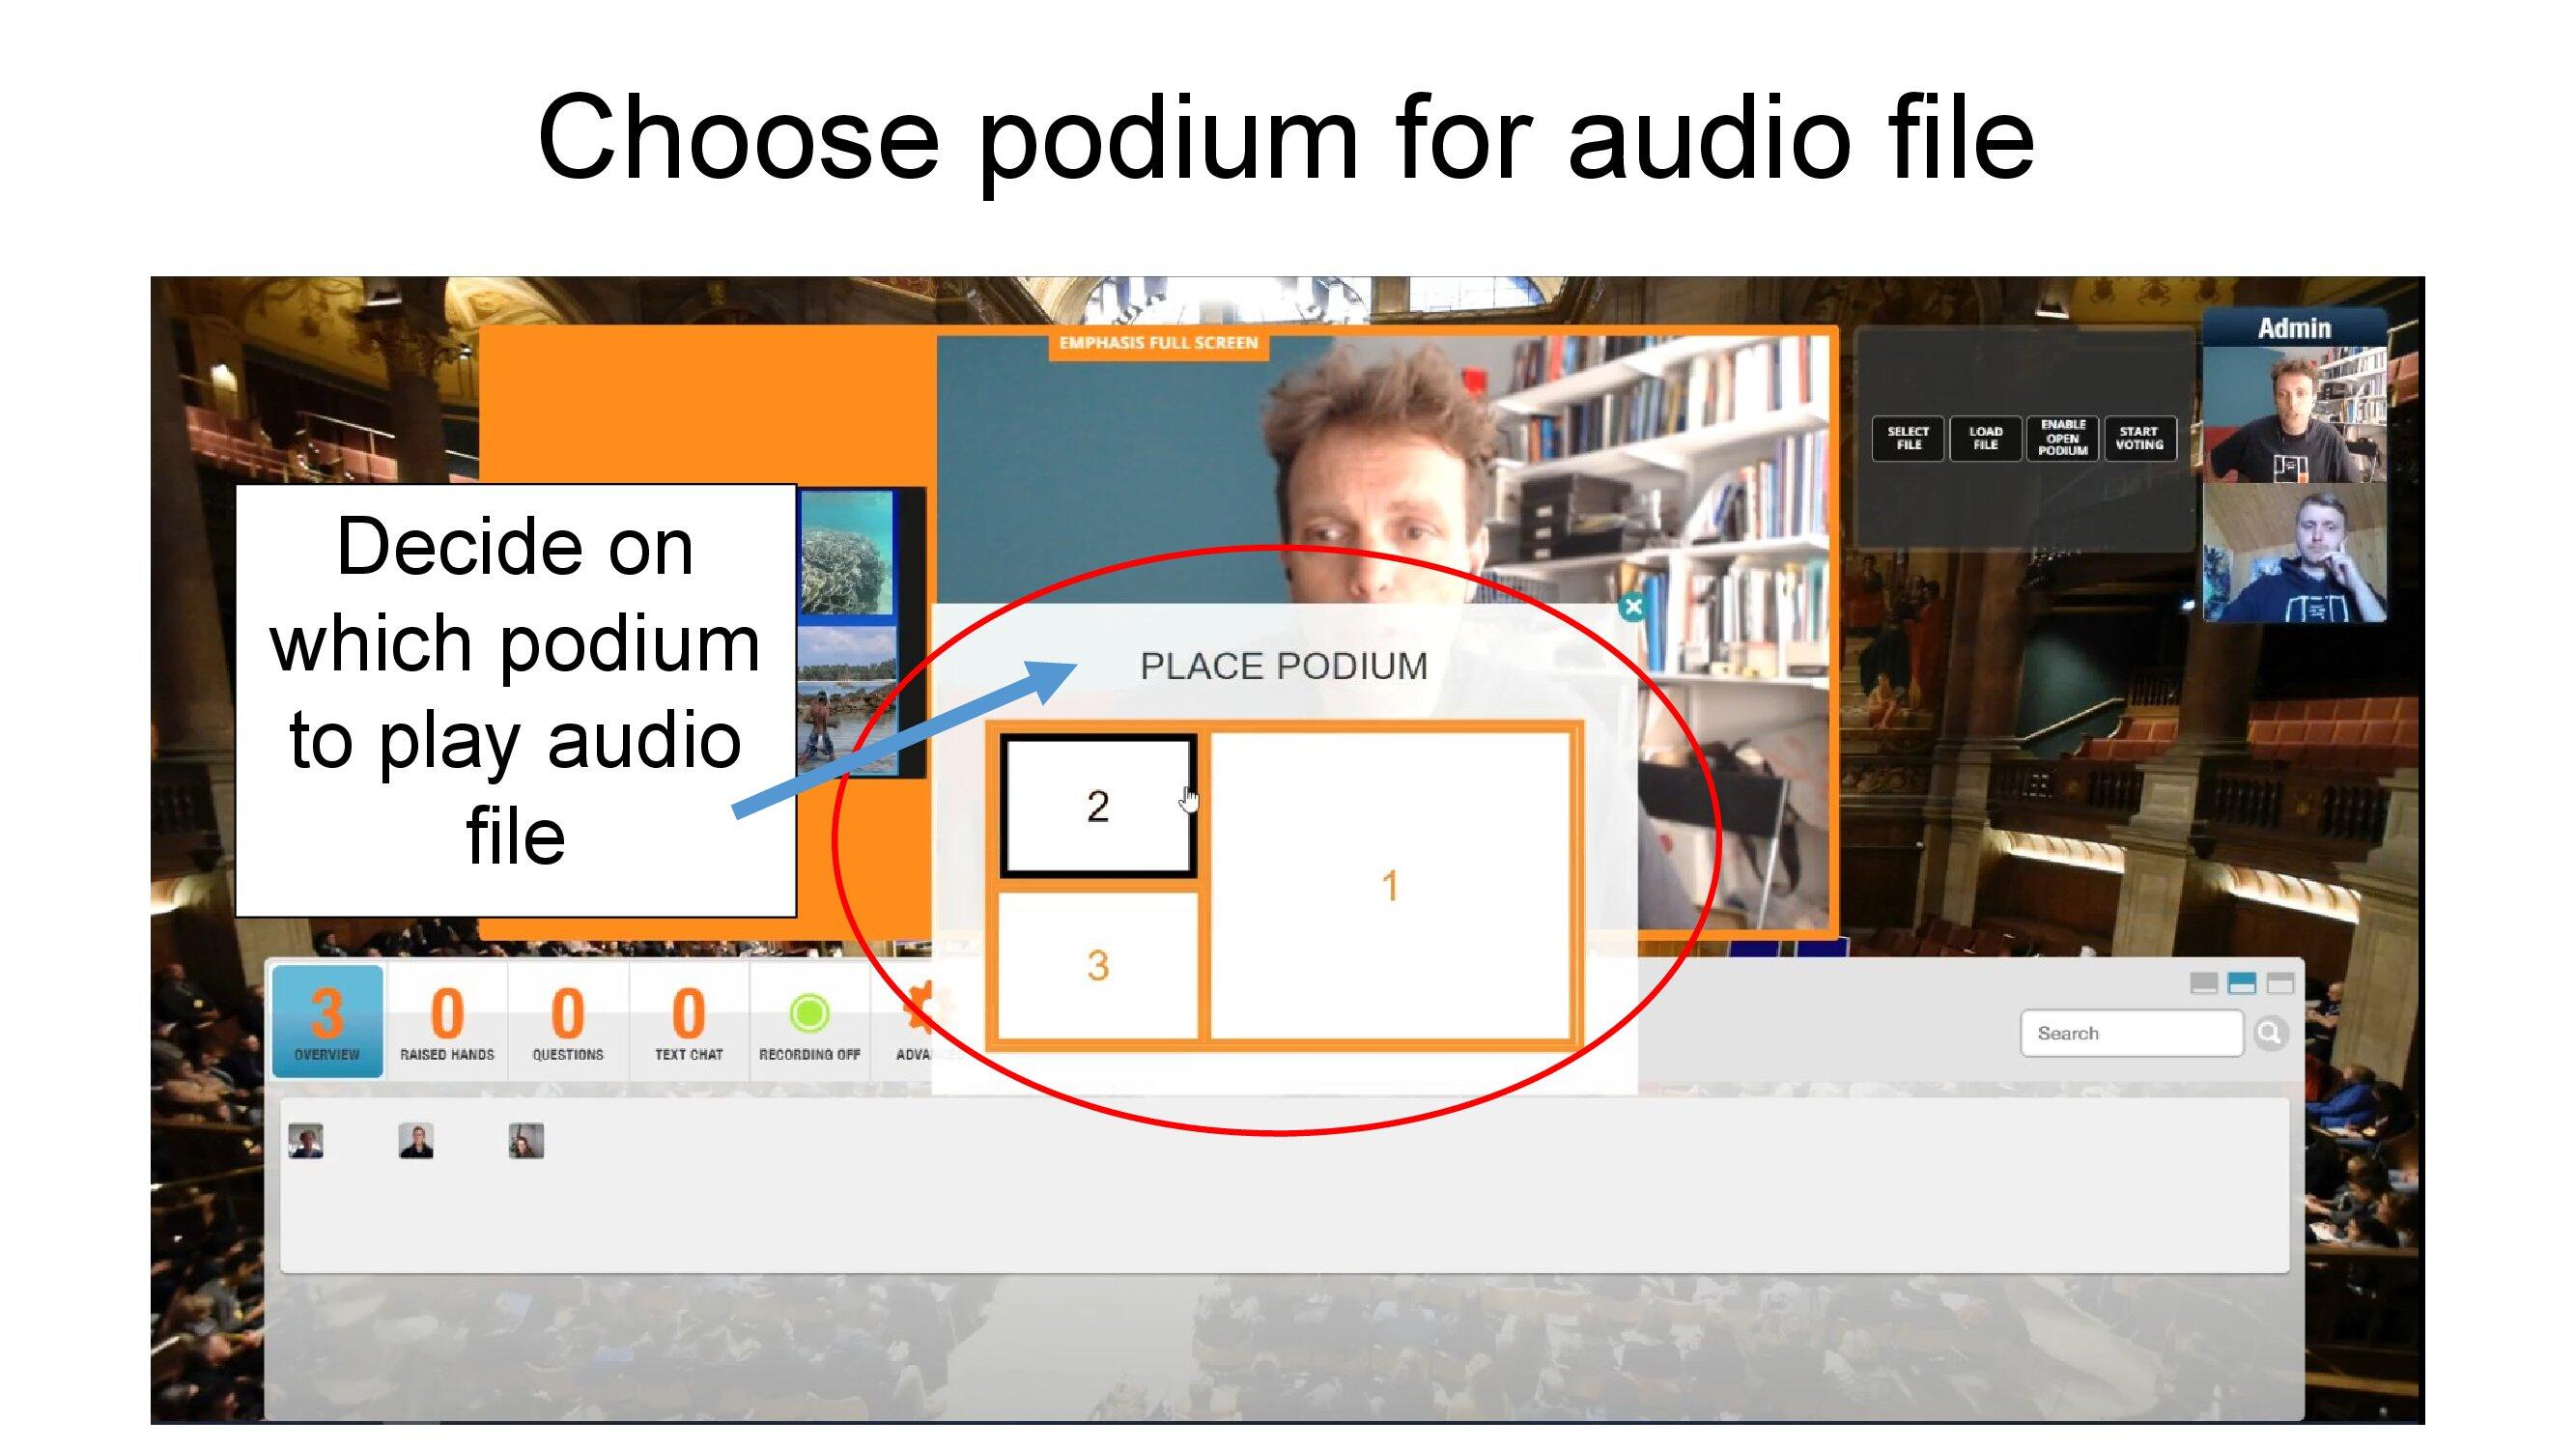
As the audio file displays as sound waves, the podium does not need to be emphasised.
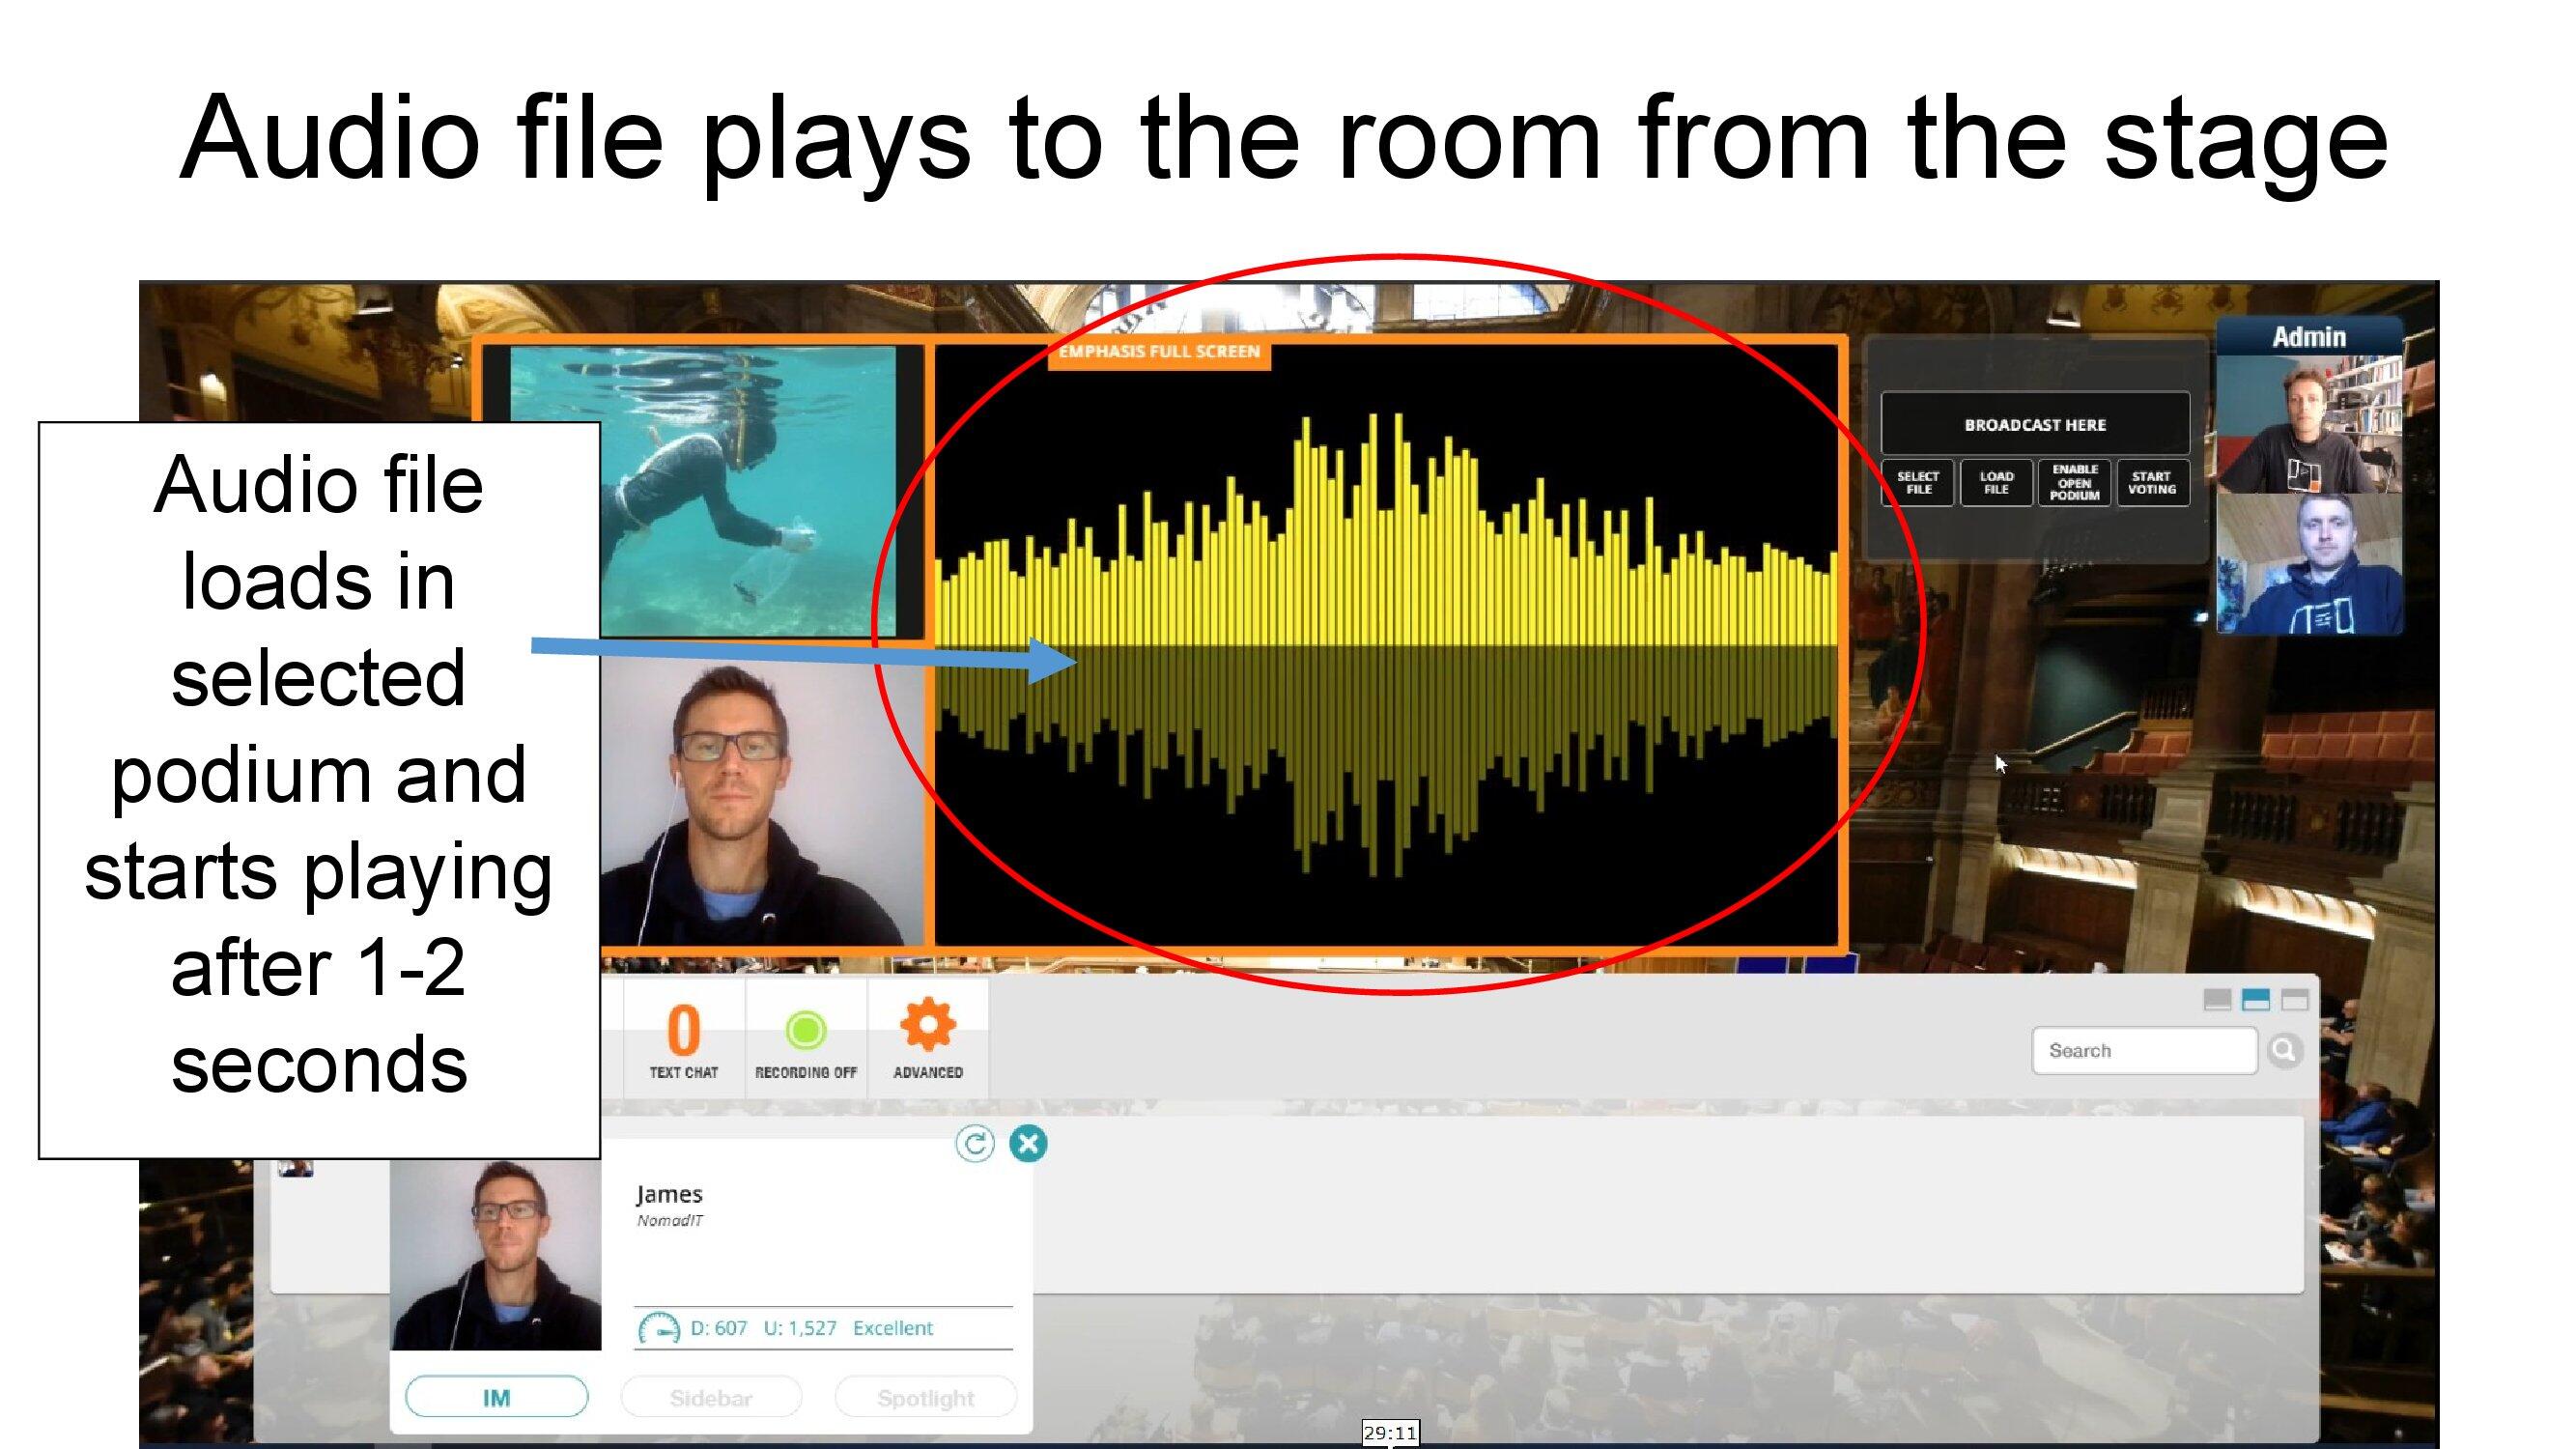
It is worth an admin (perhaps the volunteer) keeping an eye on the Chat window in case the audience report not hearing the file. You might need to take podium down, refresh, and select file again.
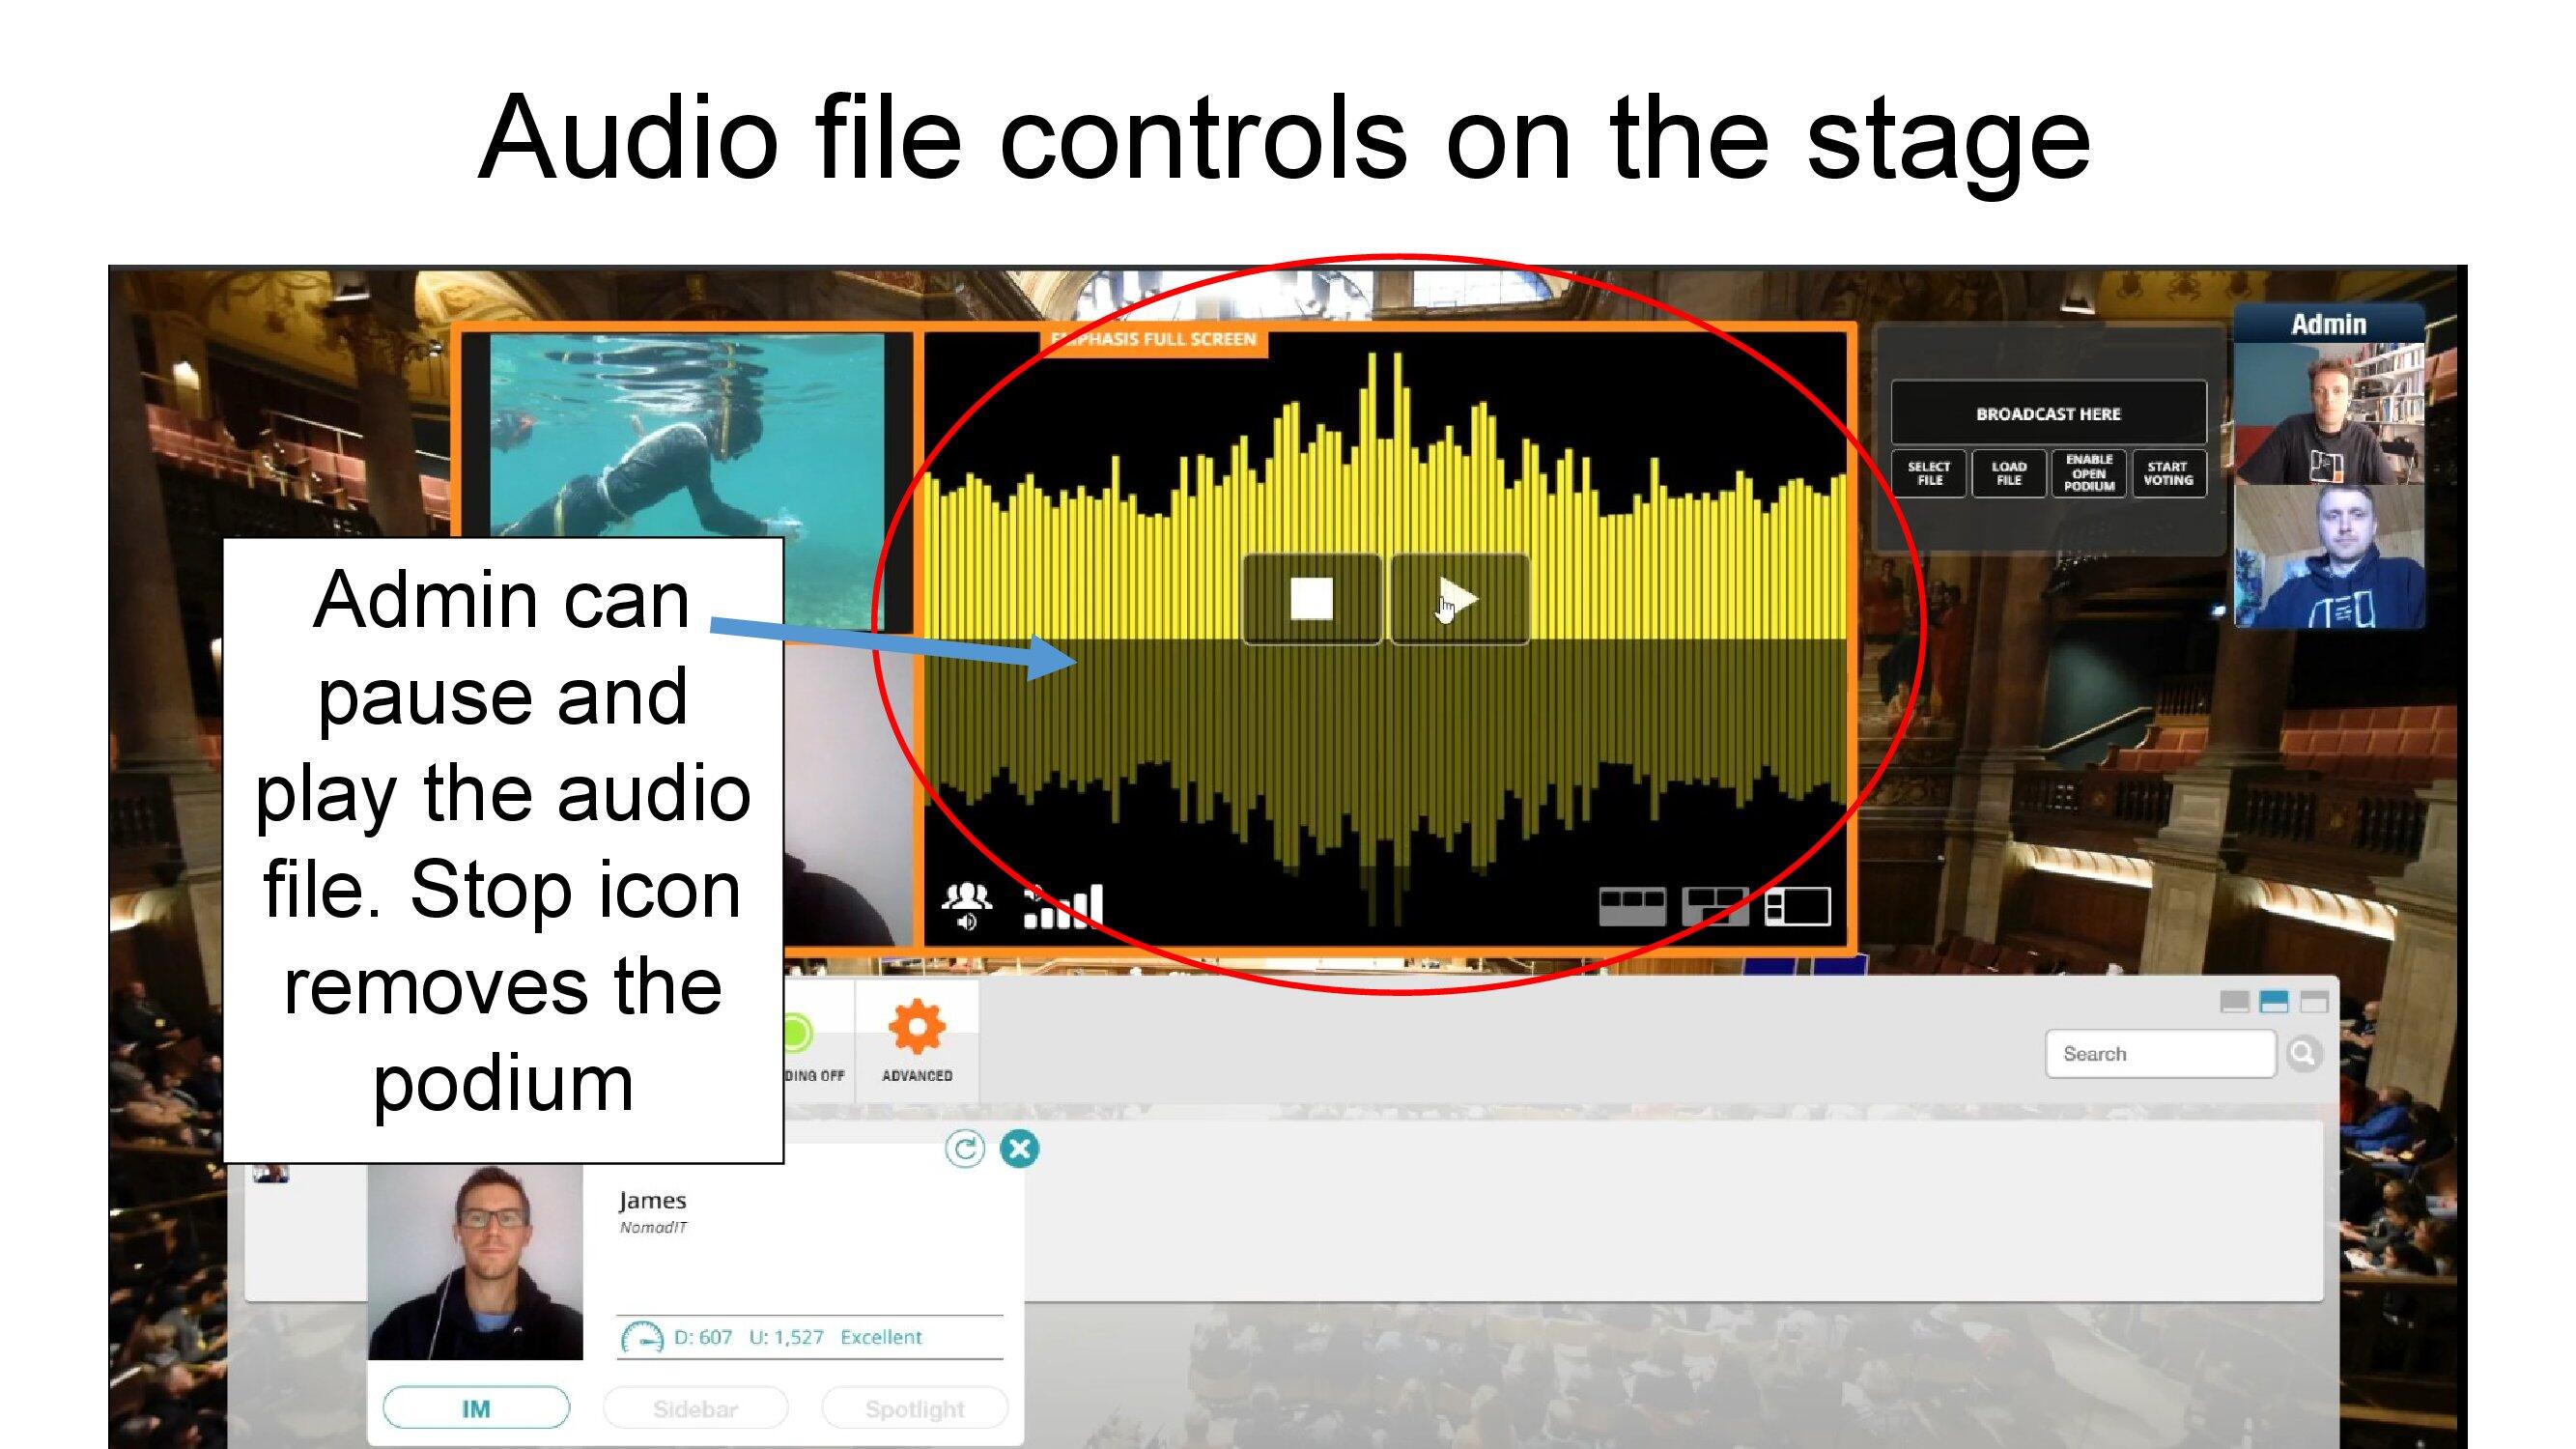
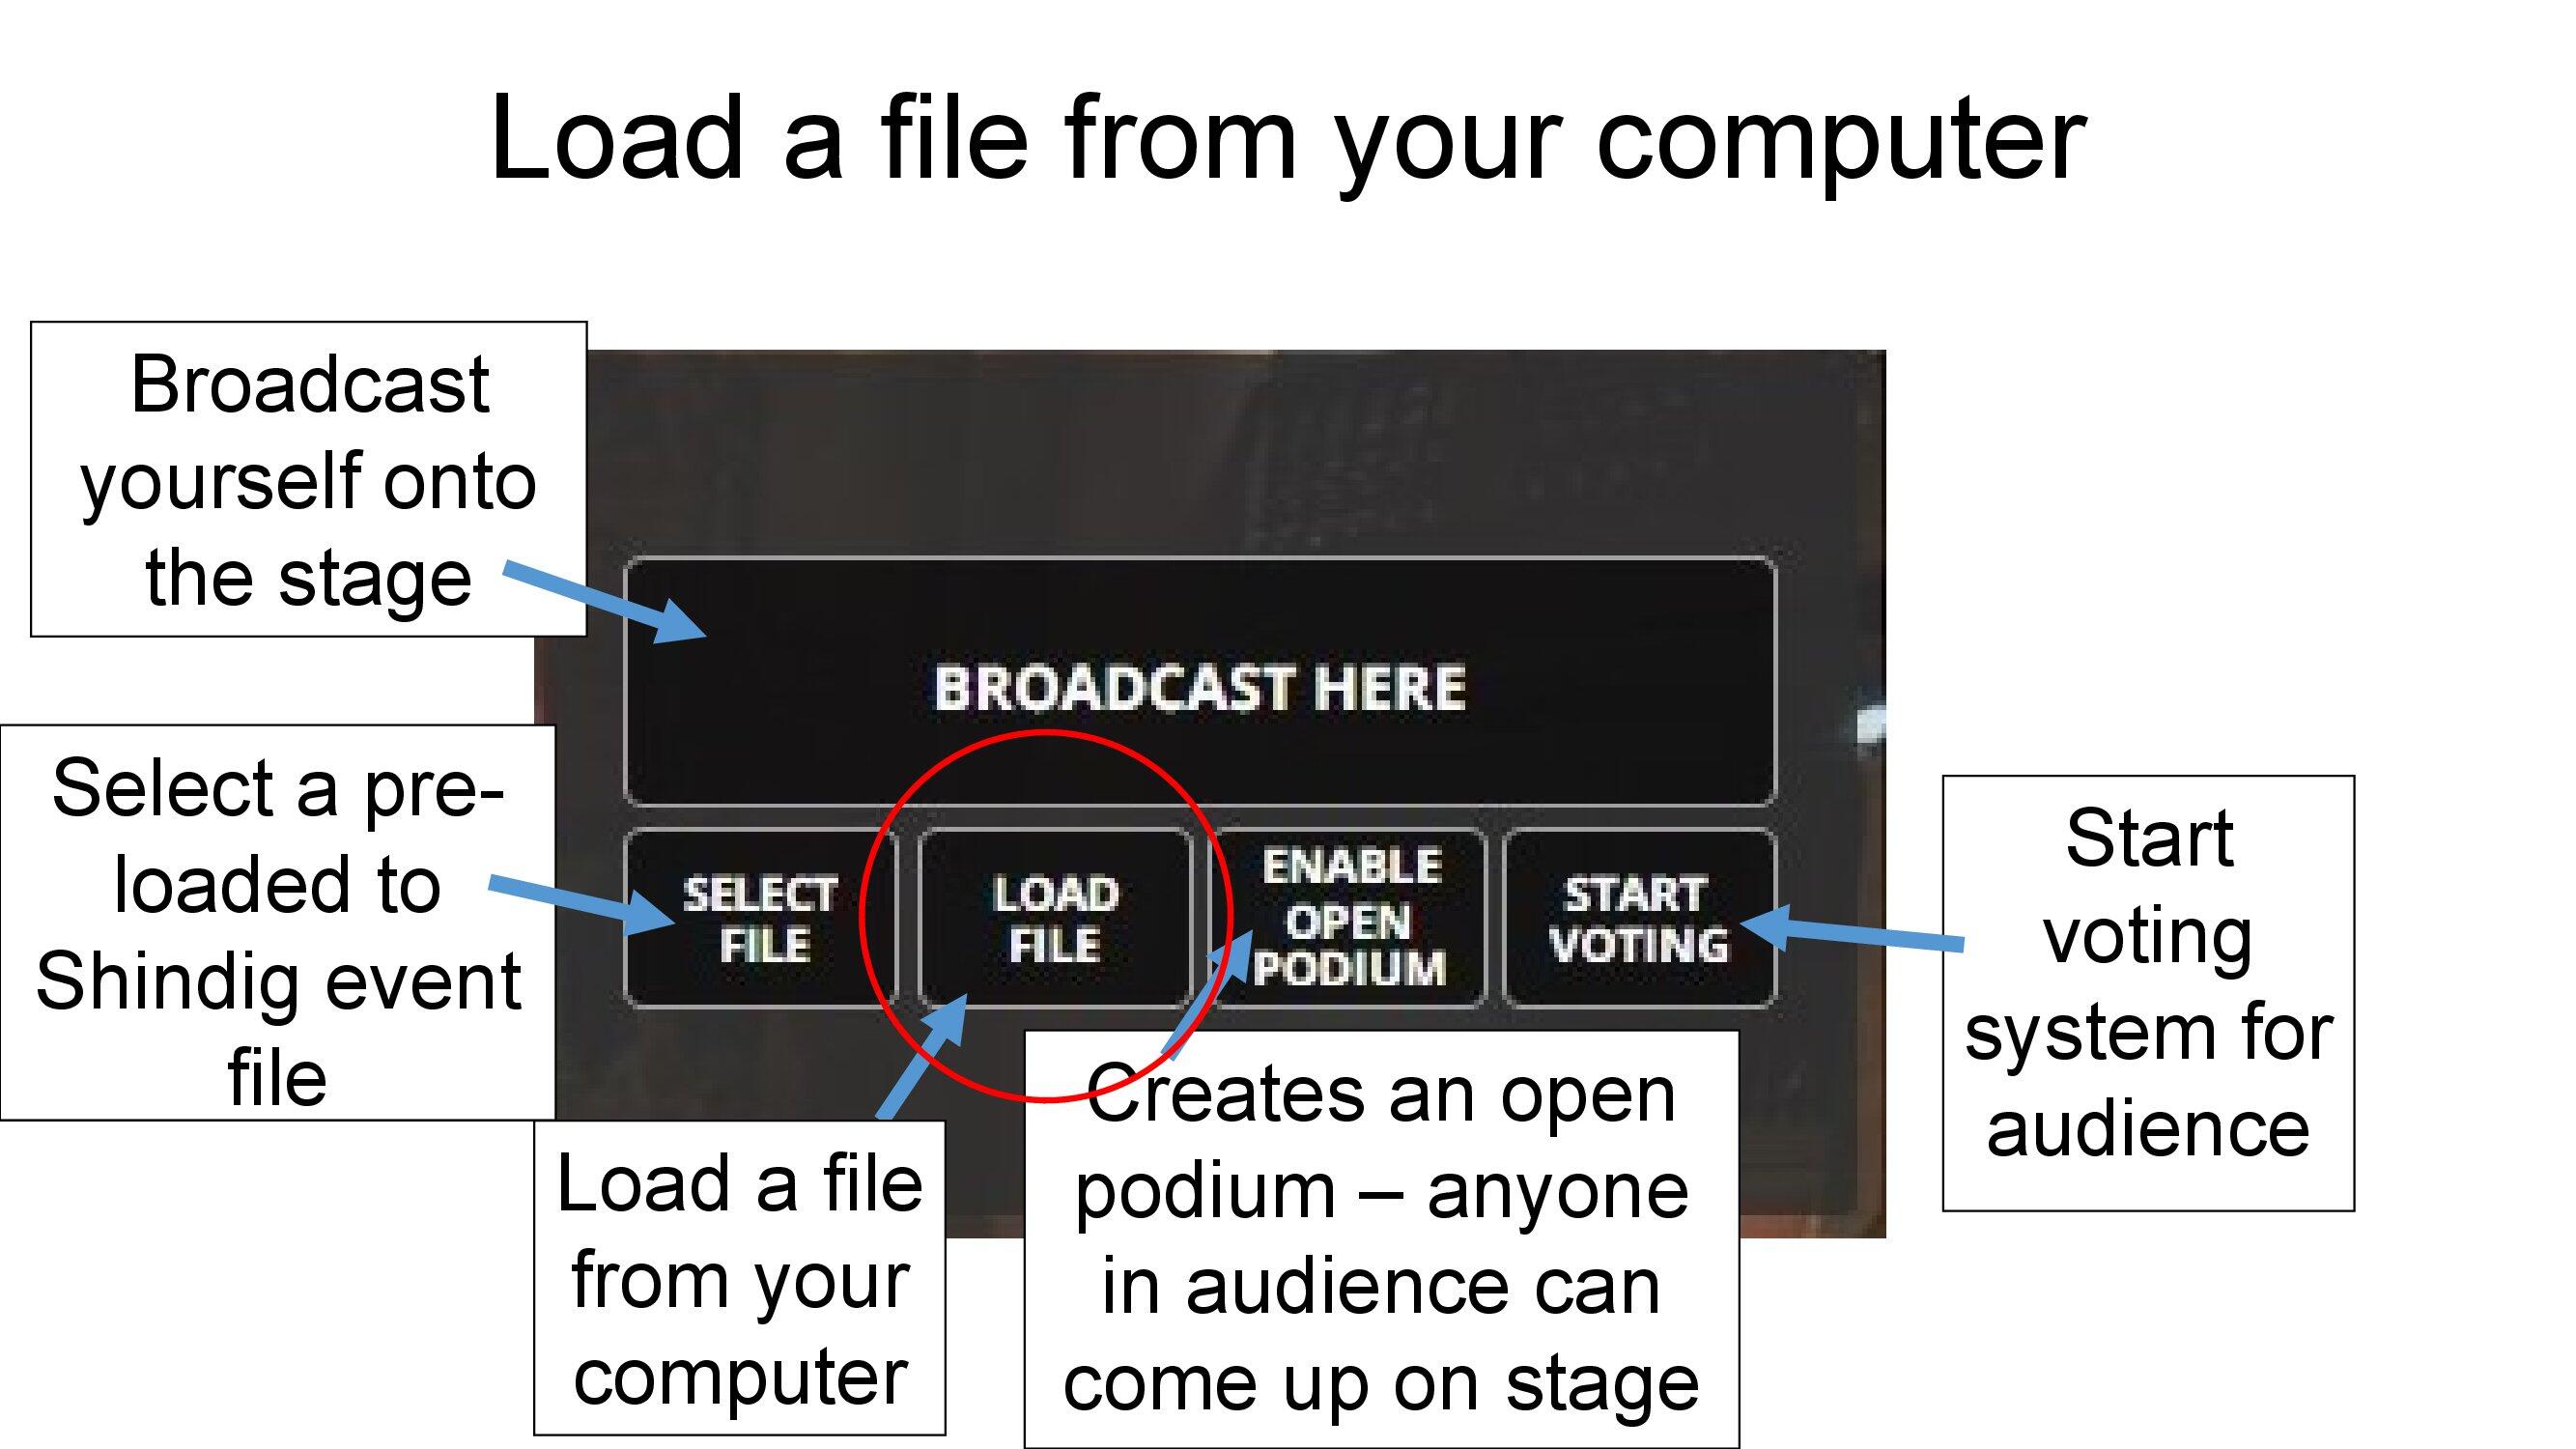
If a file is needed which has not been pre-loaded, use Load File to upload it.
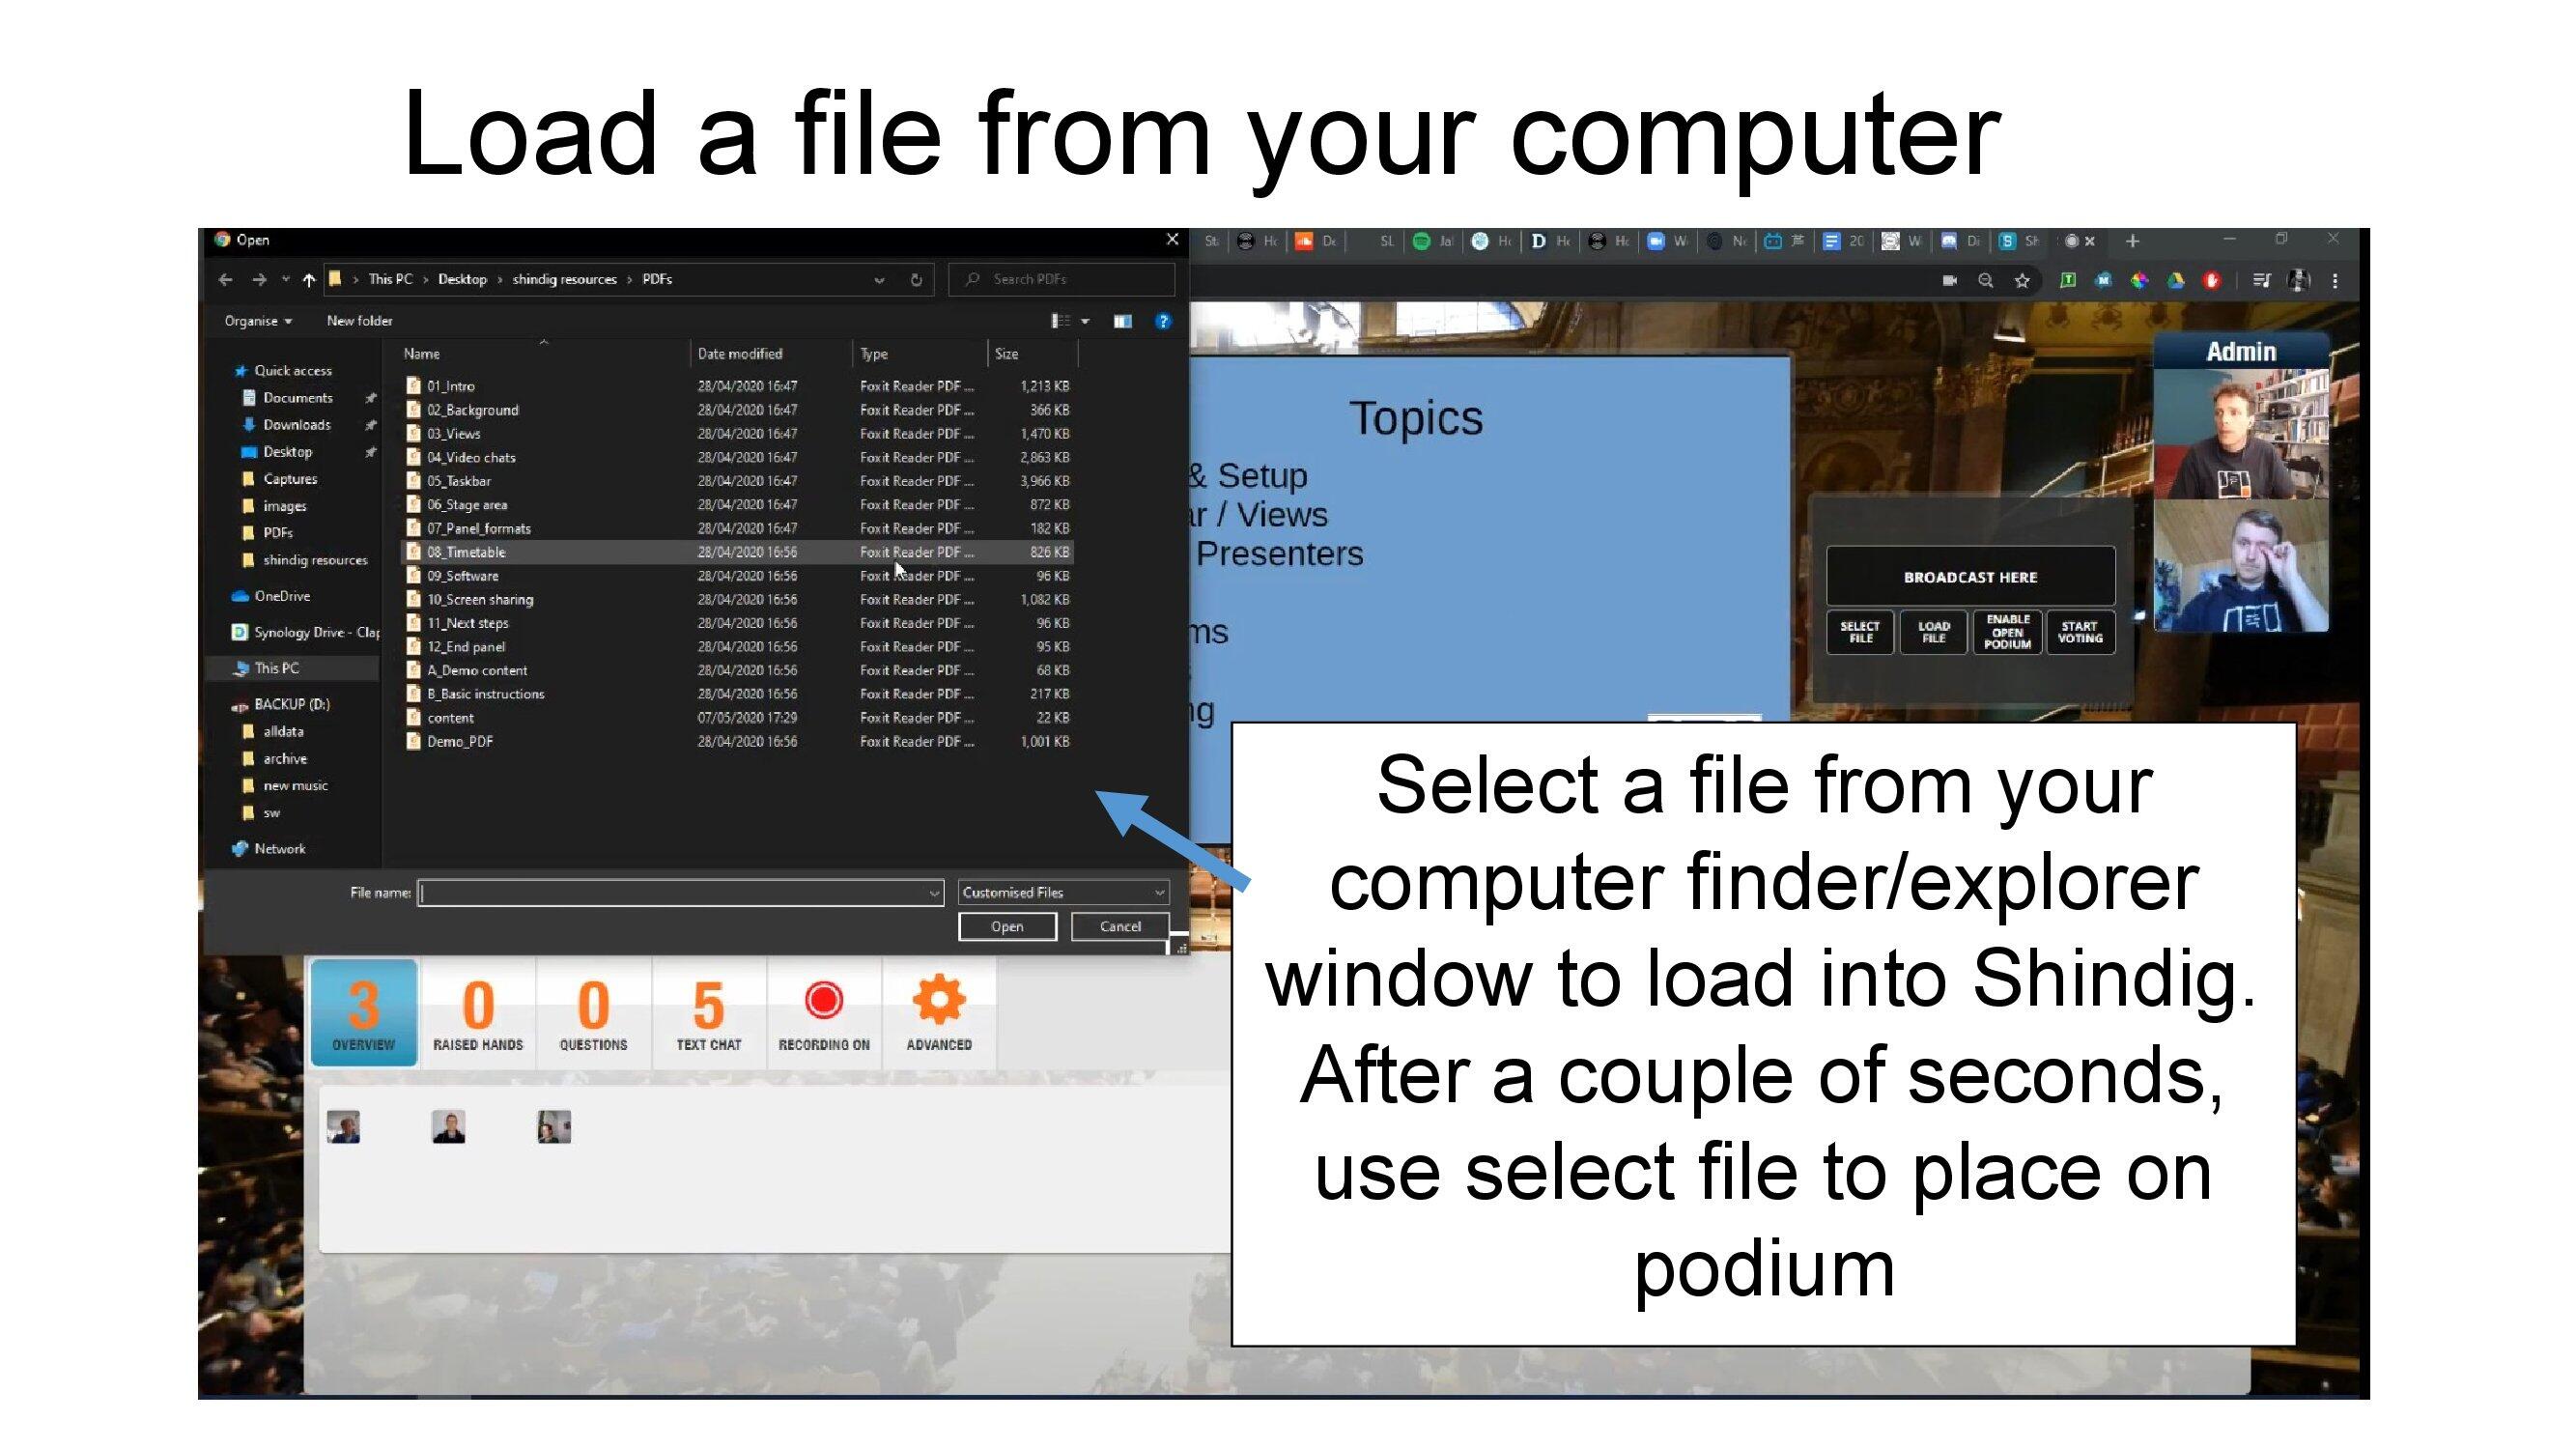
Once the file has uploaded (slight delay for larger files), display it on the podium using Select File.
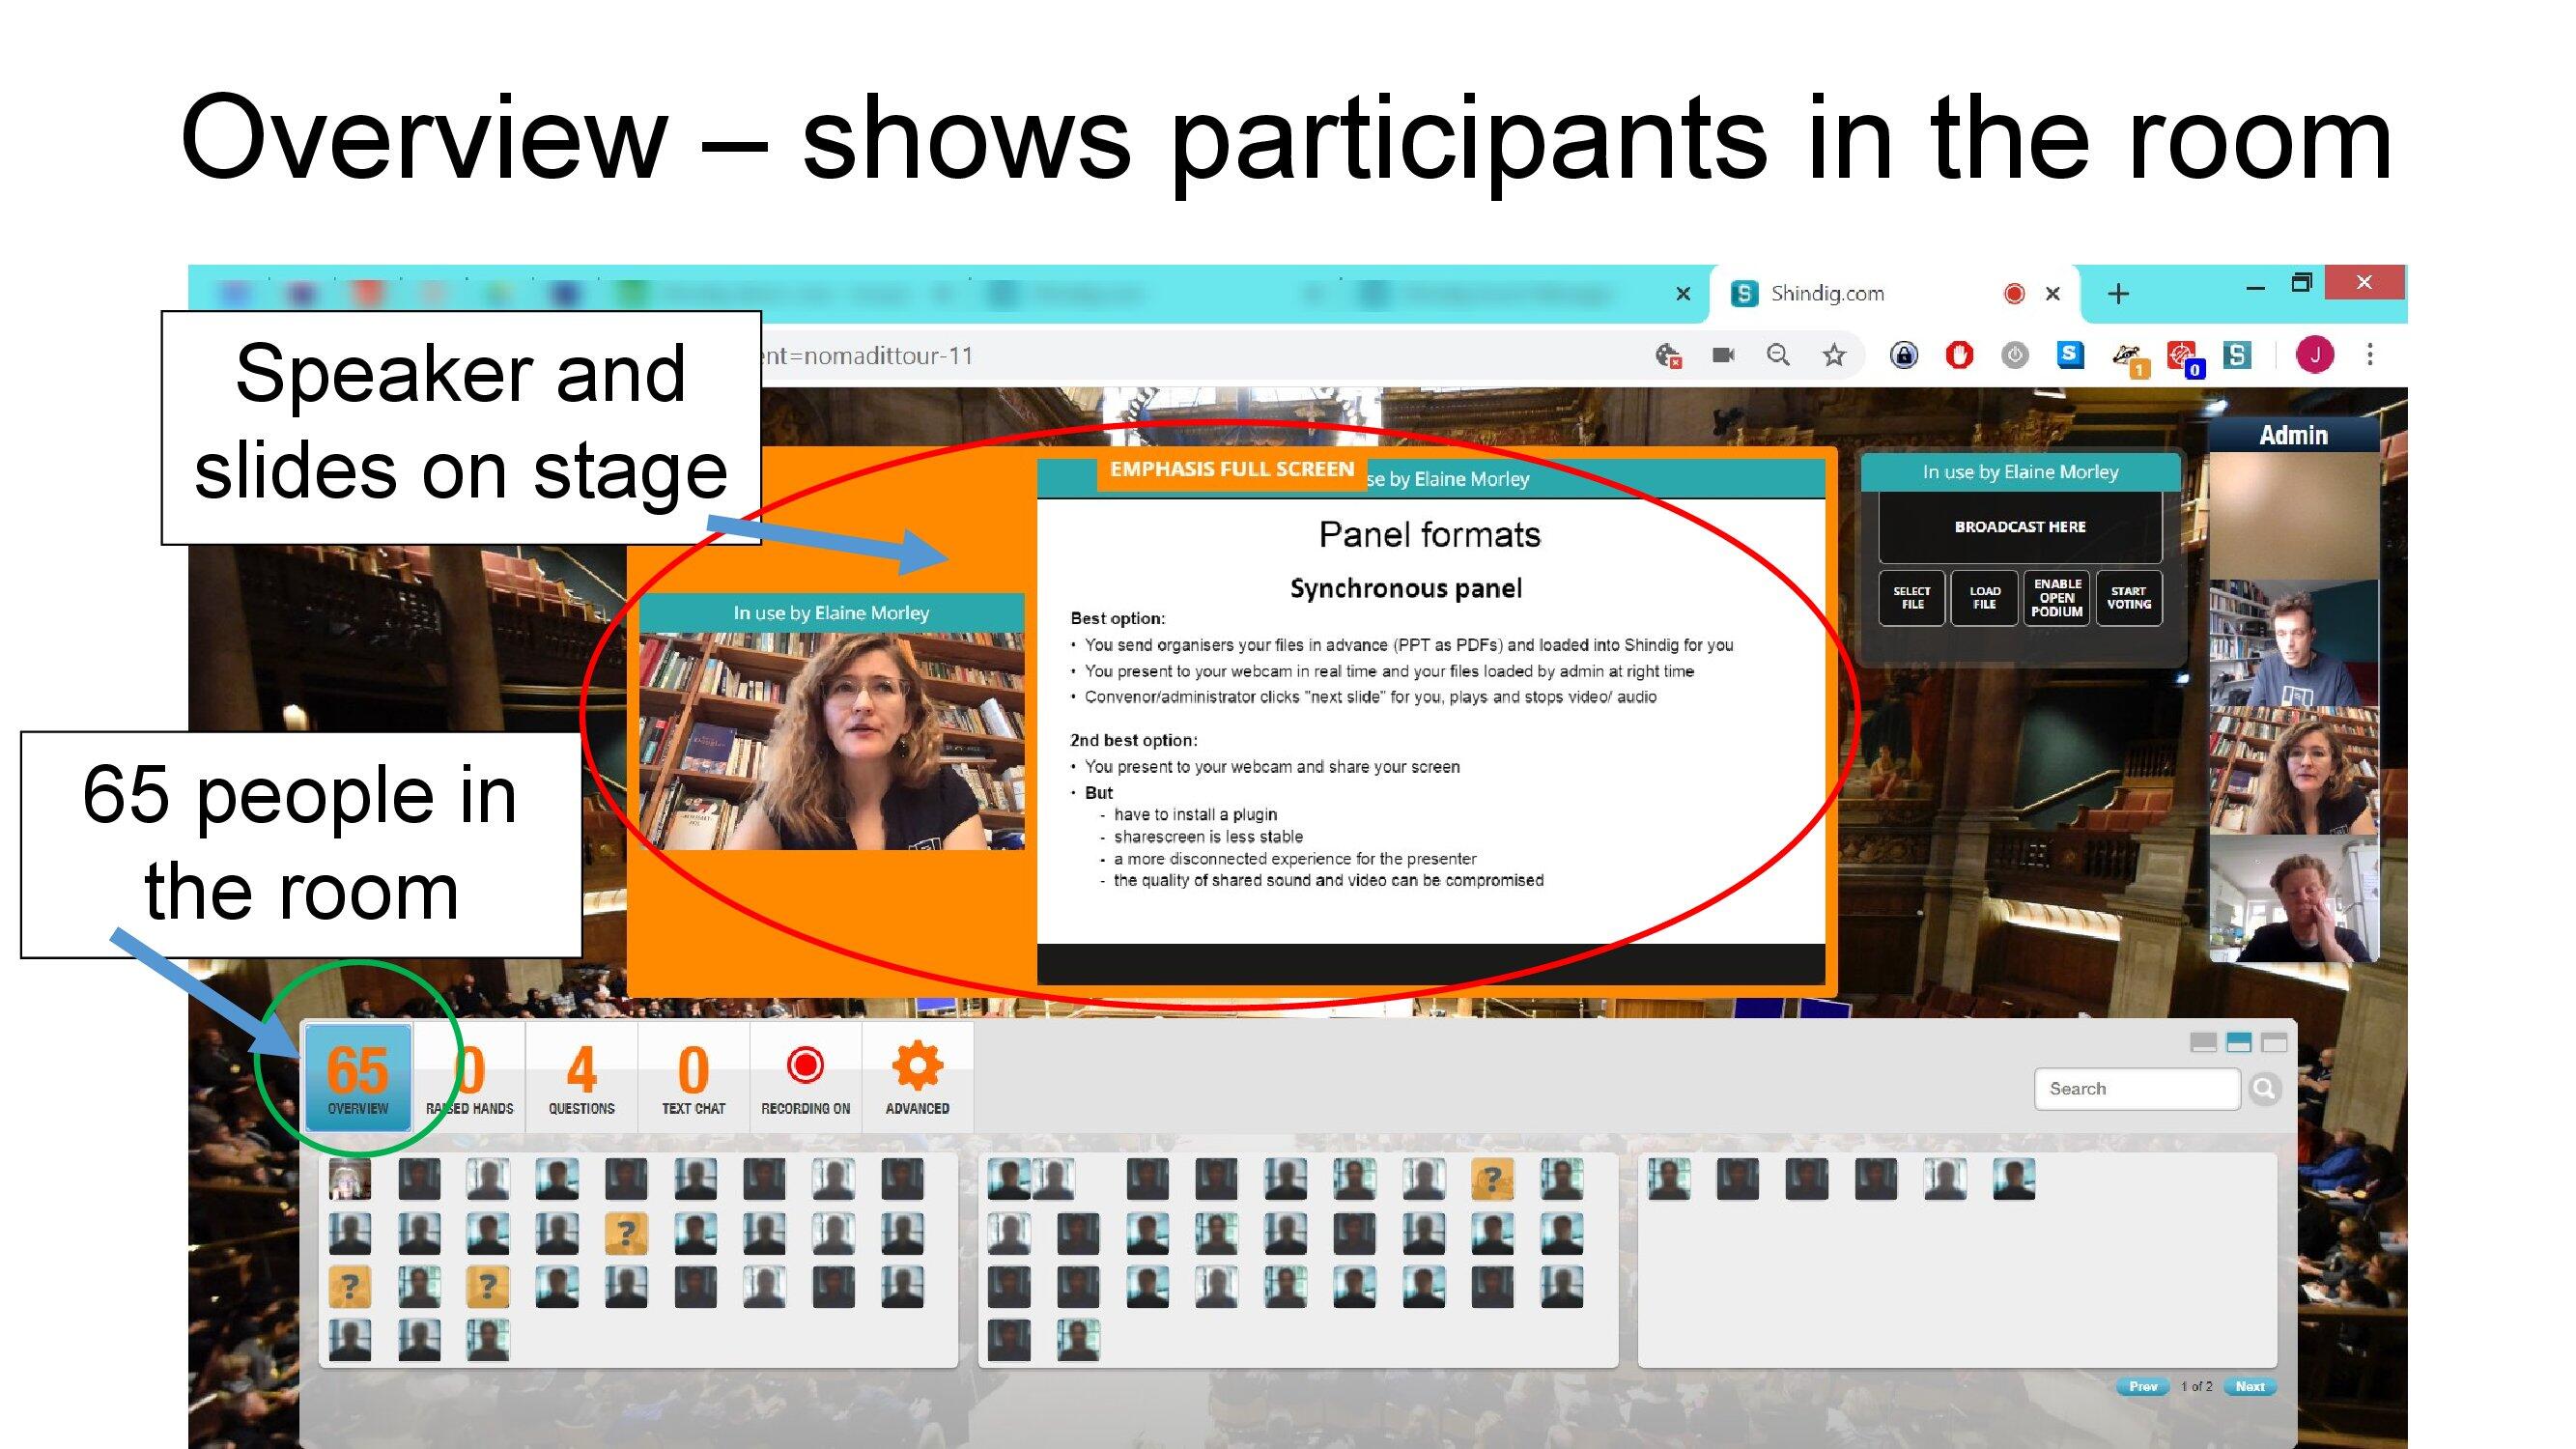
The attendees are divided into groups of 30.
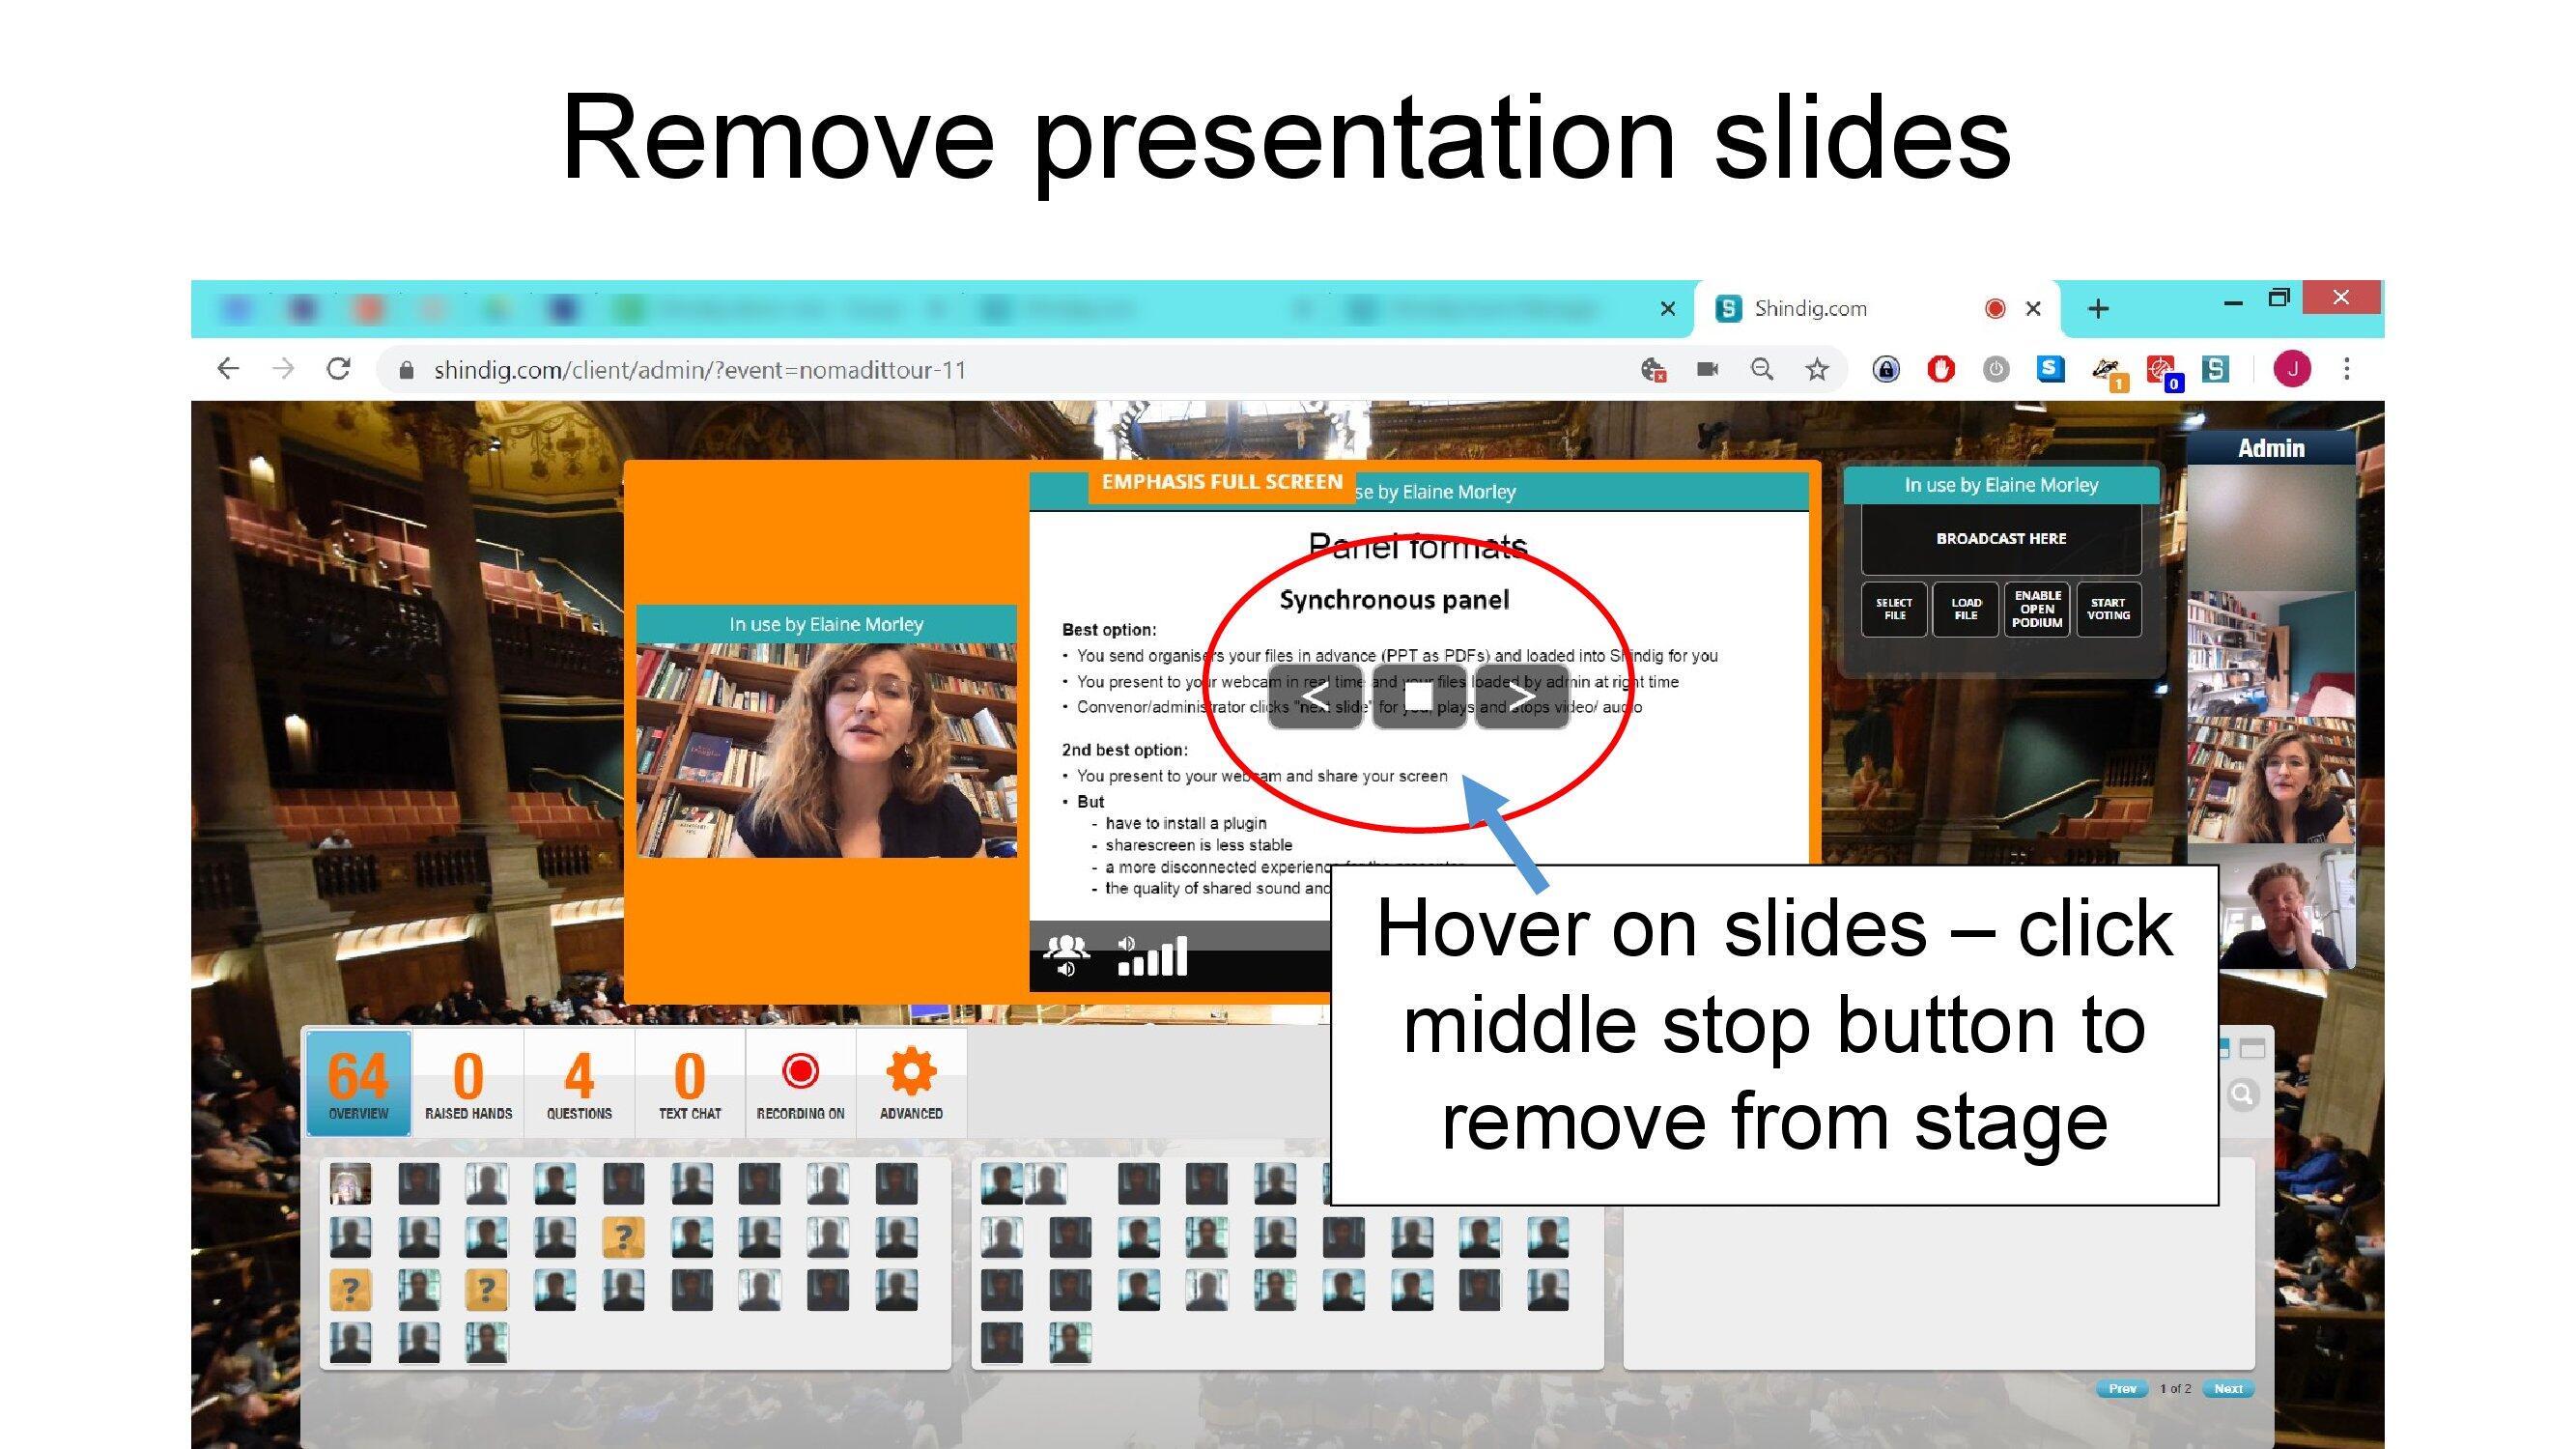
When the presentation is over, take down the slides by closing that podium.
4. Taking questions
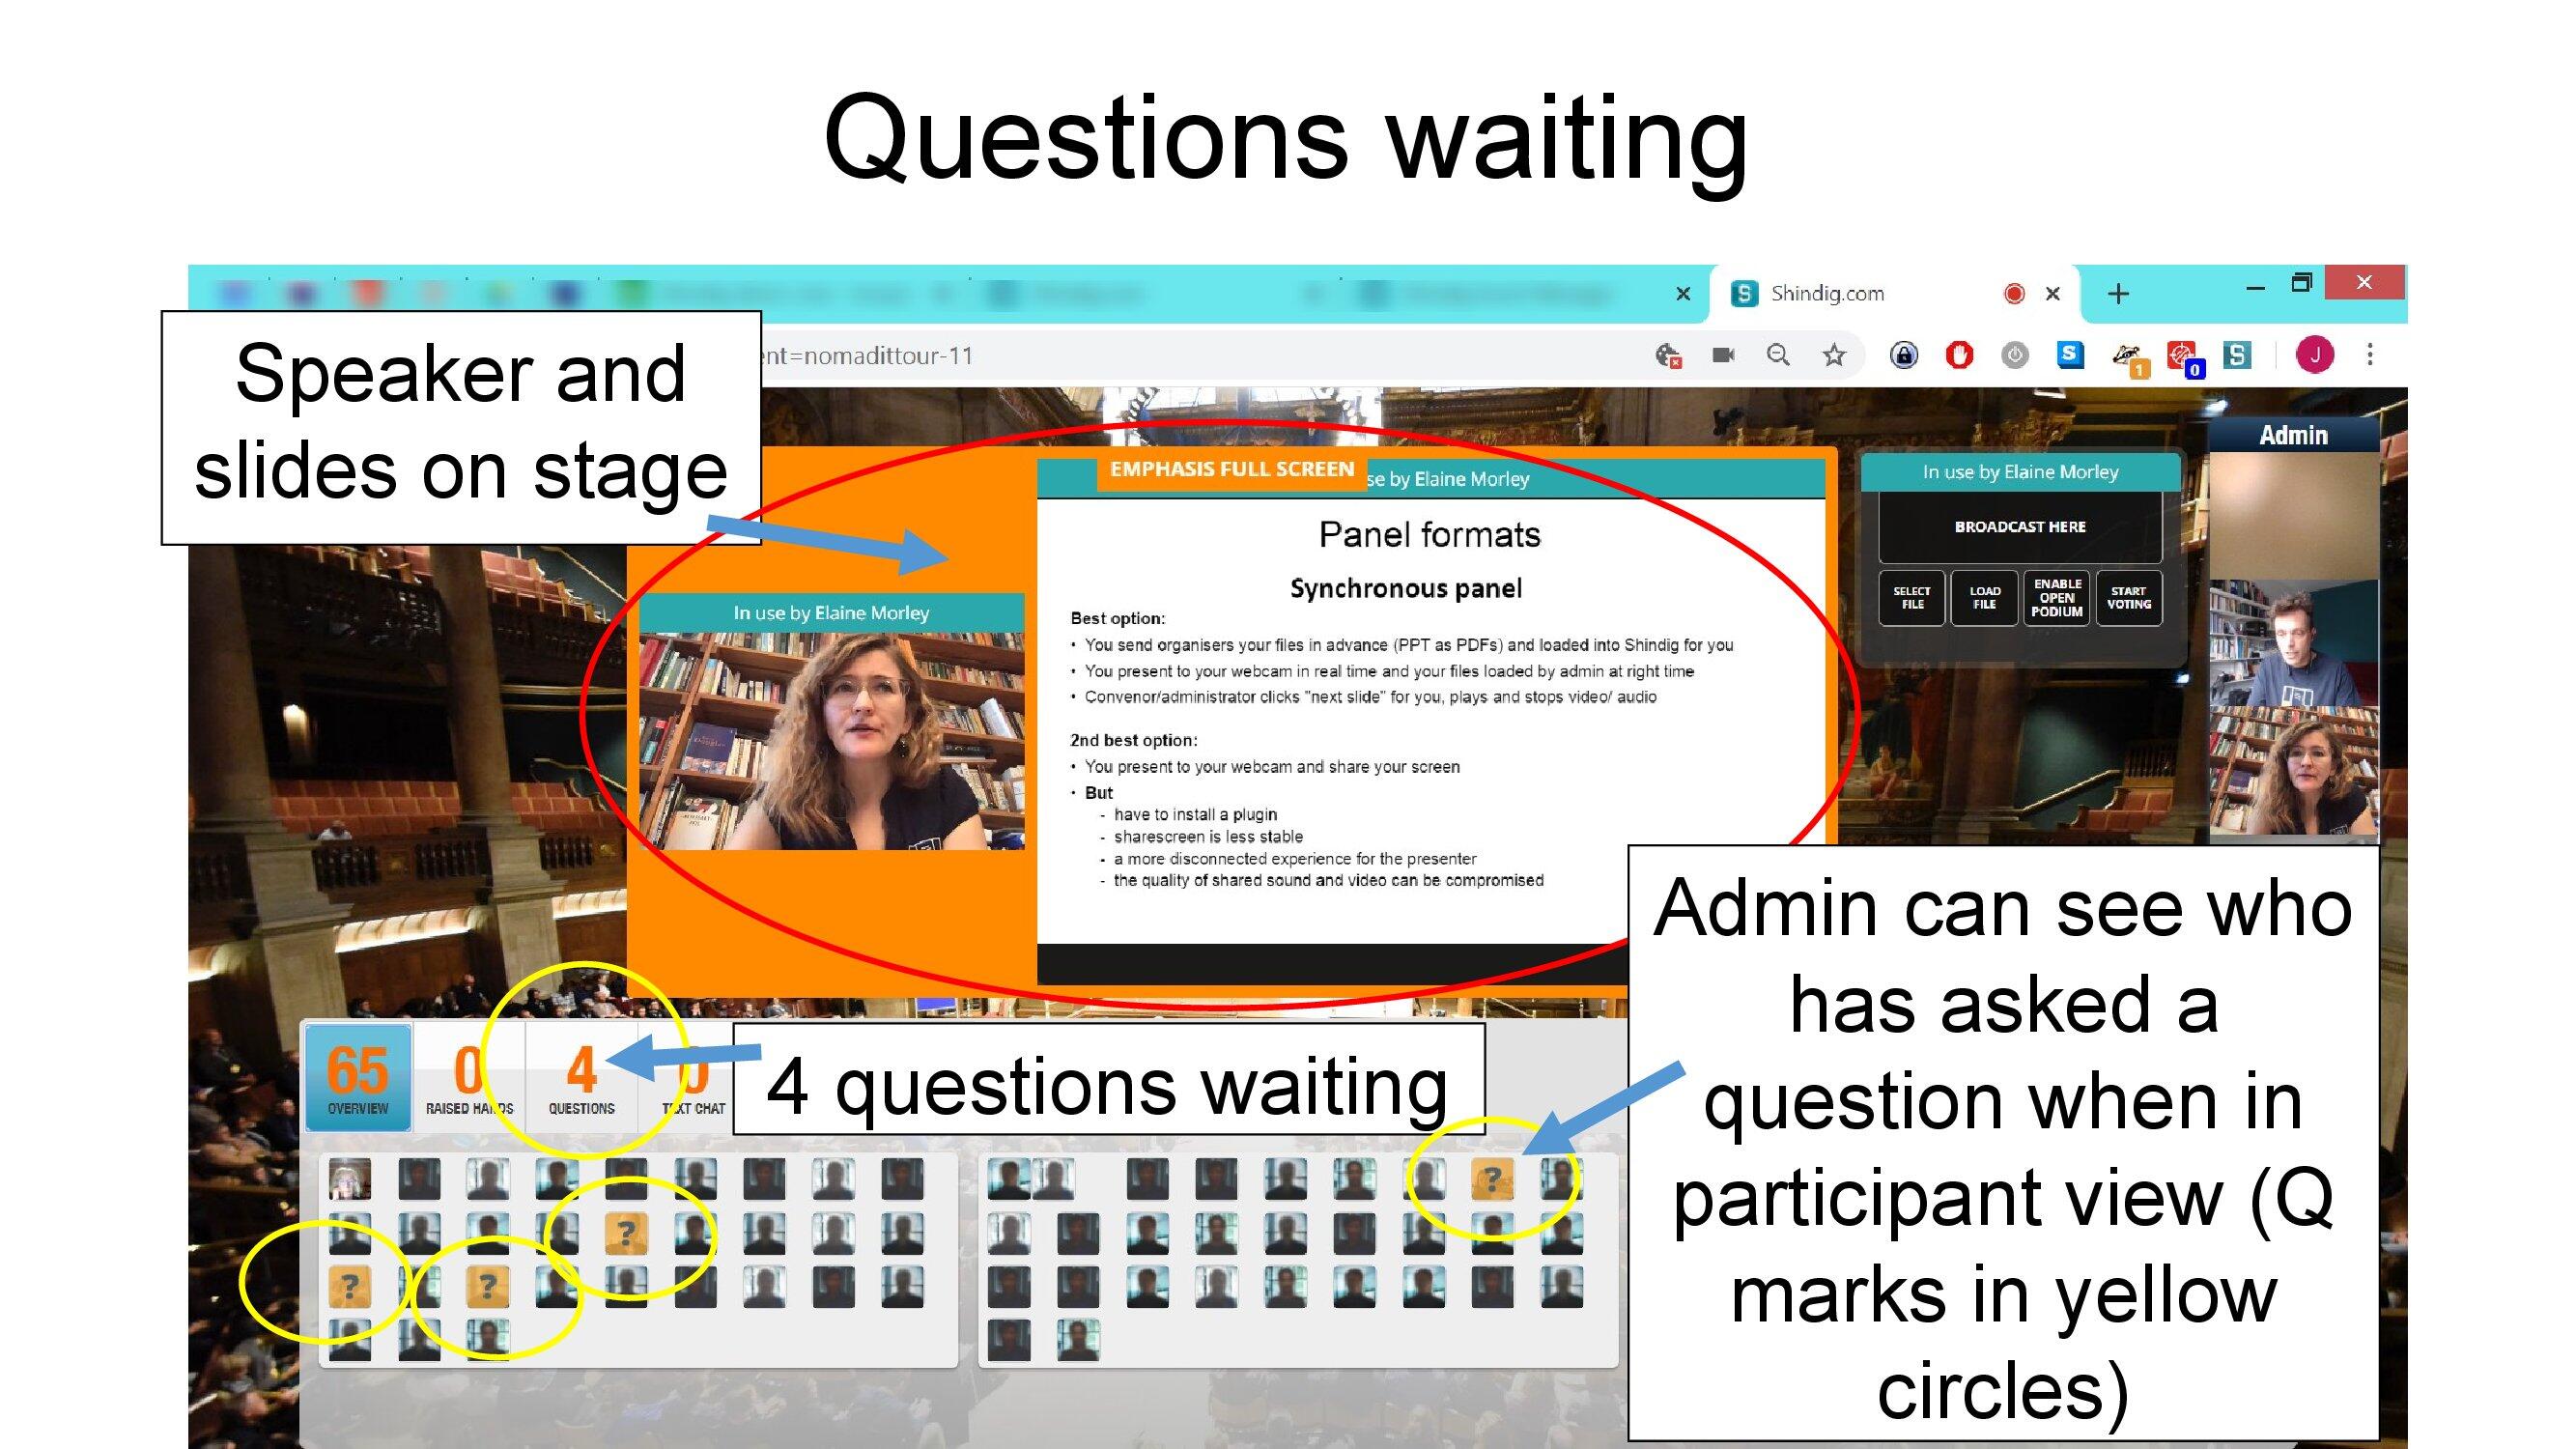
Questions are best invited through the Ask? function attendees have on their toolbar.
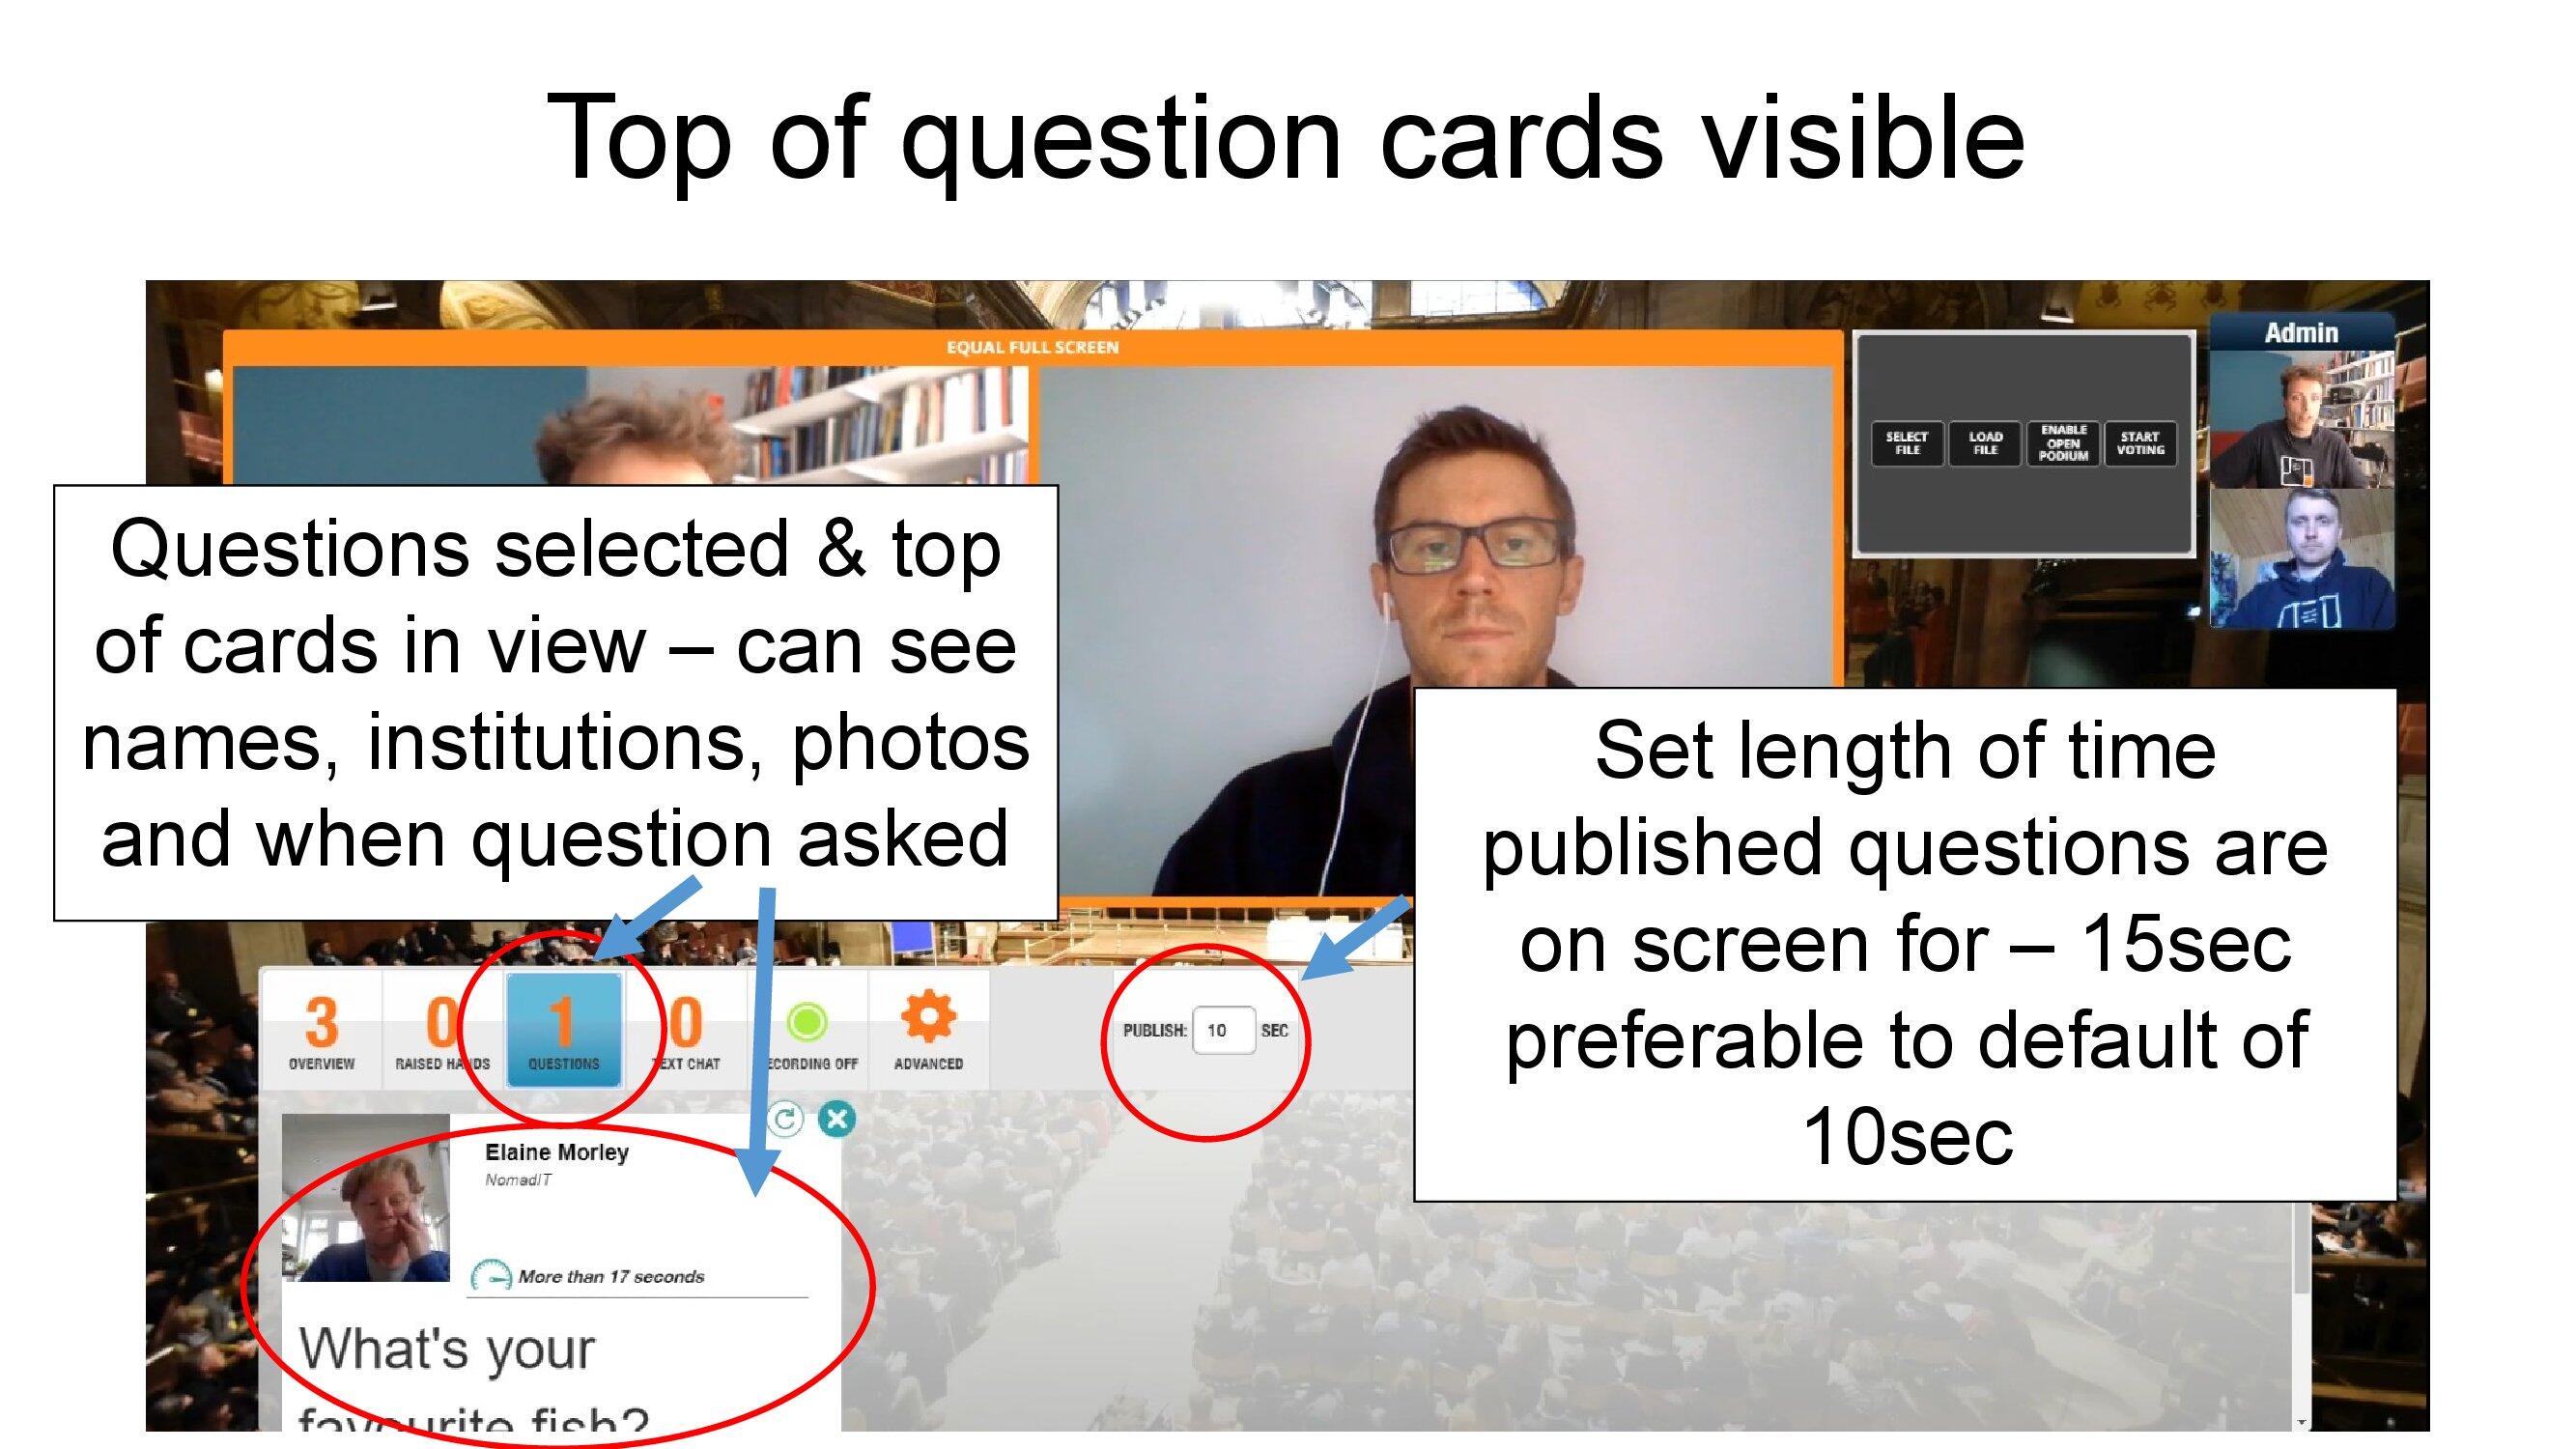
Questions are typed in and submitted, allowing admins to filter and decide which to take/address.
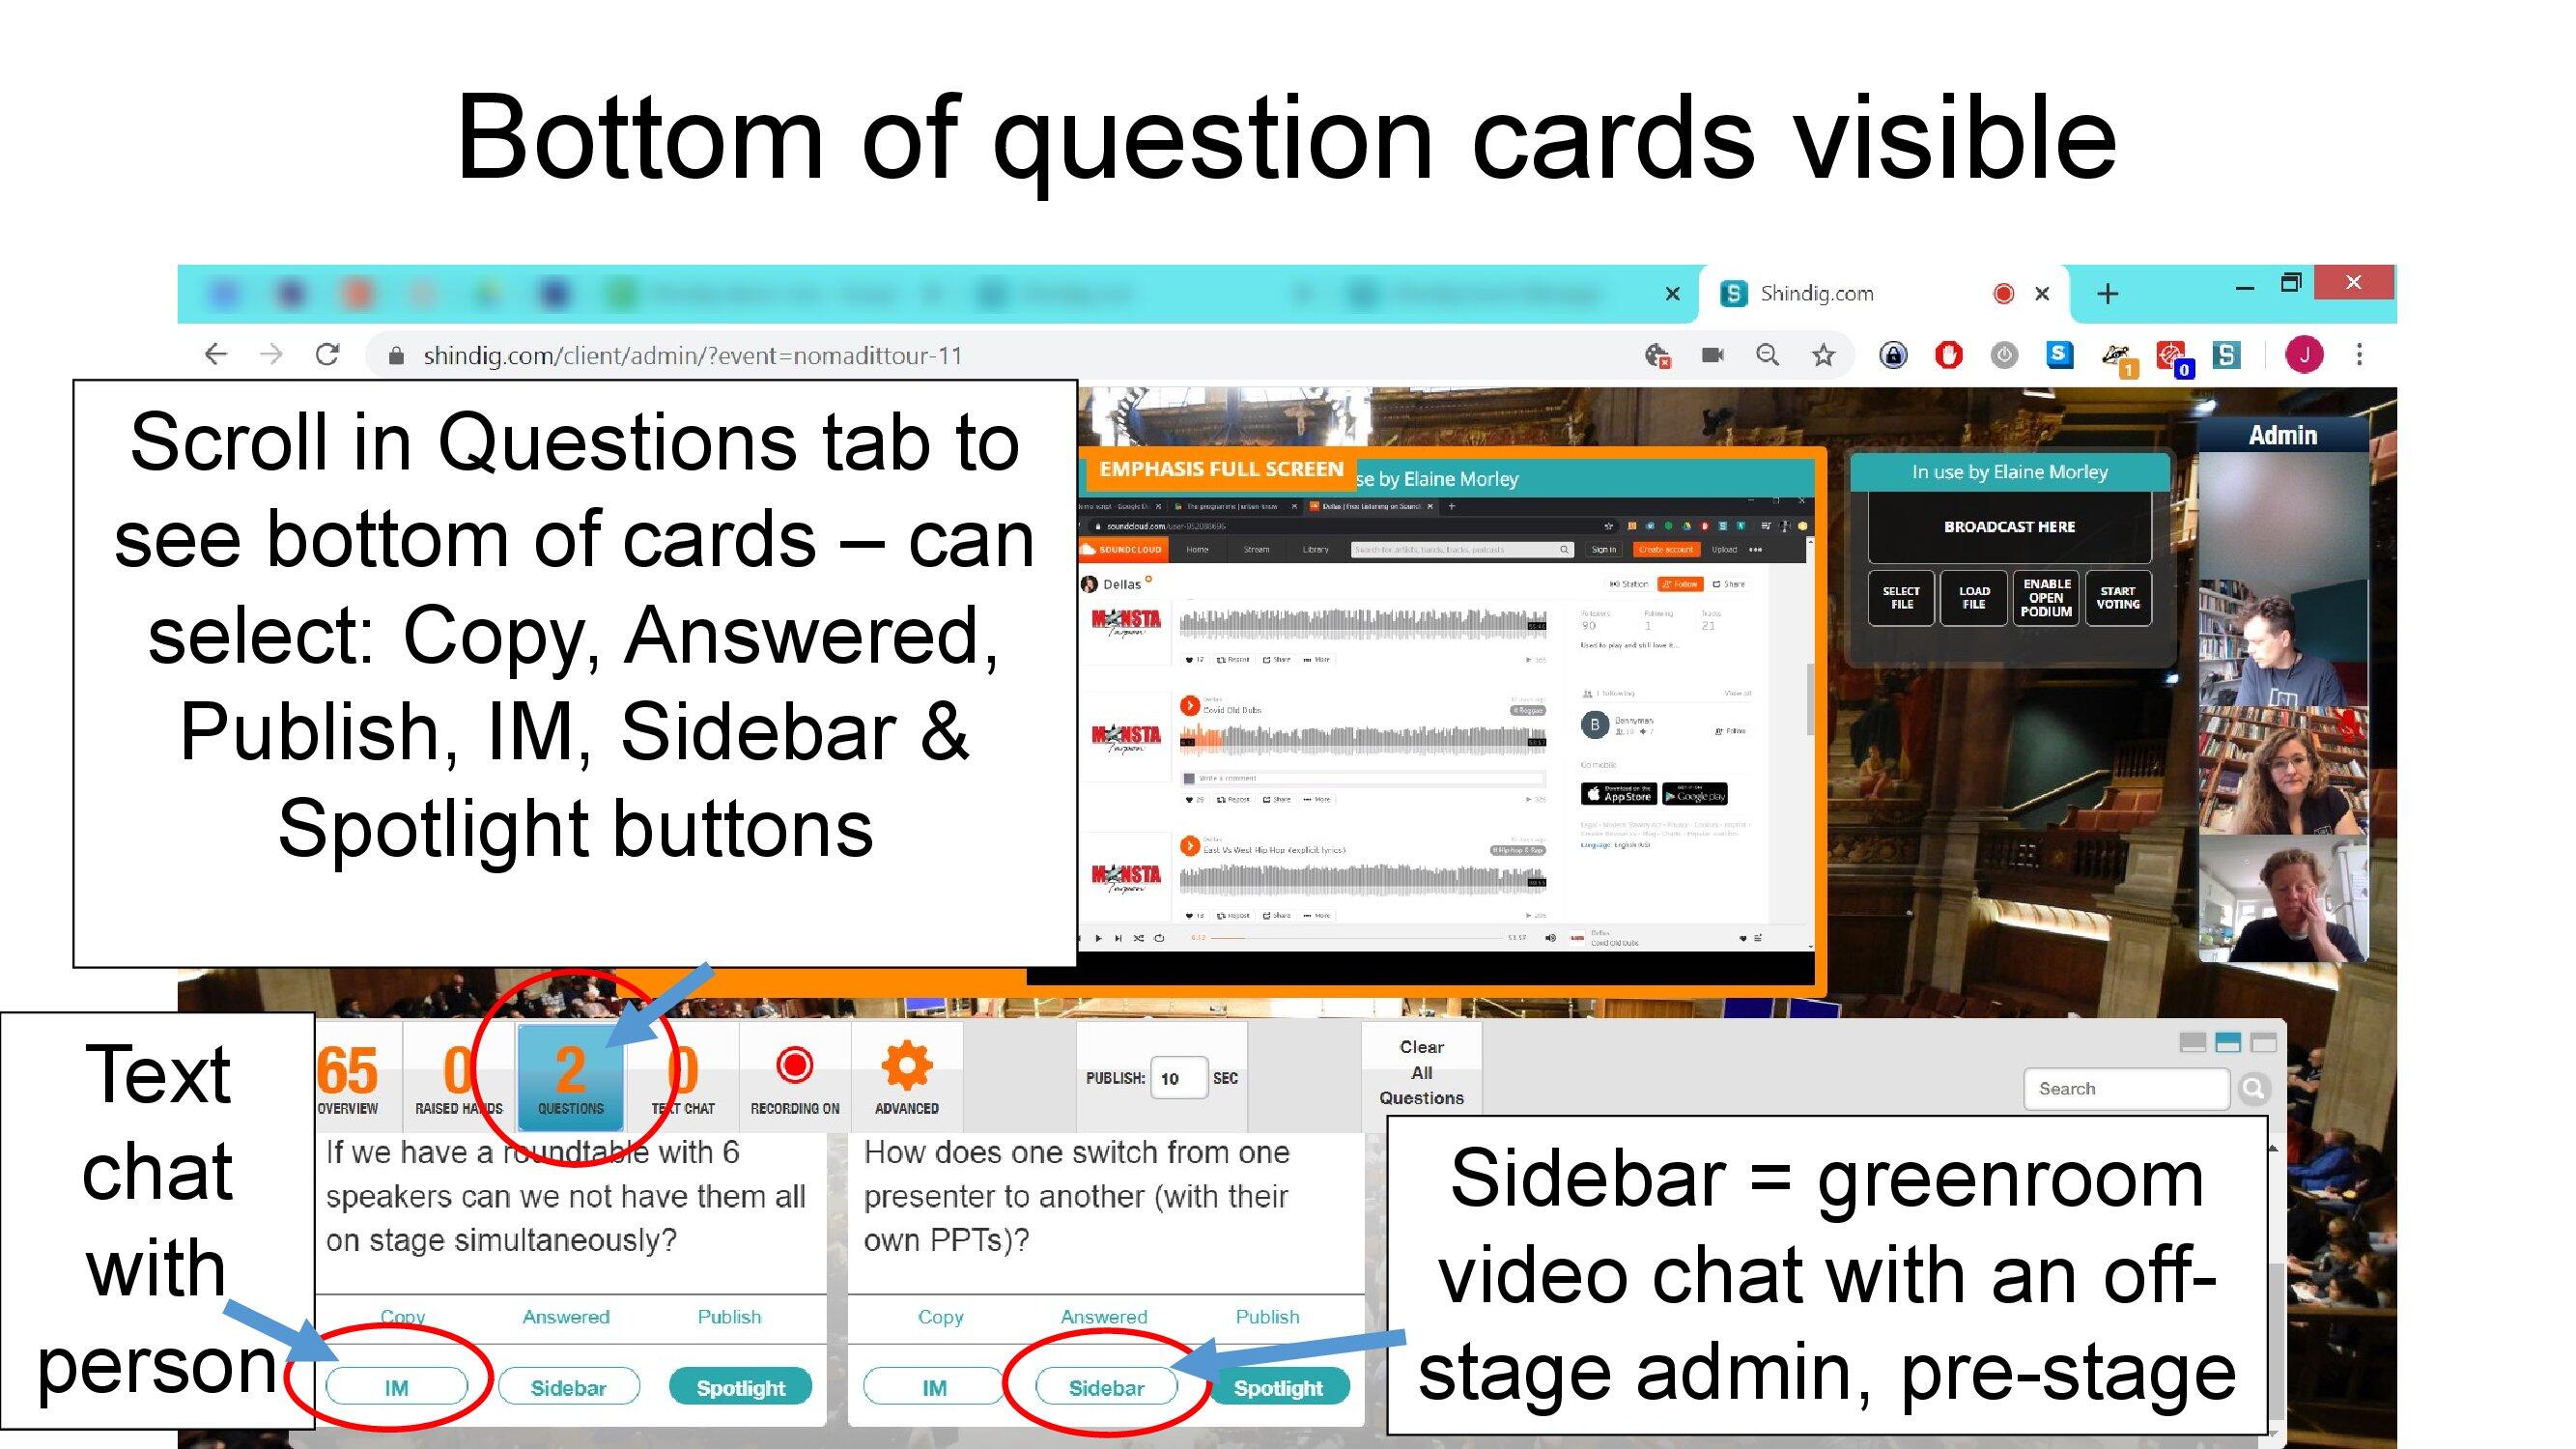
Scroll through the question cards in your toolbar.
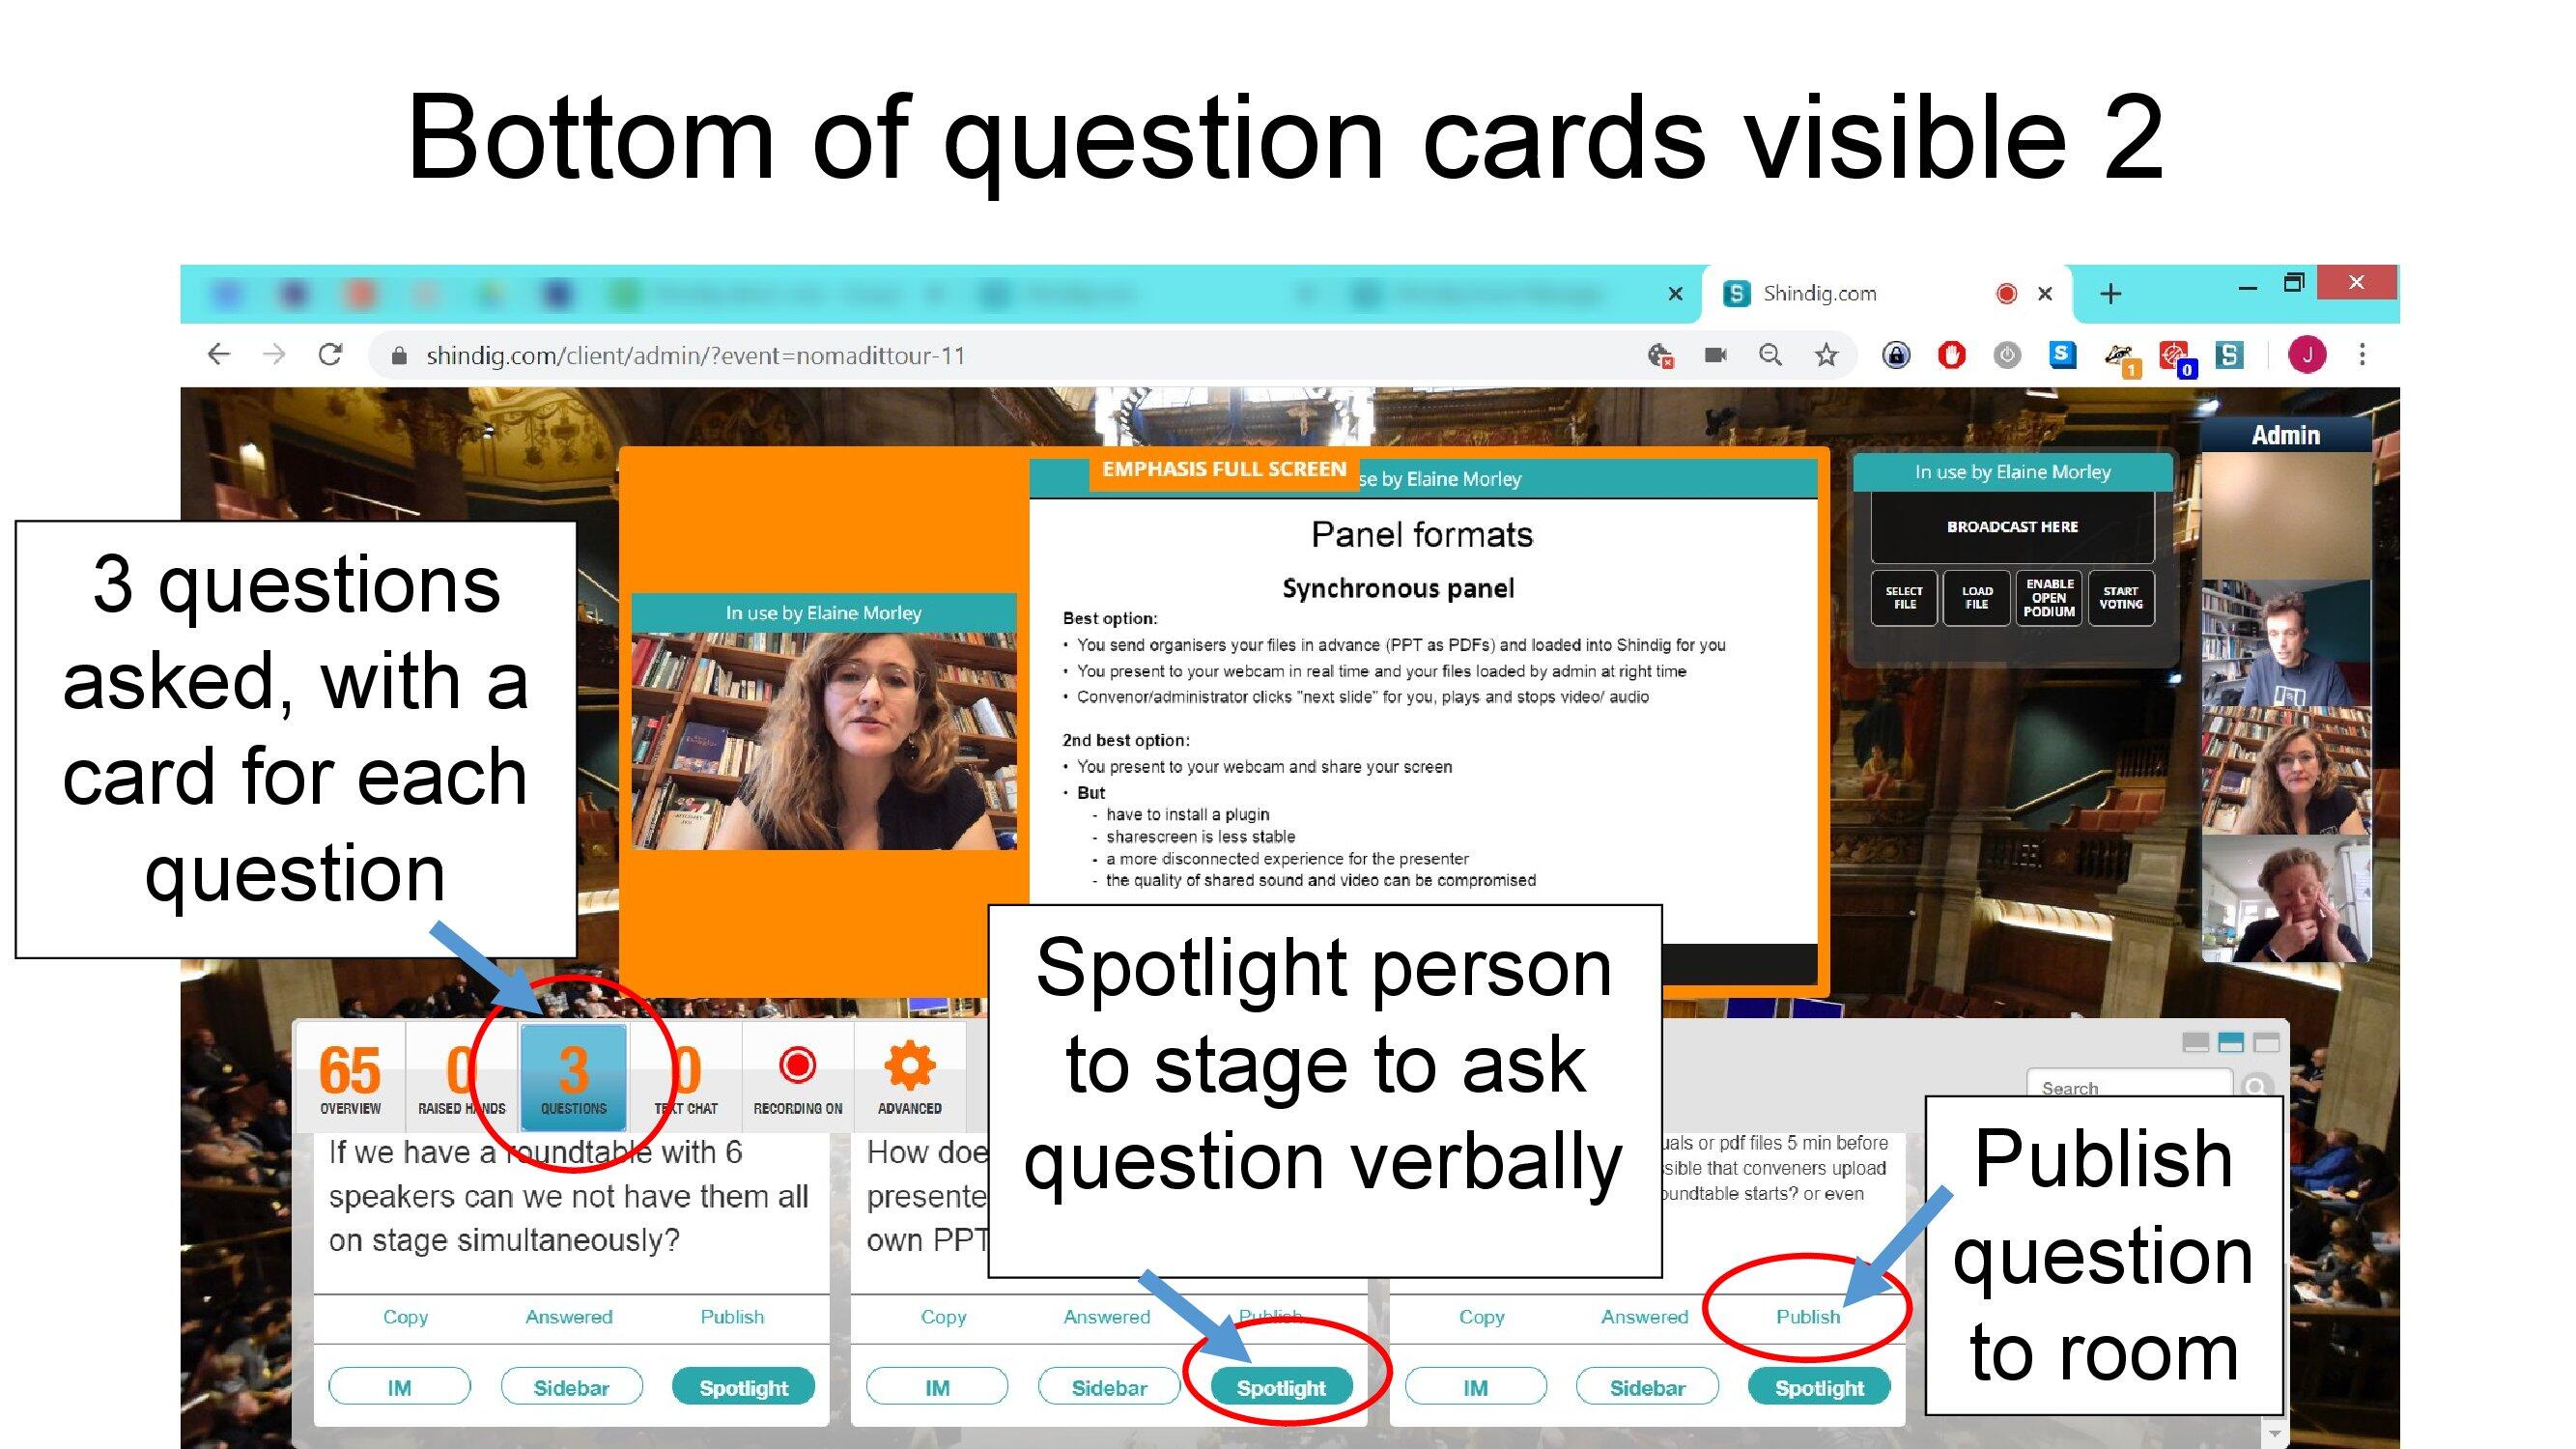
Decide whether to ignore, publish onto stage, or - if you feel more background is required - spotlight the questioner.
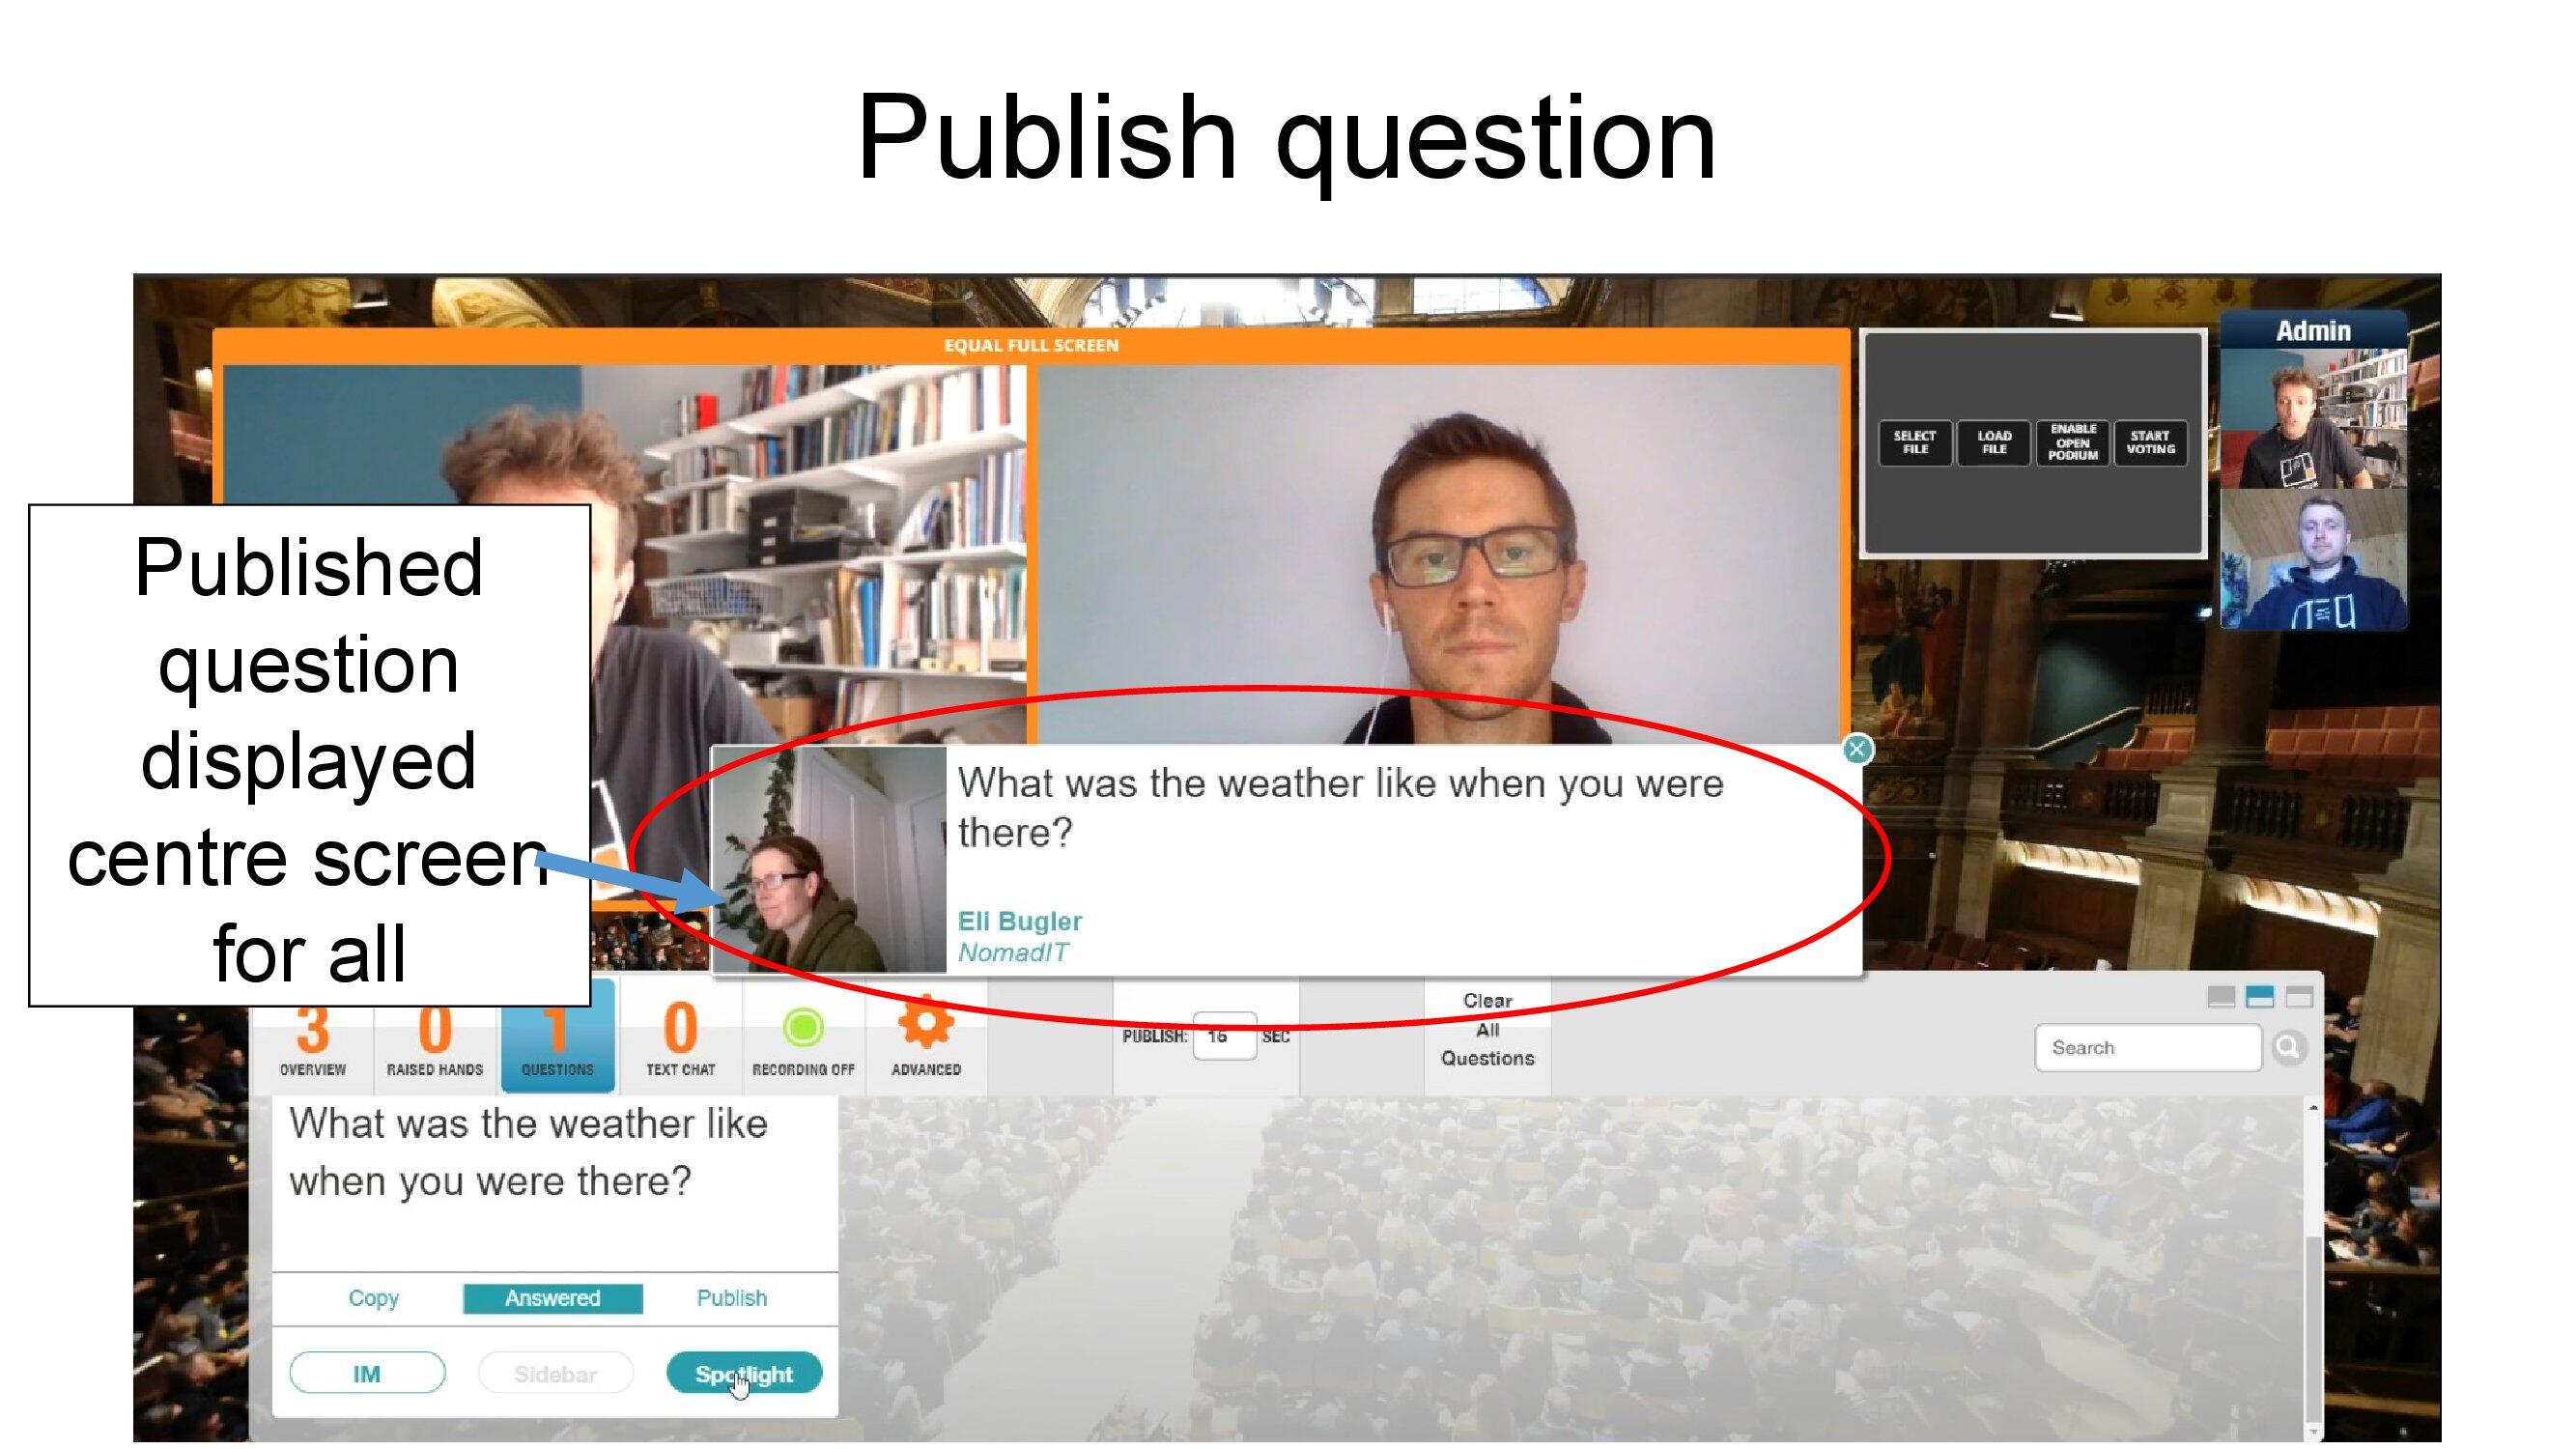
We'd suggest changing your default publication time to 15 secs. Published questions are seen on everybody's screen. However we'd advise reading out the question as well (increases accessibility).
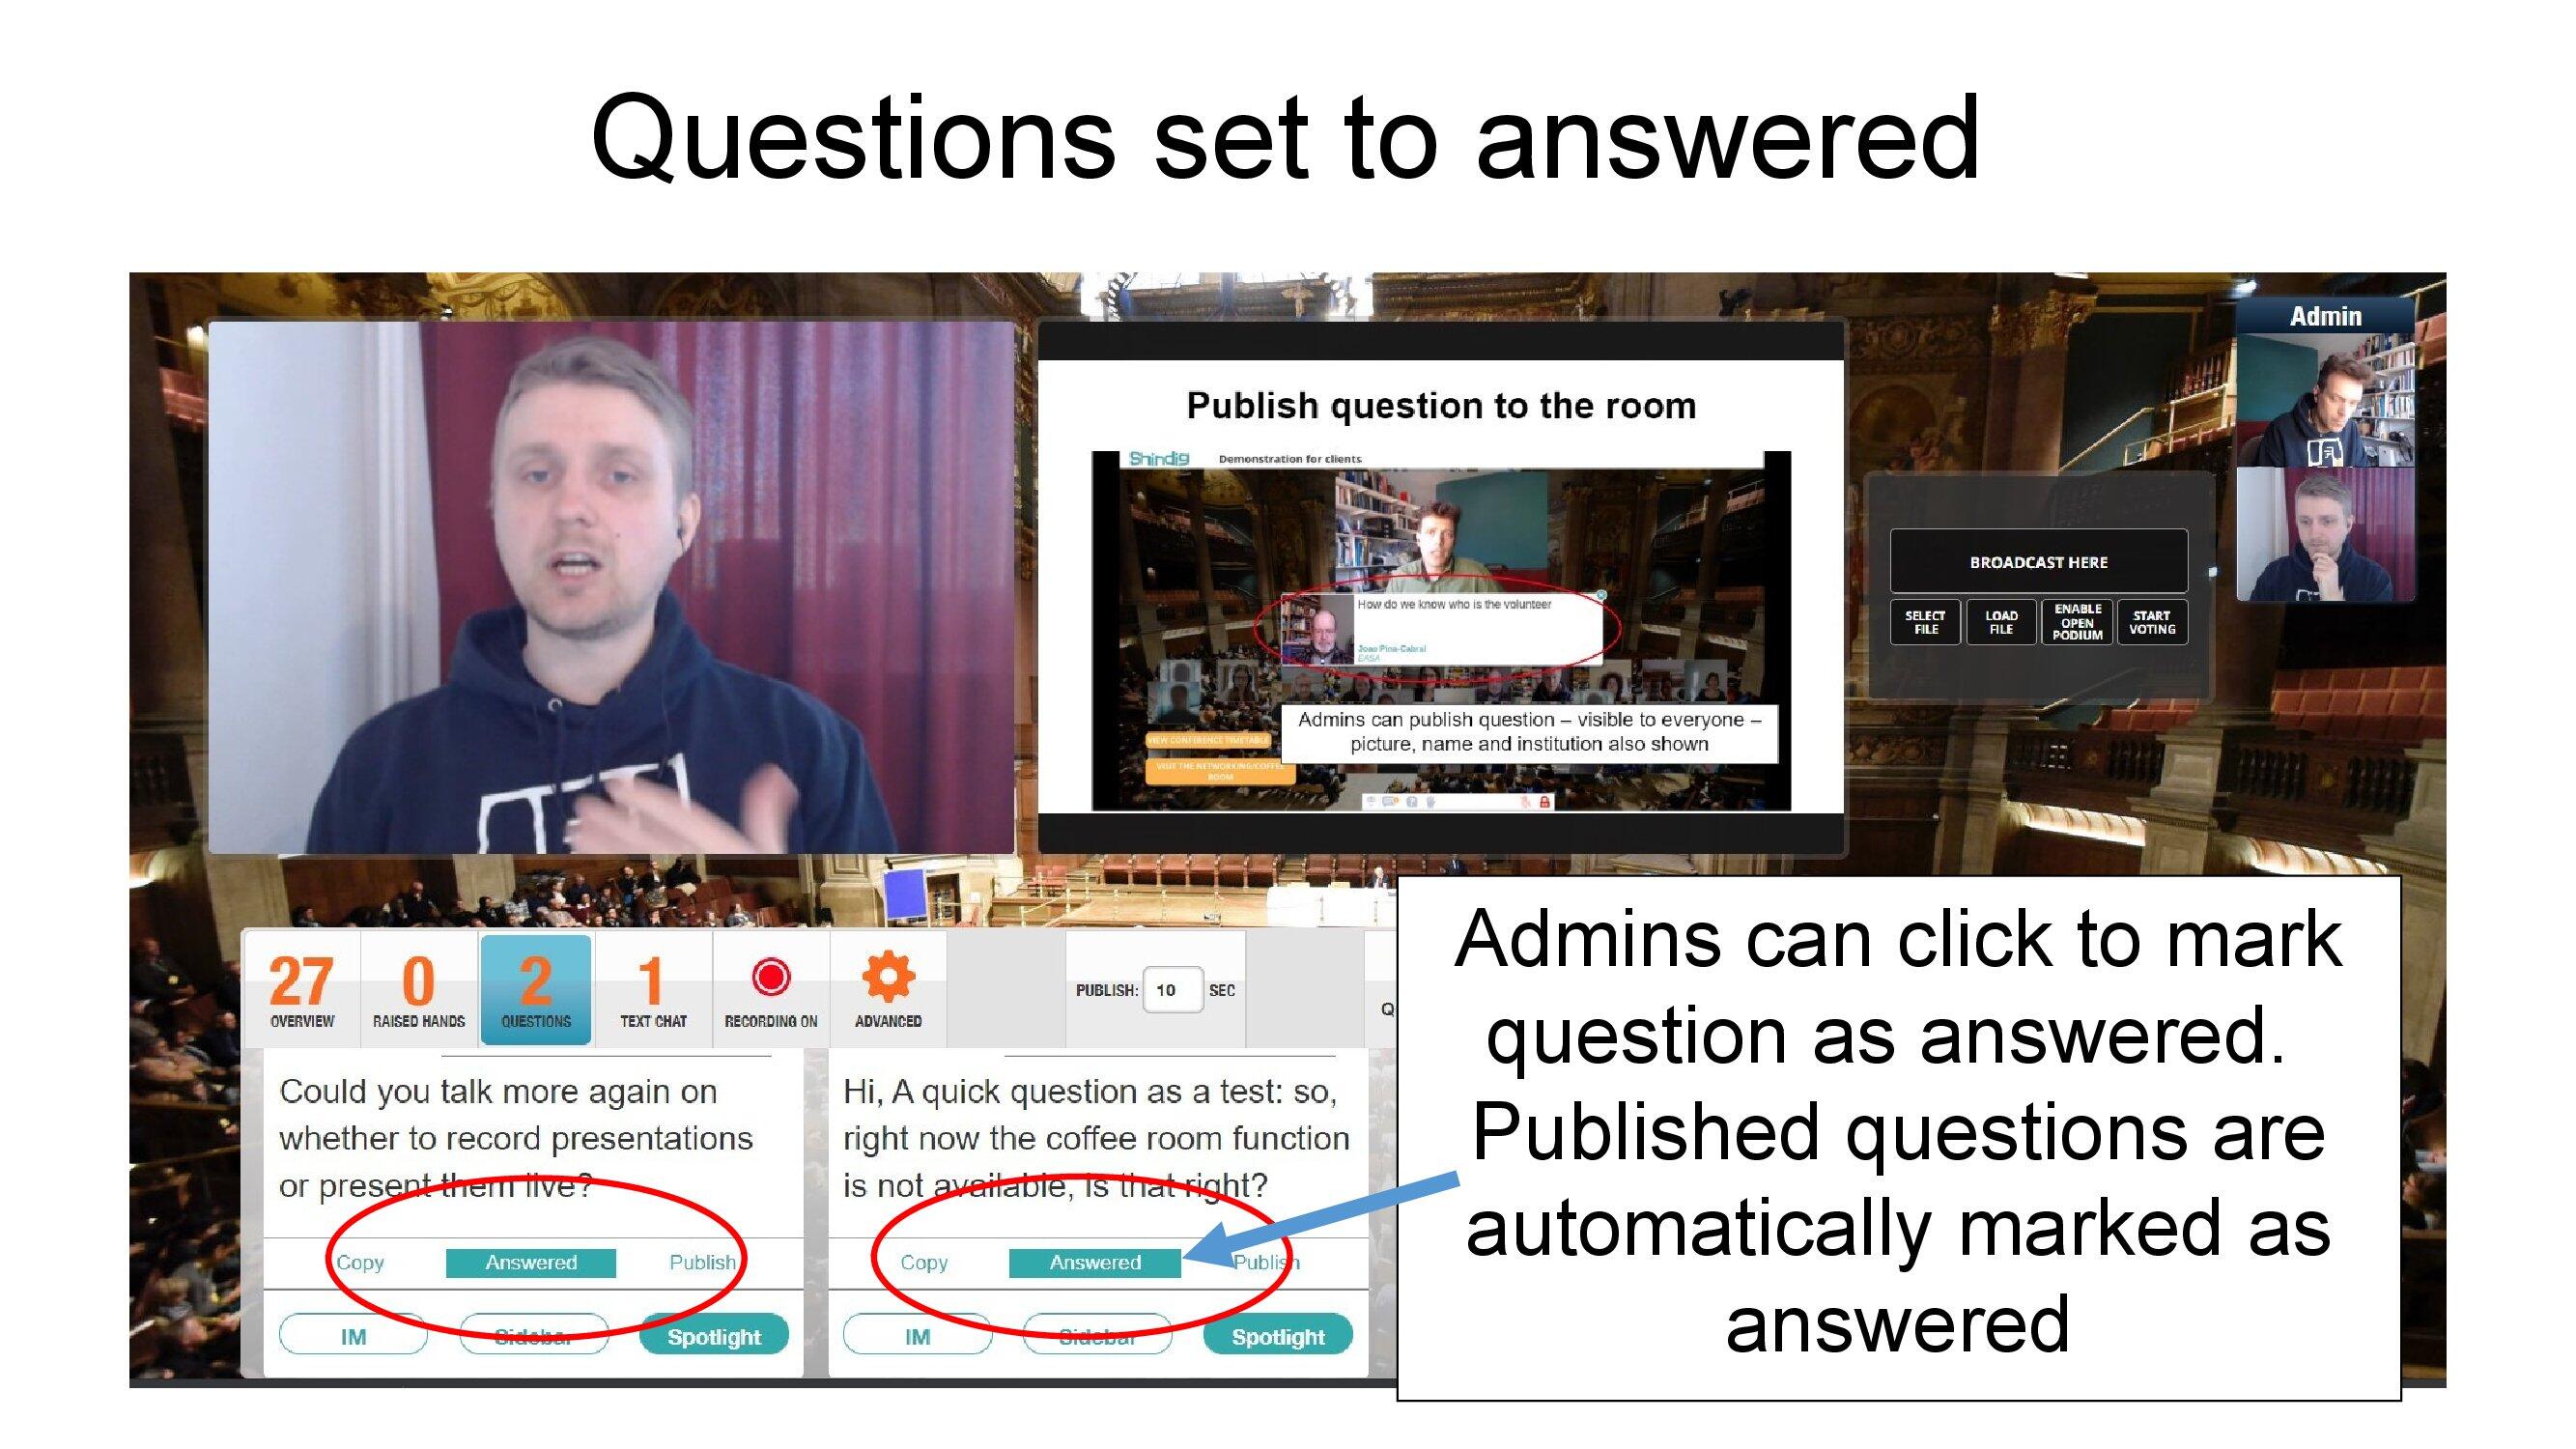
If a question is published it is marked as Answered. Admins can also mark questions as Answered if not published (if they've perhaps answered in a side chat/IM).
5. Open podiums
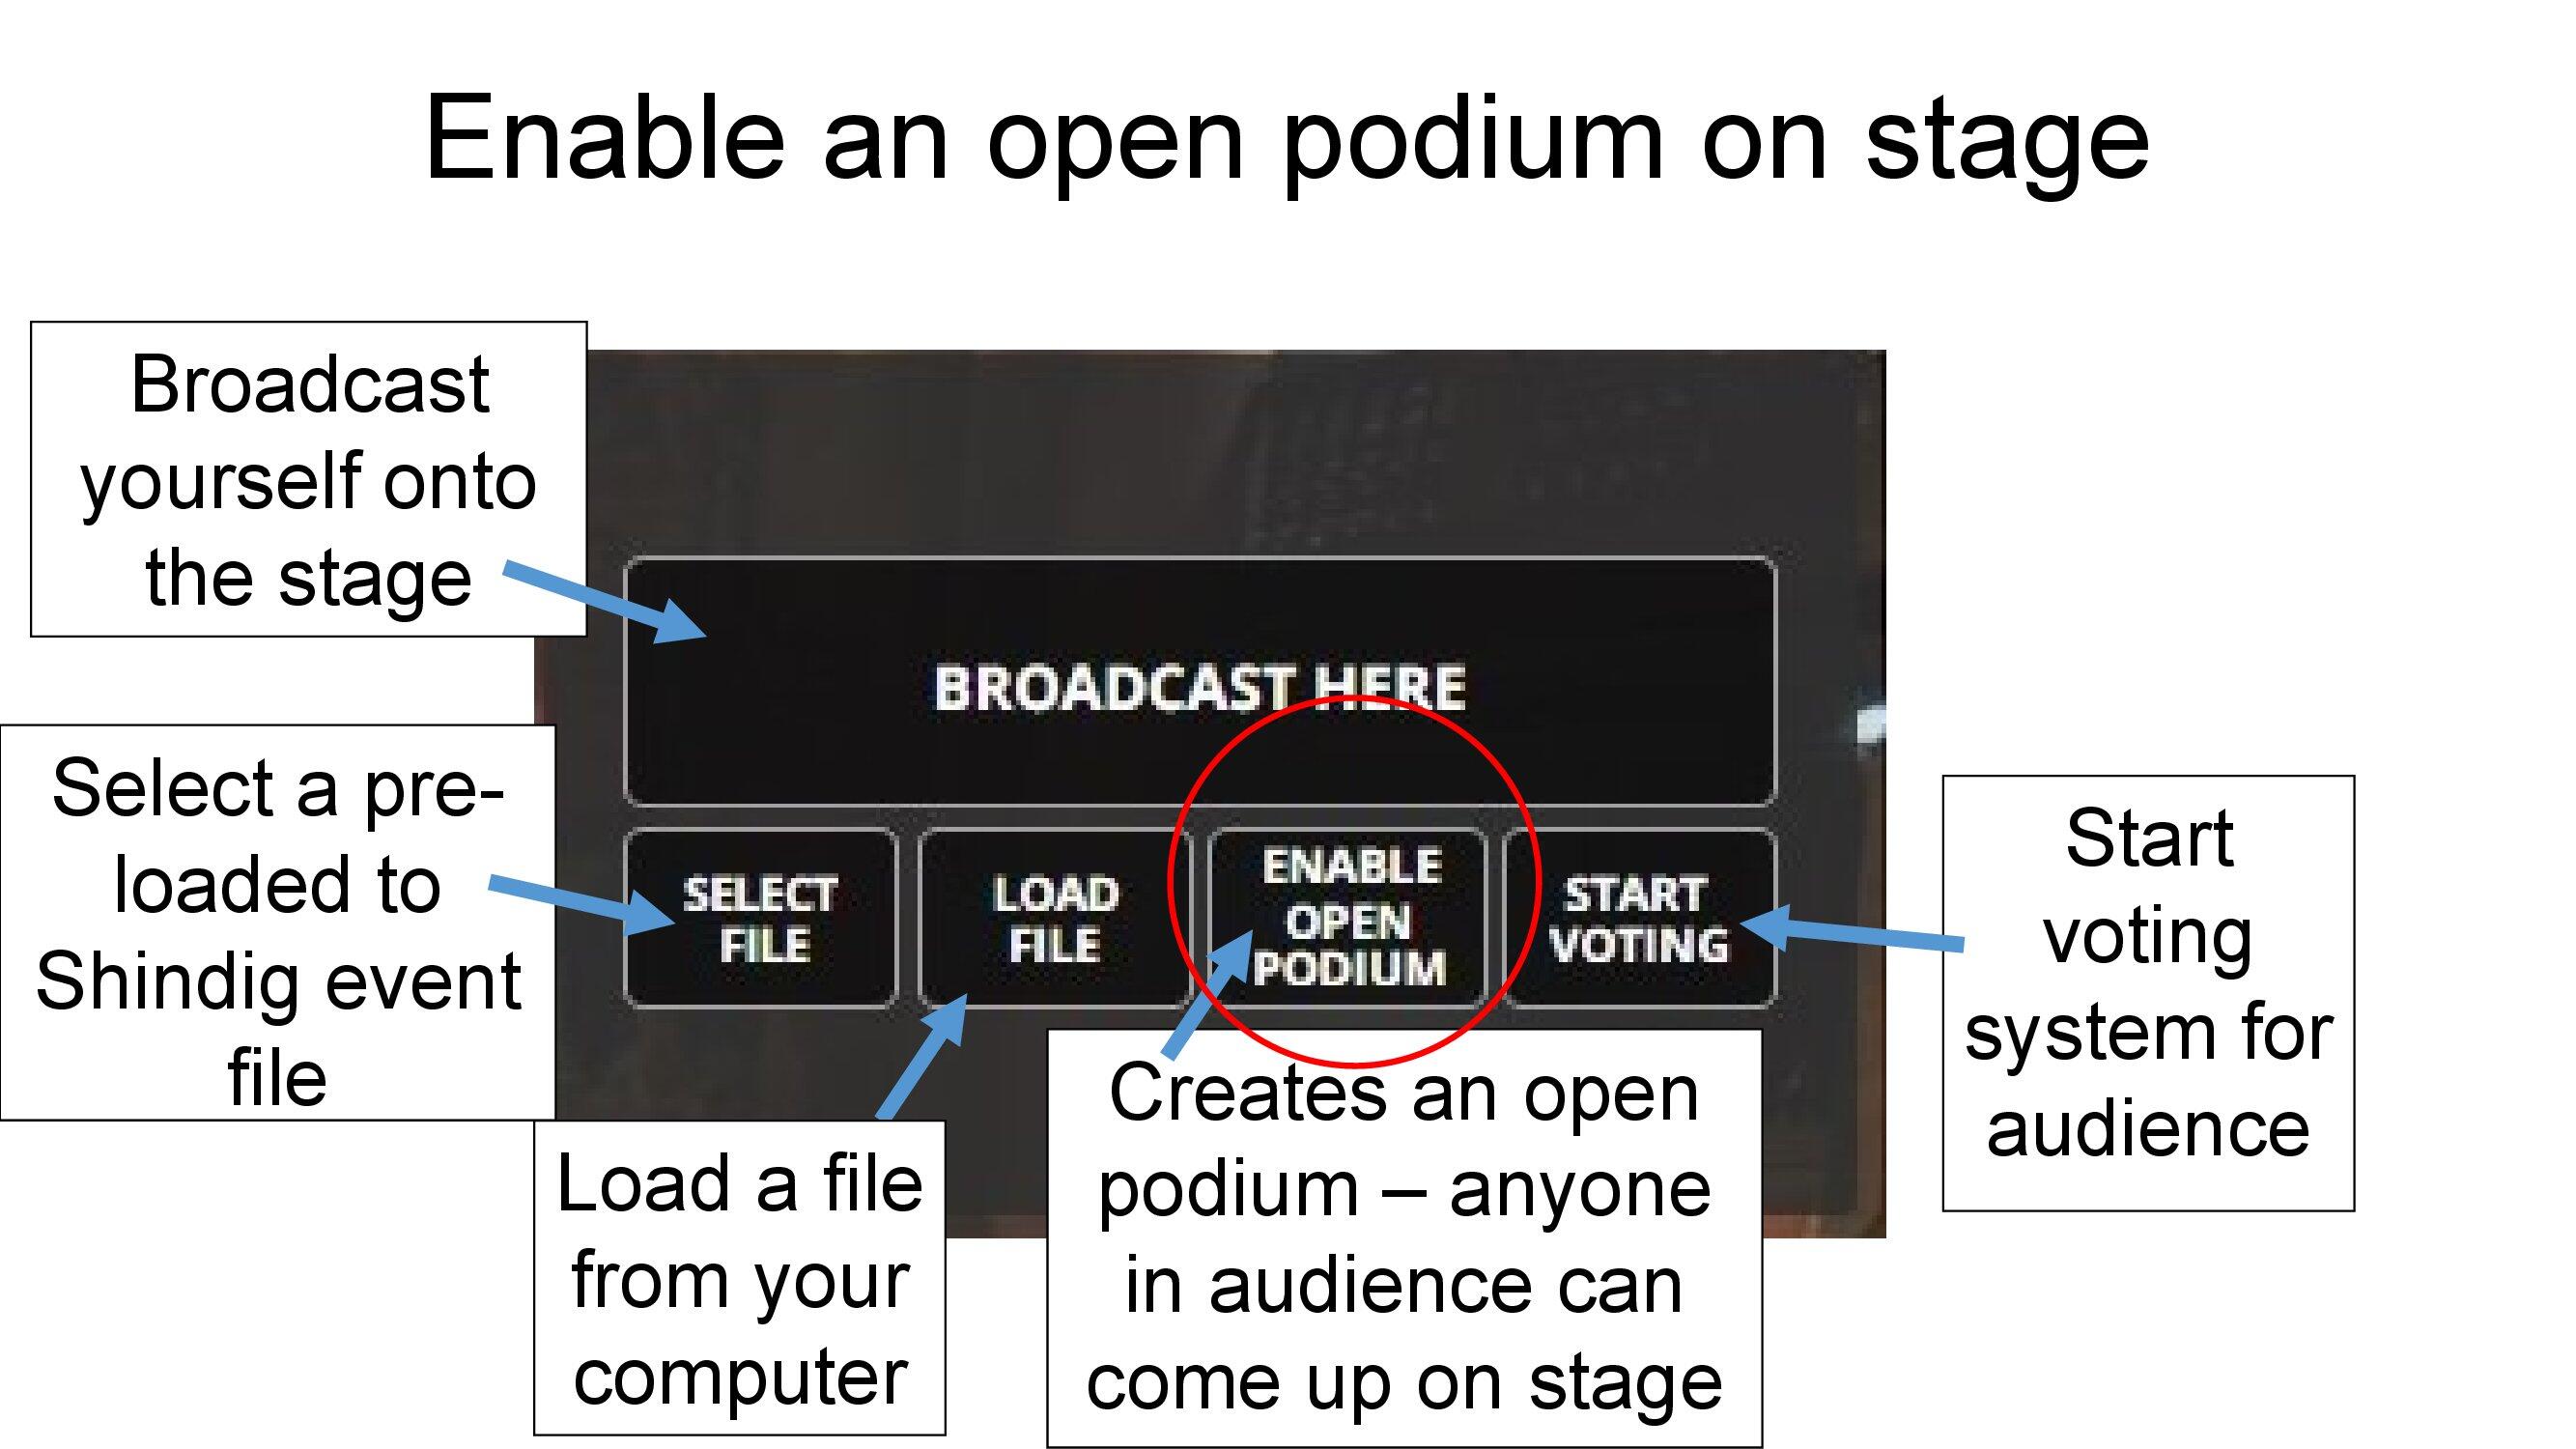
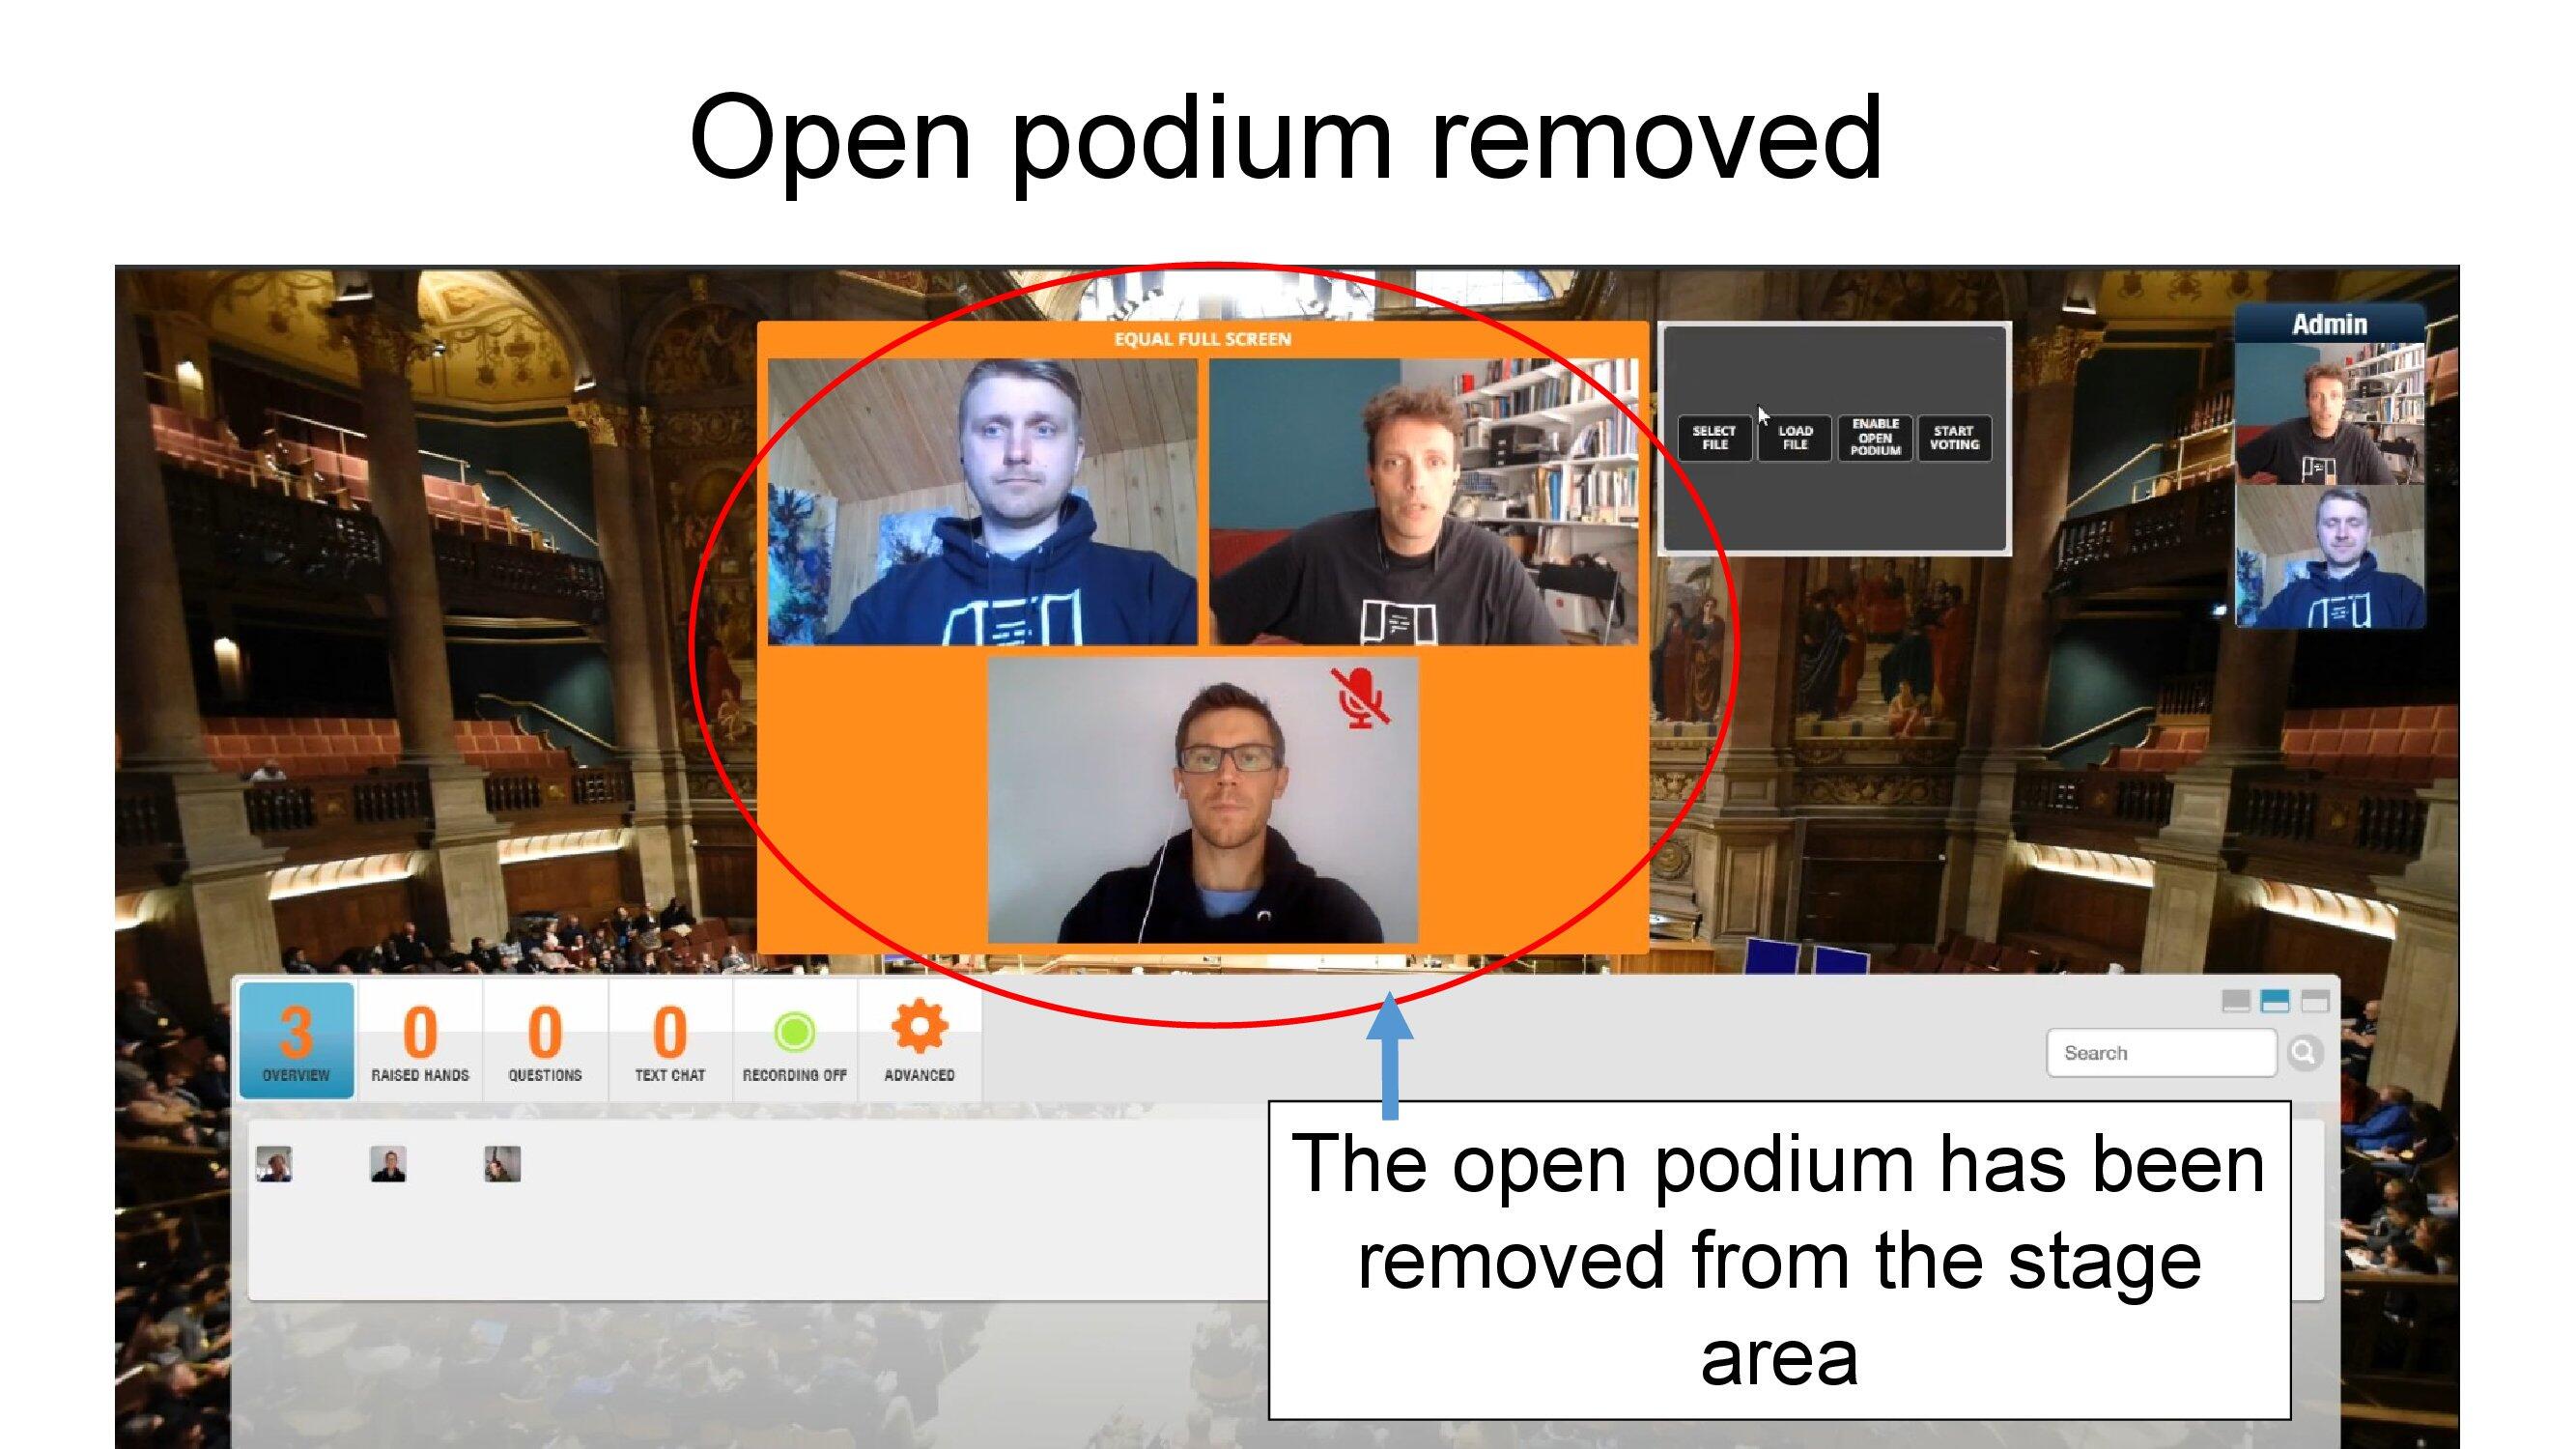
Another way to take questions is to enable an open podium which allows attendees to jump on stage and ask a question verbally.
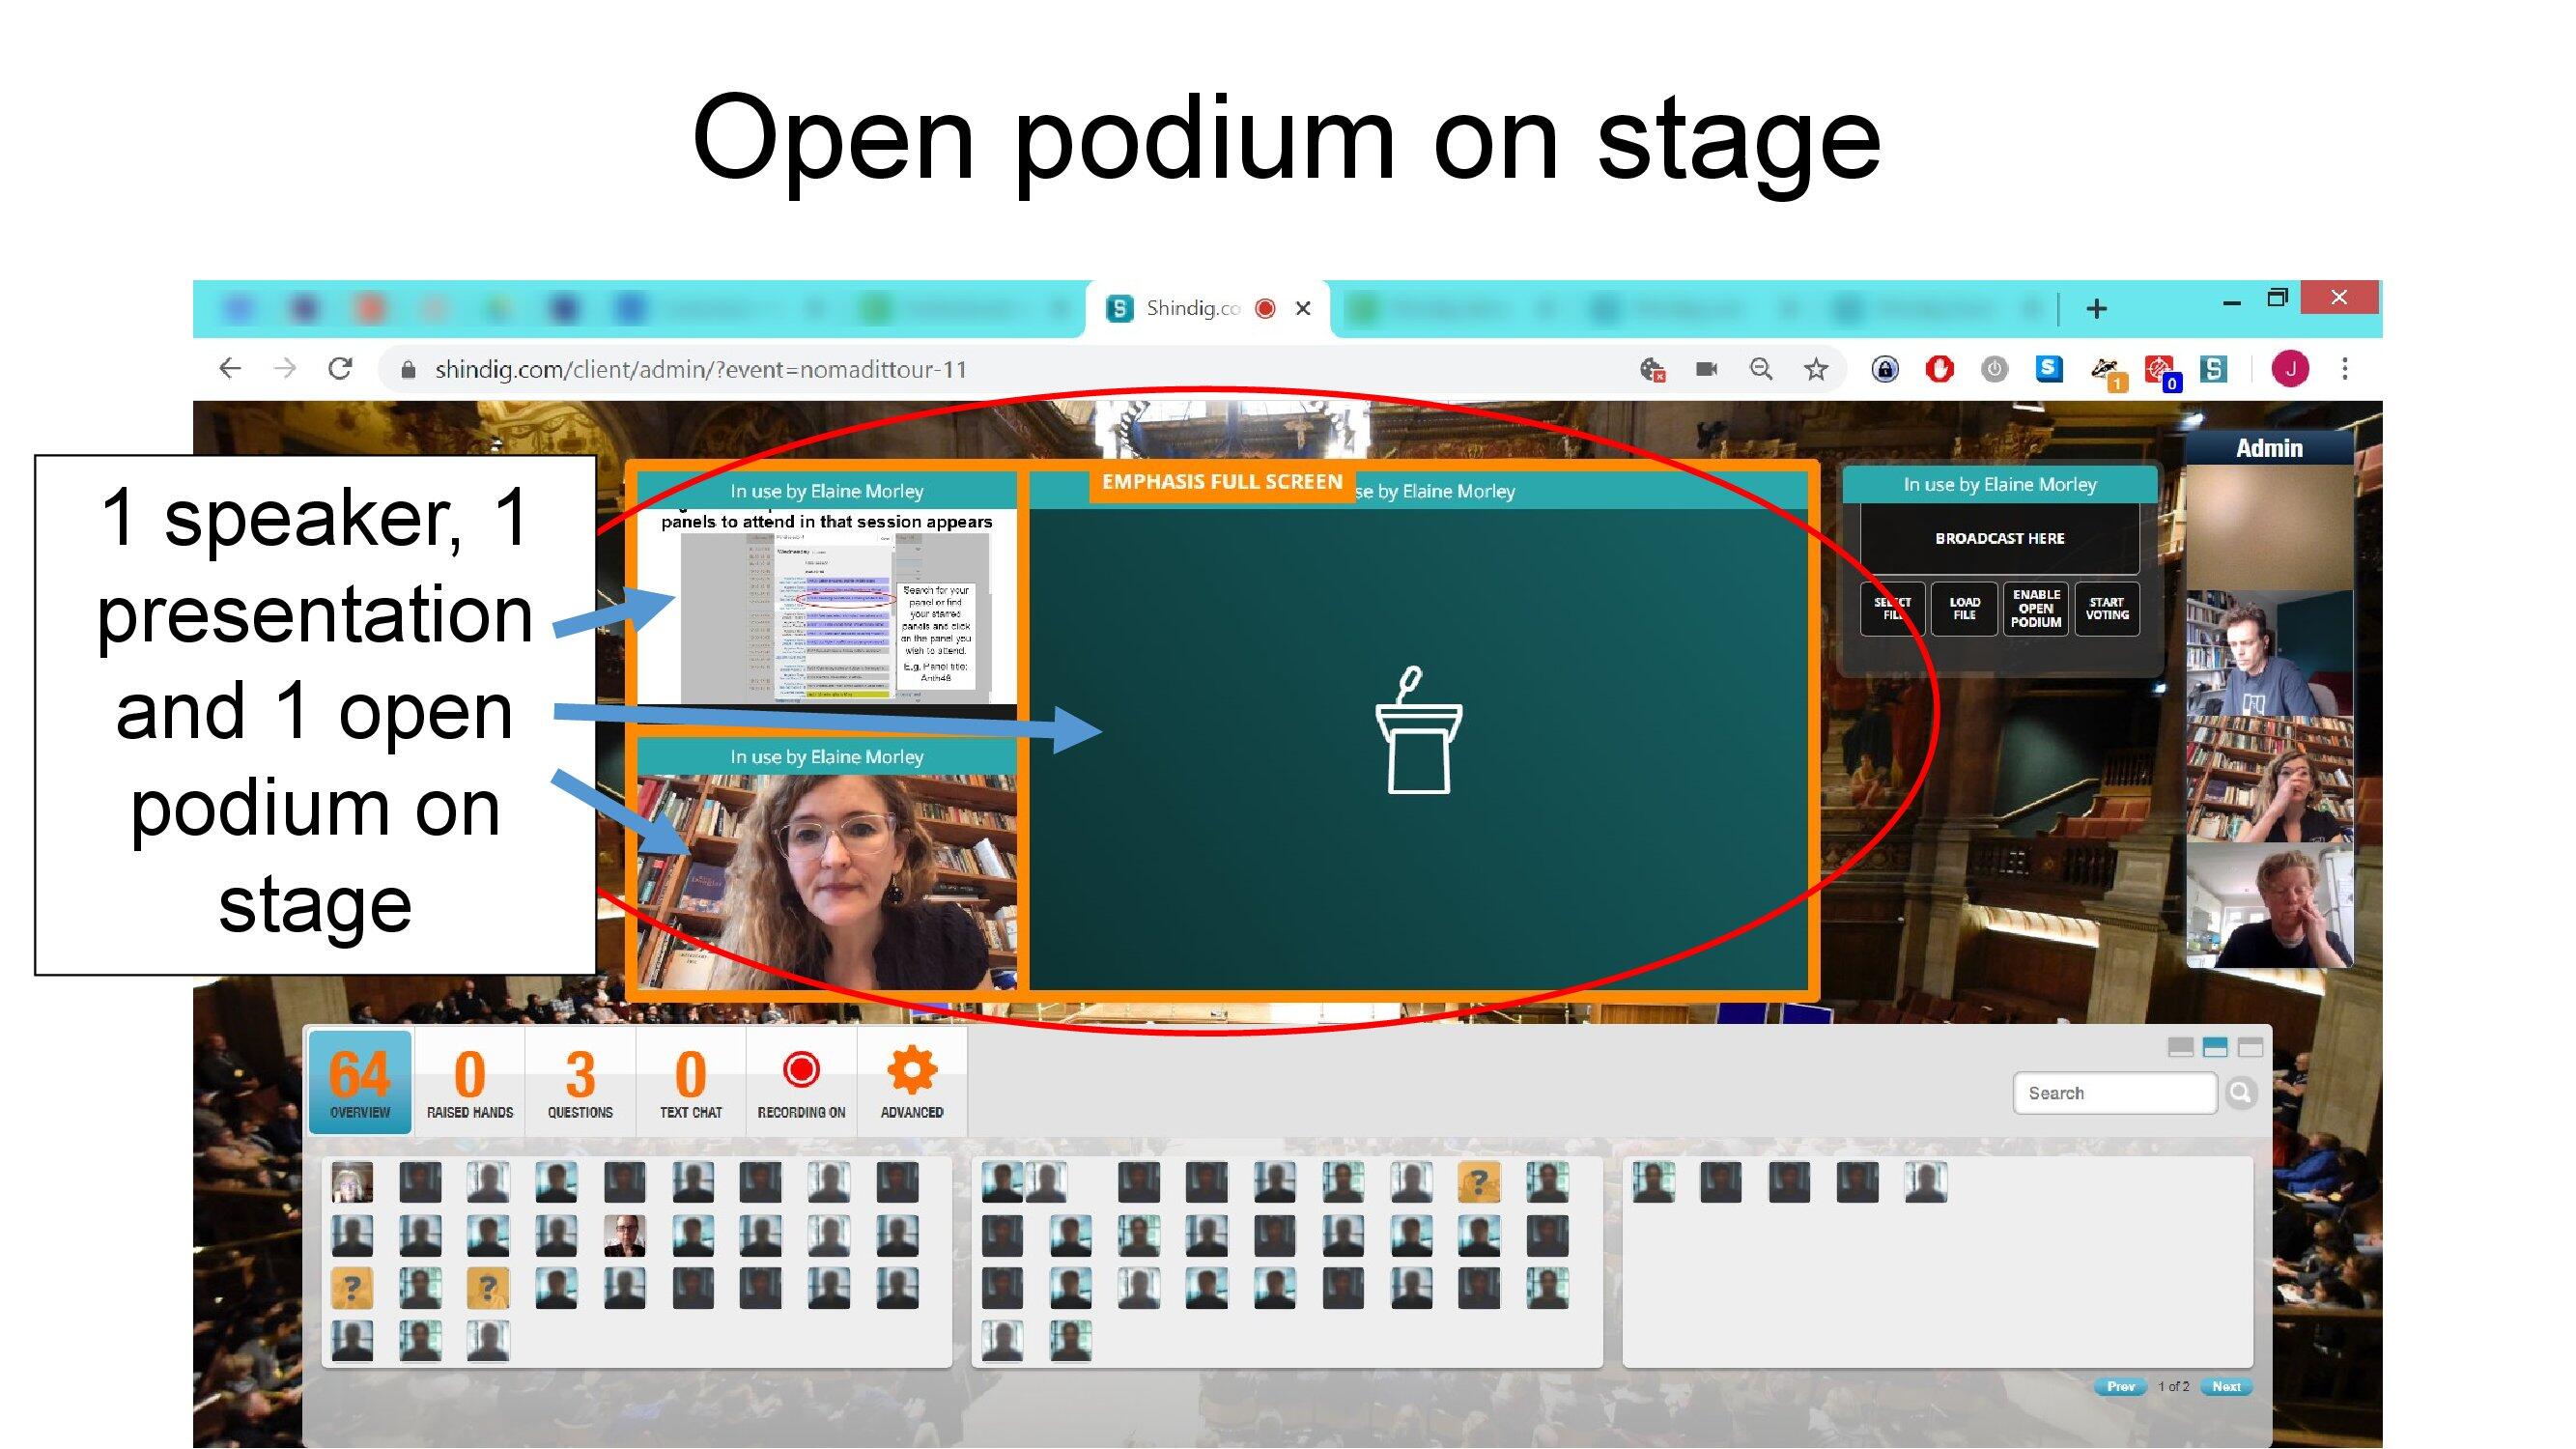
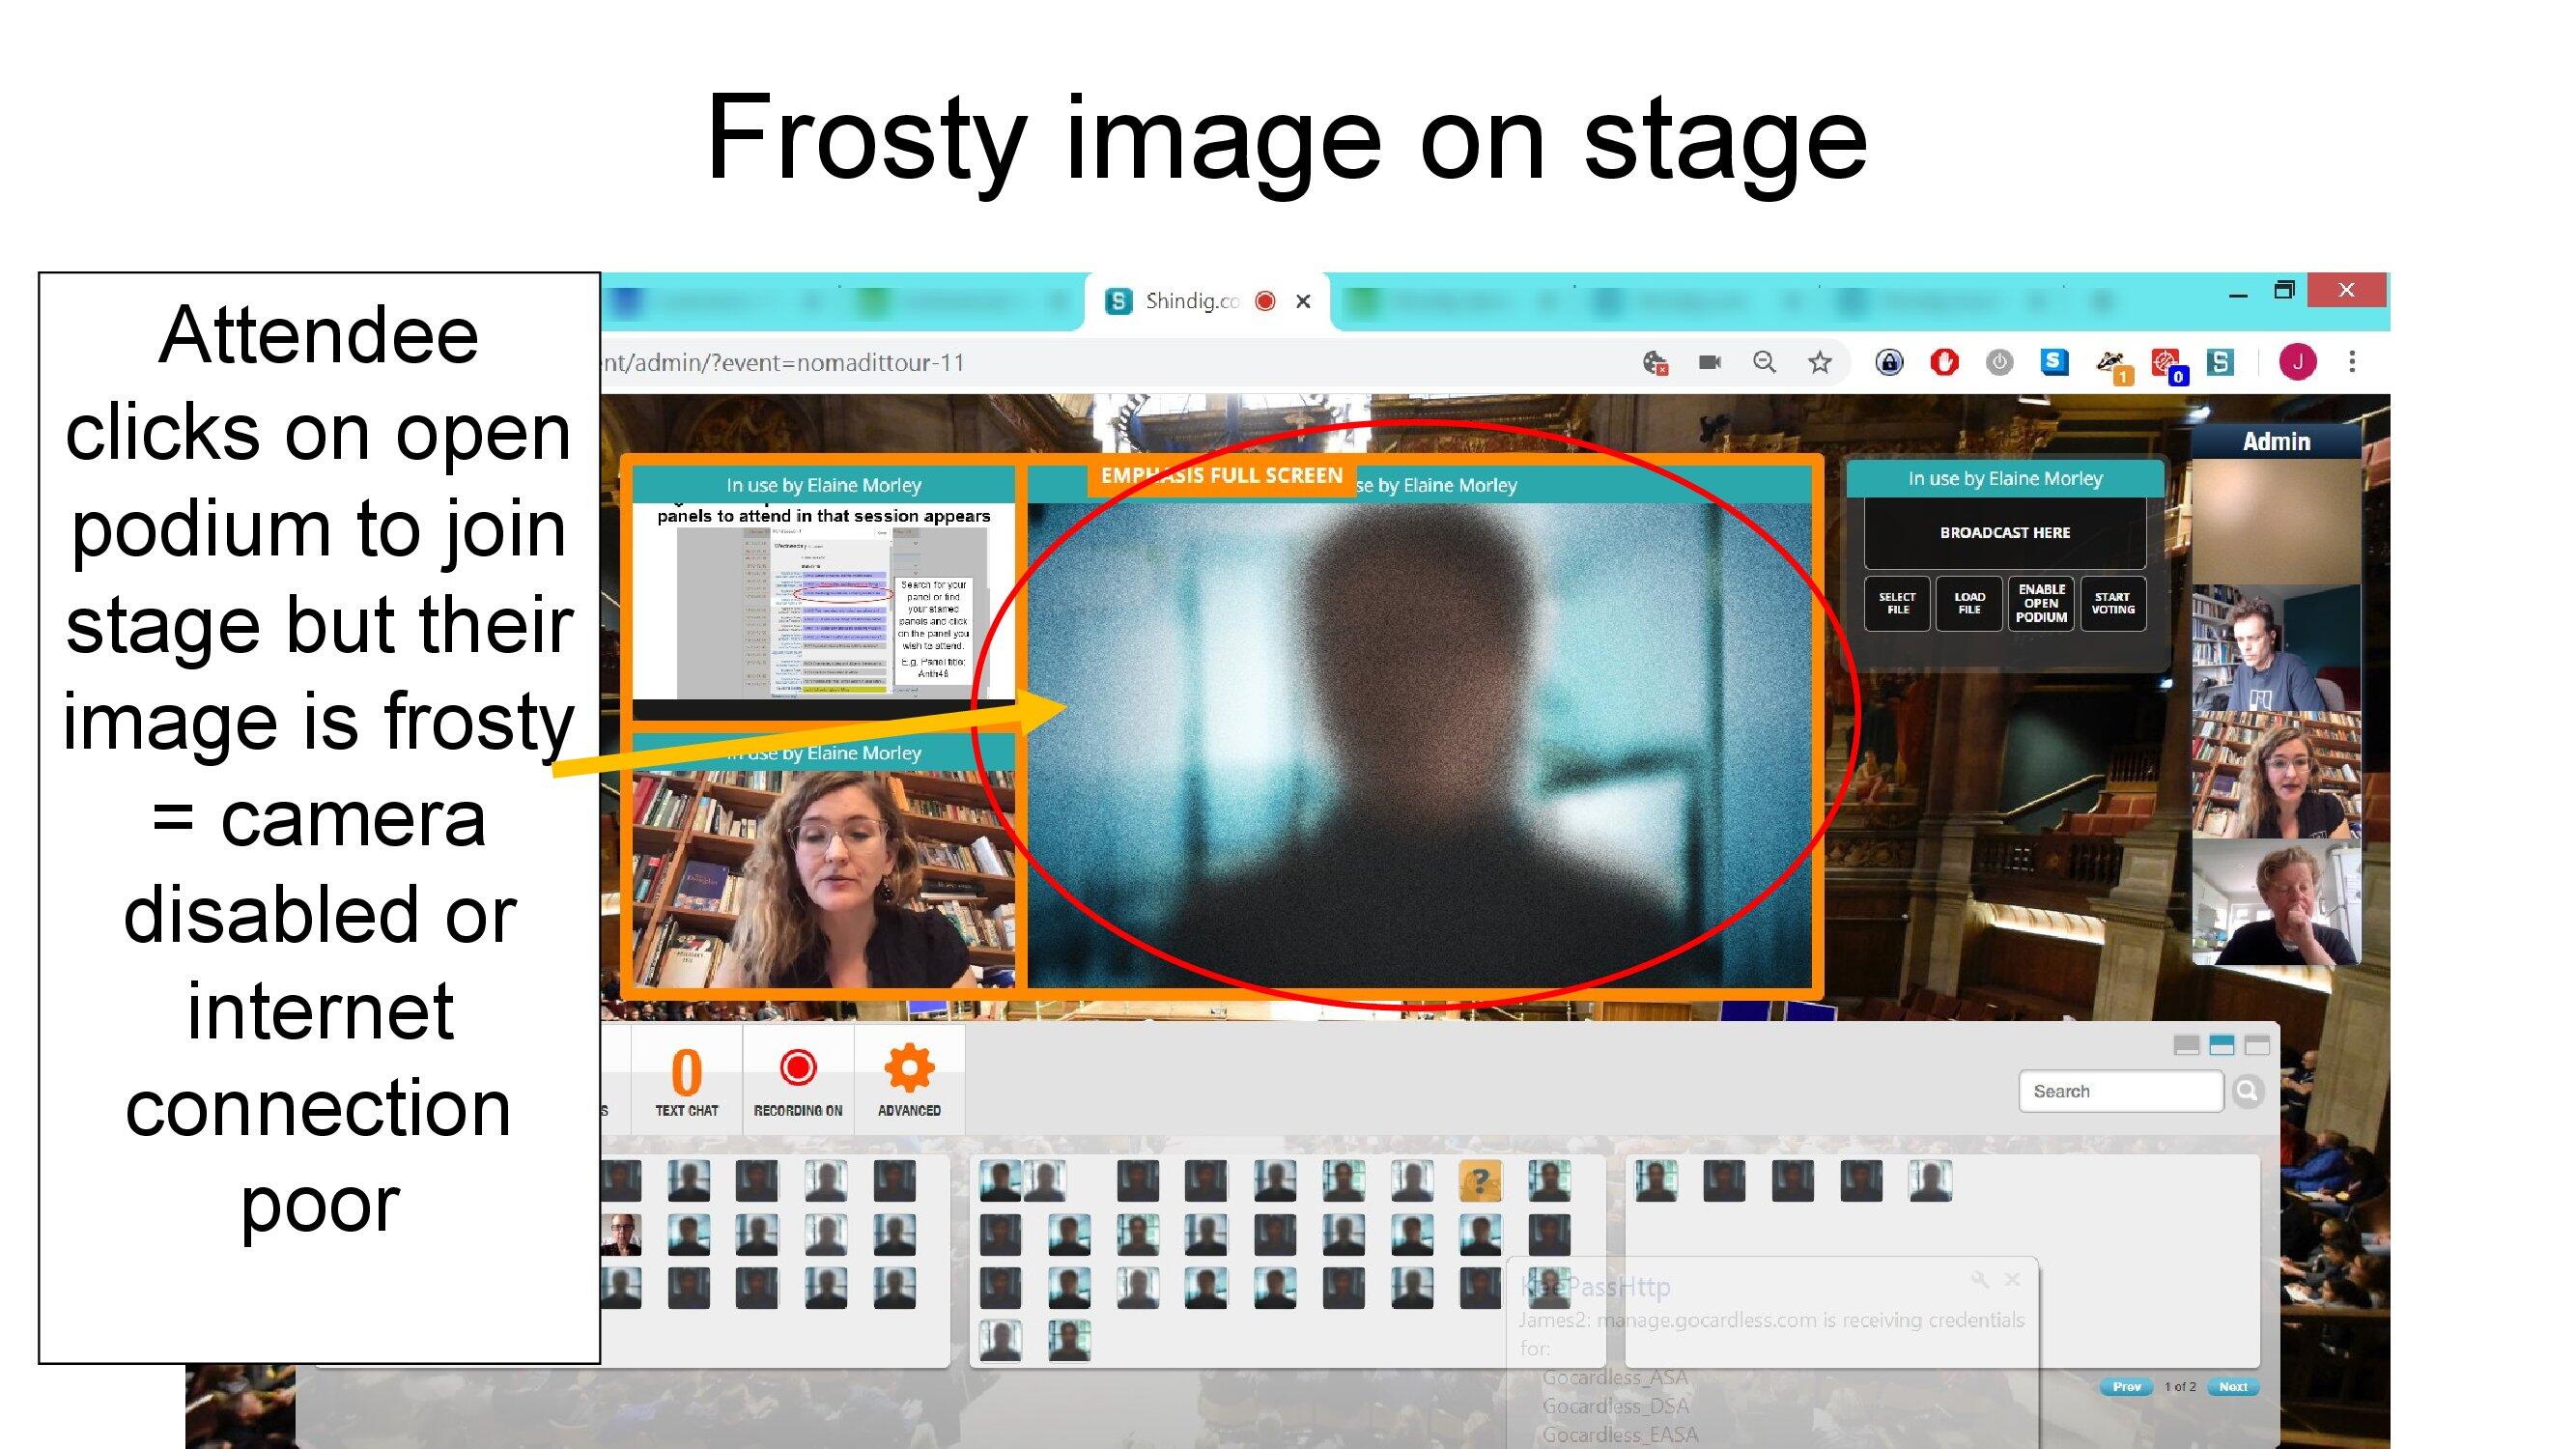
A frosty podium image means the attendee either has their camera off or bandwidth issues. You may ask them to enable their camera, but the important thing is to hear their question.
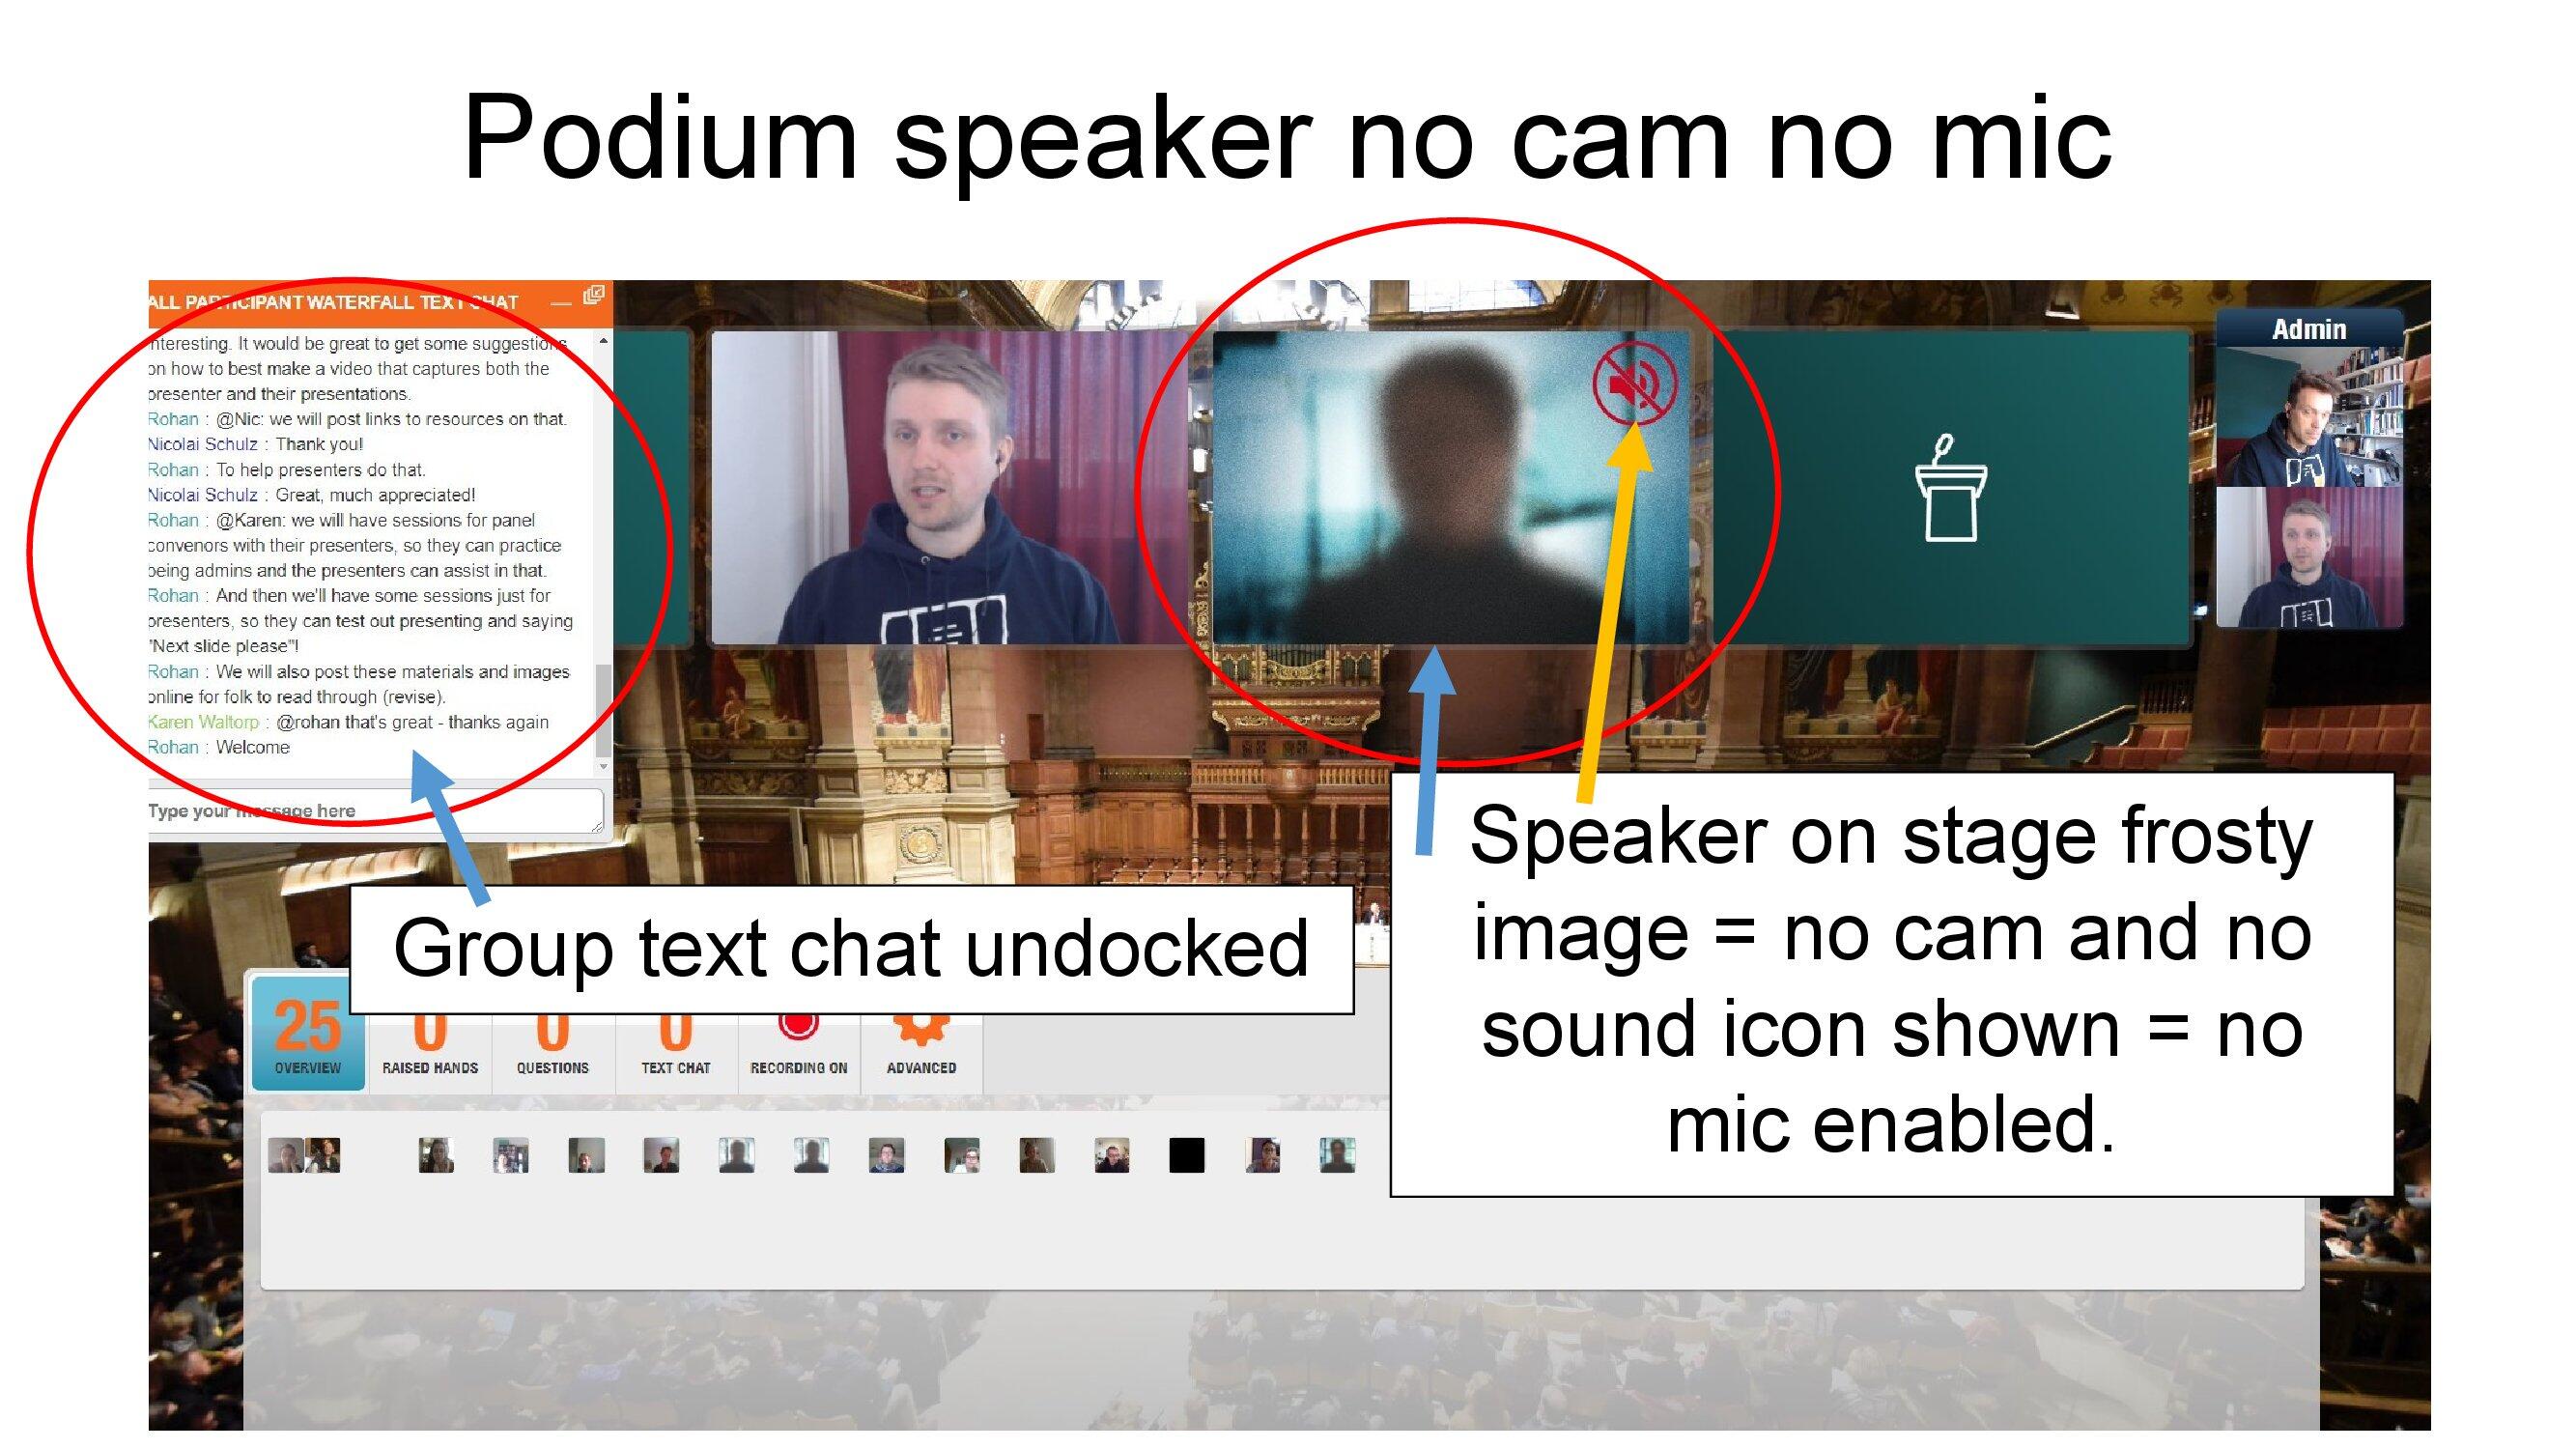
If you cannot hear them, look at the icon on their podium. In this case it signifies 'No Sound' so instruct the attendee to change their mic settings via the gear icon top right of their screen.
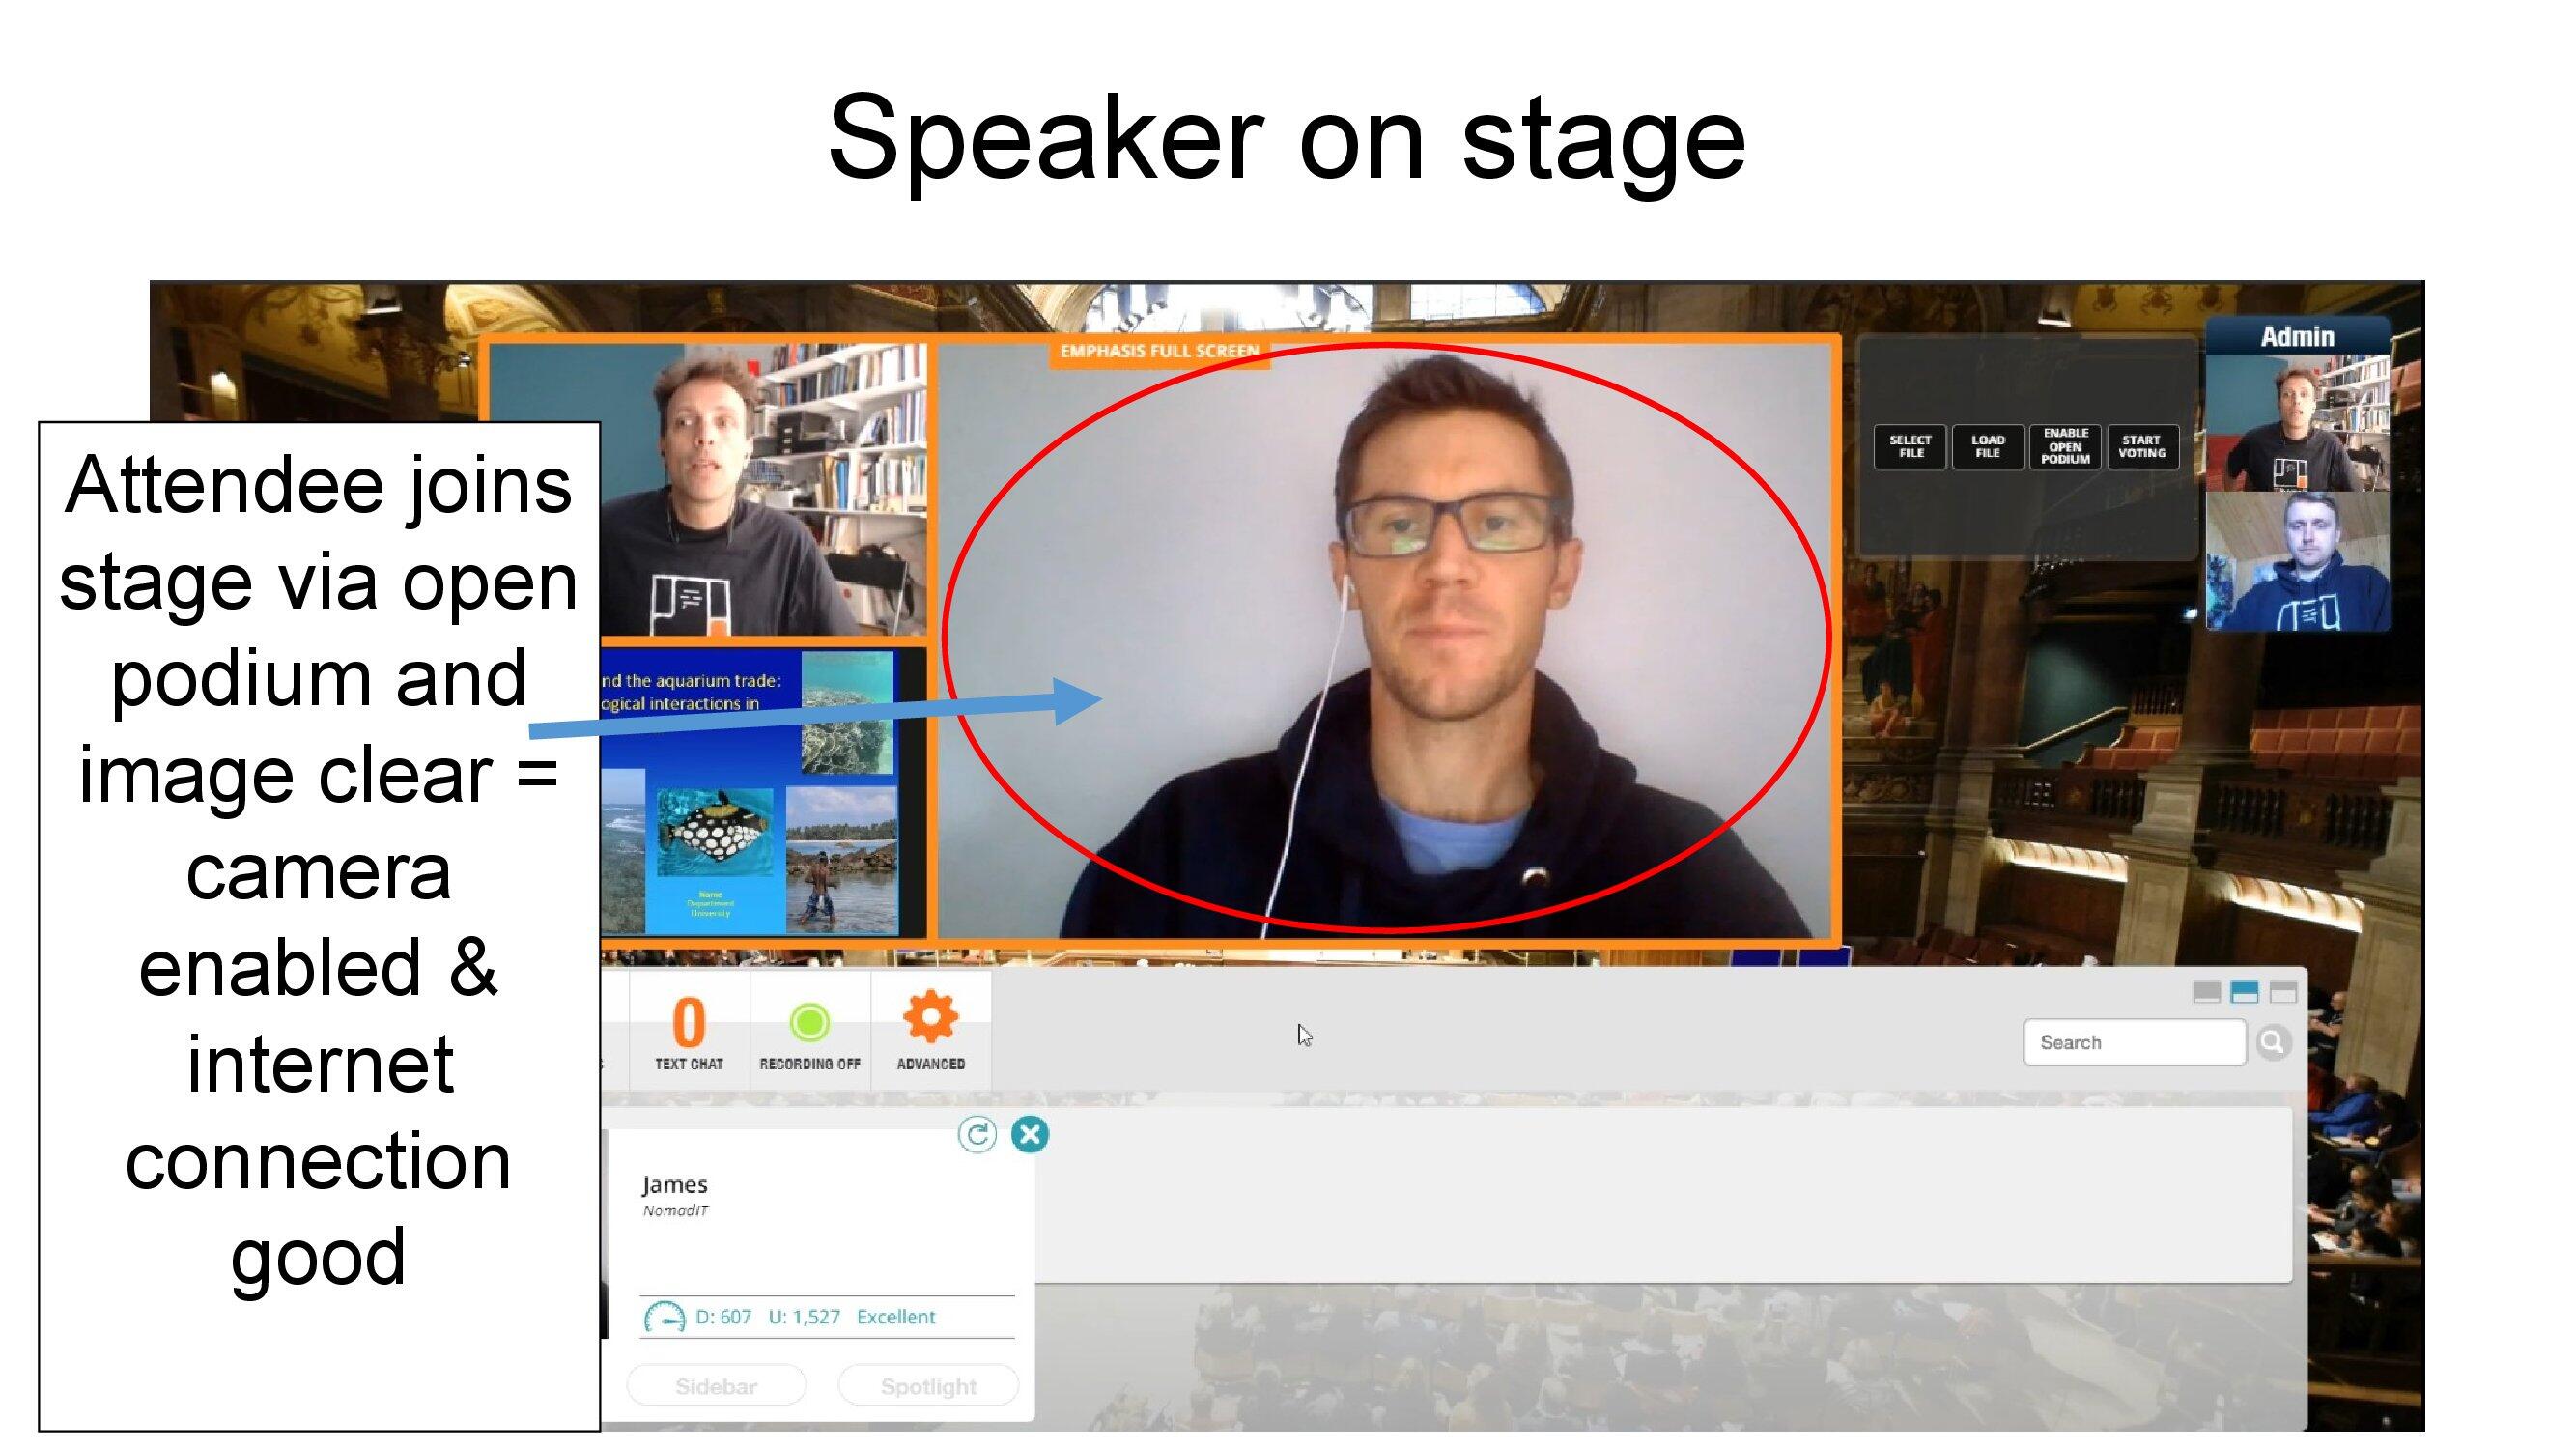
An attendee on an open podium has a Leave button to jump down from the stage, once they've asked their question. They might need reminding to do so.
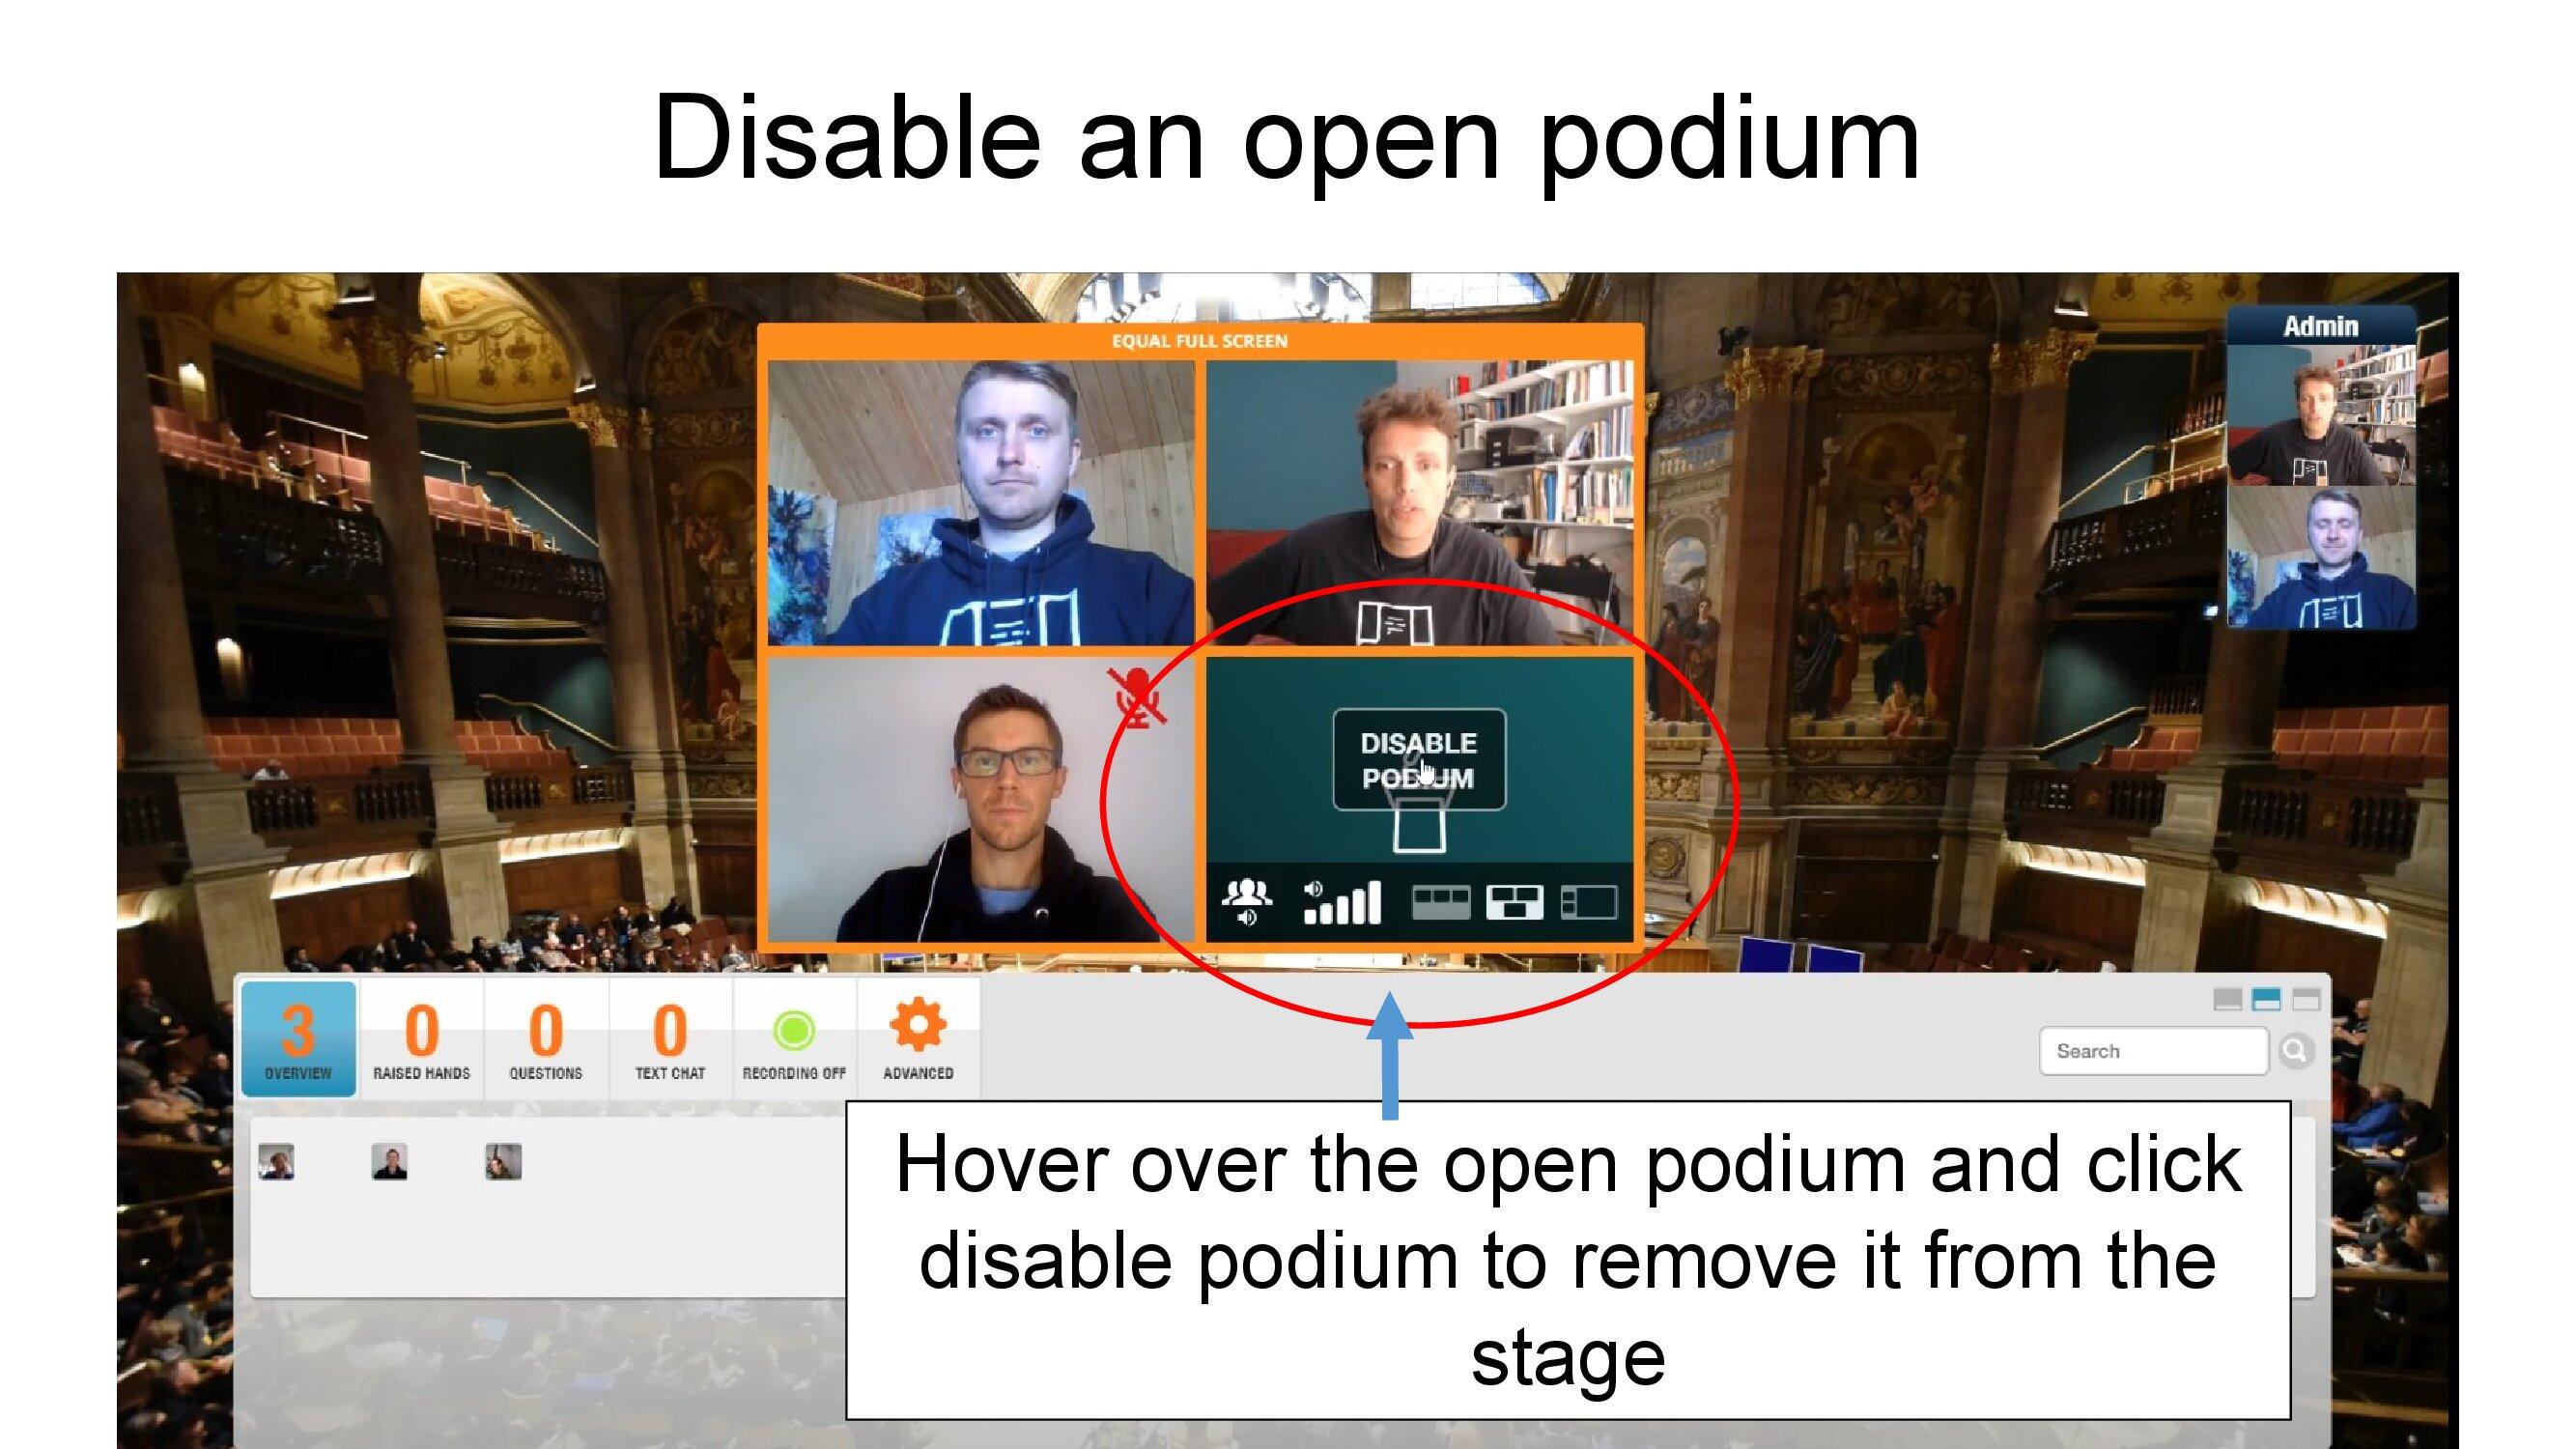
When you are finished using an Open Podium, select Disable podium to prevent interruption.
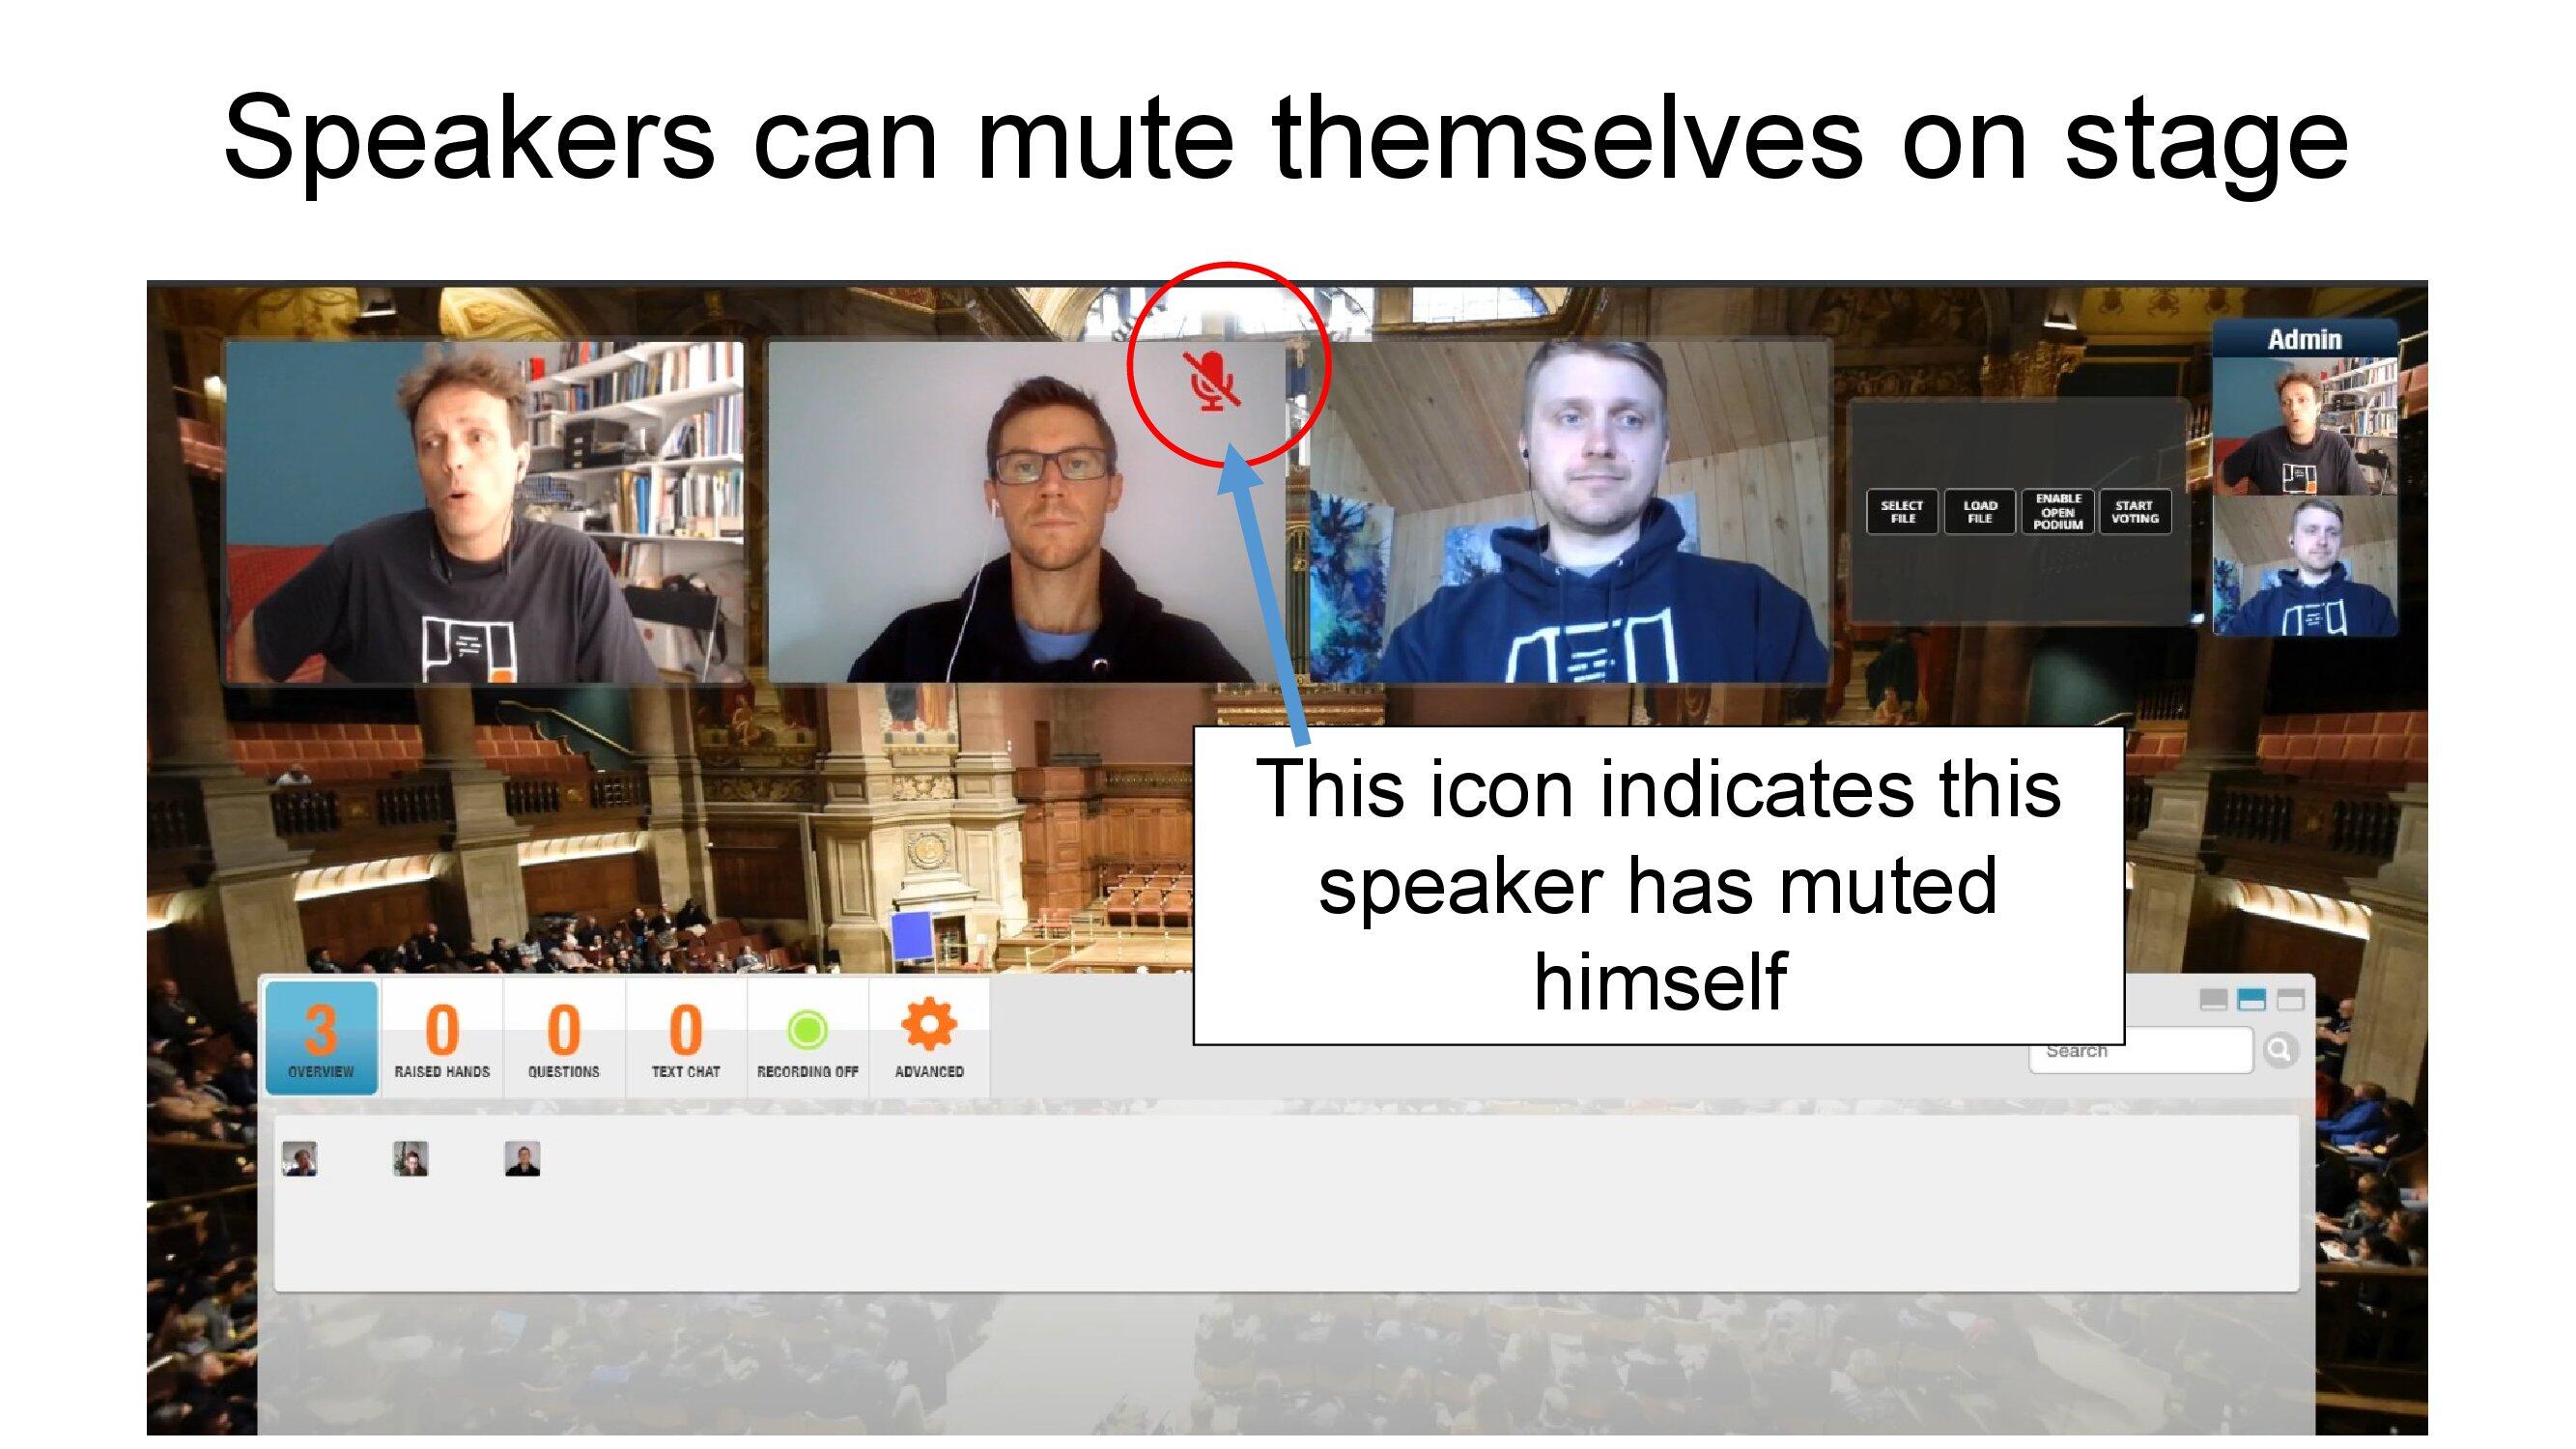
Note the muted mic icon on the middle speaker (as opposed to the no sound icon 4 slides back). They will need to click Un-mute in order to be heard.
6. Toolbar extras
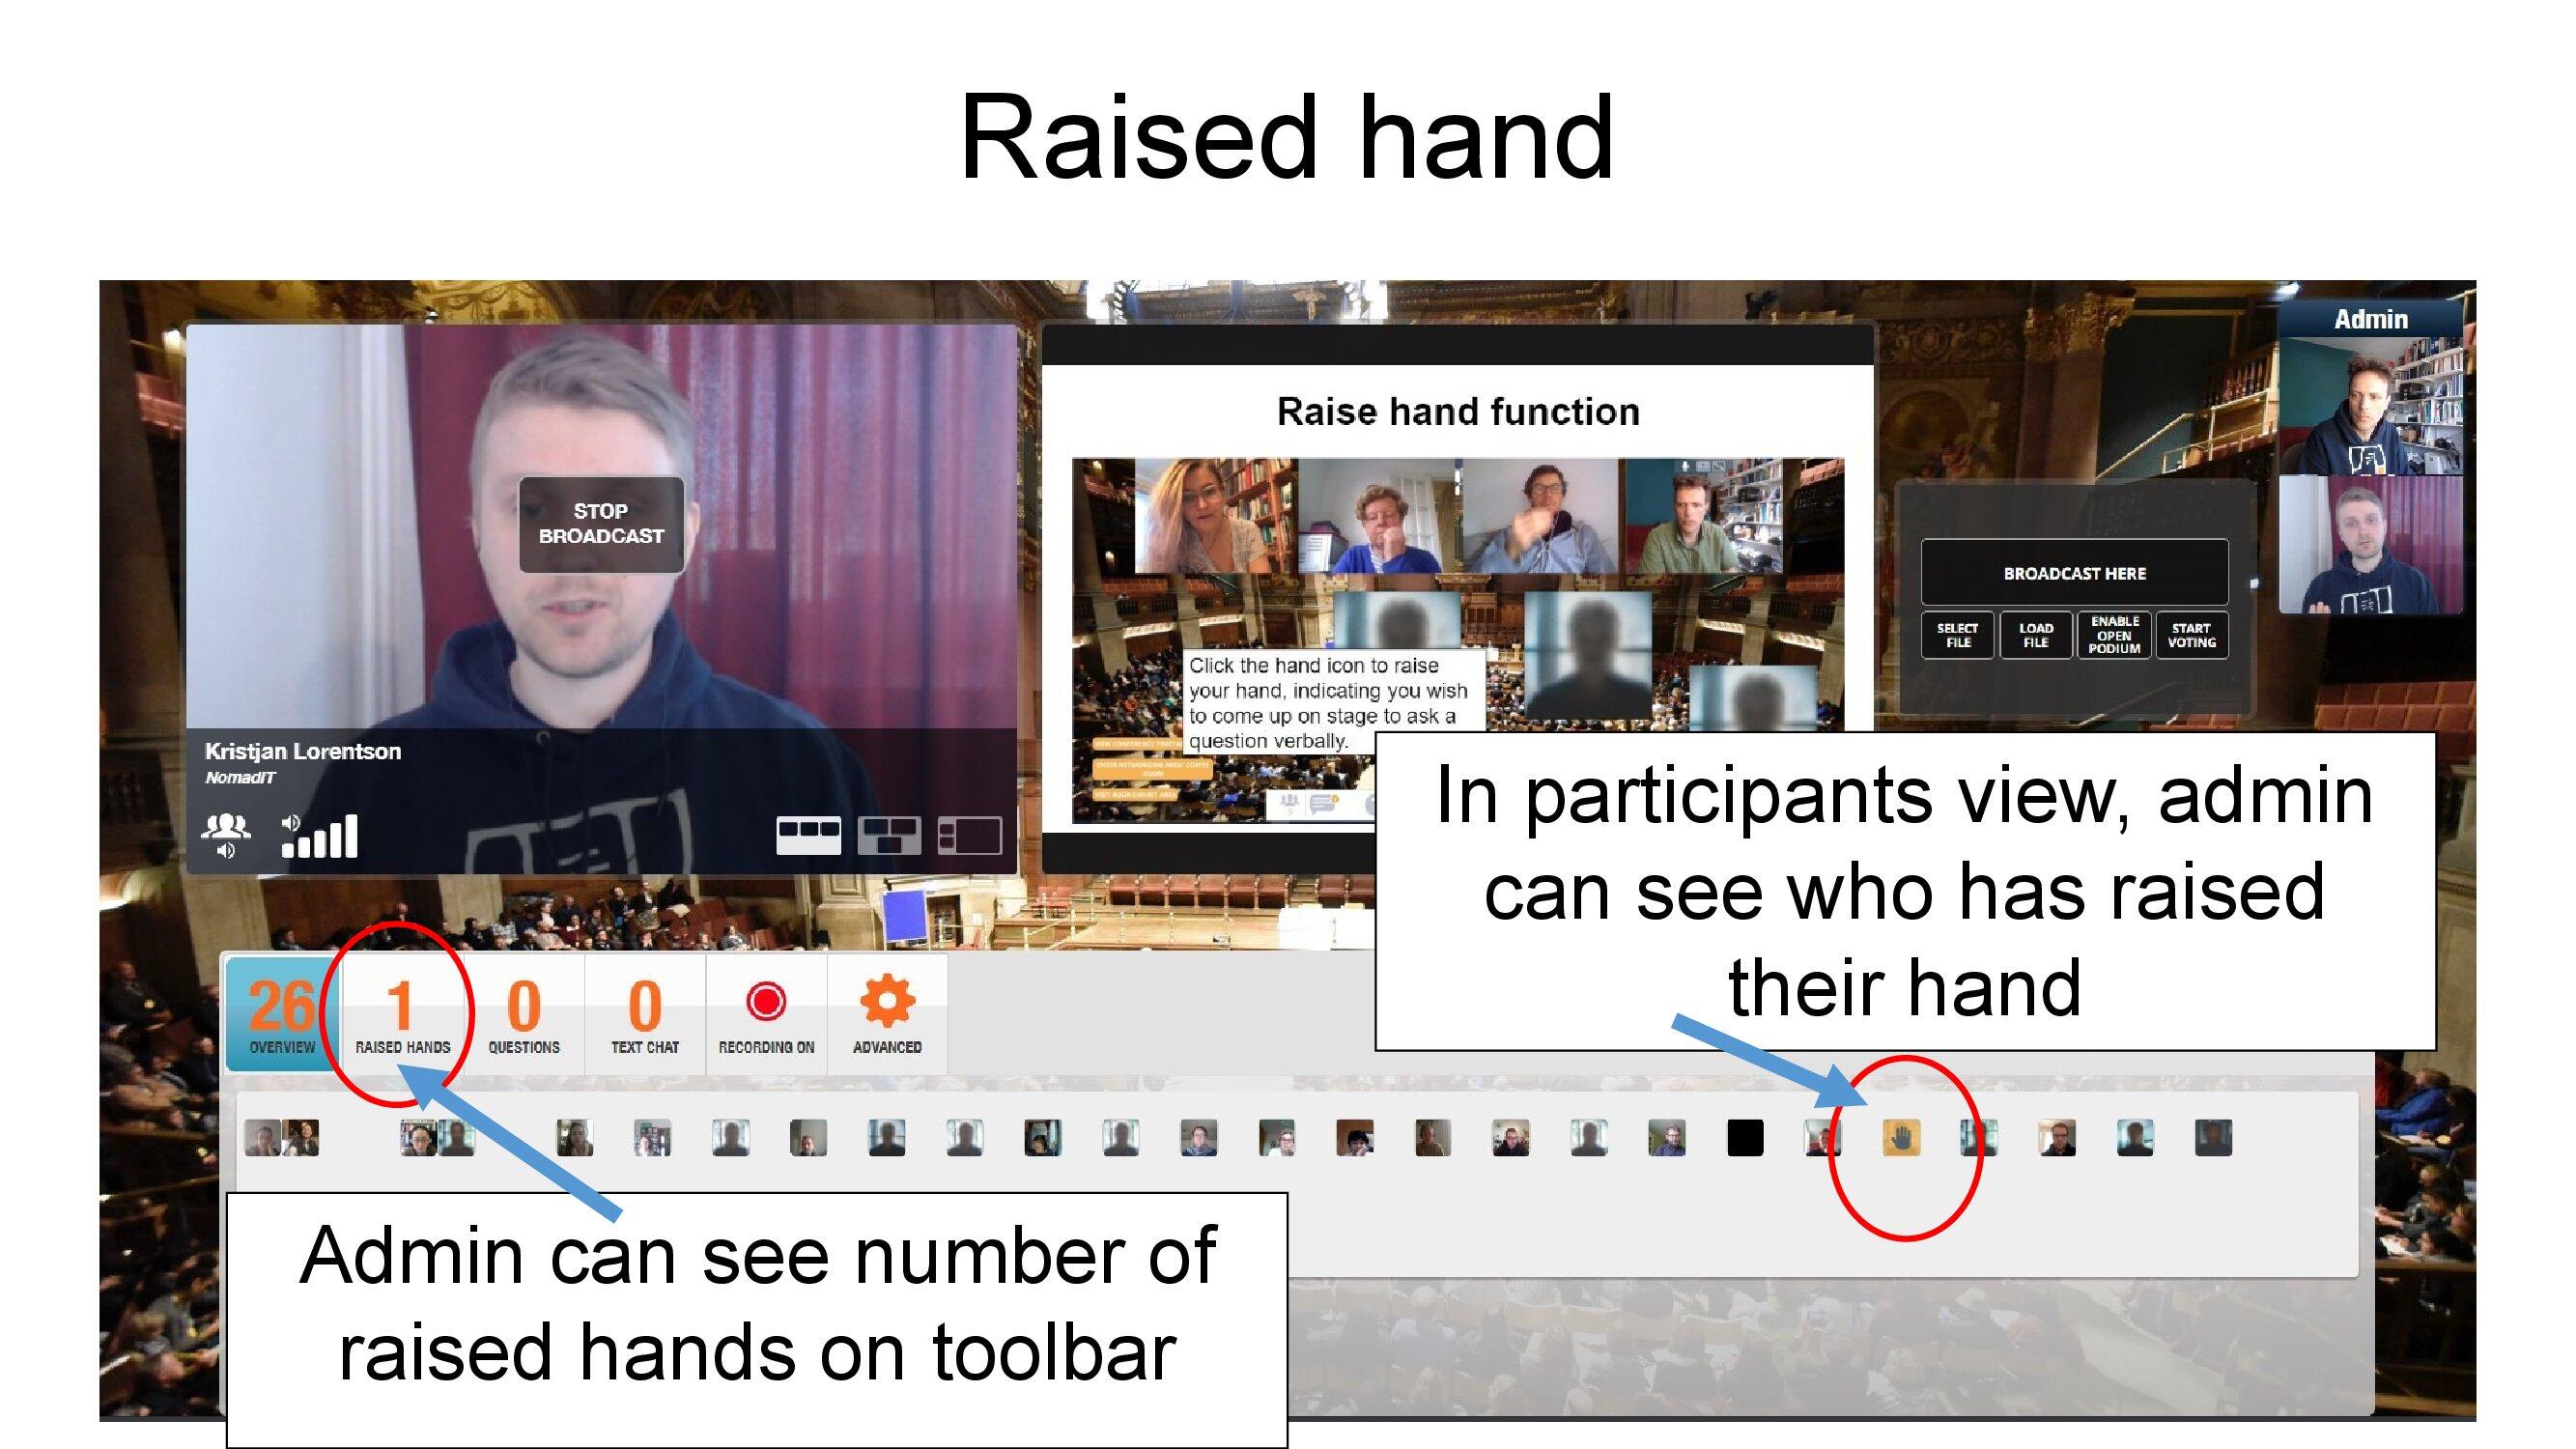
Use the raised hands functionality either to get visual feedback from attendees, or to allow them to signal a desire to come up on stage. Make it clear at specific times, what it is you want them to mean by raising their hand.
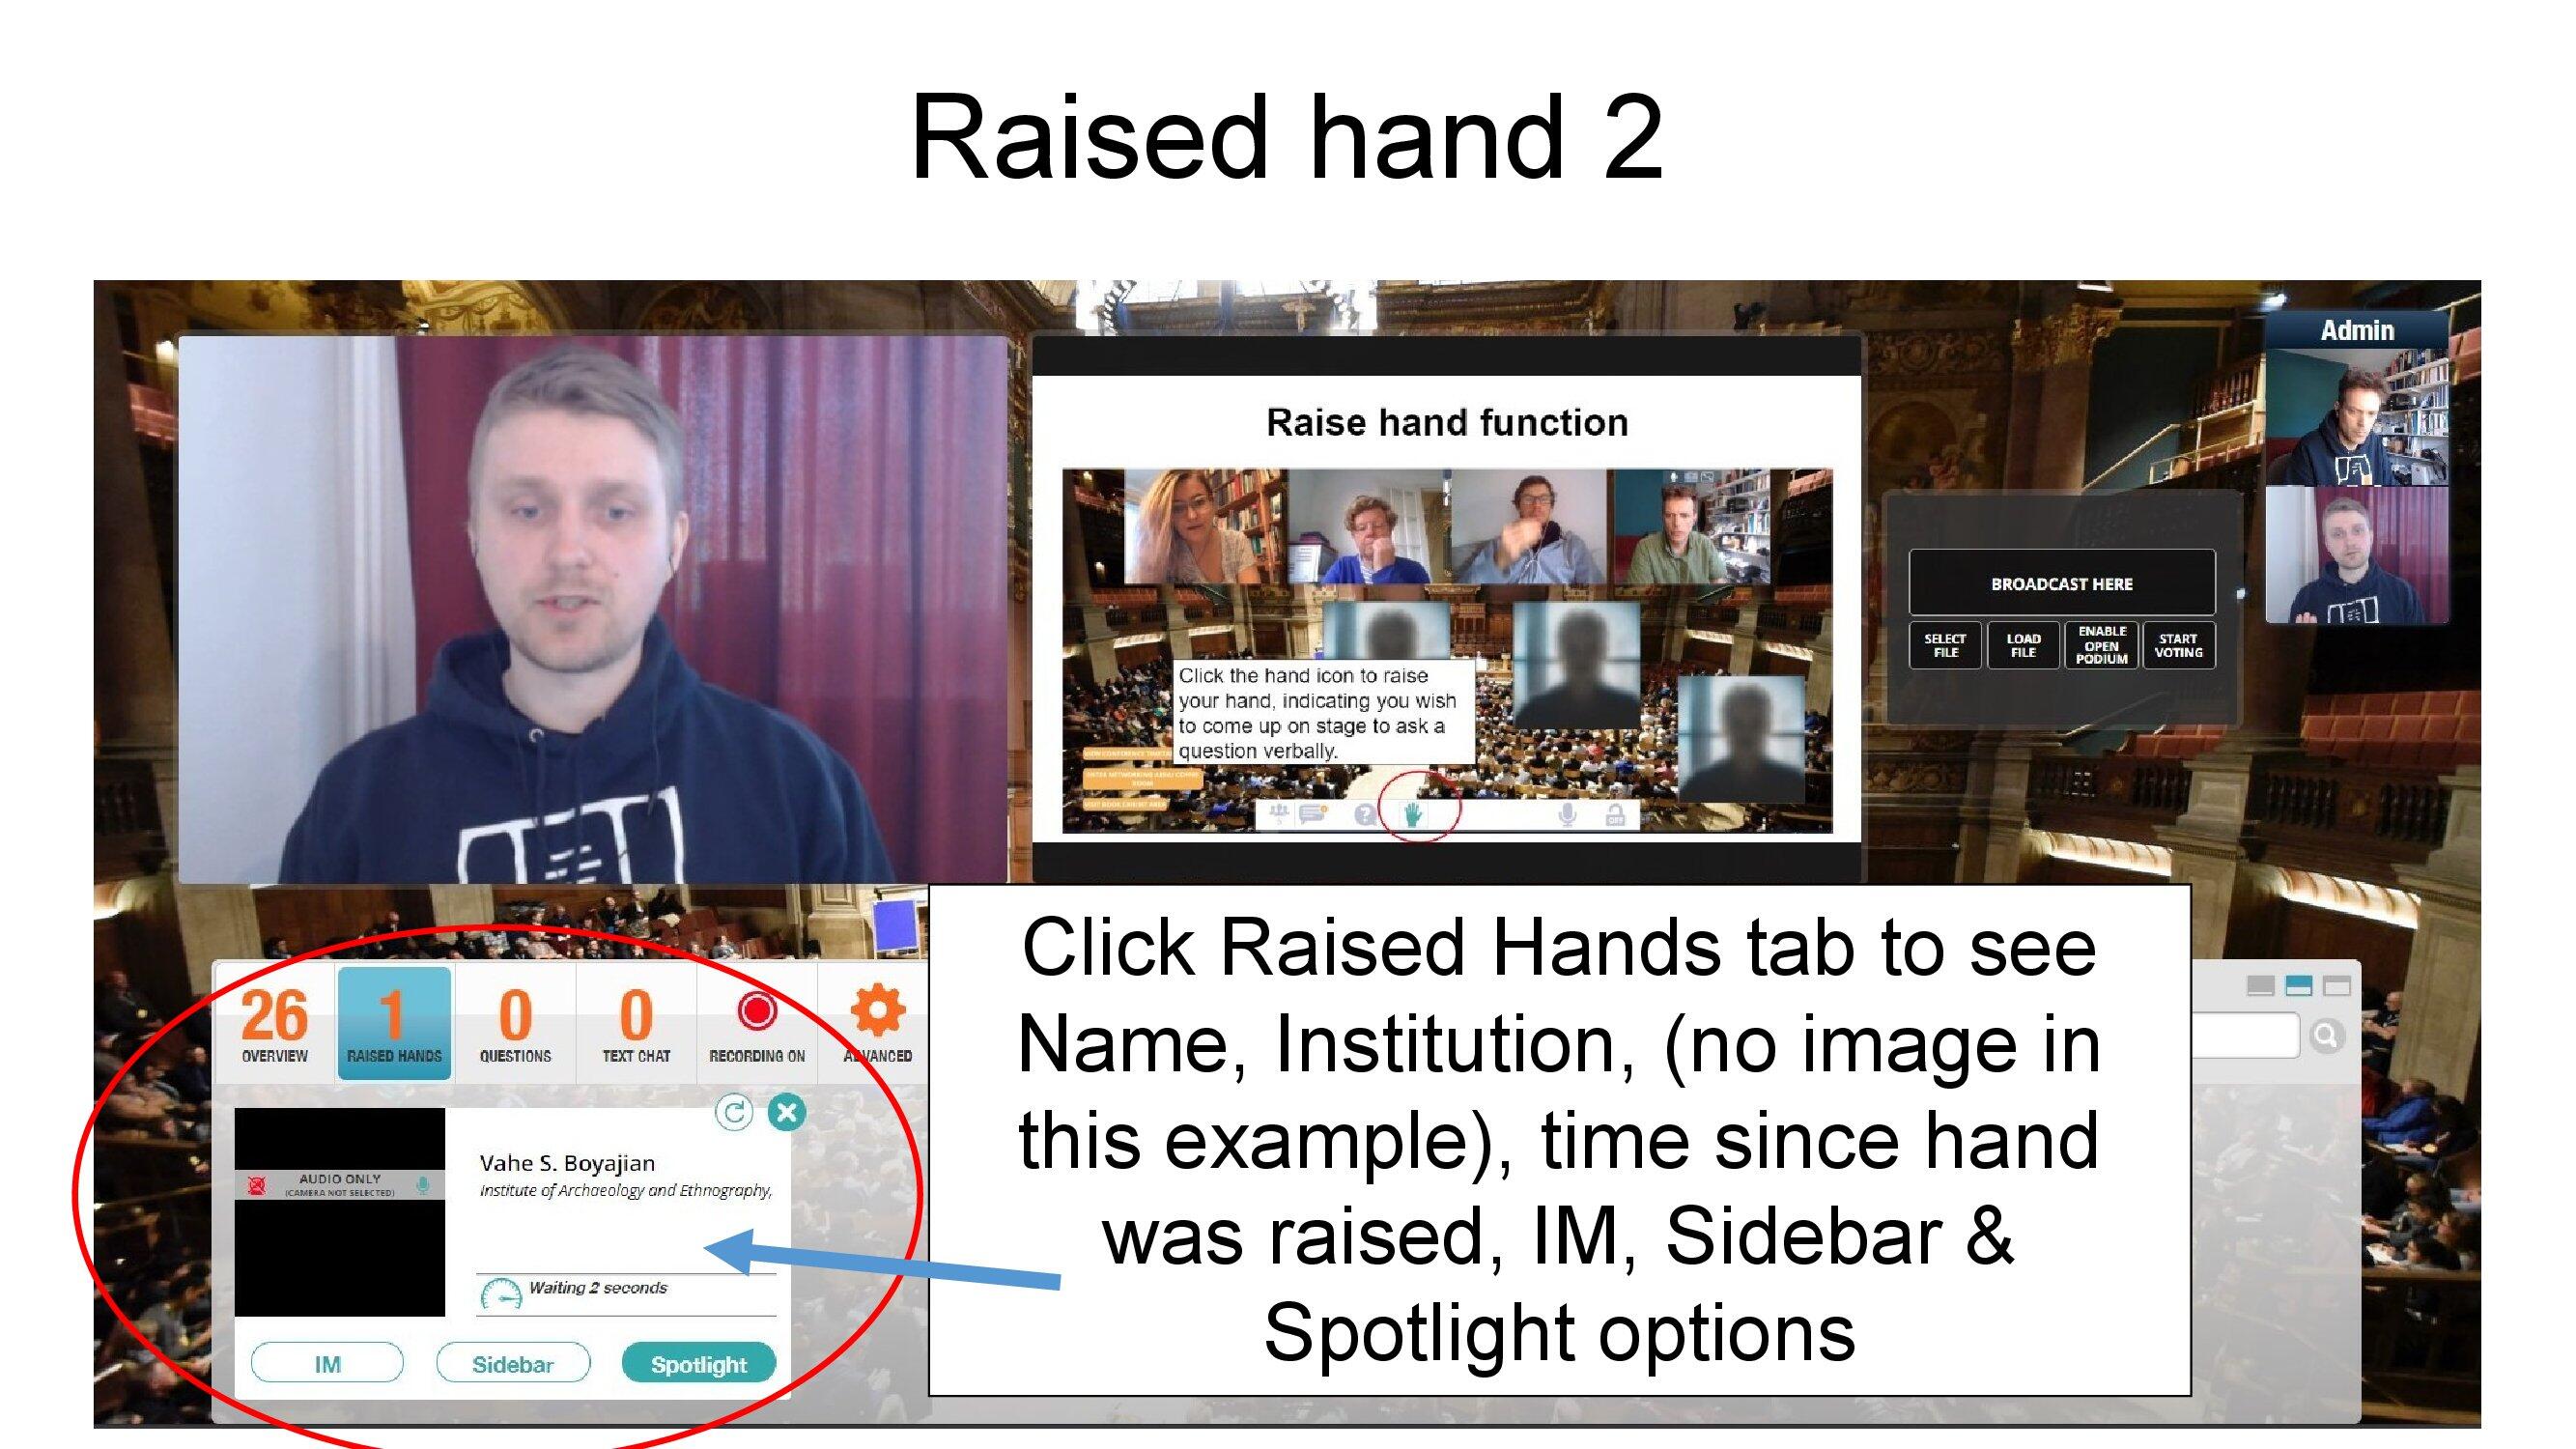
The second toolbar tab displays those with raised hands, and if planning to spotlight them on stage, you can check their readiness (bandwidth, image, audio).
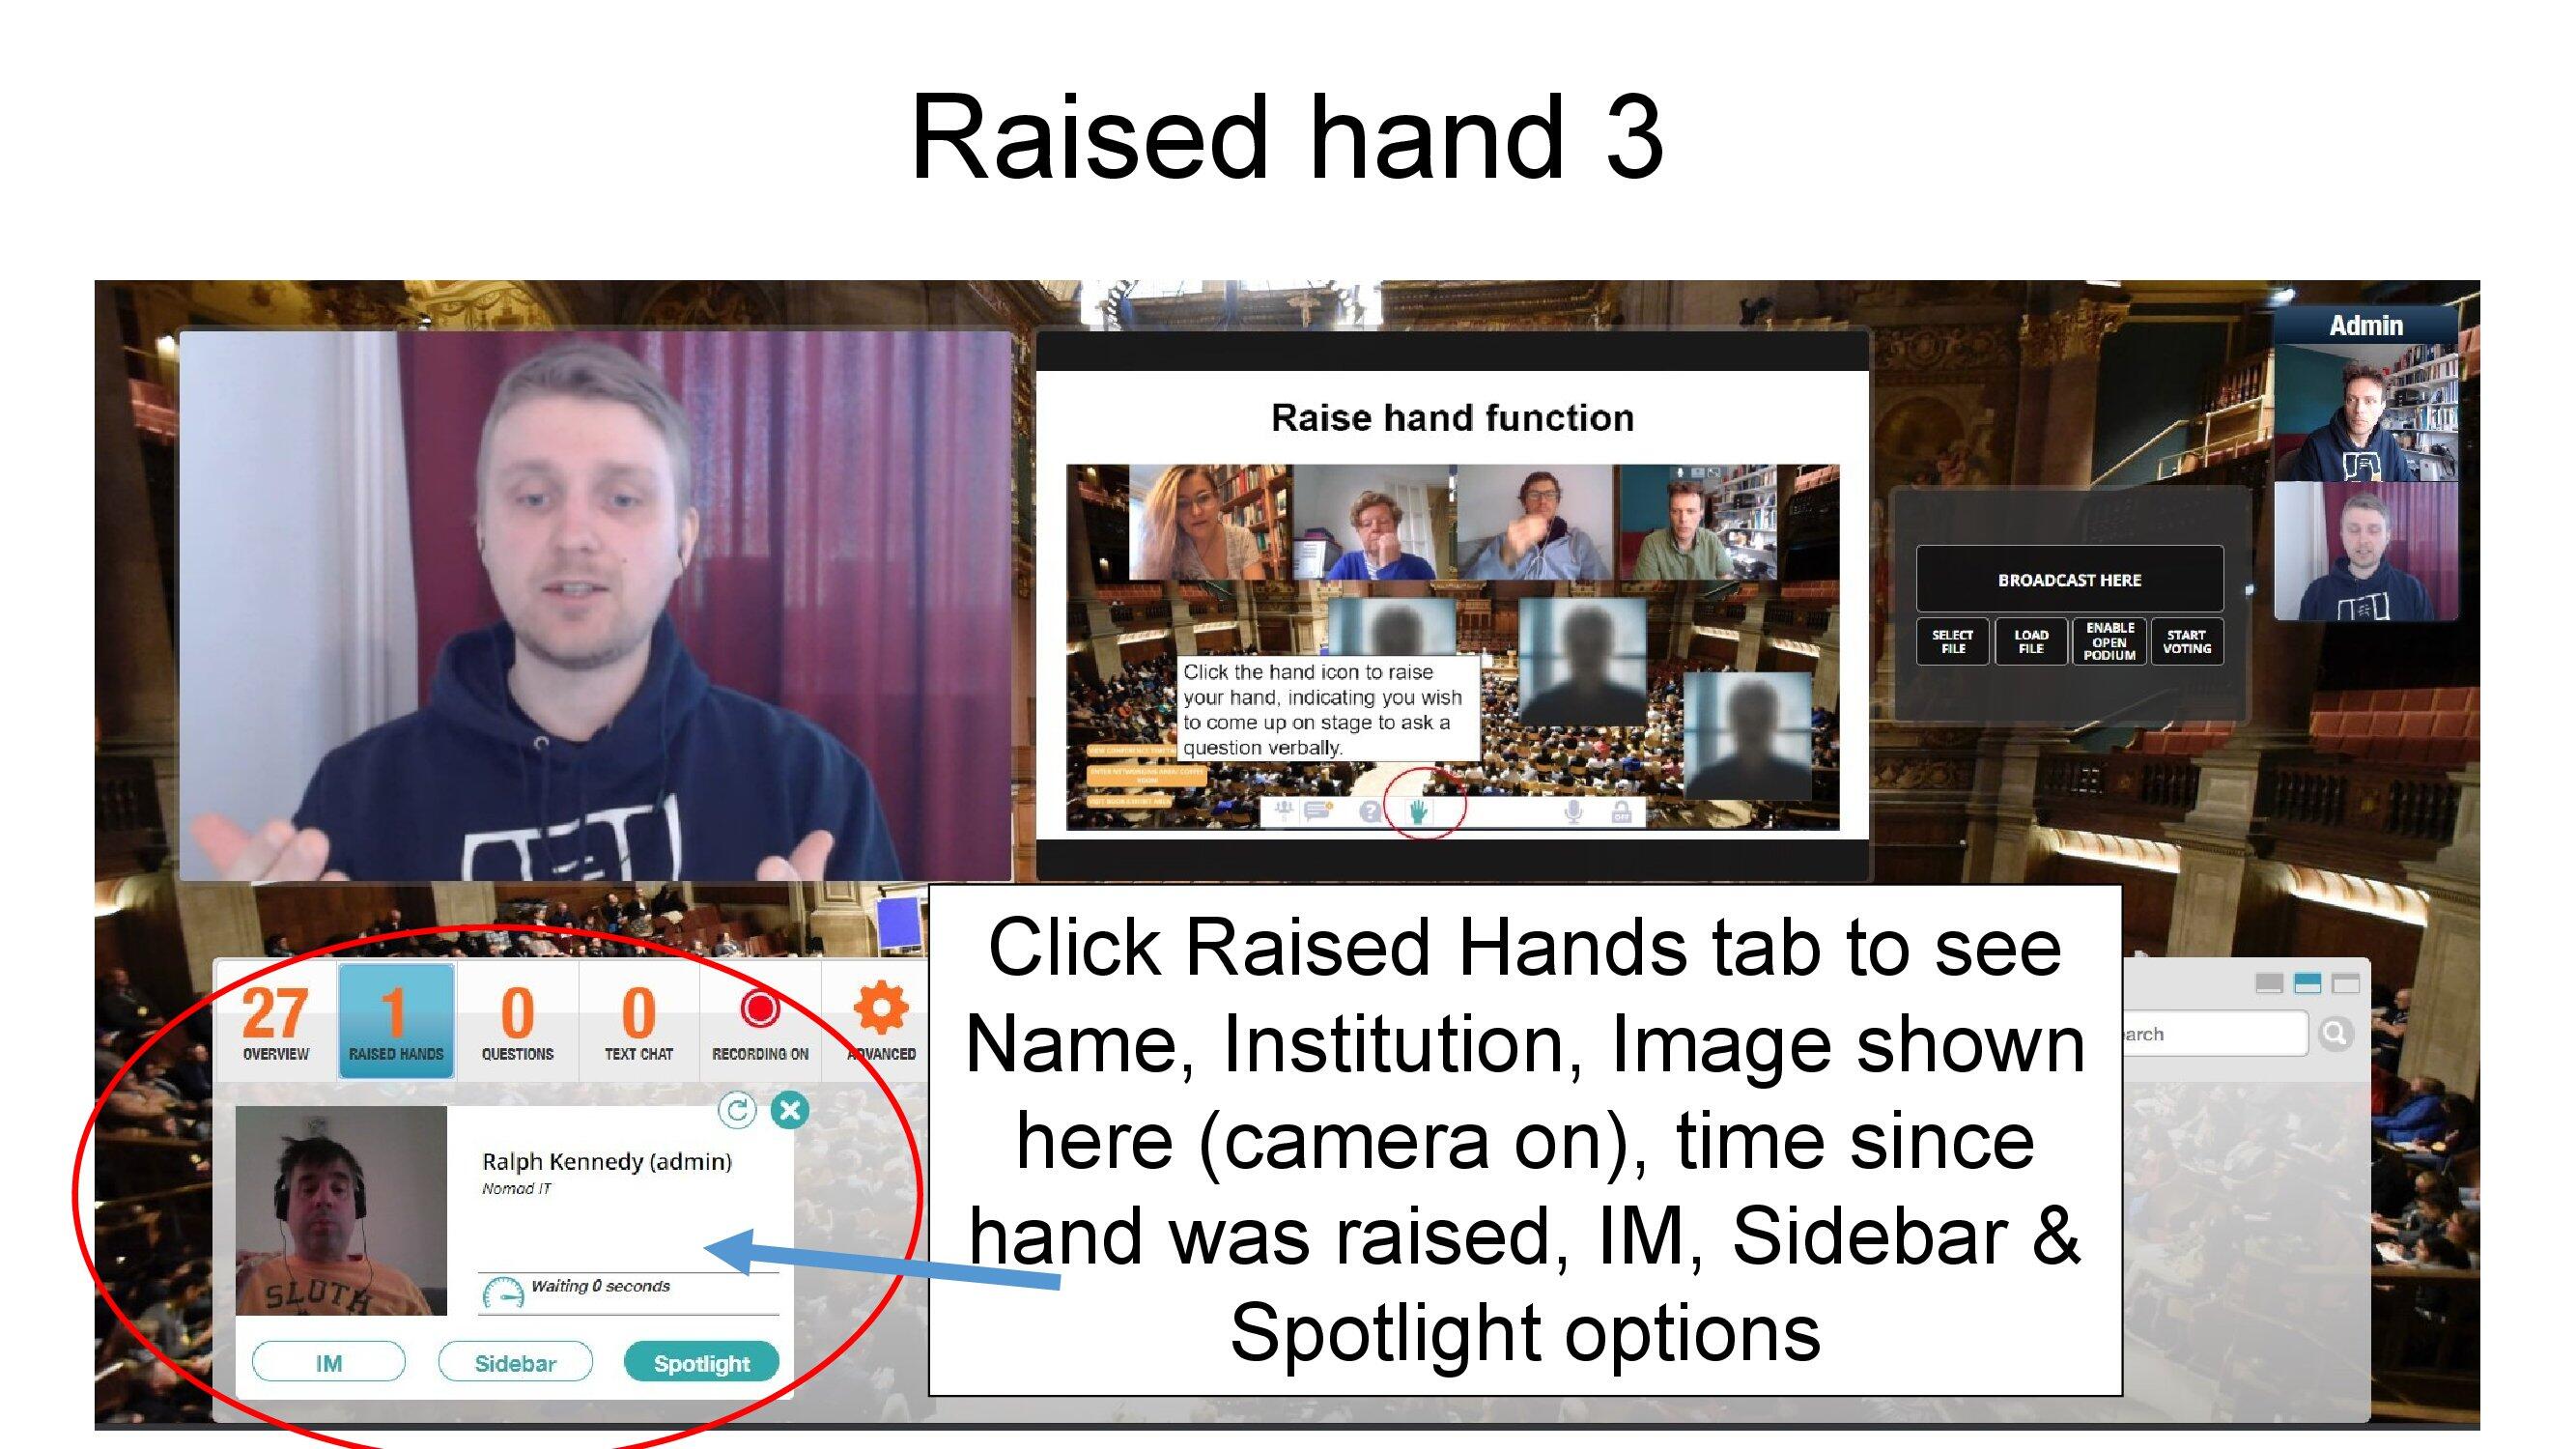
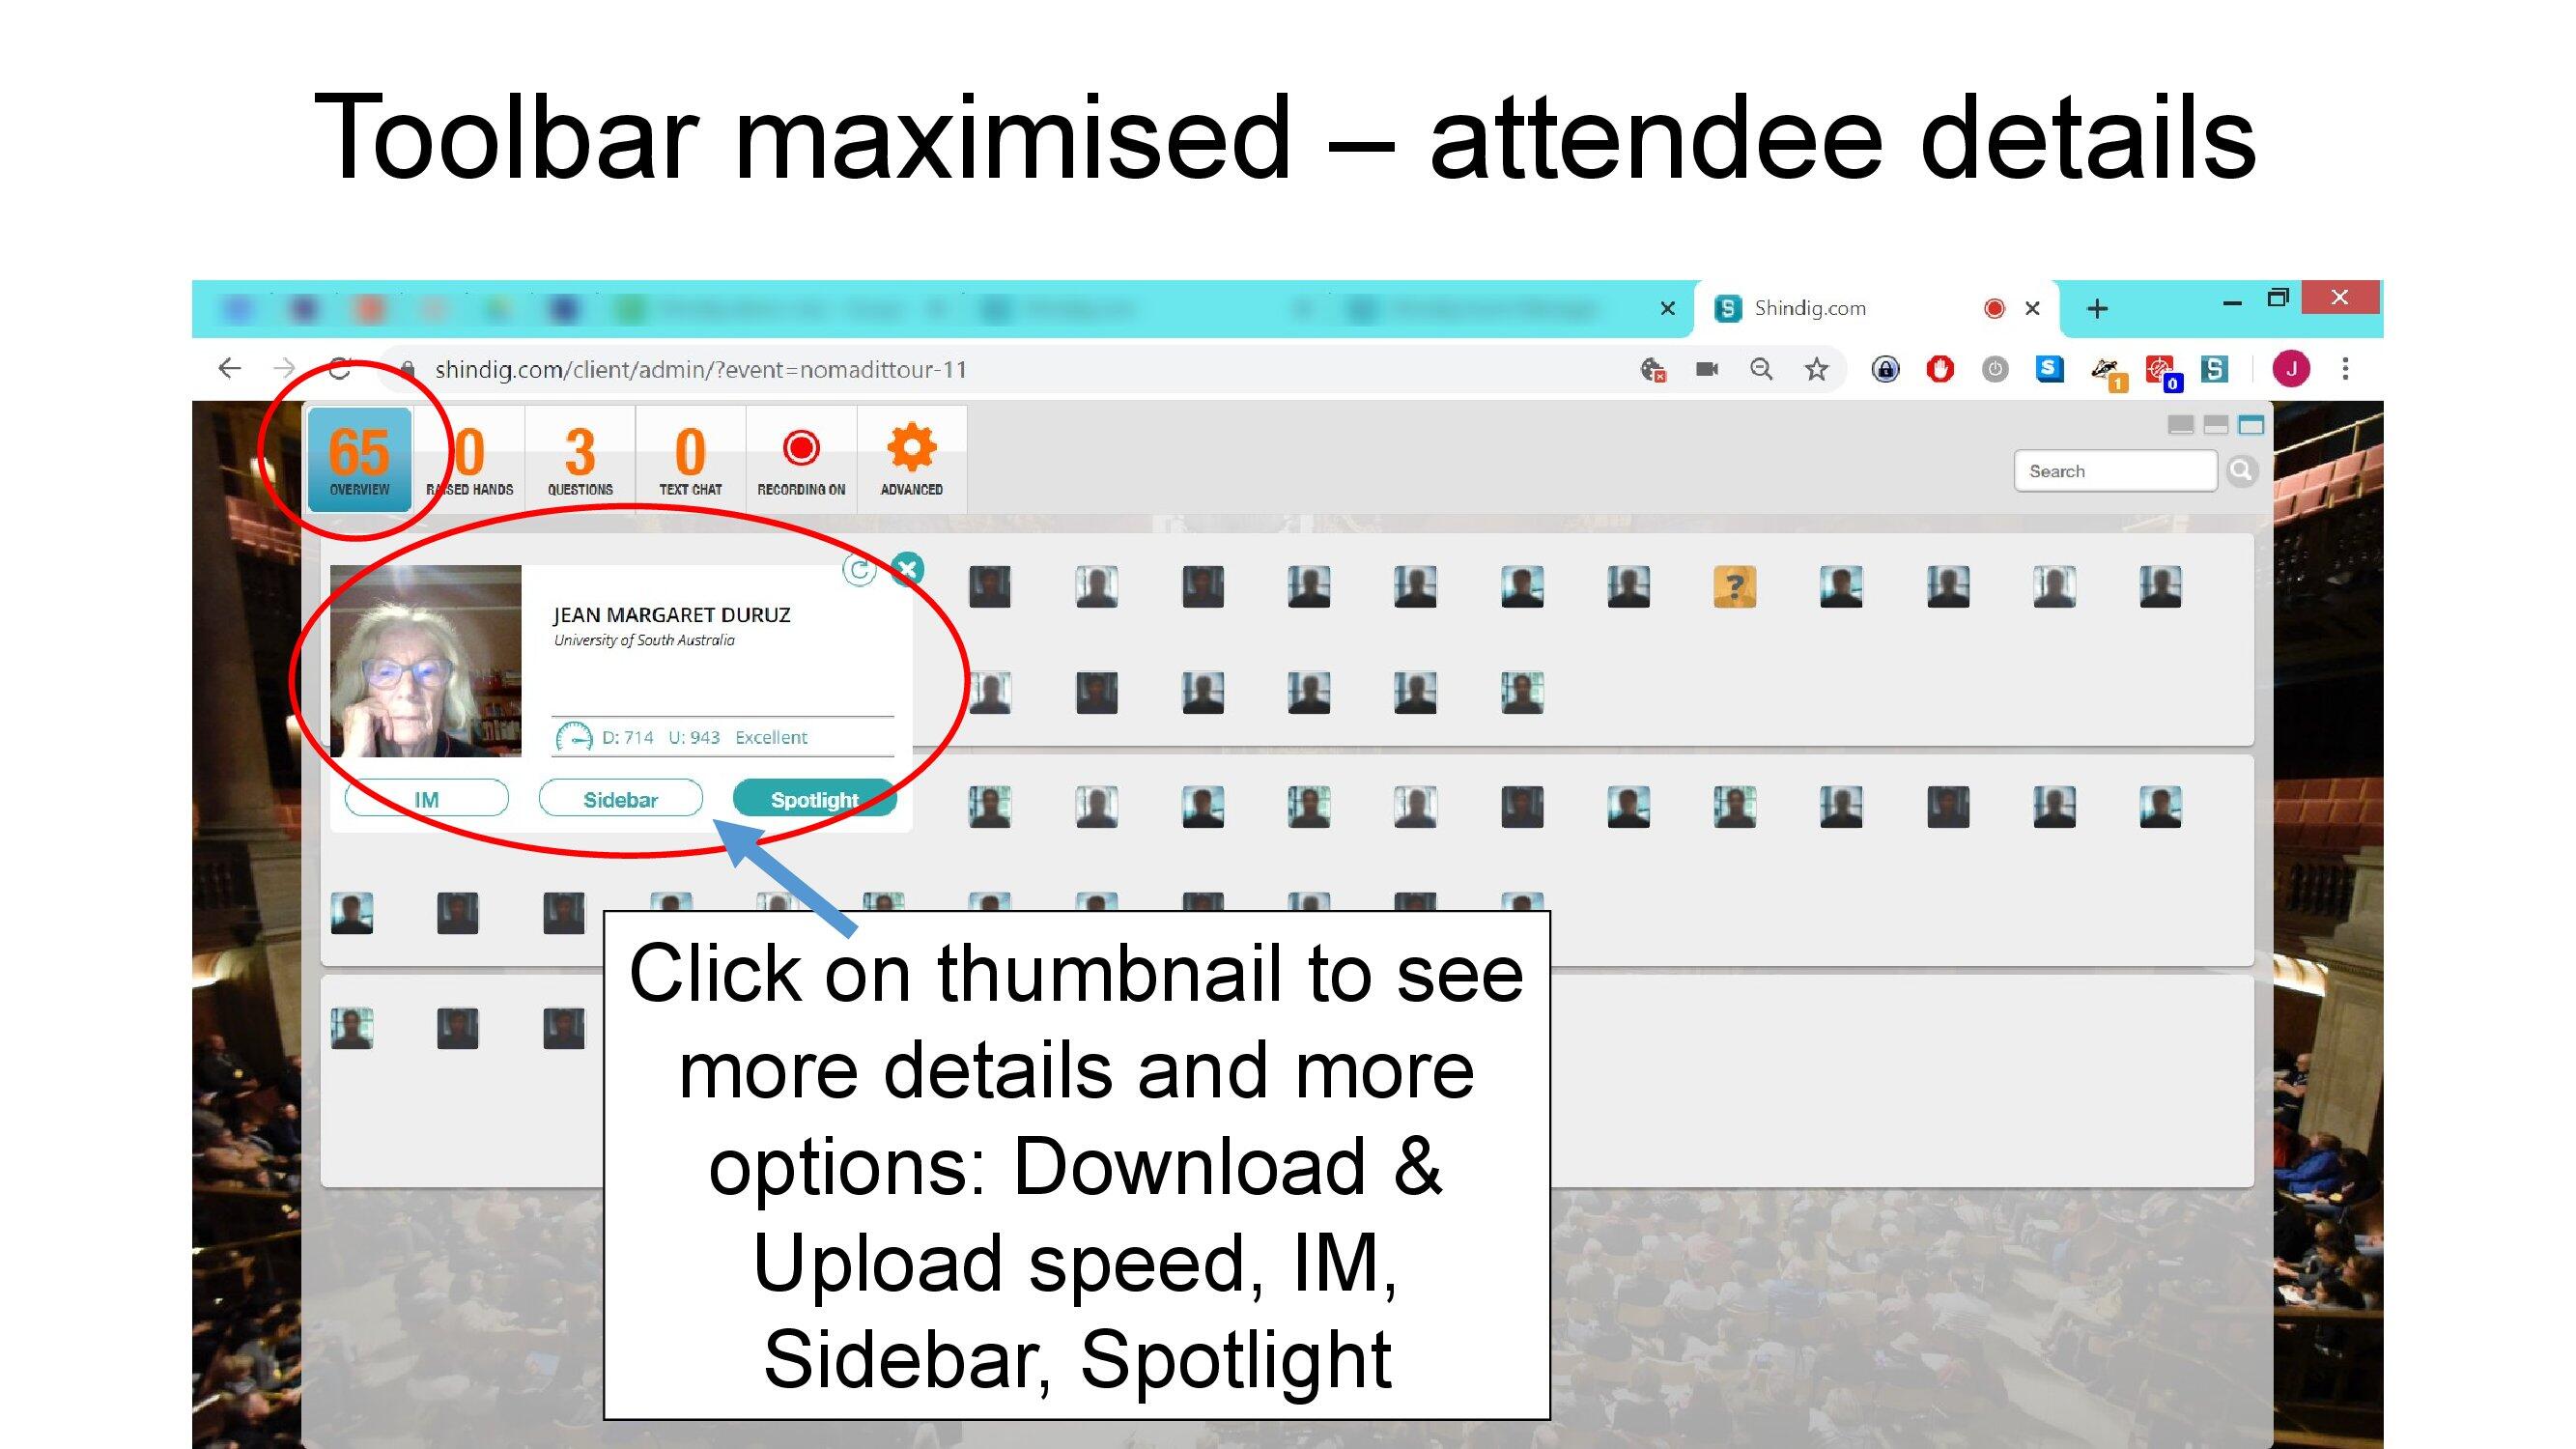
The attendee's card has options for IM or spotlighting to the stage.
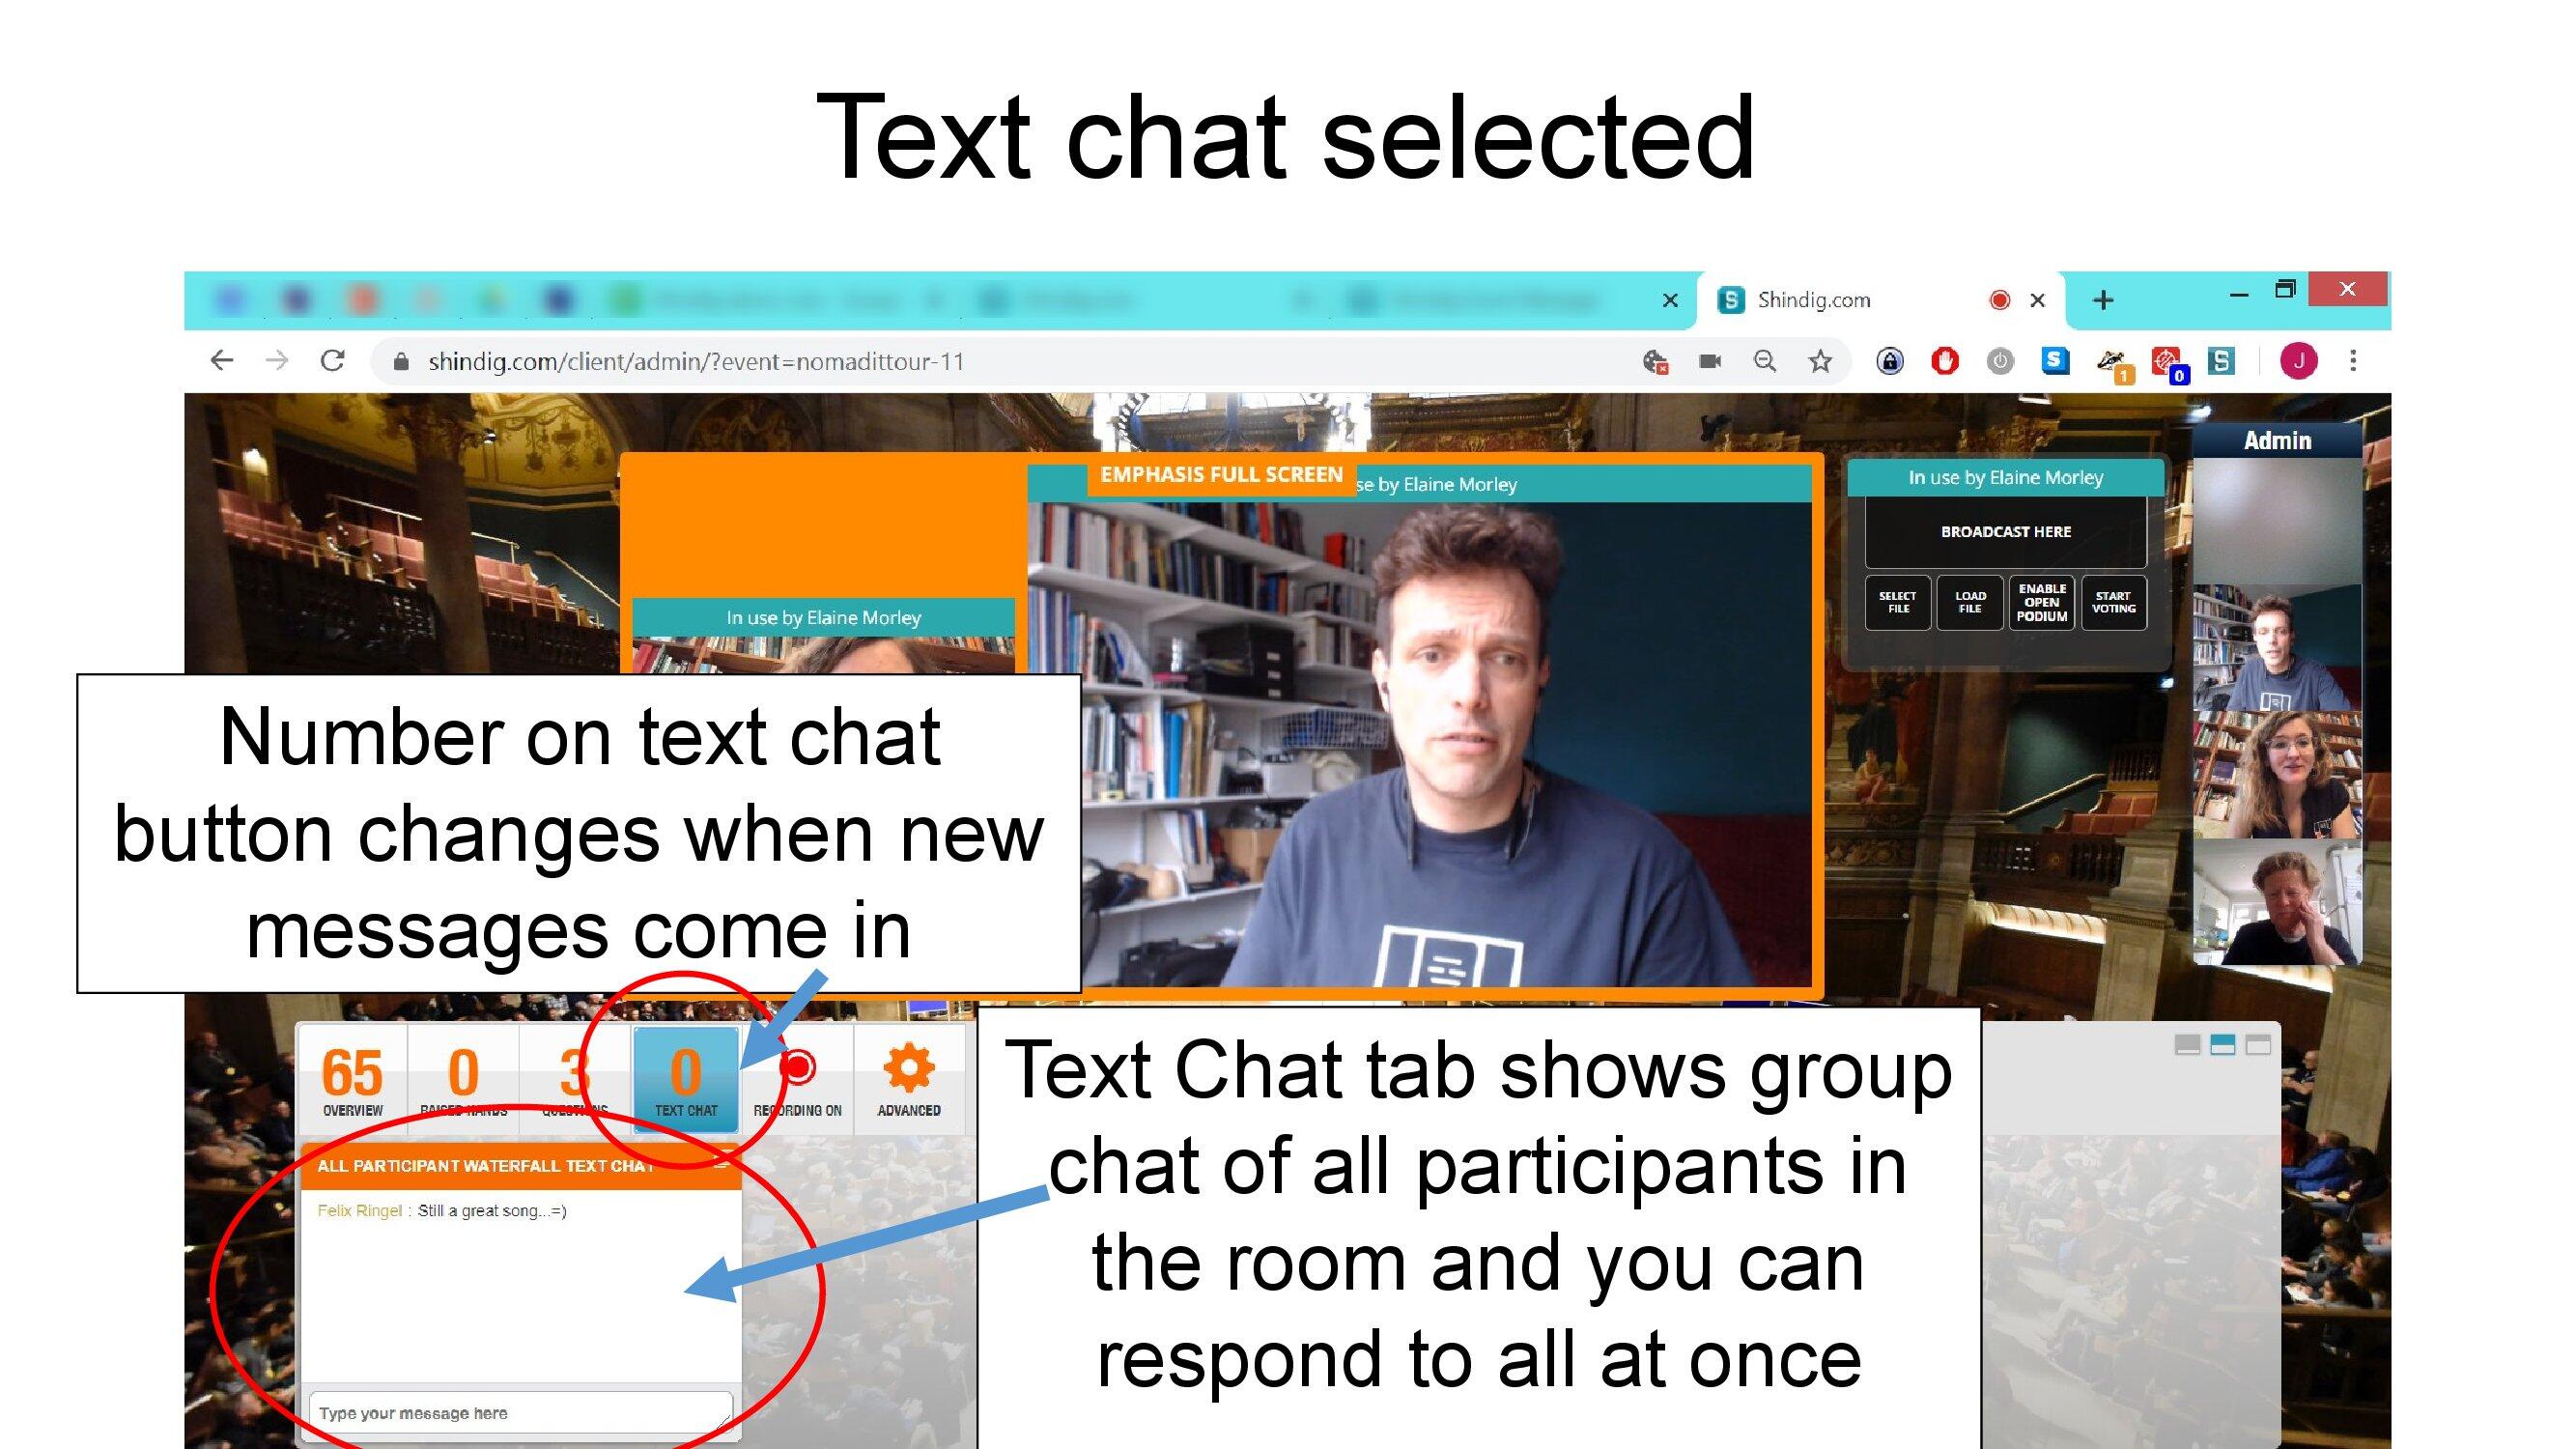
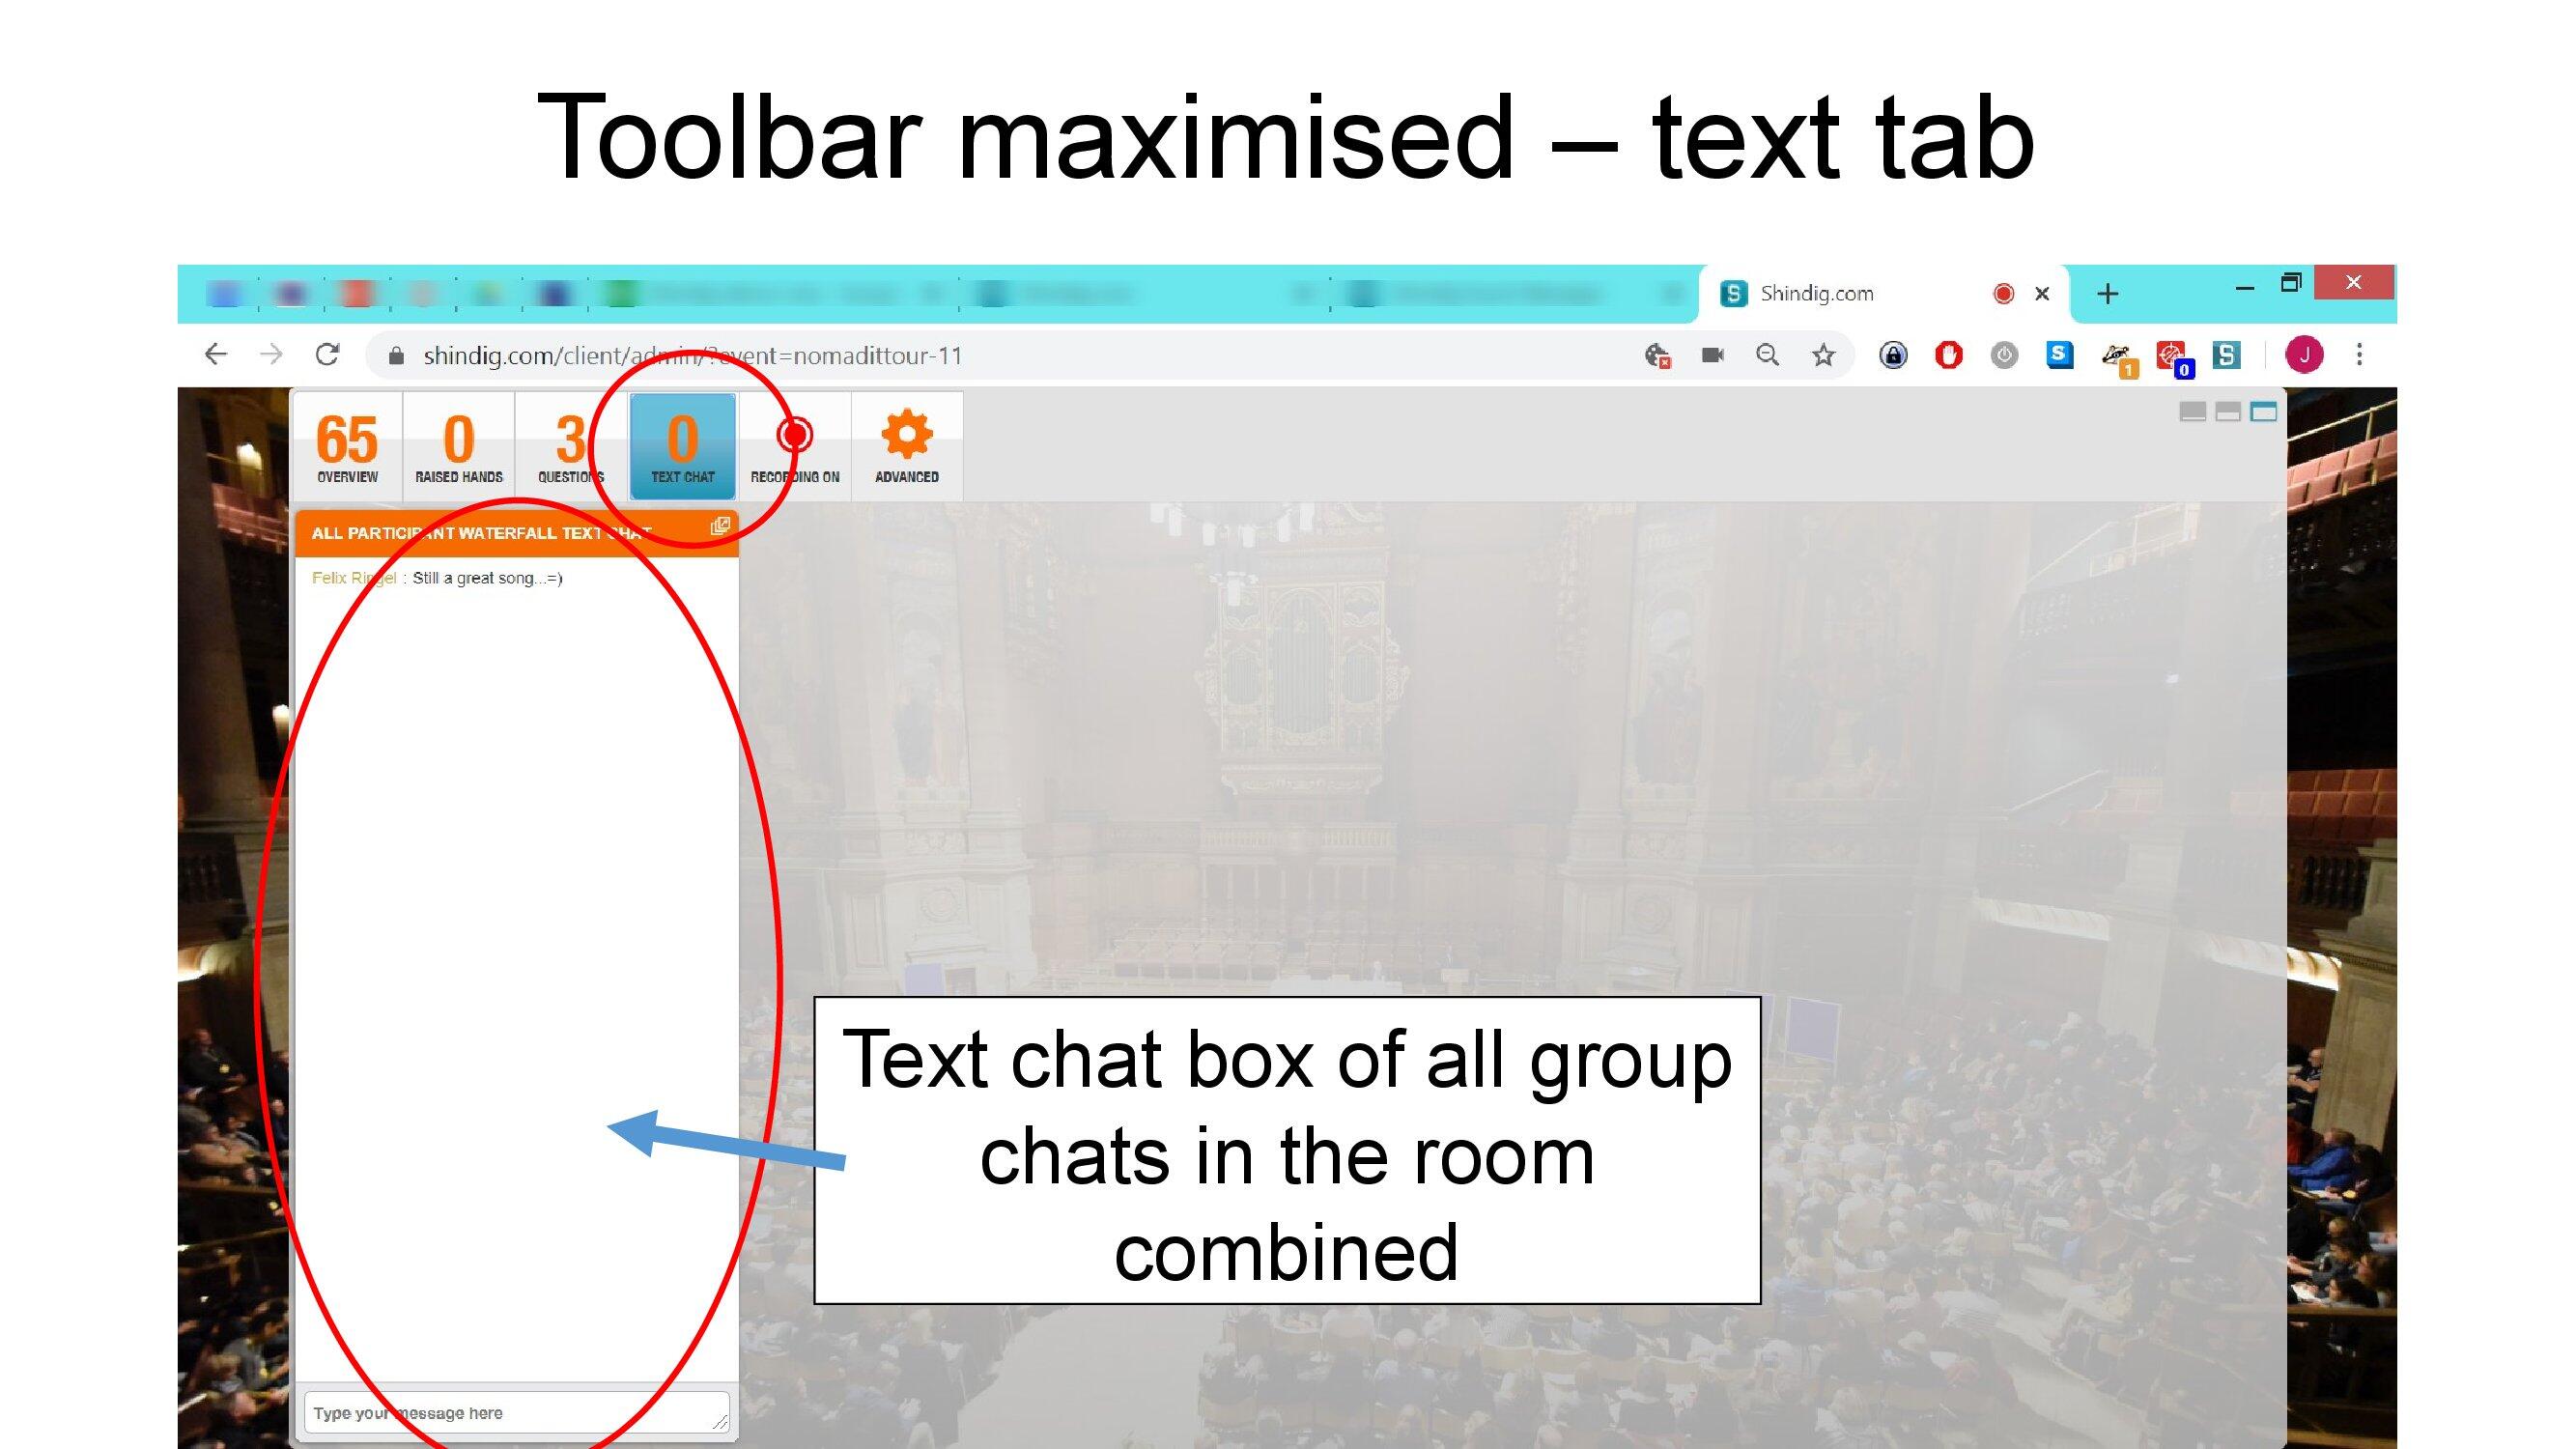
Attendee group chats are grouped into groups of 30. Admins can see chats across all groups. If answering to all groups, bear in mind that only one group will have seen the question.
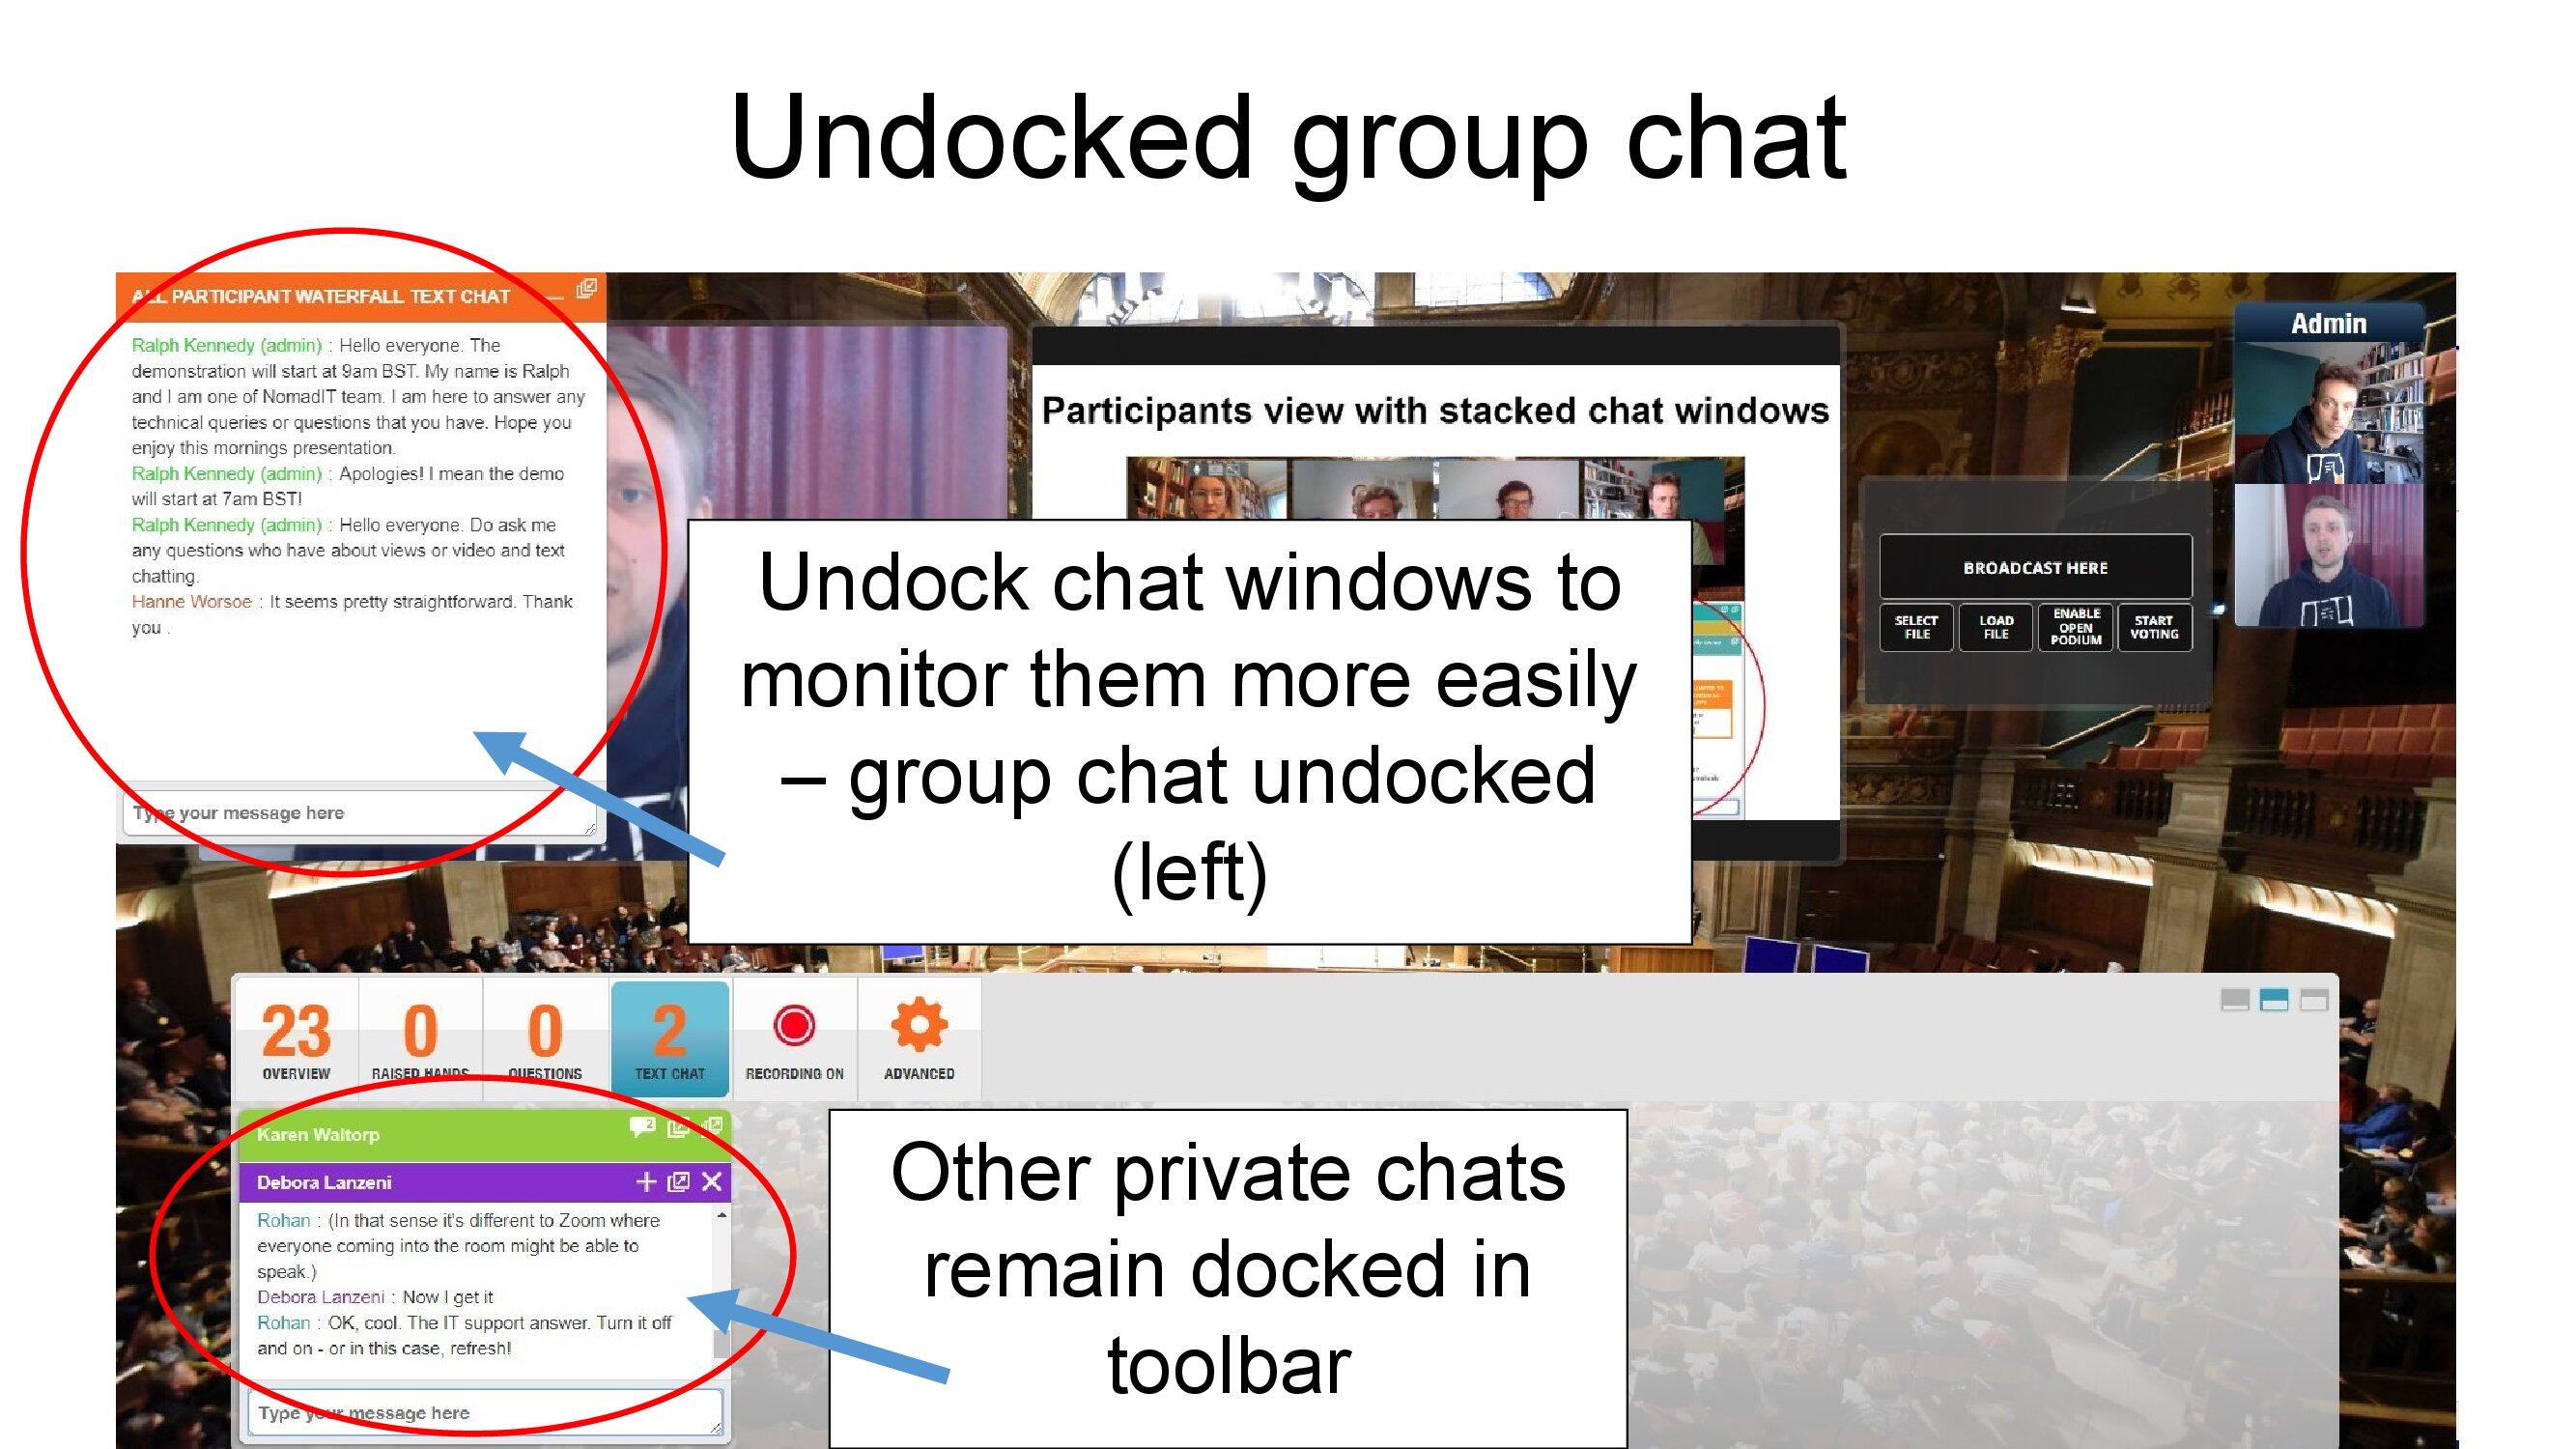
It's challenging to both control podiums and monitor chat. Ask your co-convenor or volunteer to cover chat. You might want a 3-way chat with them open and undocked to allow you to monitor this backstage communication channel.
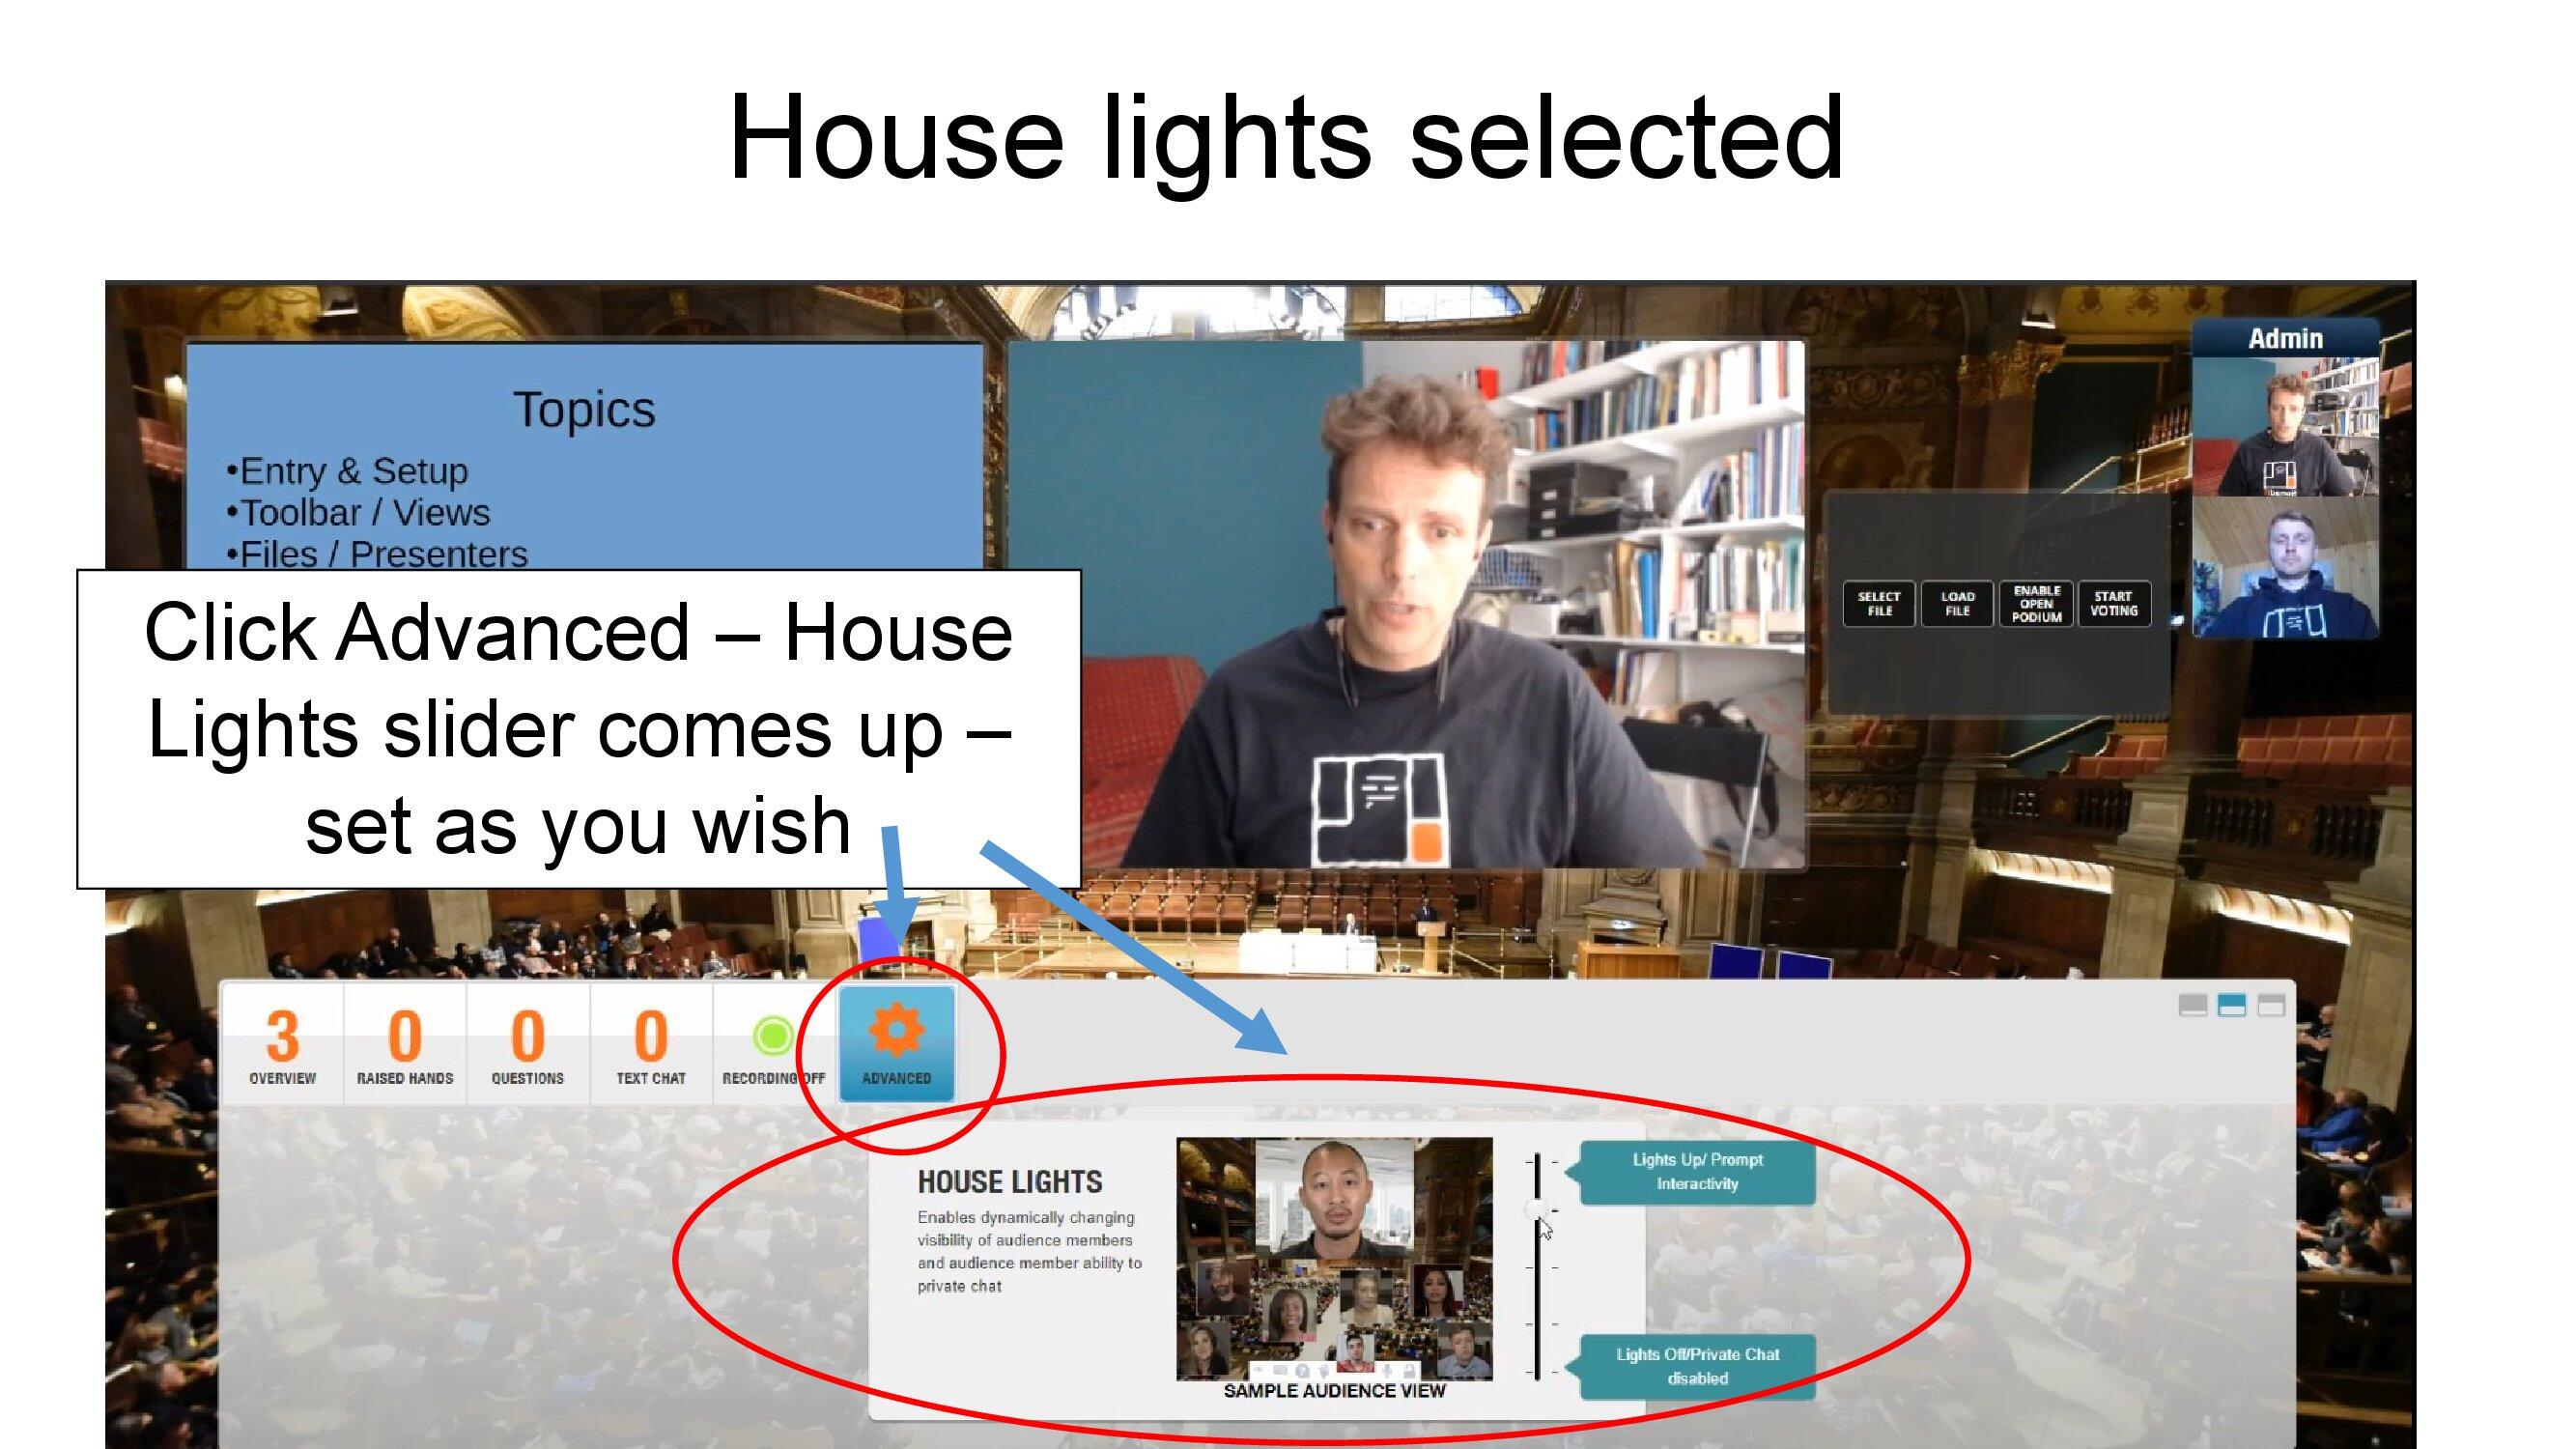
You can lower house lights to help attendees focus on presentations. However lowering completely prevents their use of the video chat function, which is an important networking tool - so we do not recommend doing that.
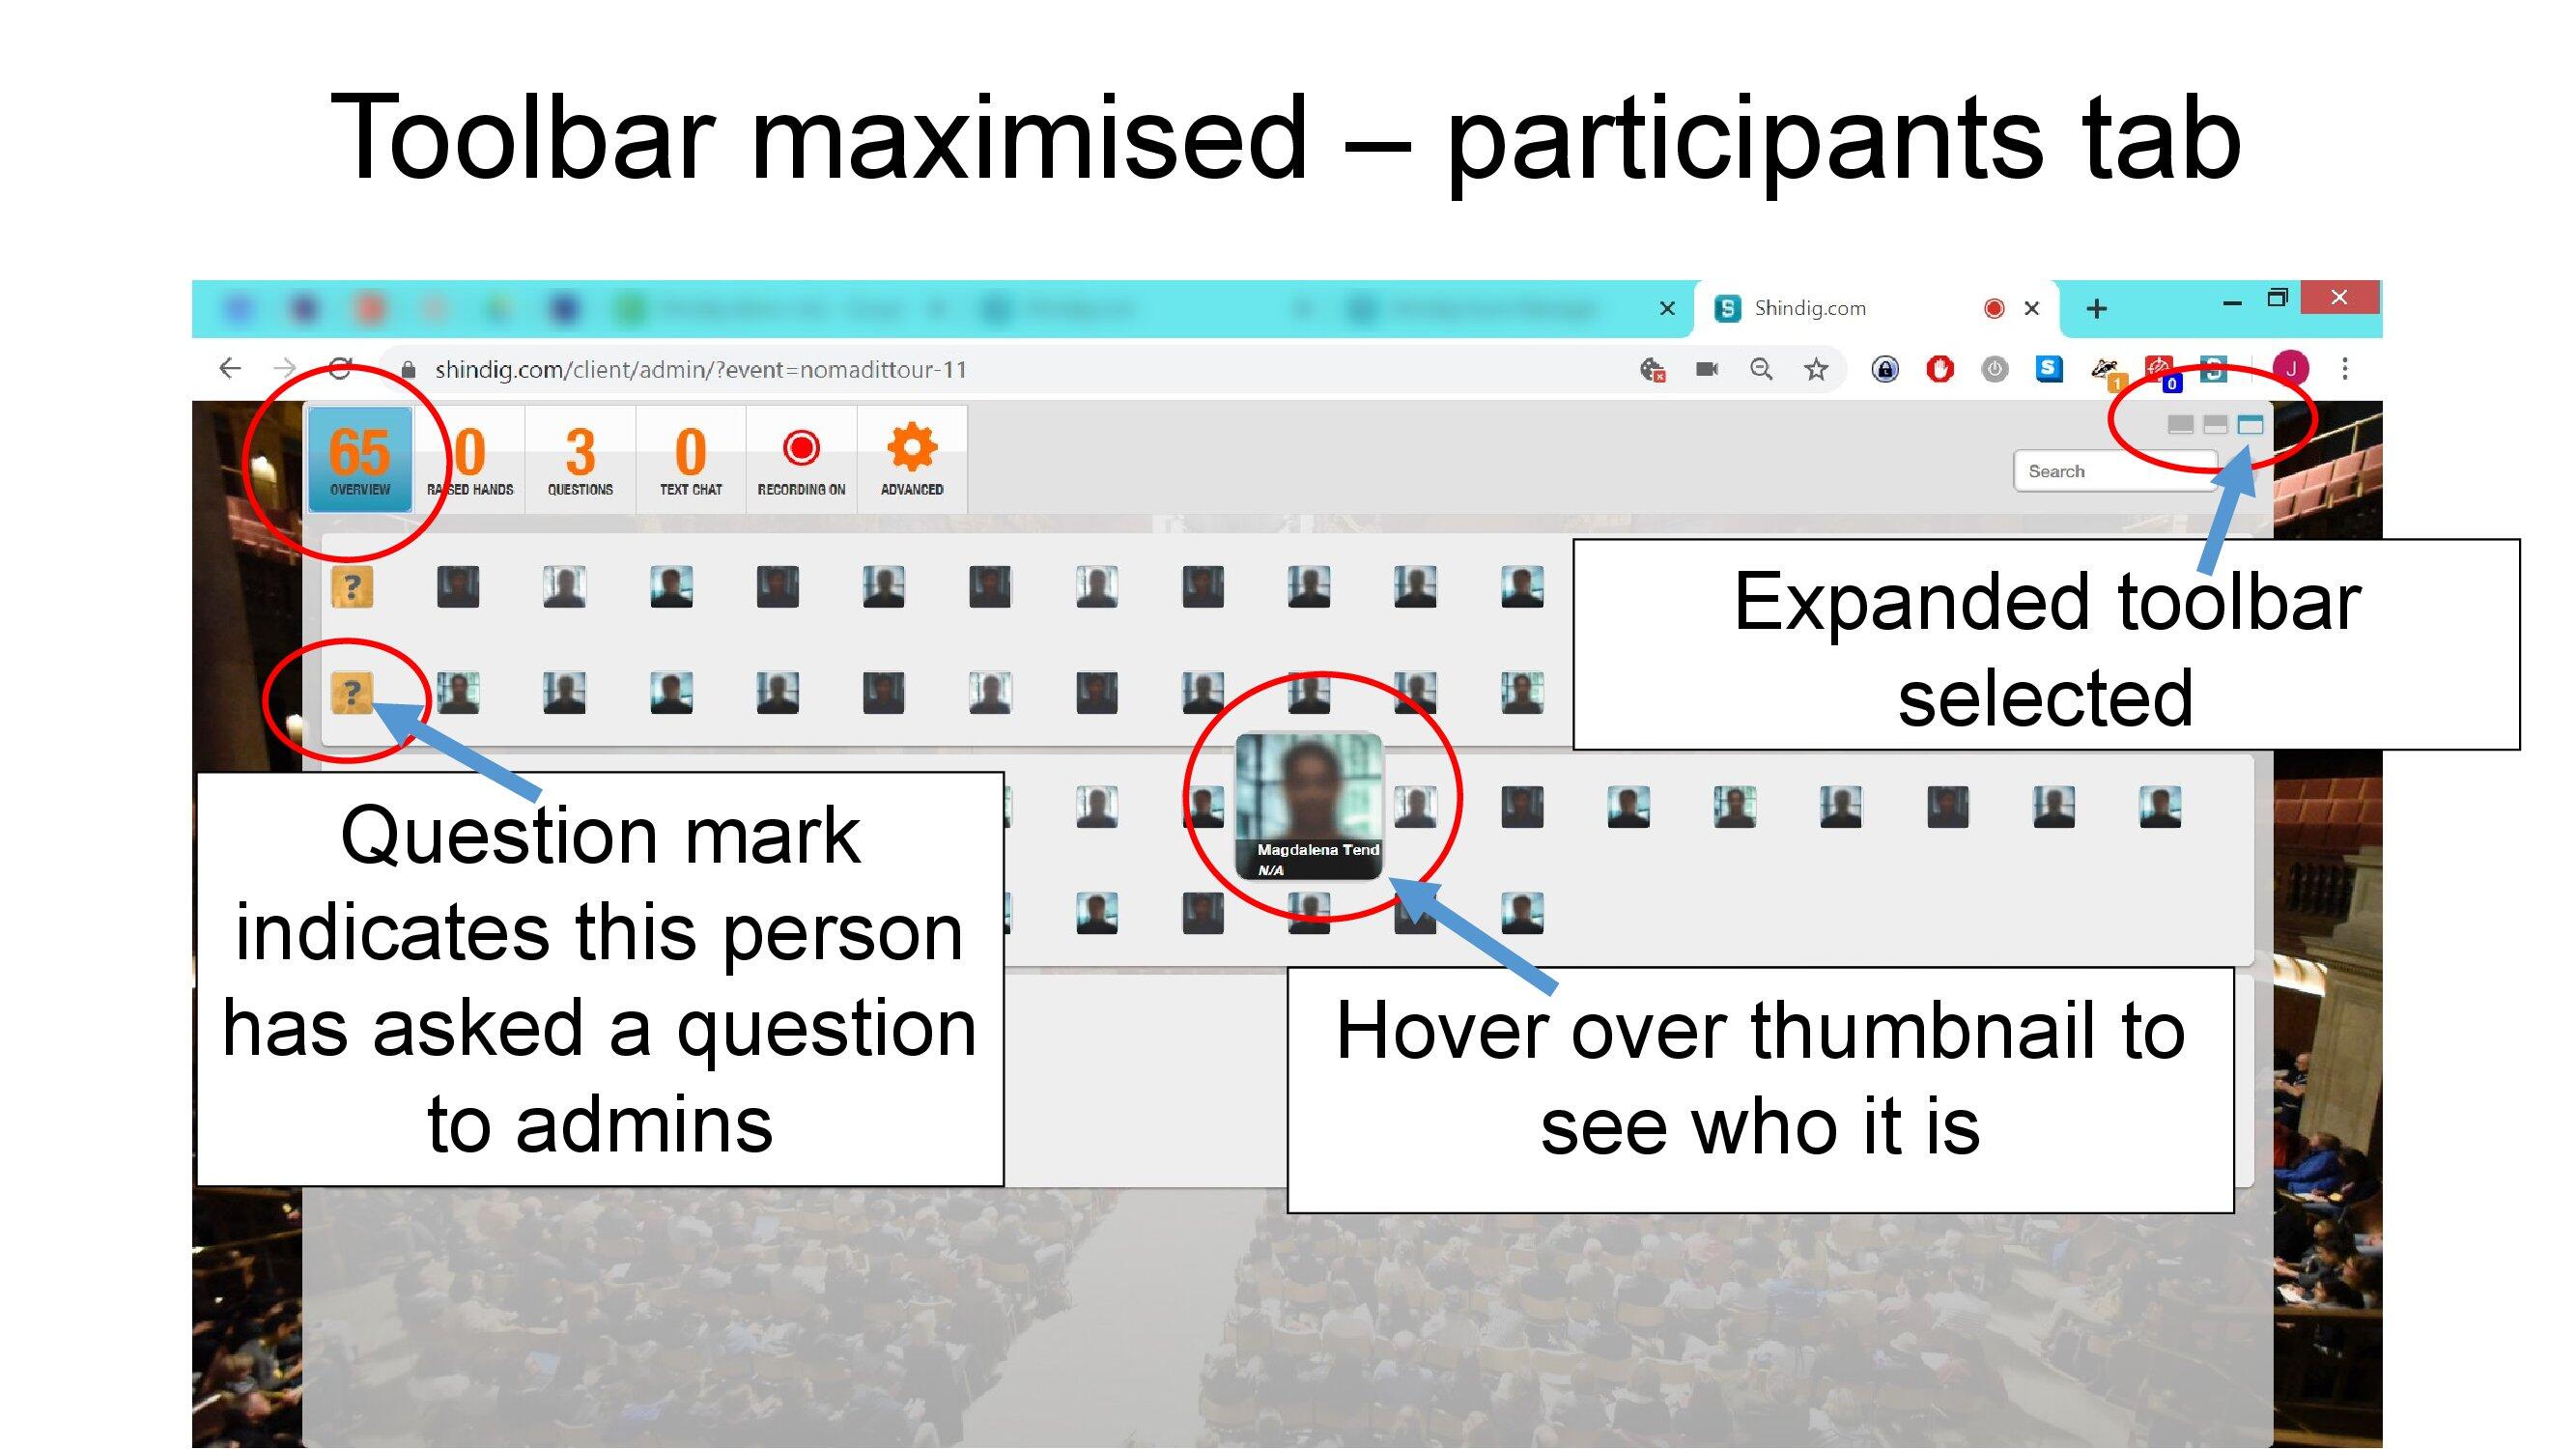
The maximised toolbar is easier to use, but covers your view of the stage.
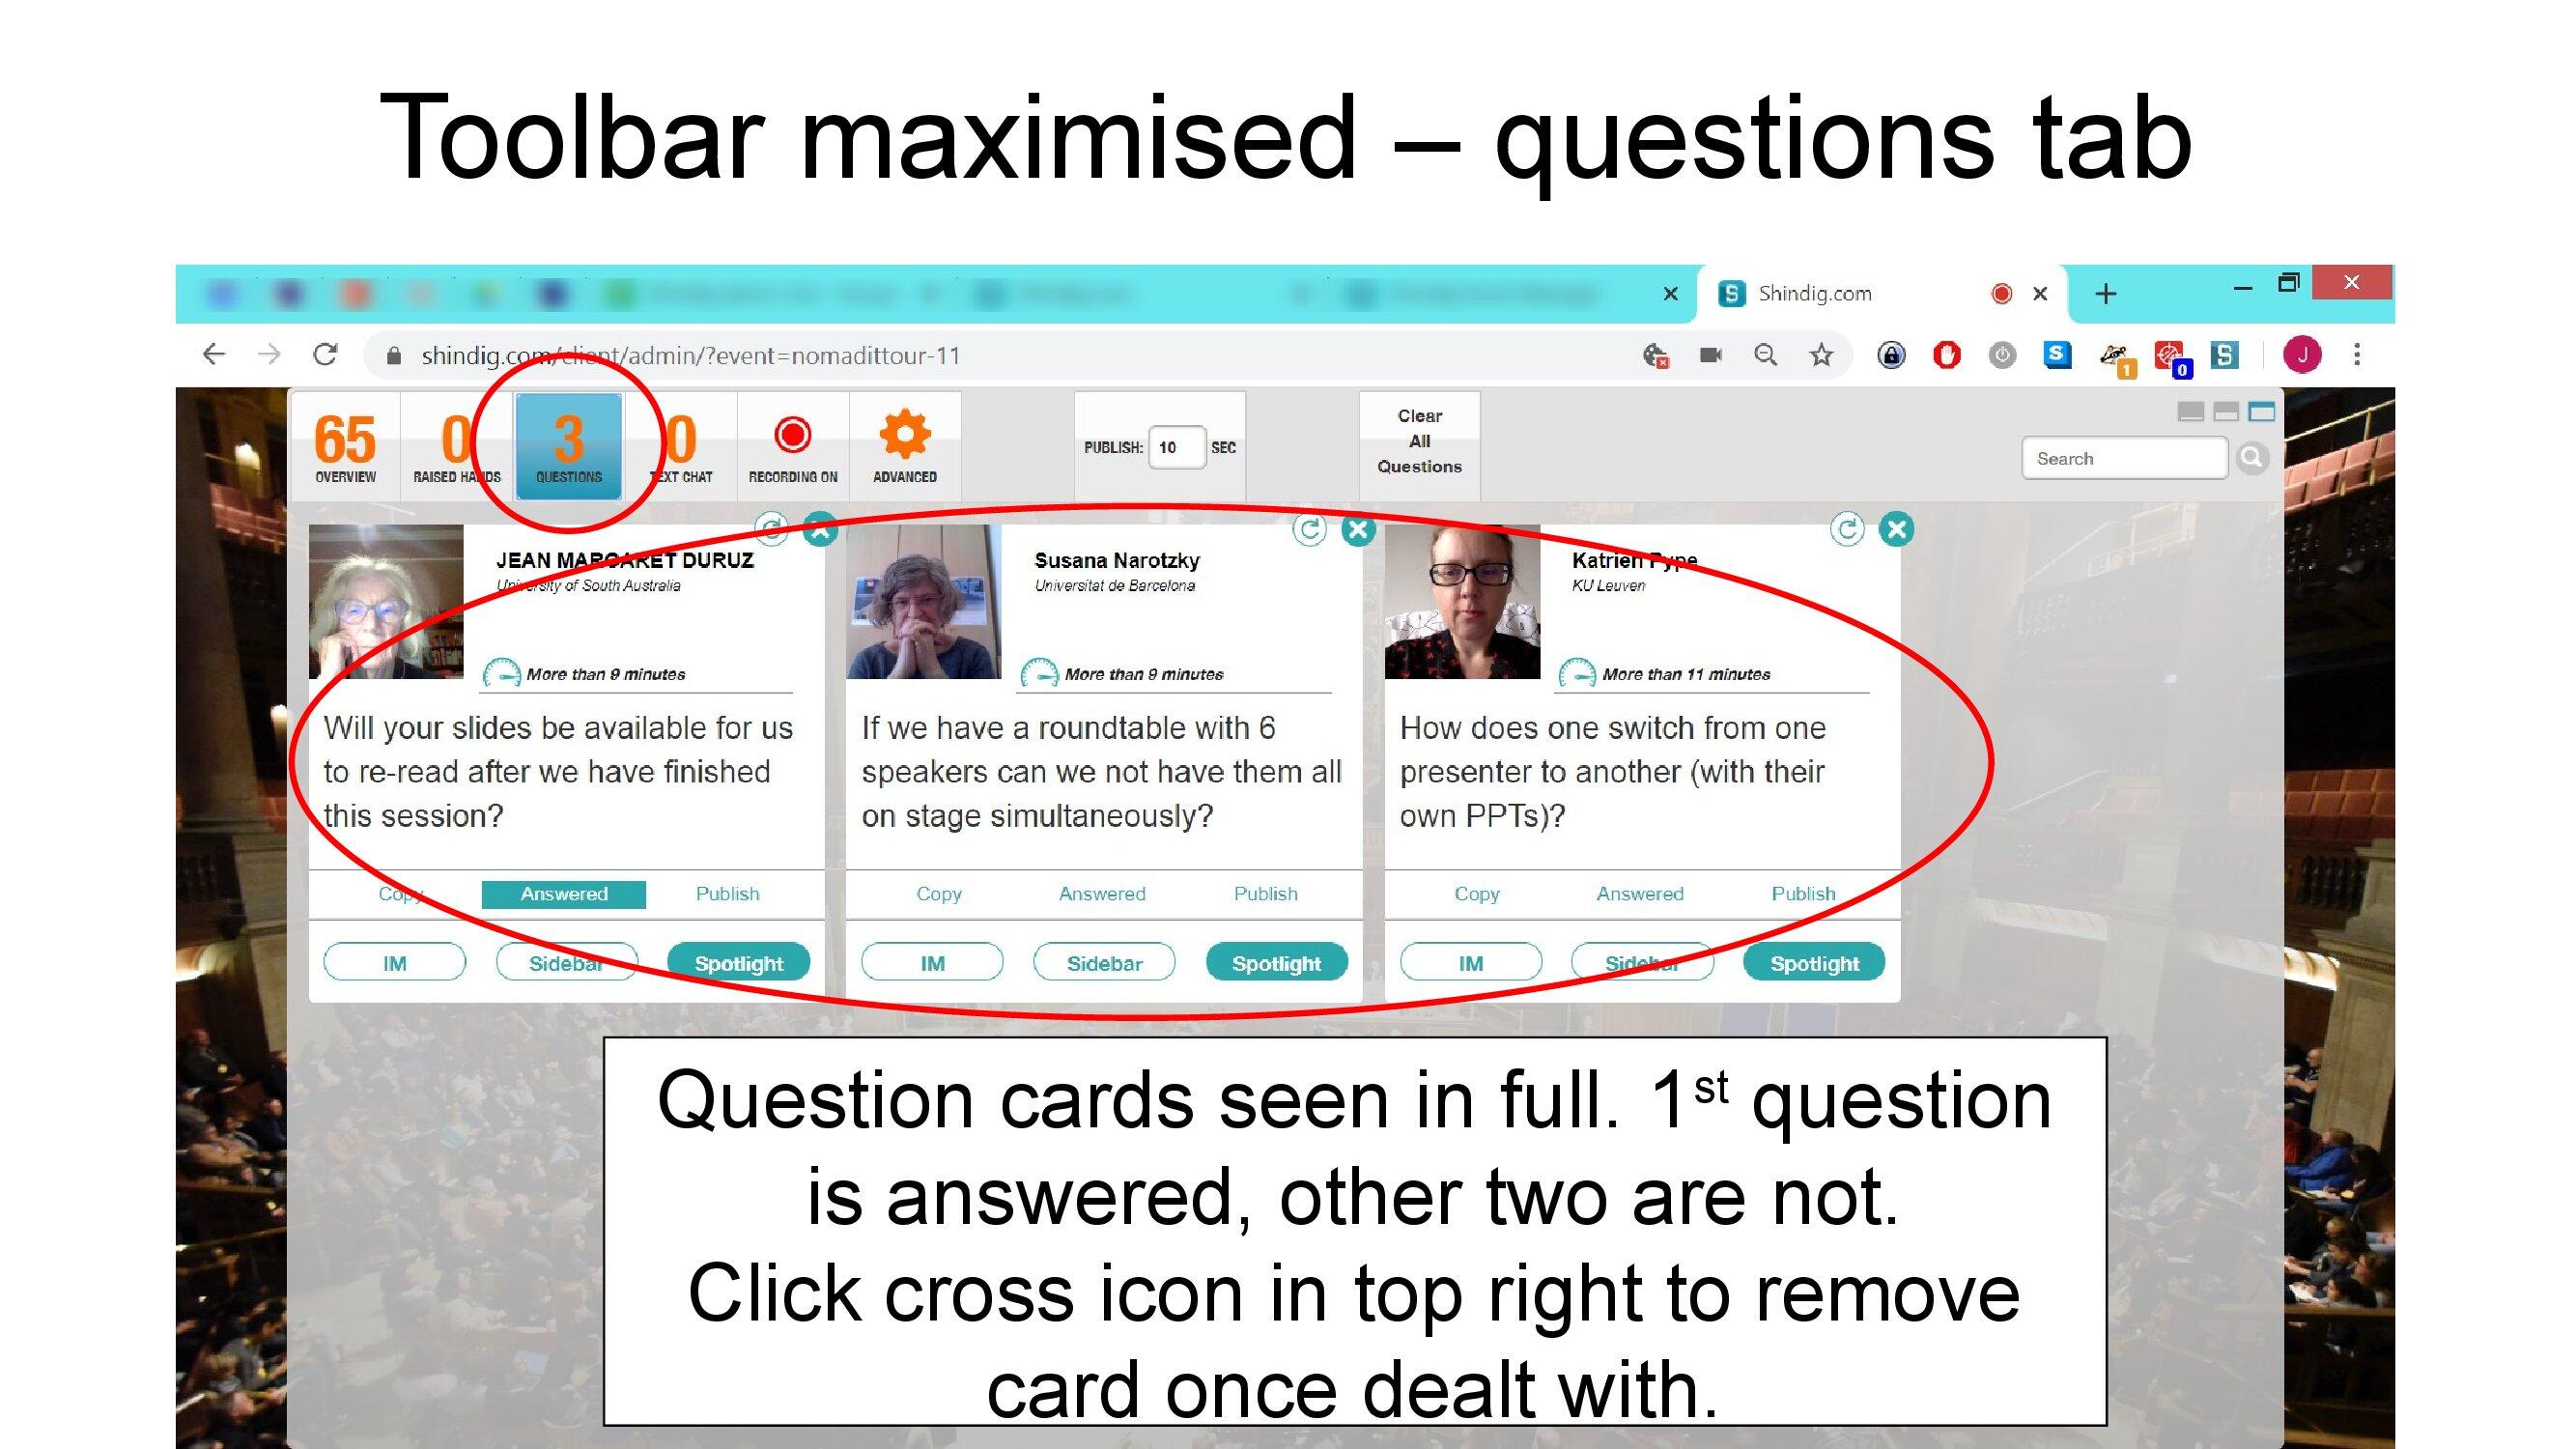
It is a helpful view when reviewing incoming questions as the cards are quite large.
7. Admins and sidebar
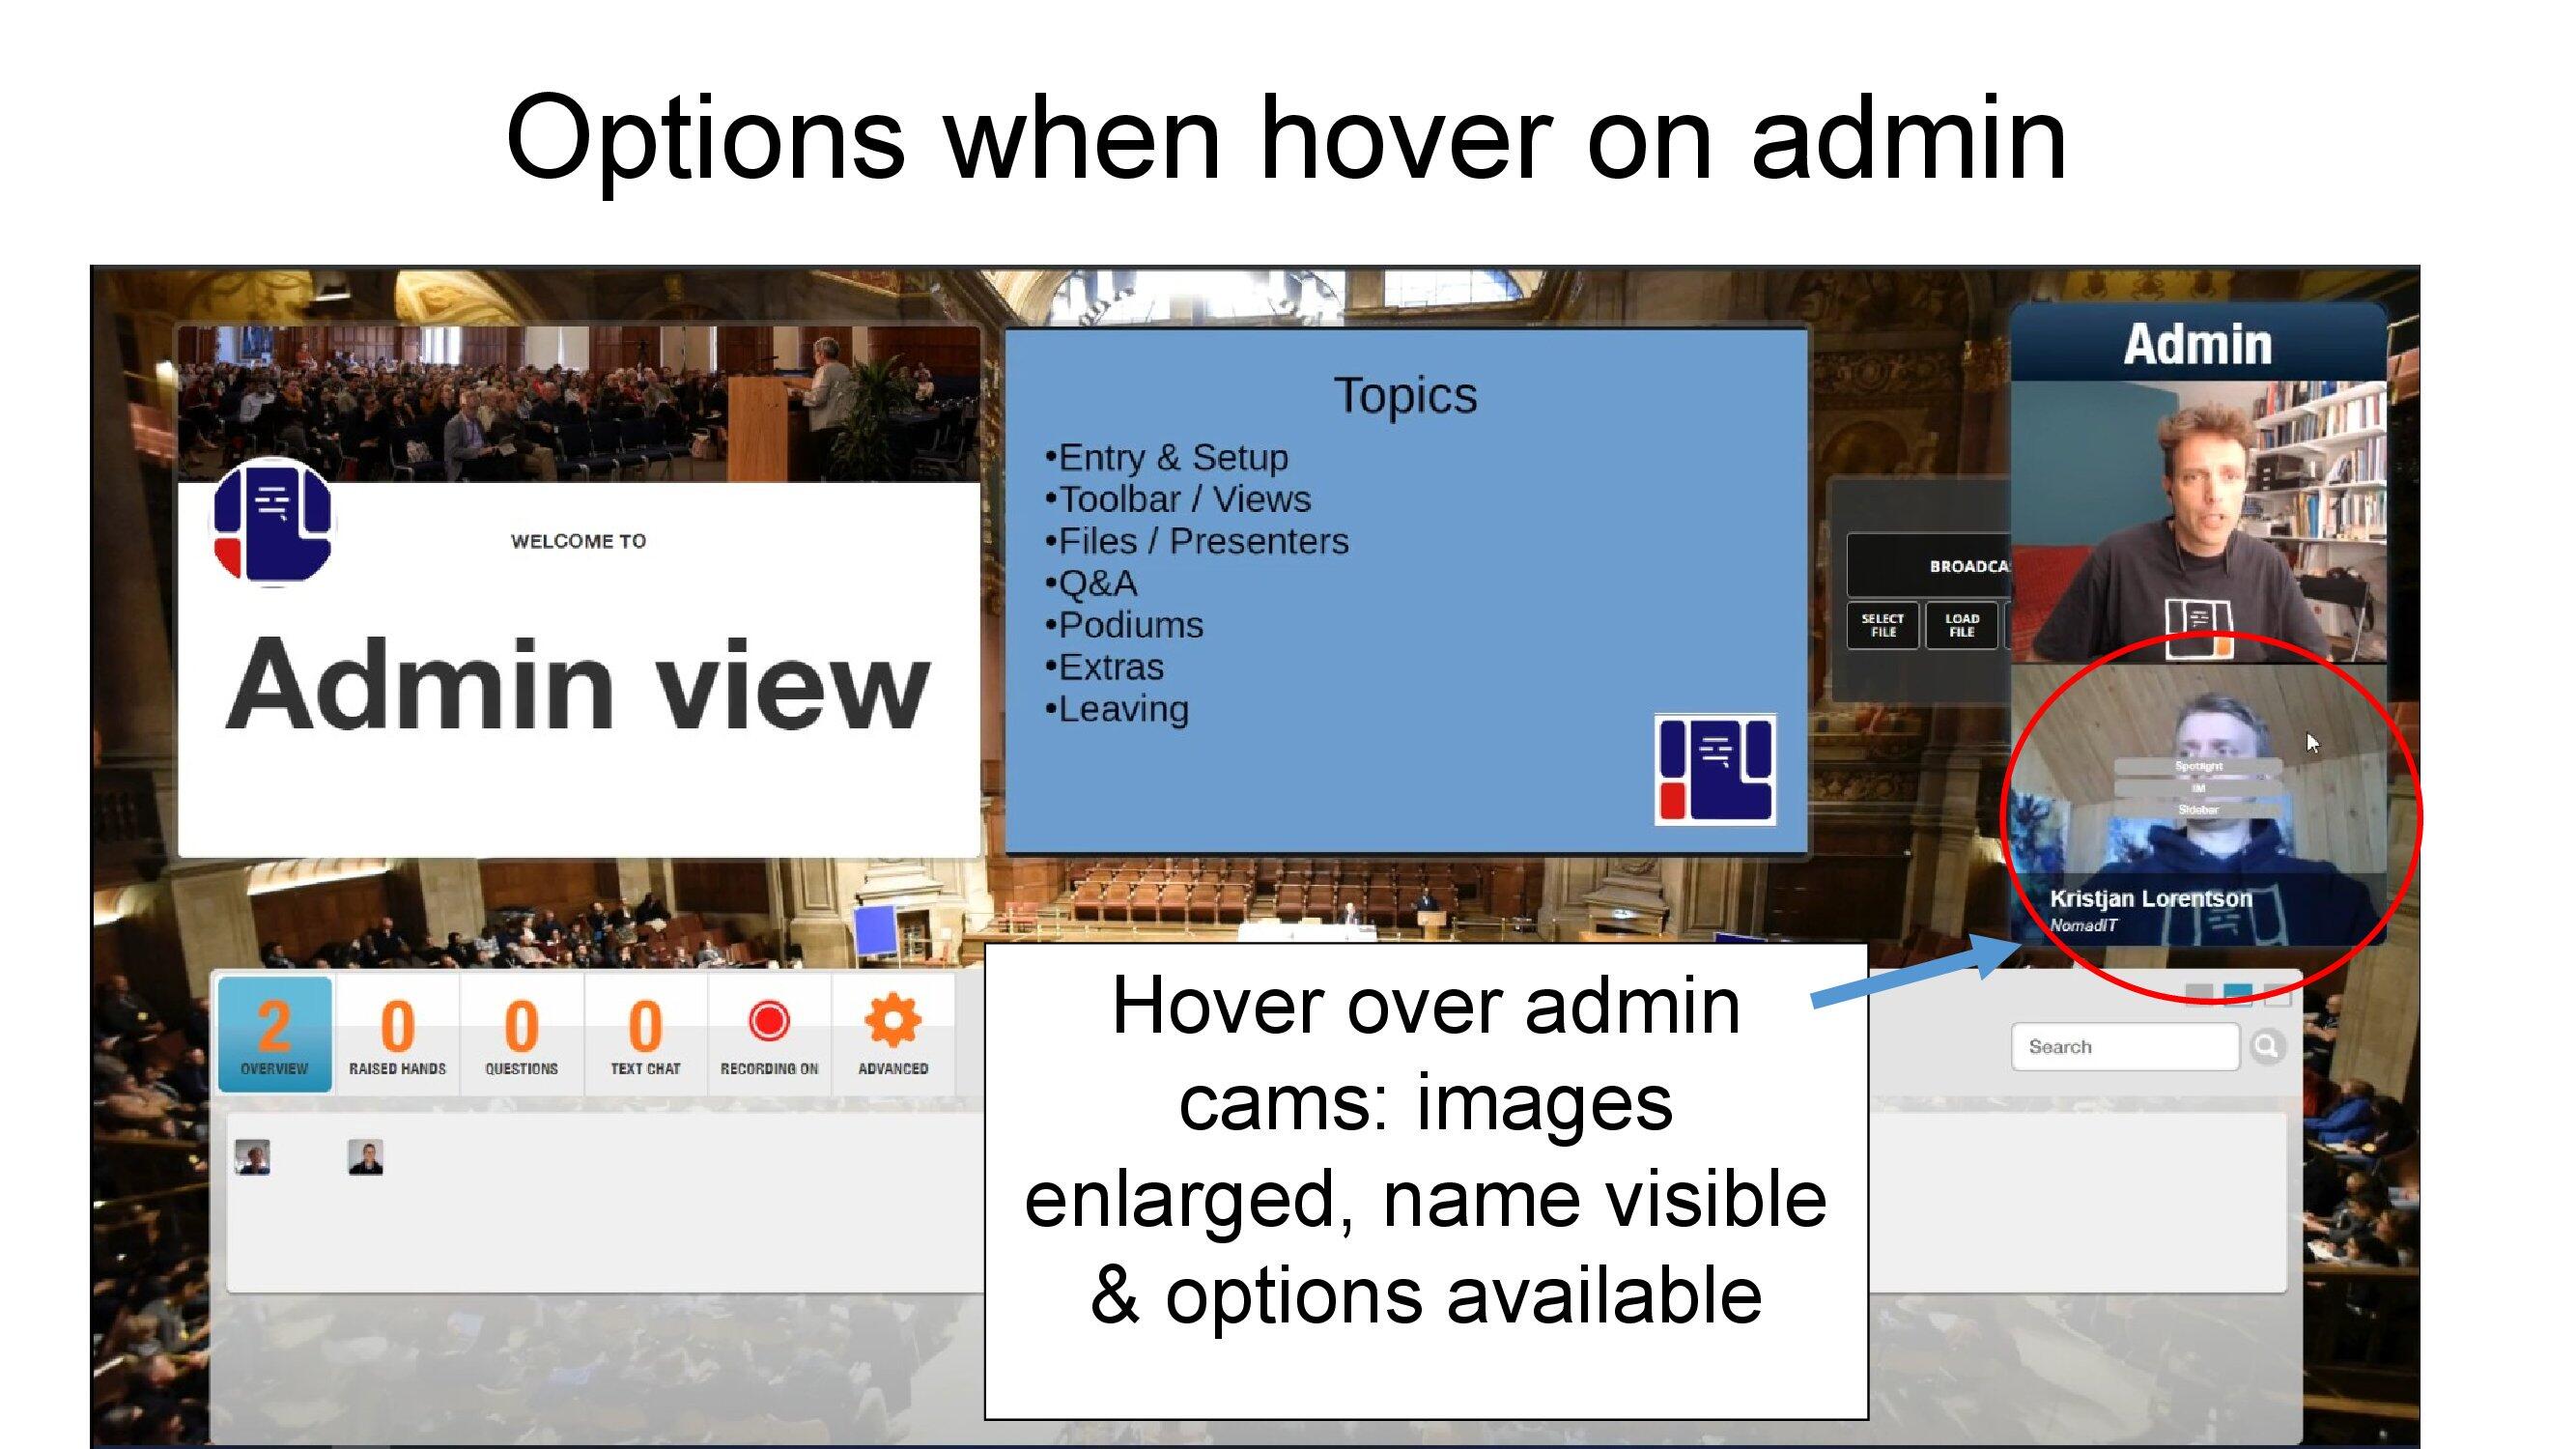
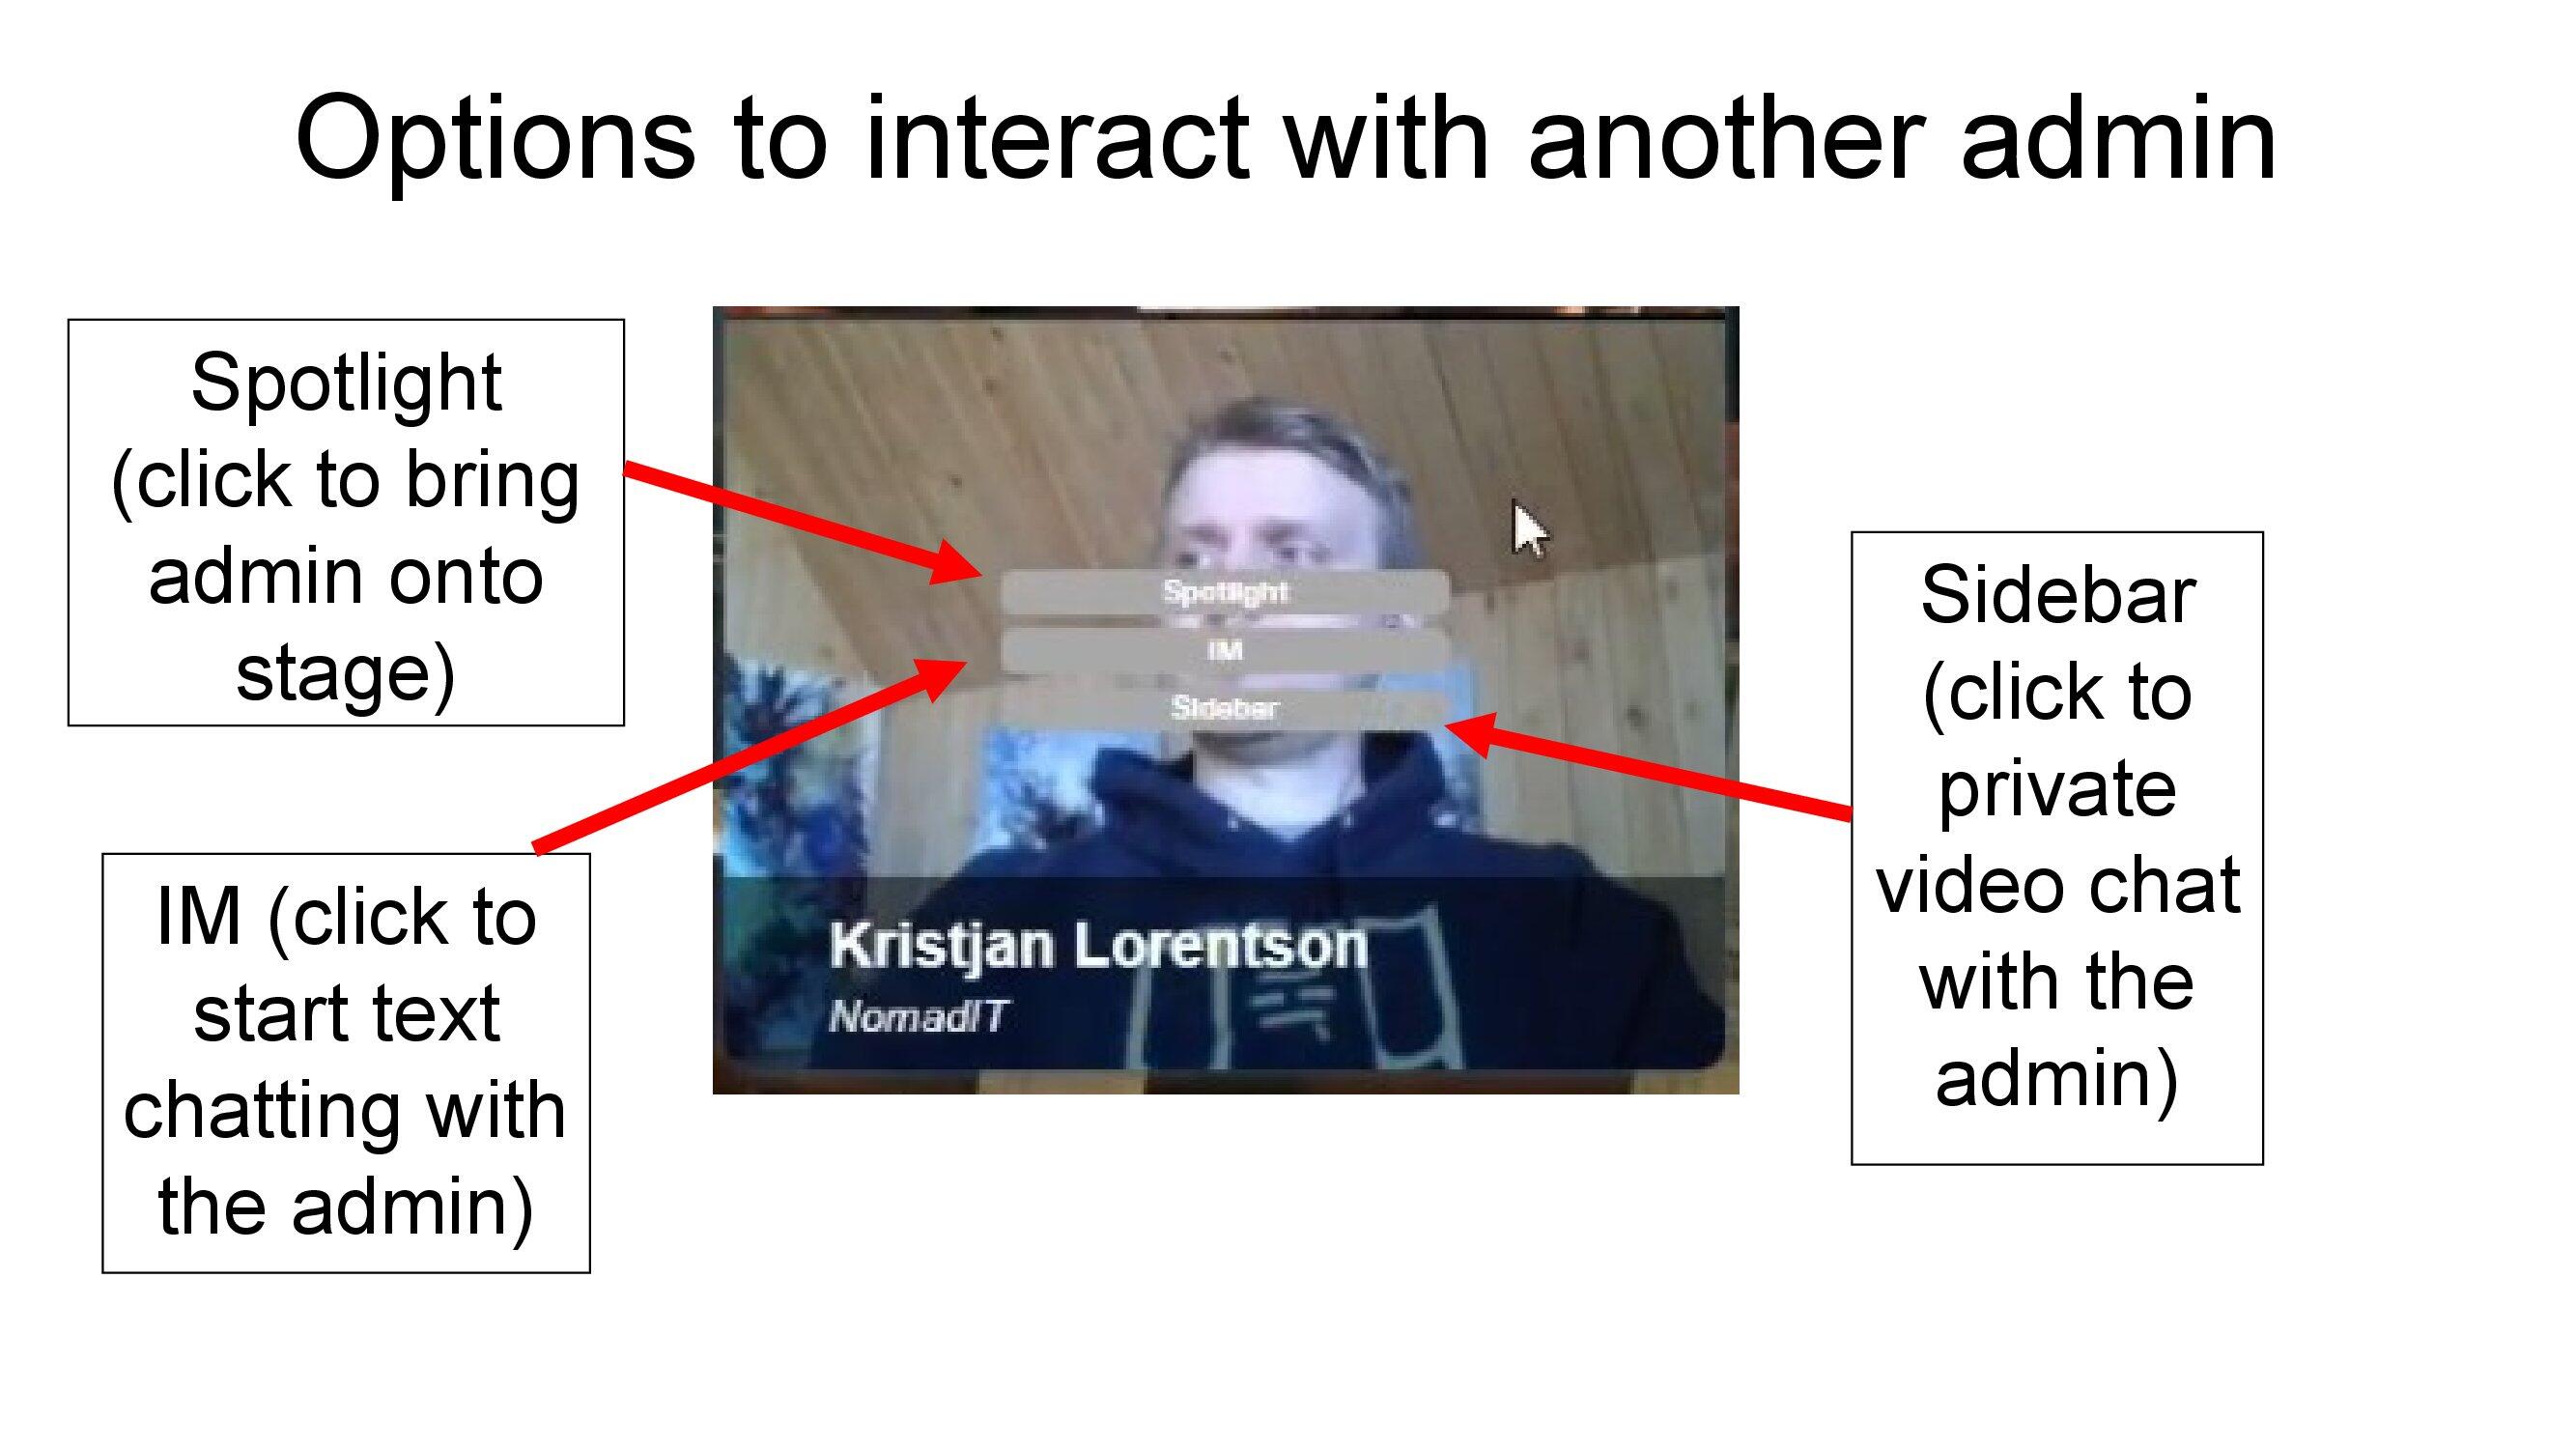
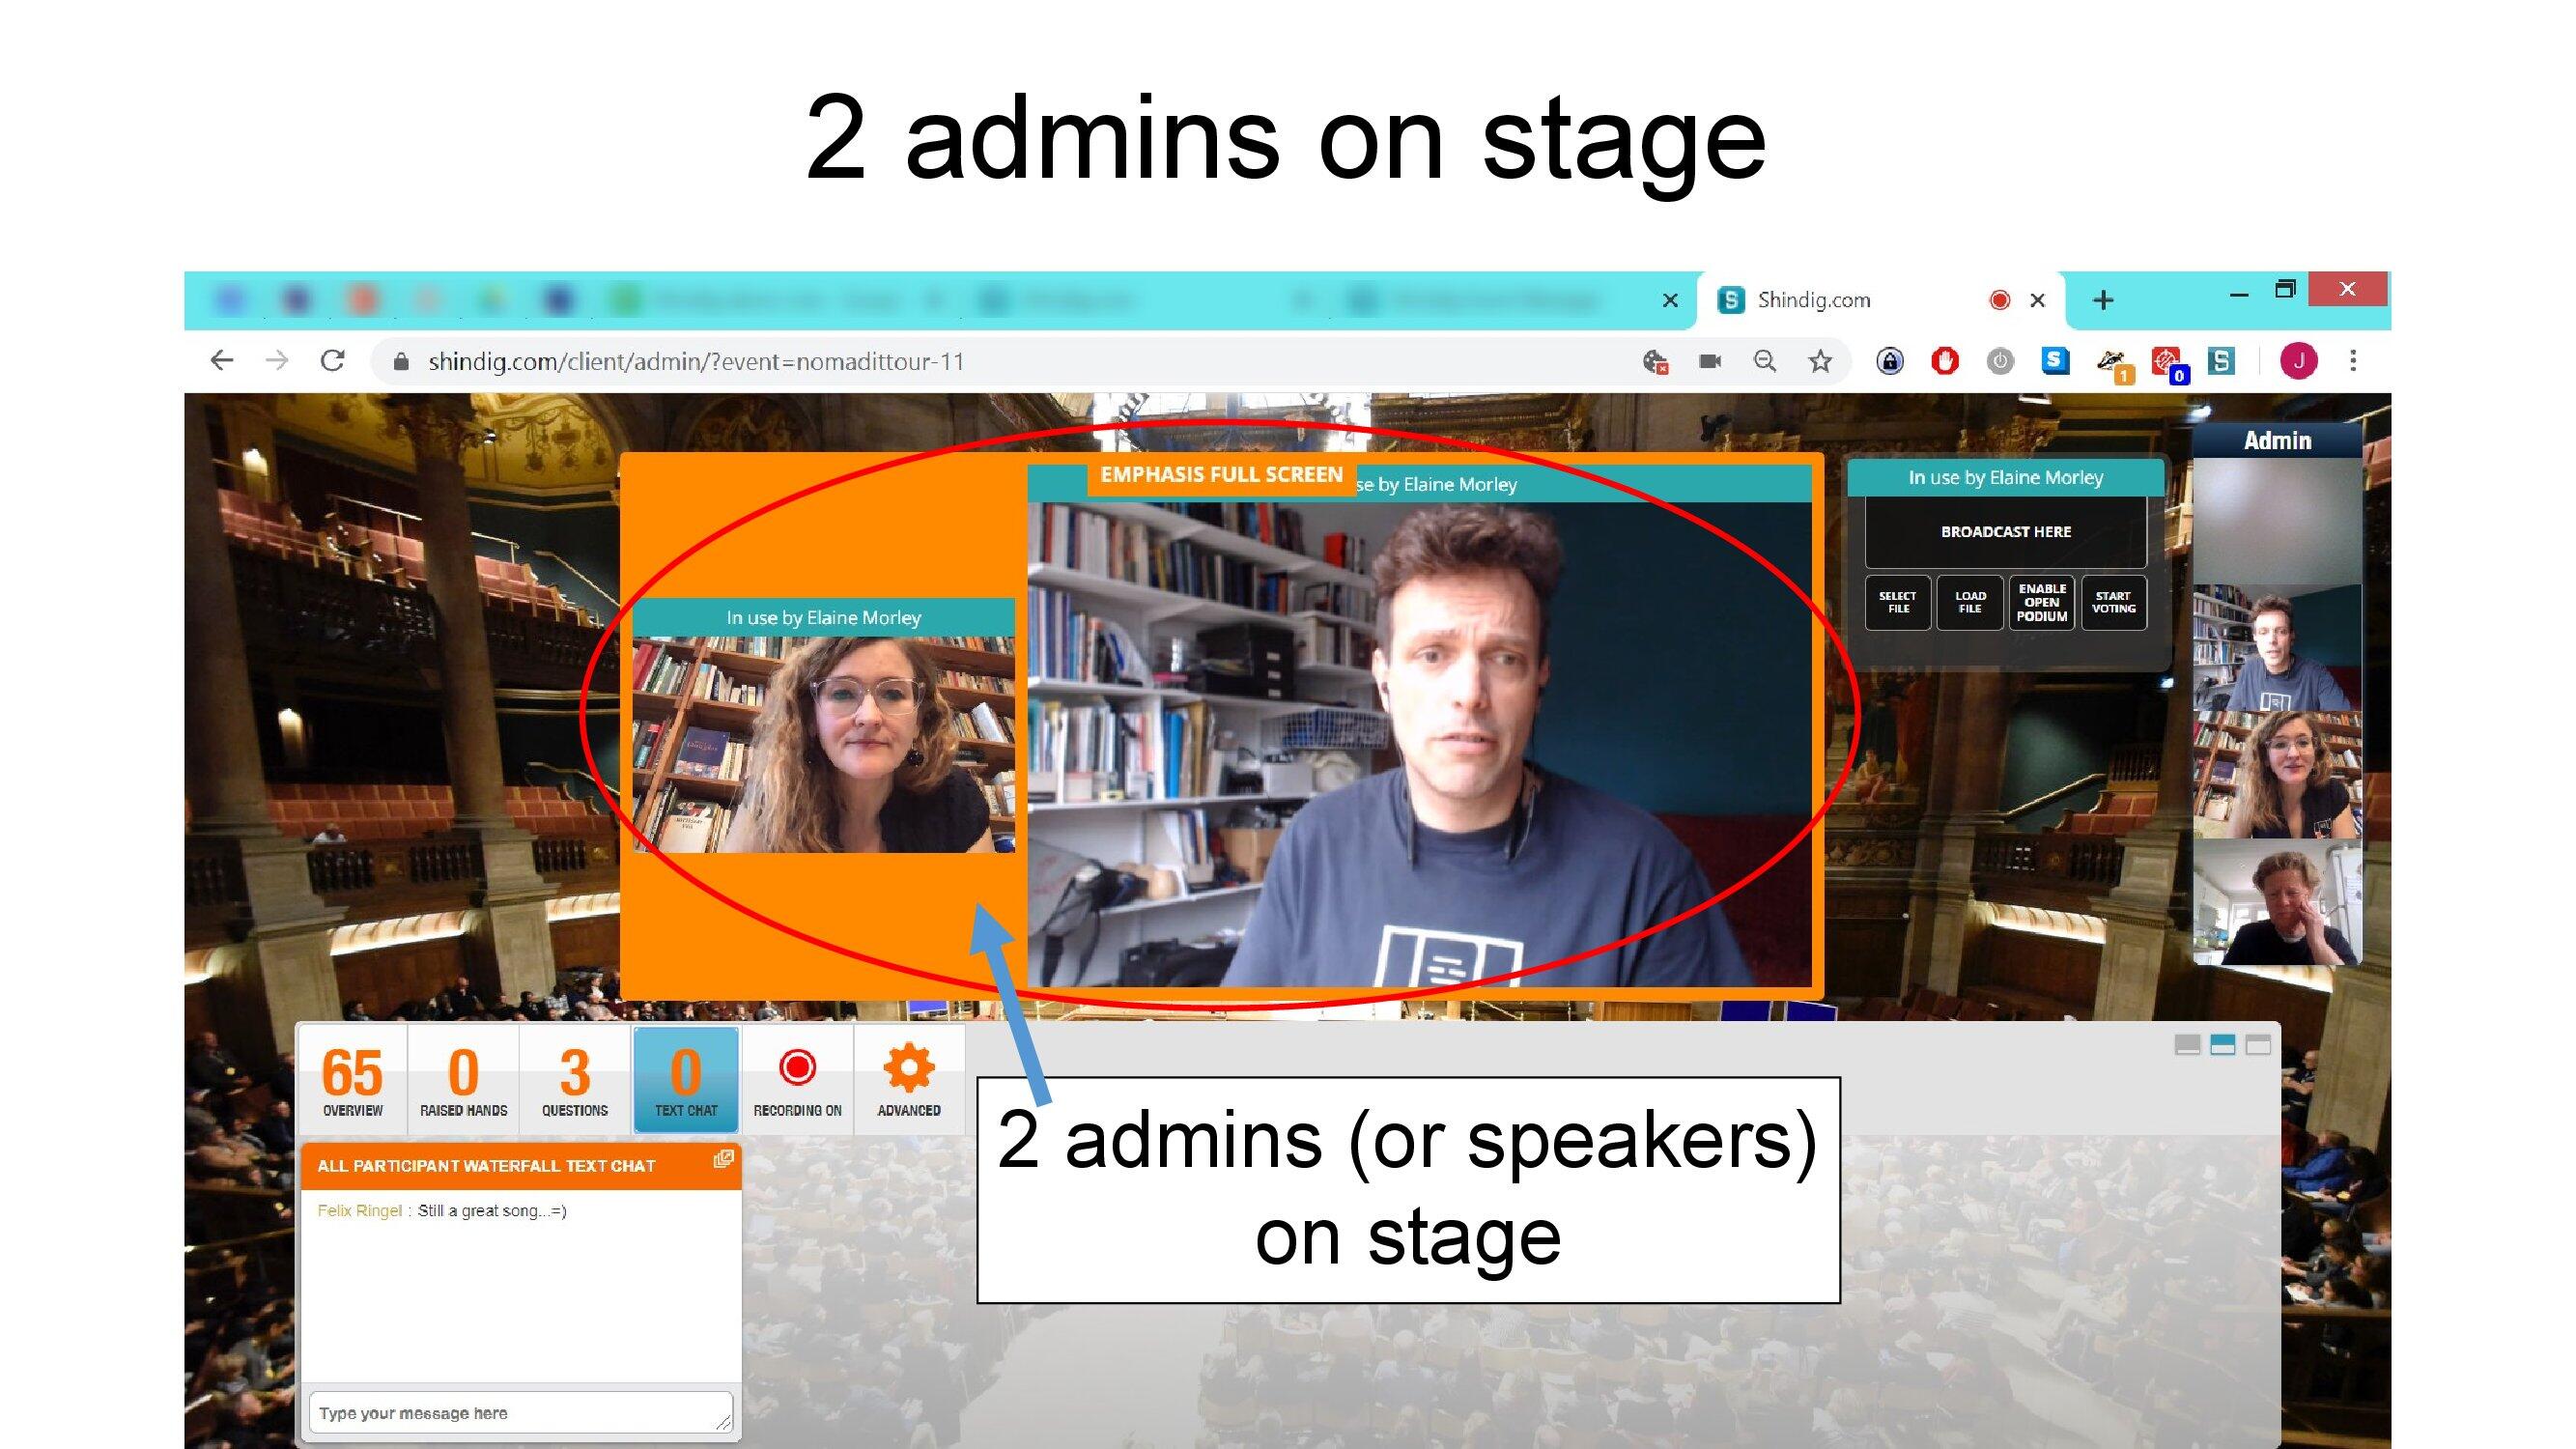
Admins can interact with each other off-stage.
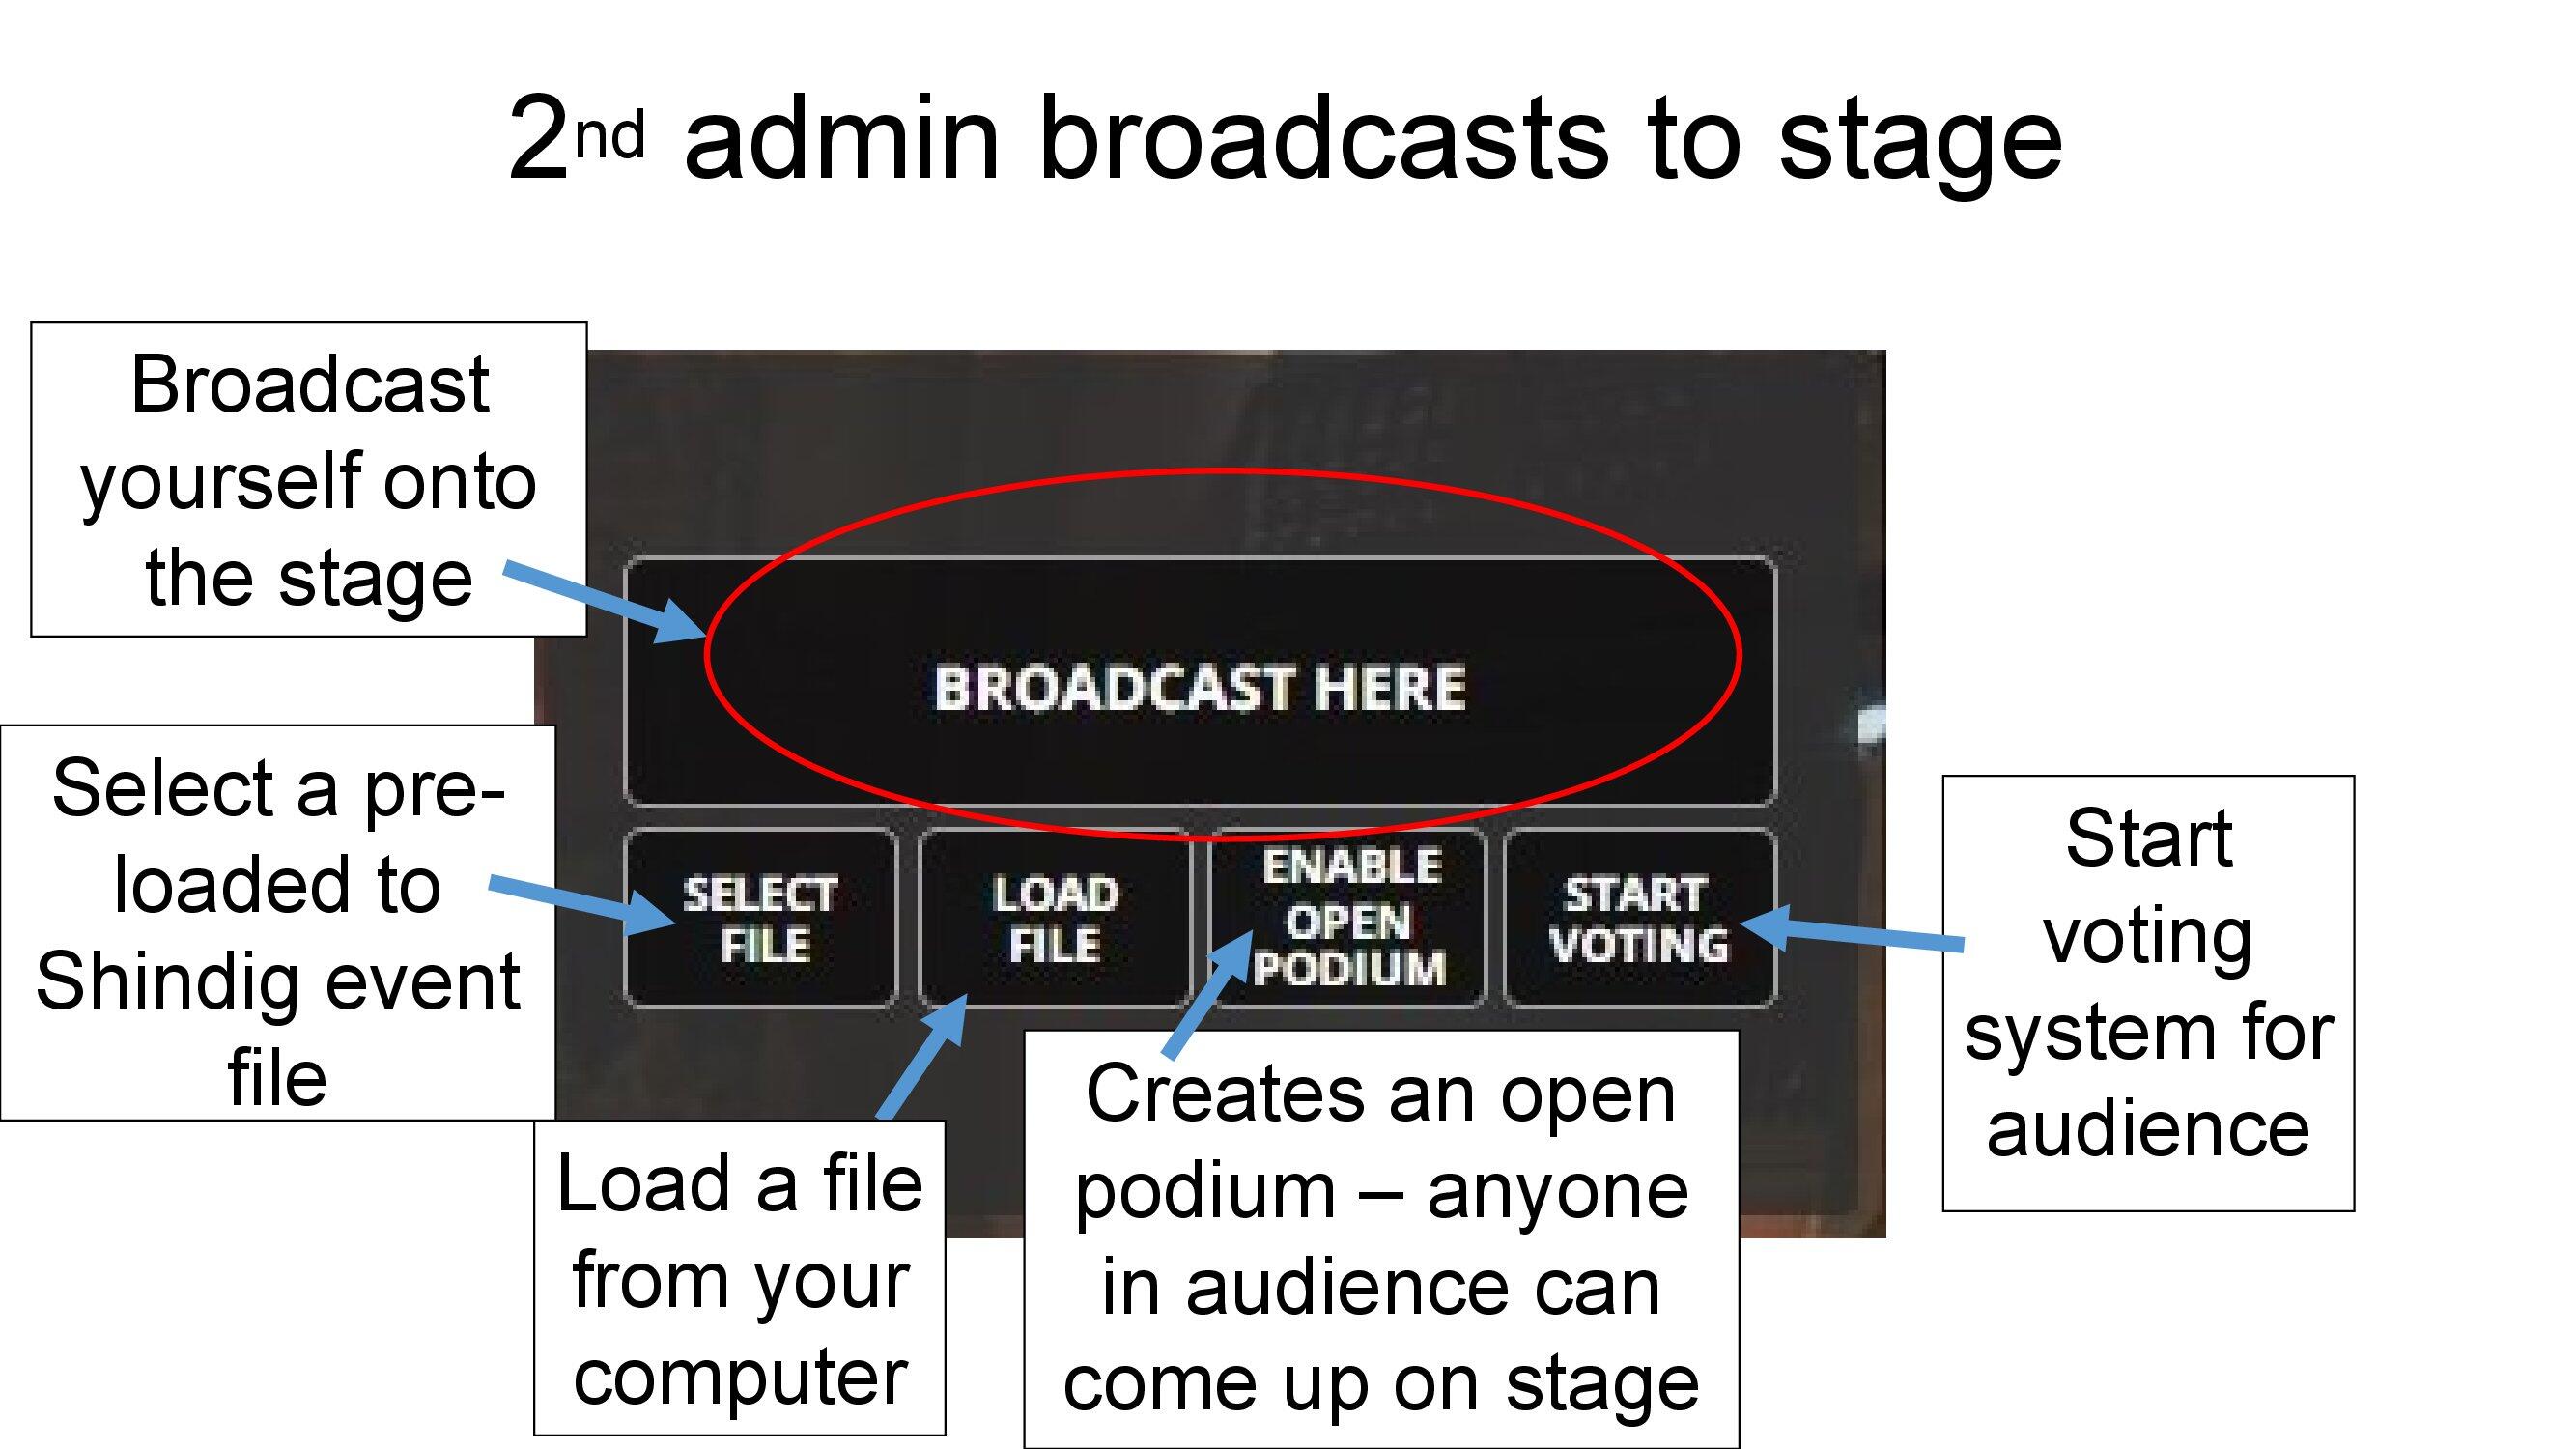
A second/third admin can bring themselves onto stage using the Broadcast here function.
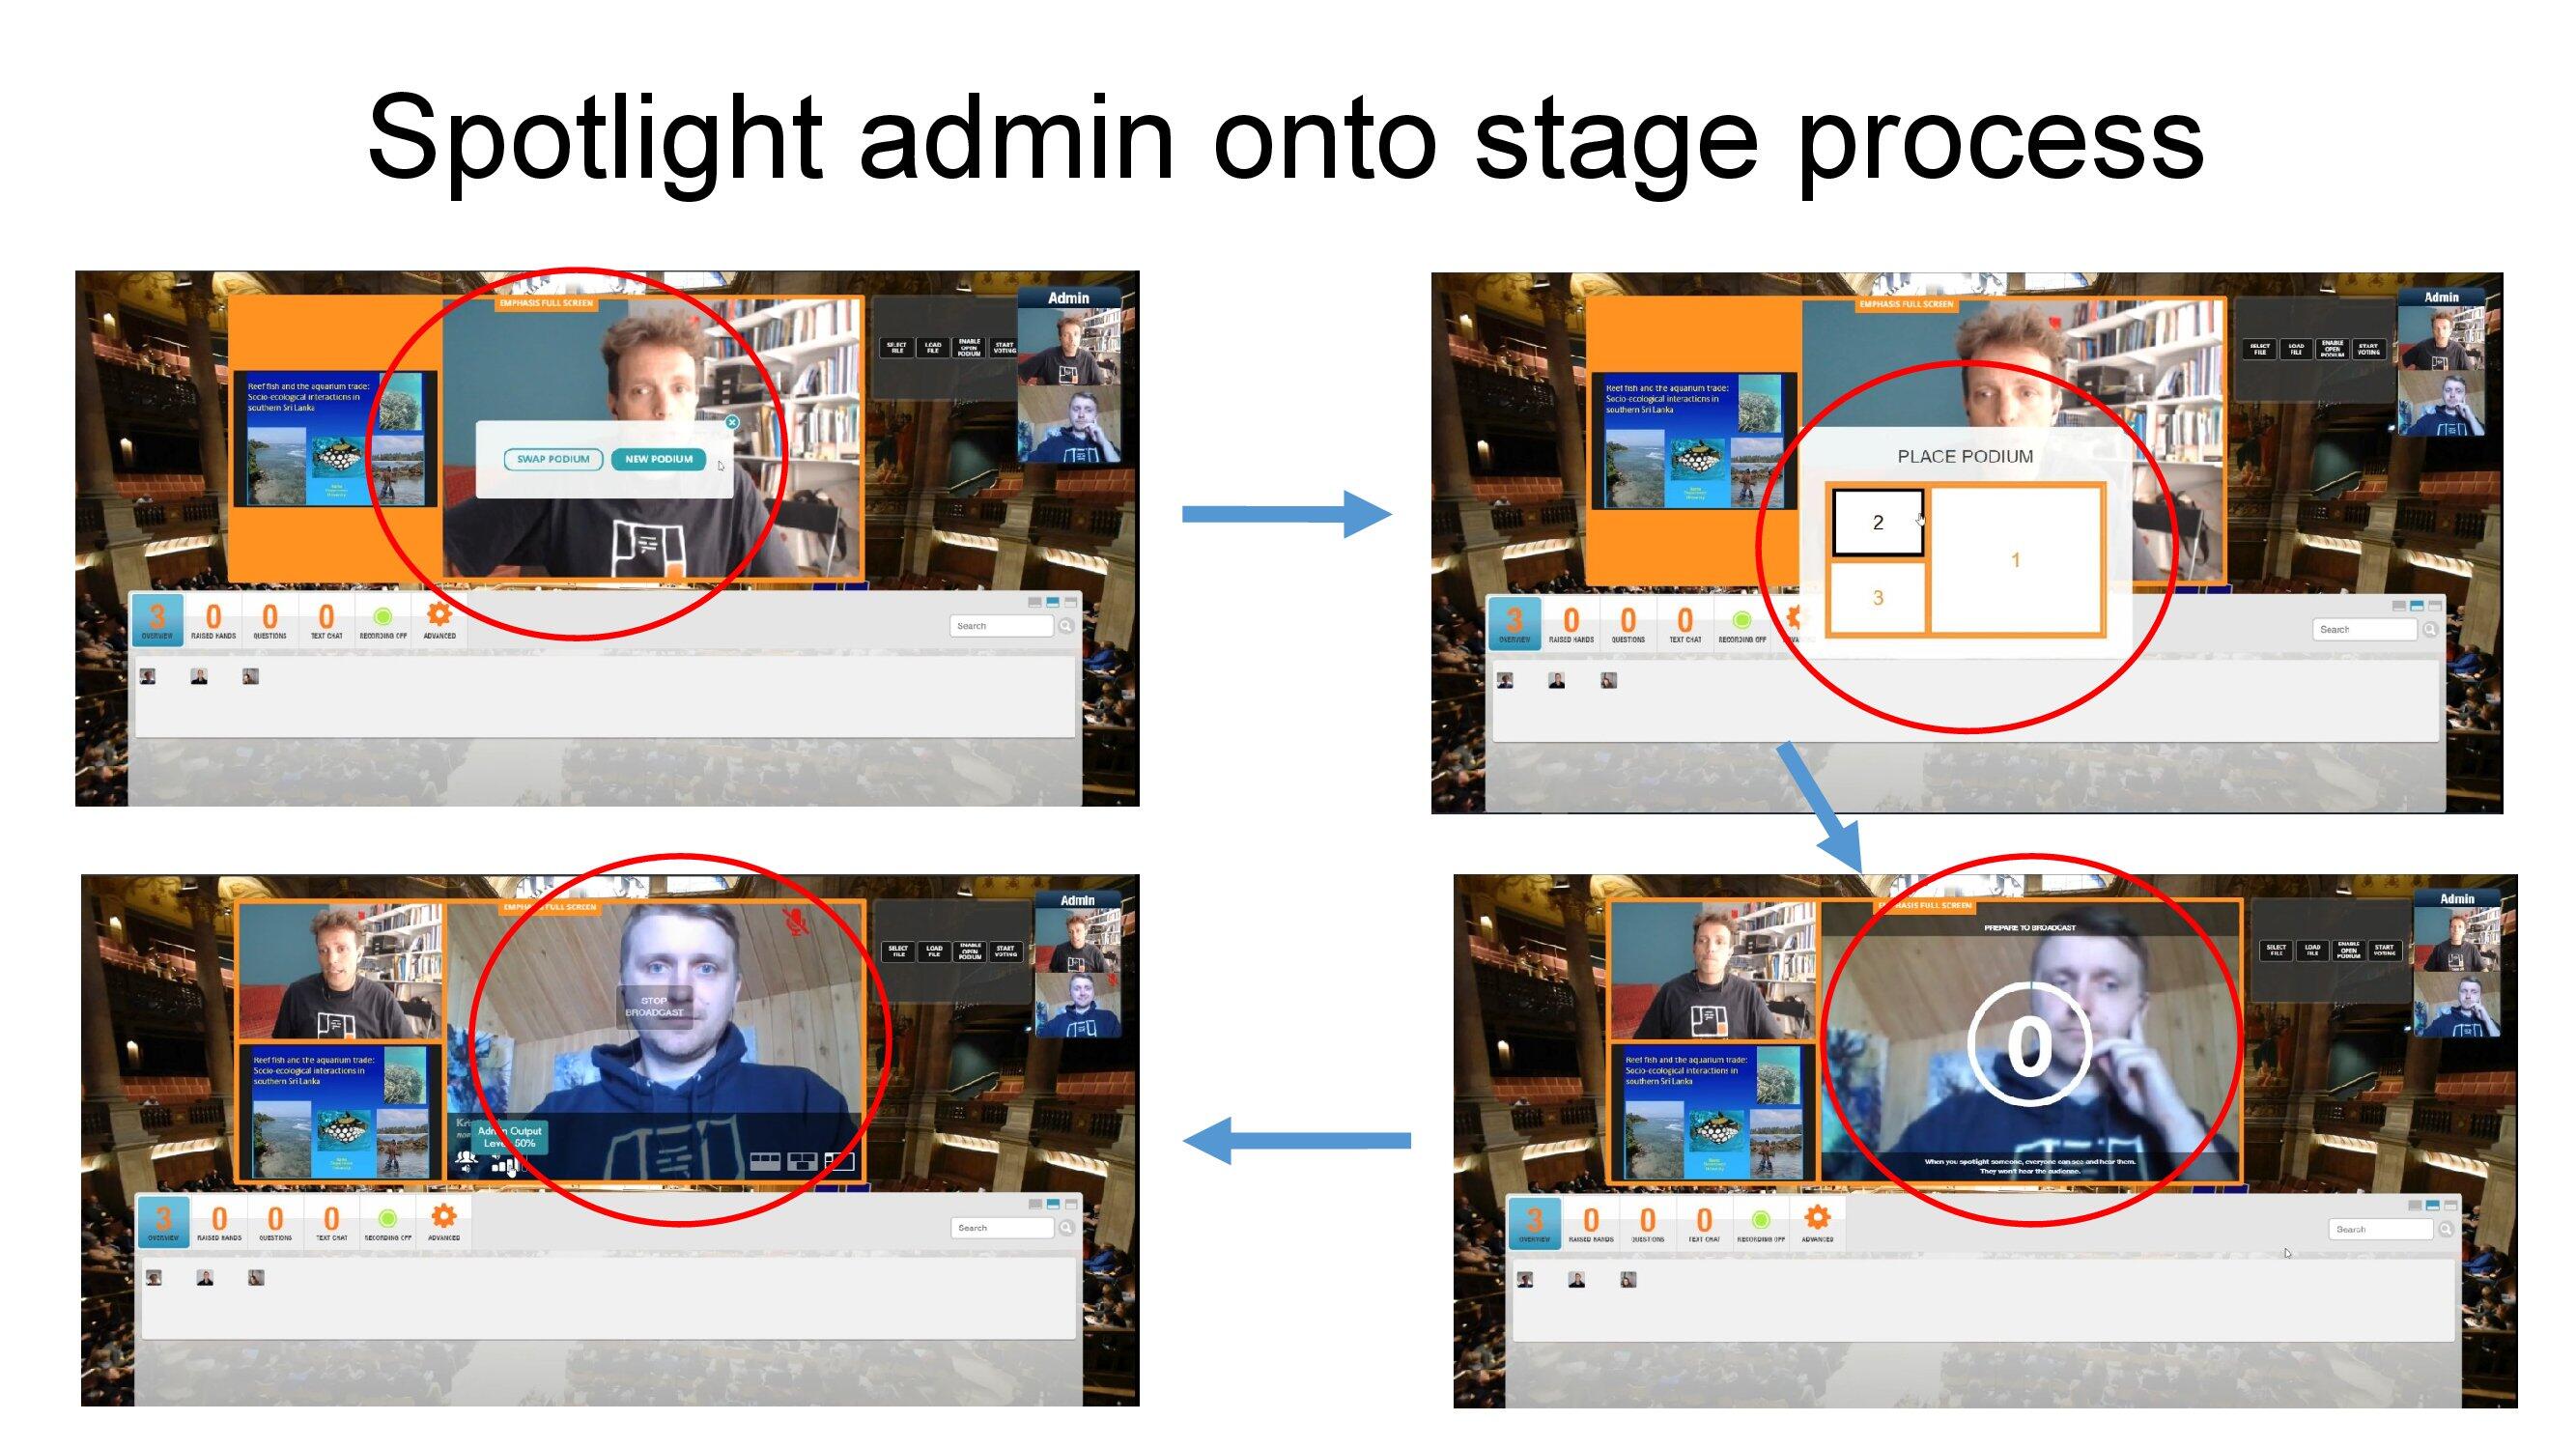
But an admin can also spotlight a fellow admin onto stage.
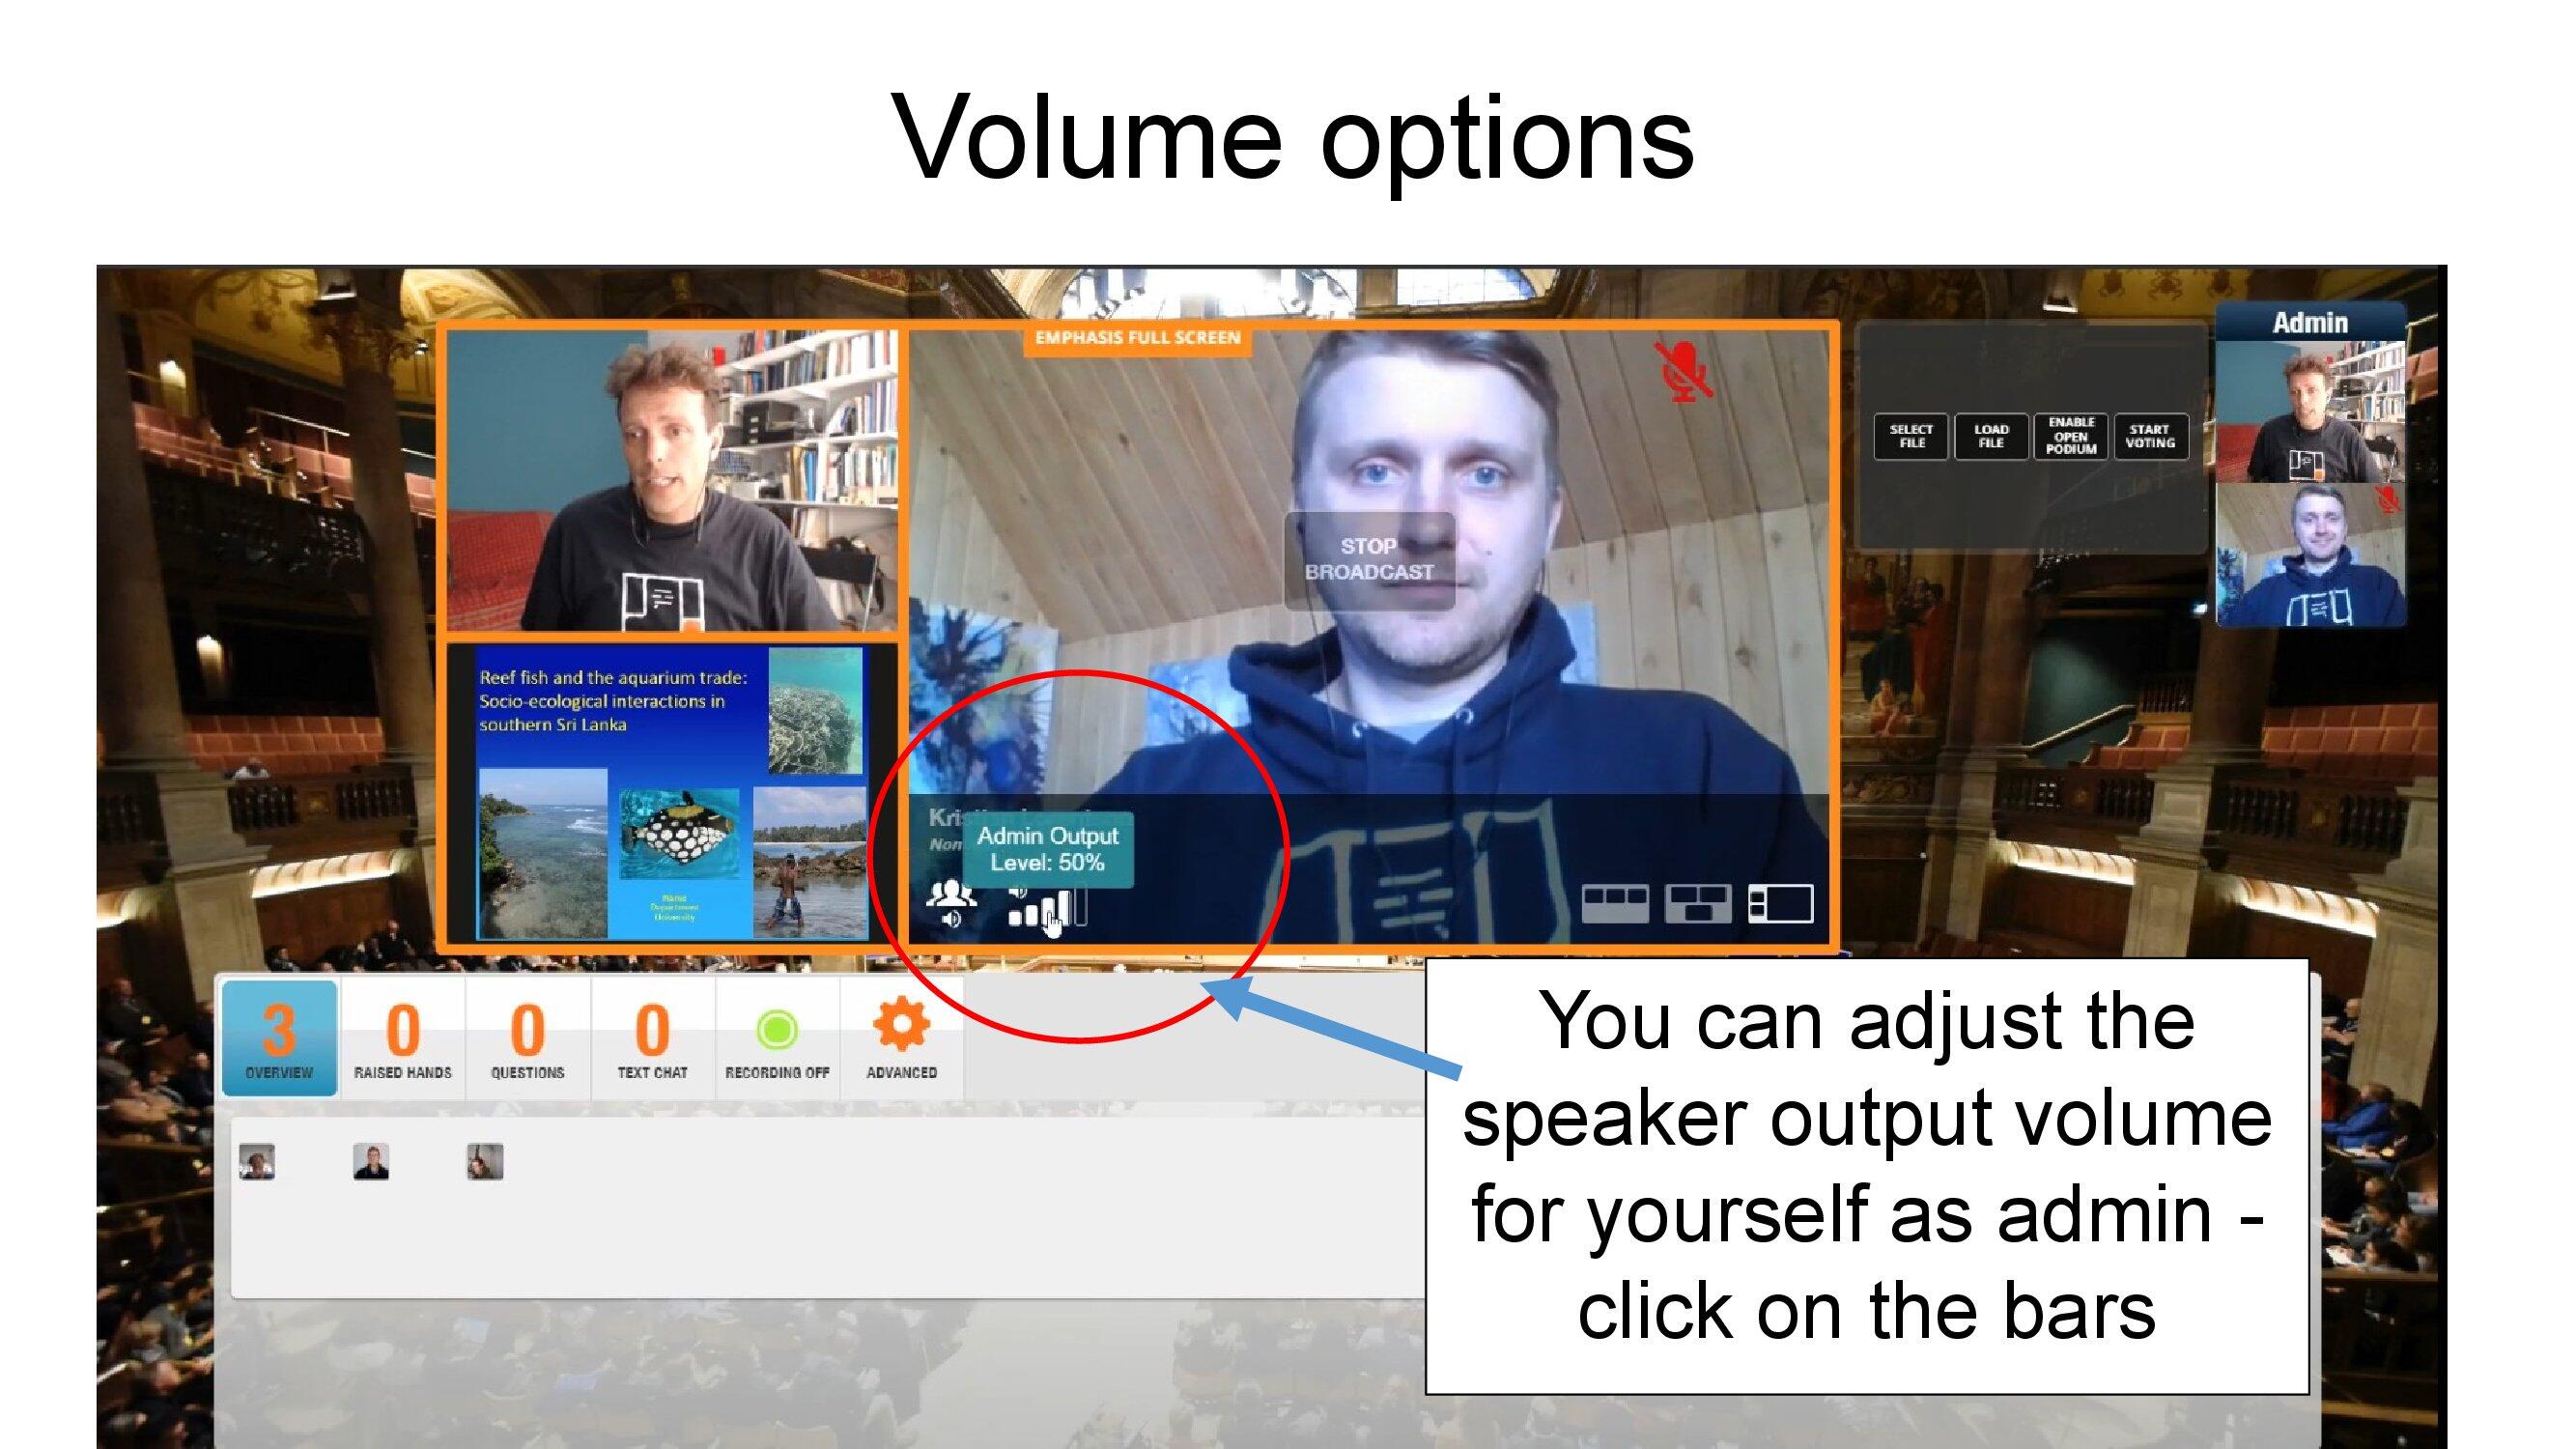
Altering the sliding volume scale controls the playback of that podium on your computer alone.
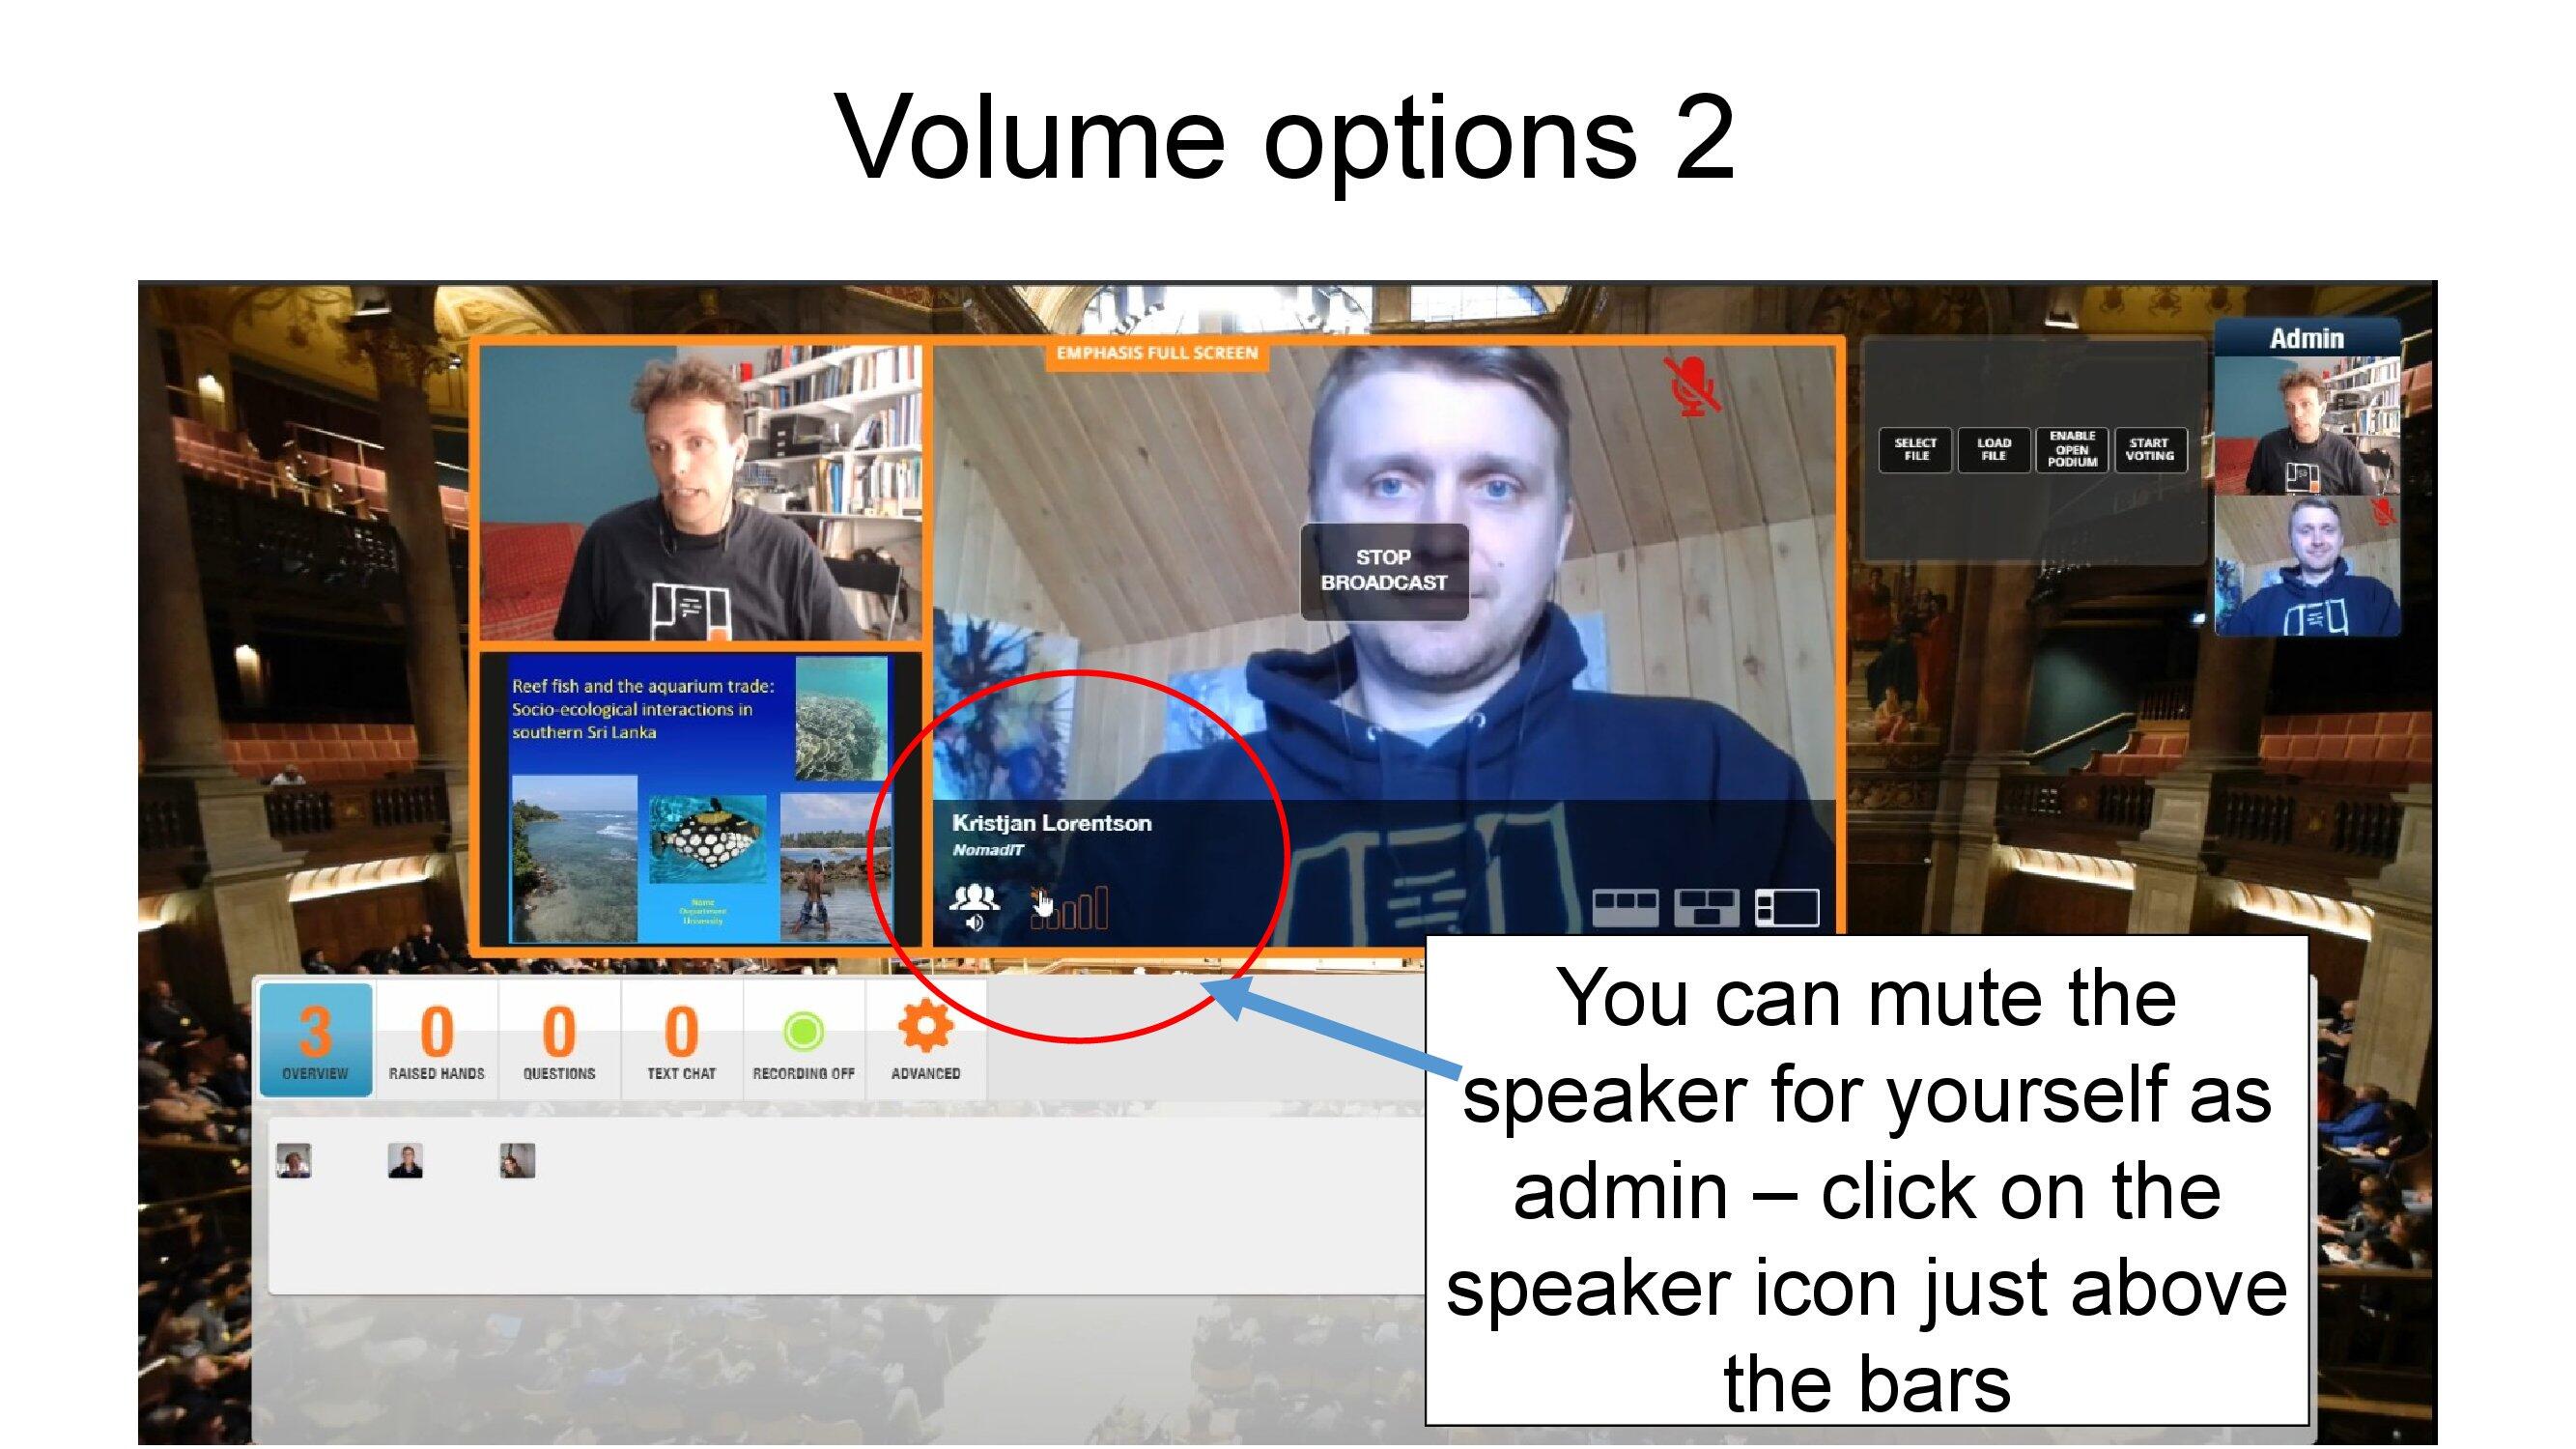
Clicking the speaker icon above the sliding volume scale, toggles mute off/on - for your playback of that podium, alone.
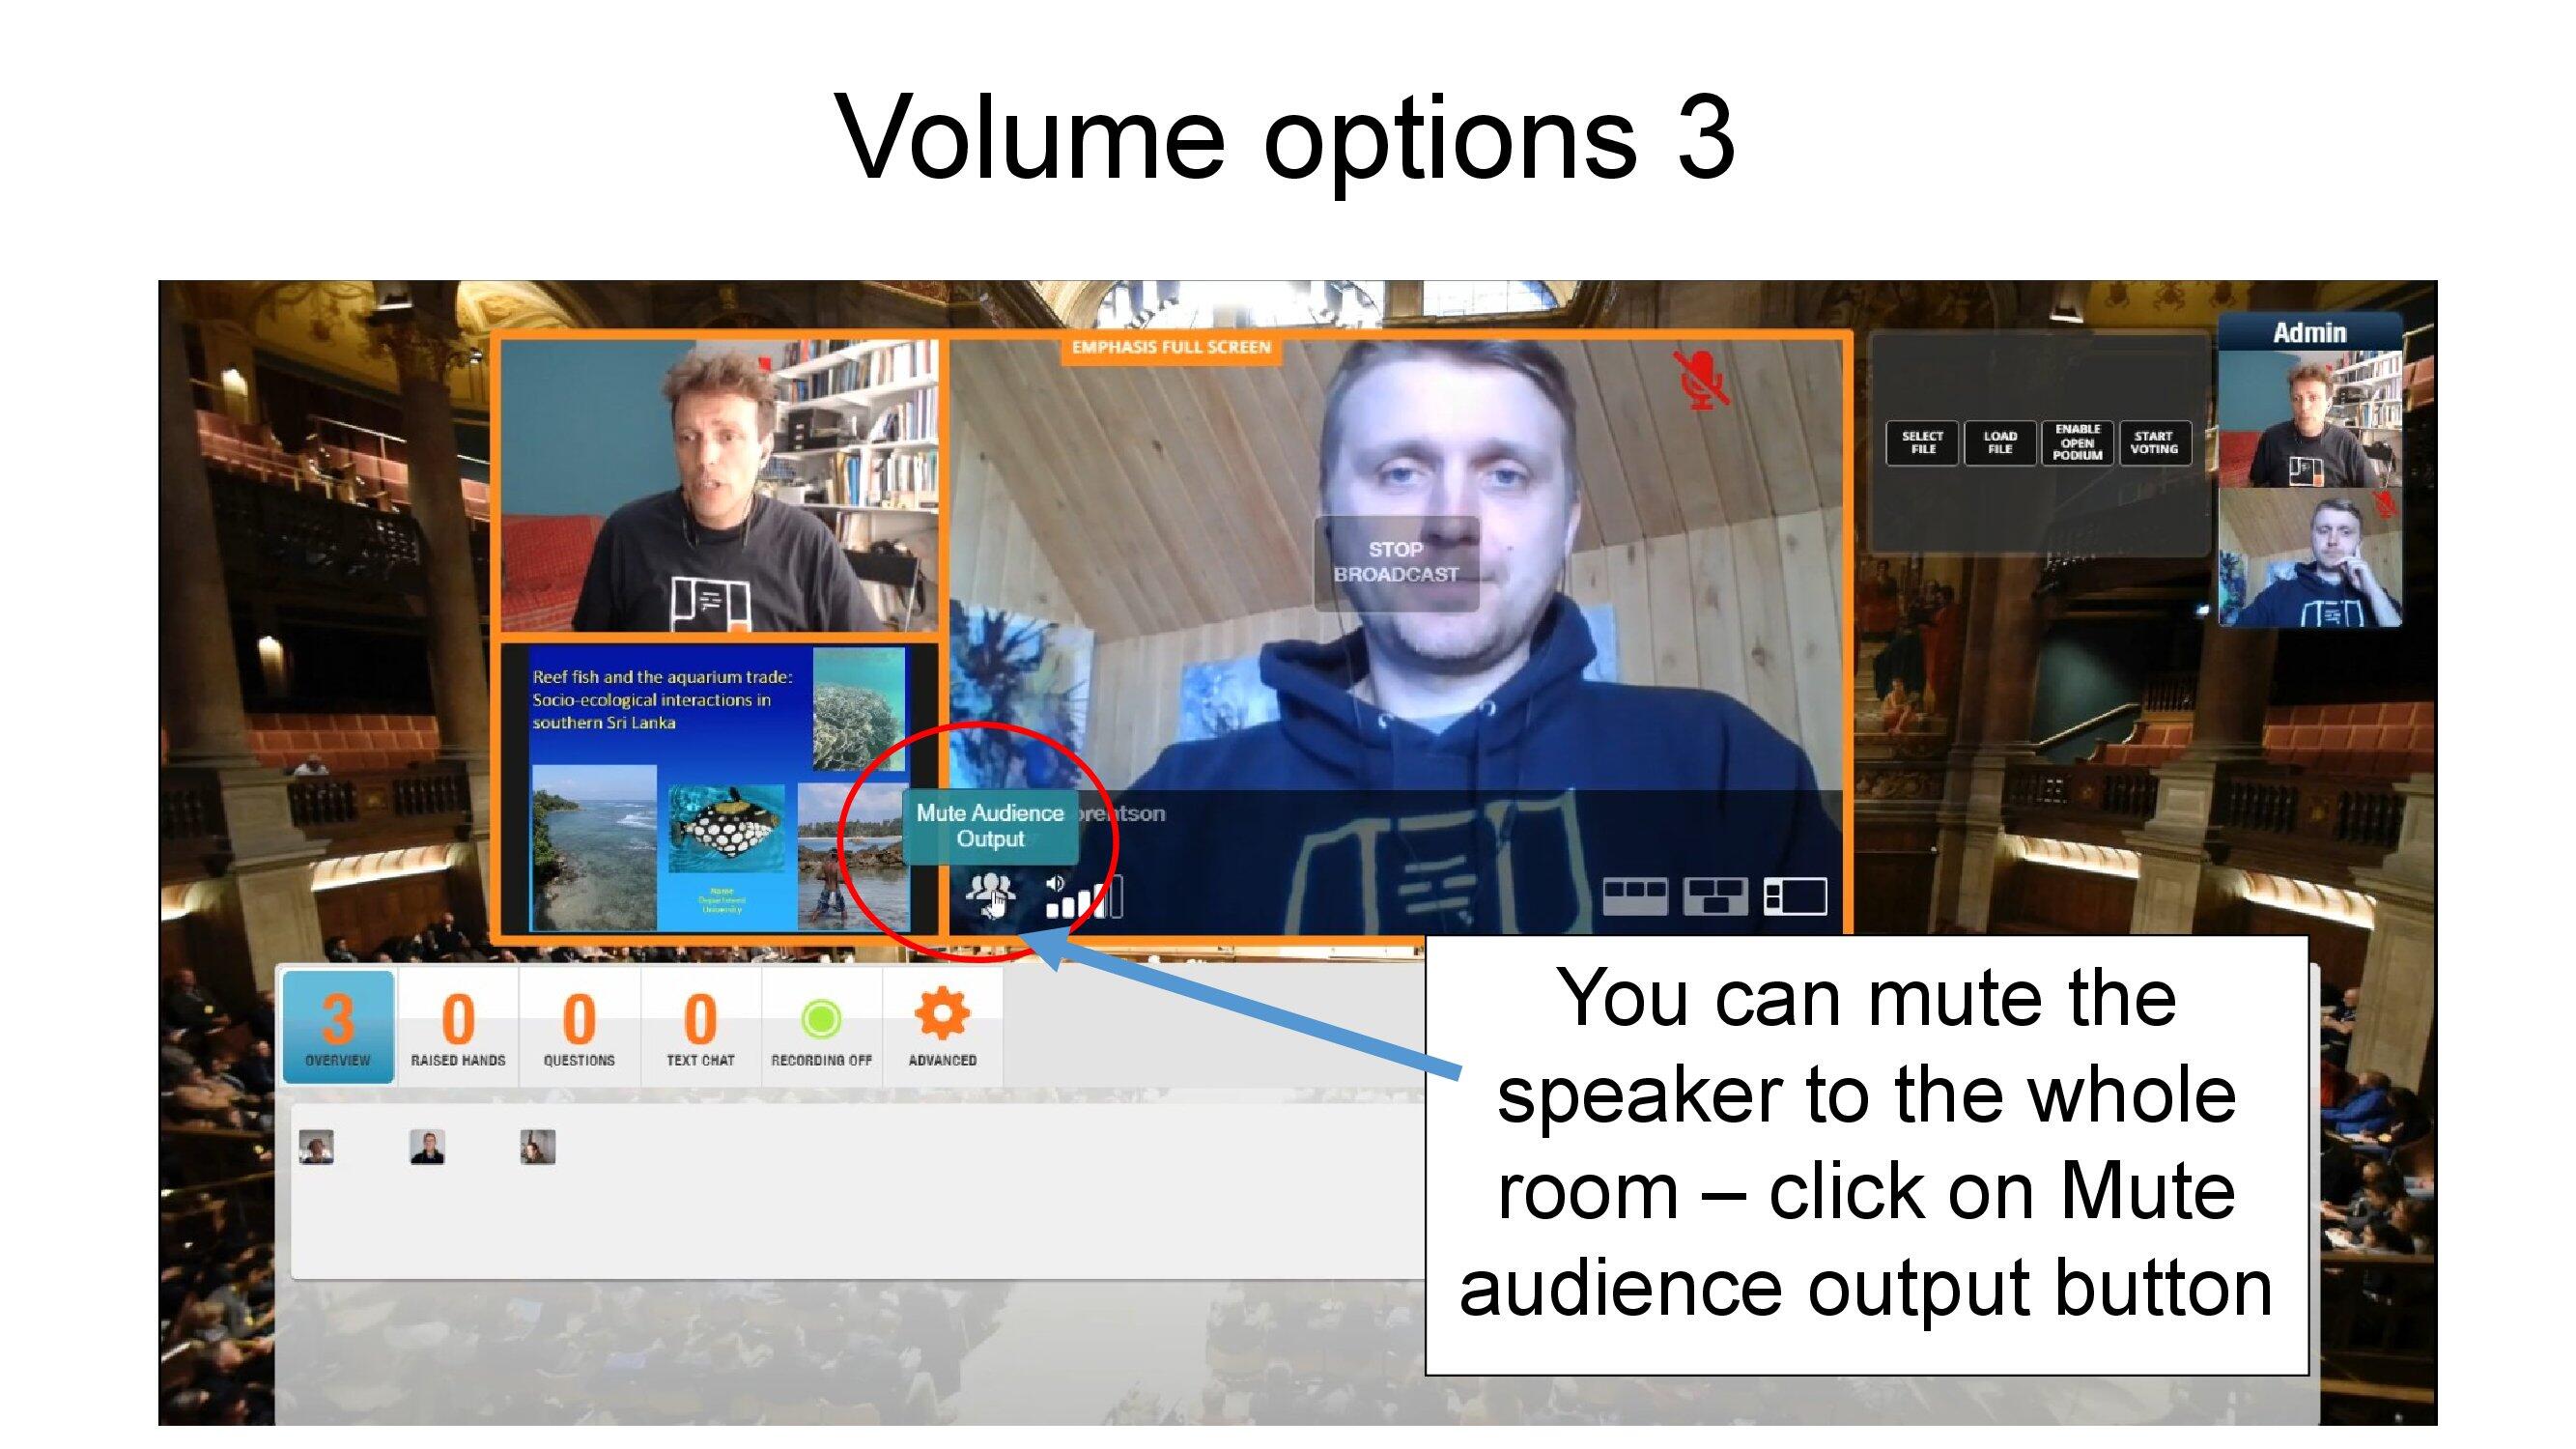
The control furthest left allows you to mute a podium for the entire room. If playing an audio/video file you can alter the volume level for the whole room.
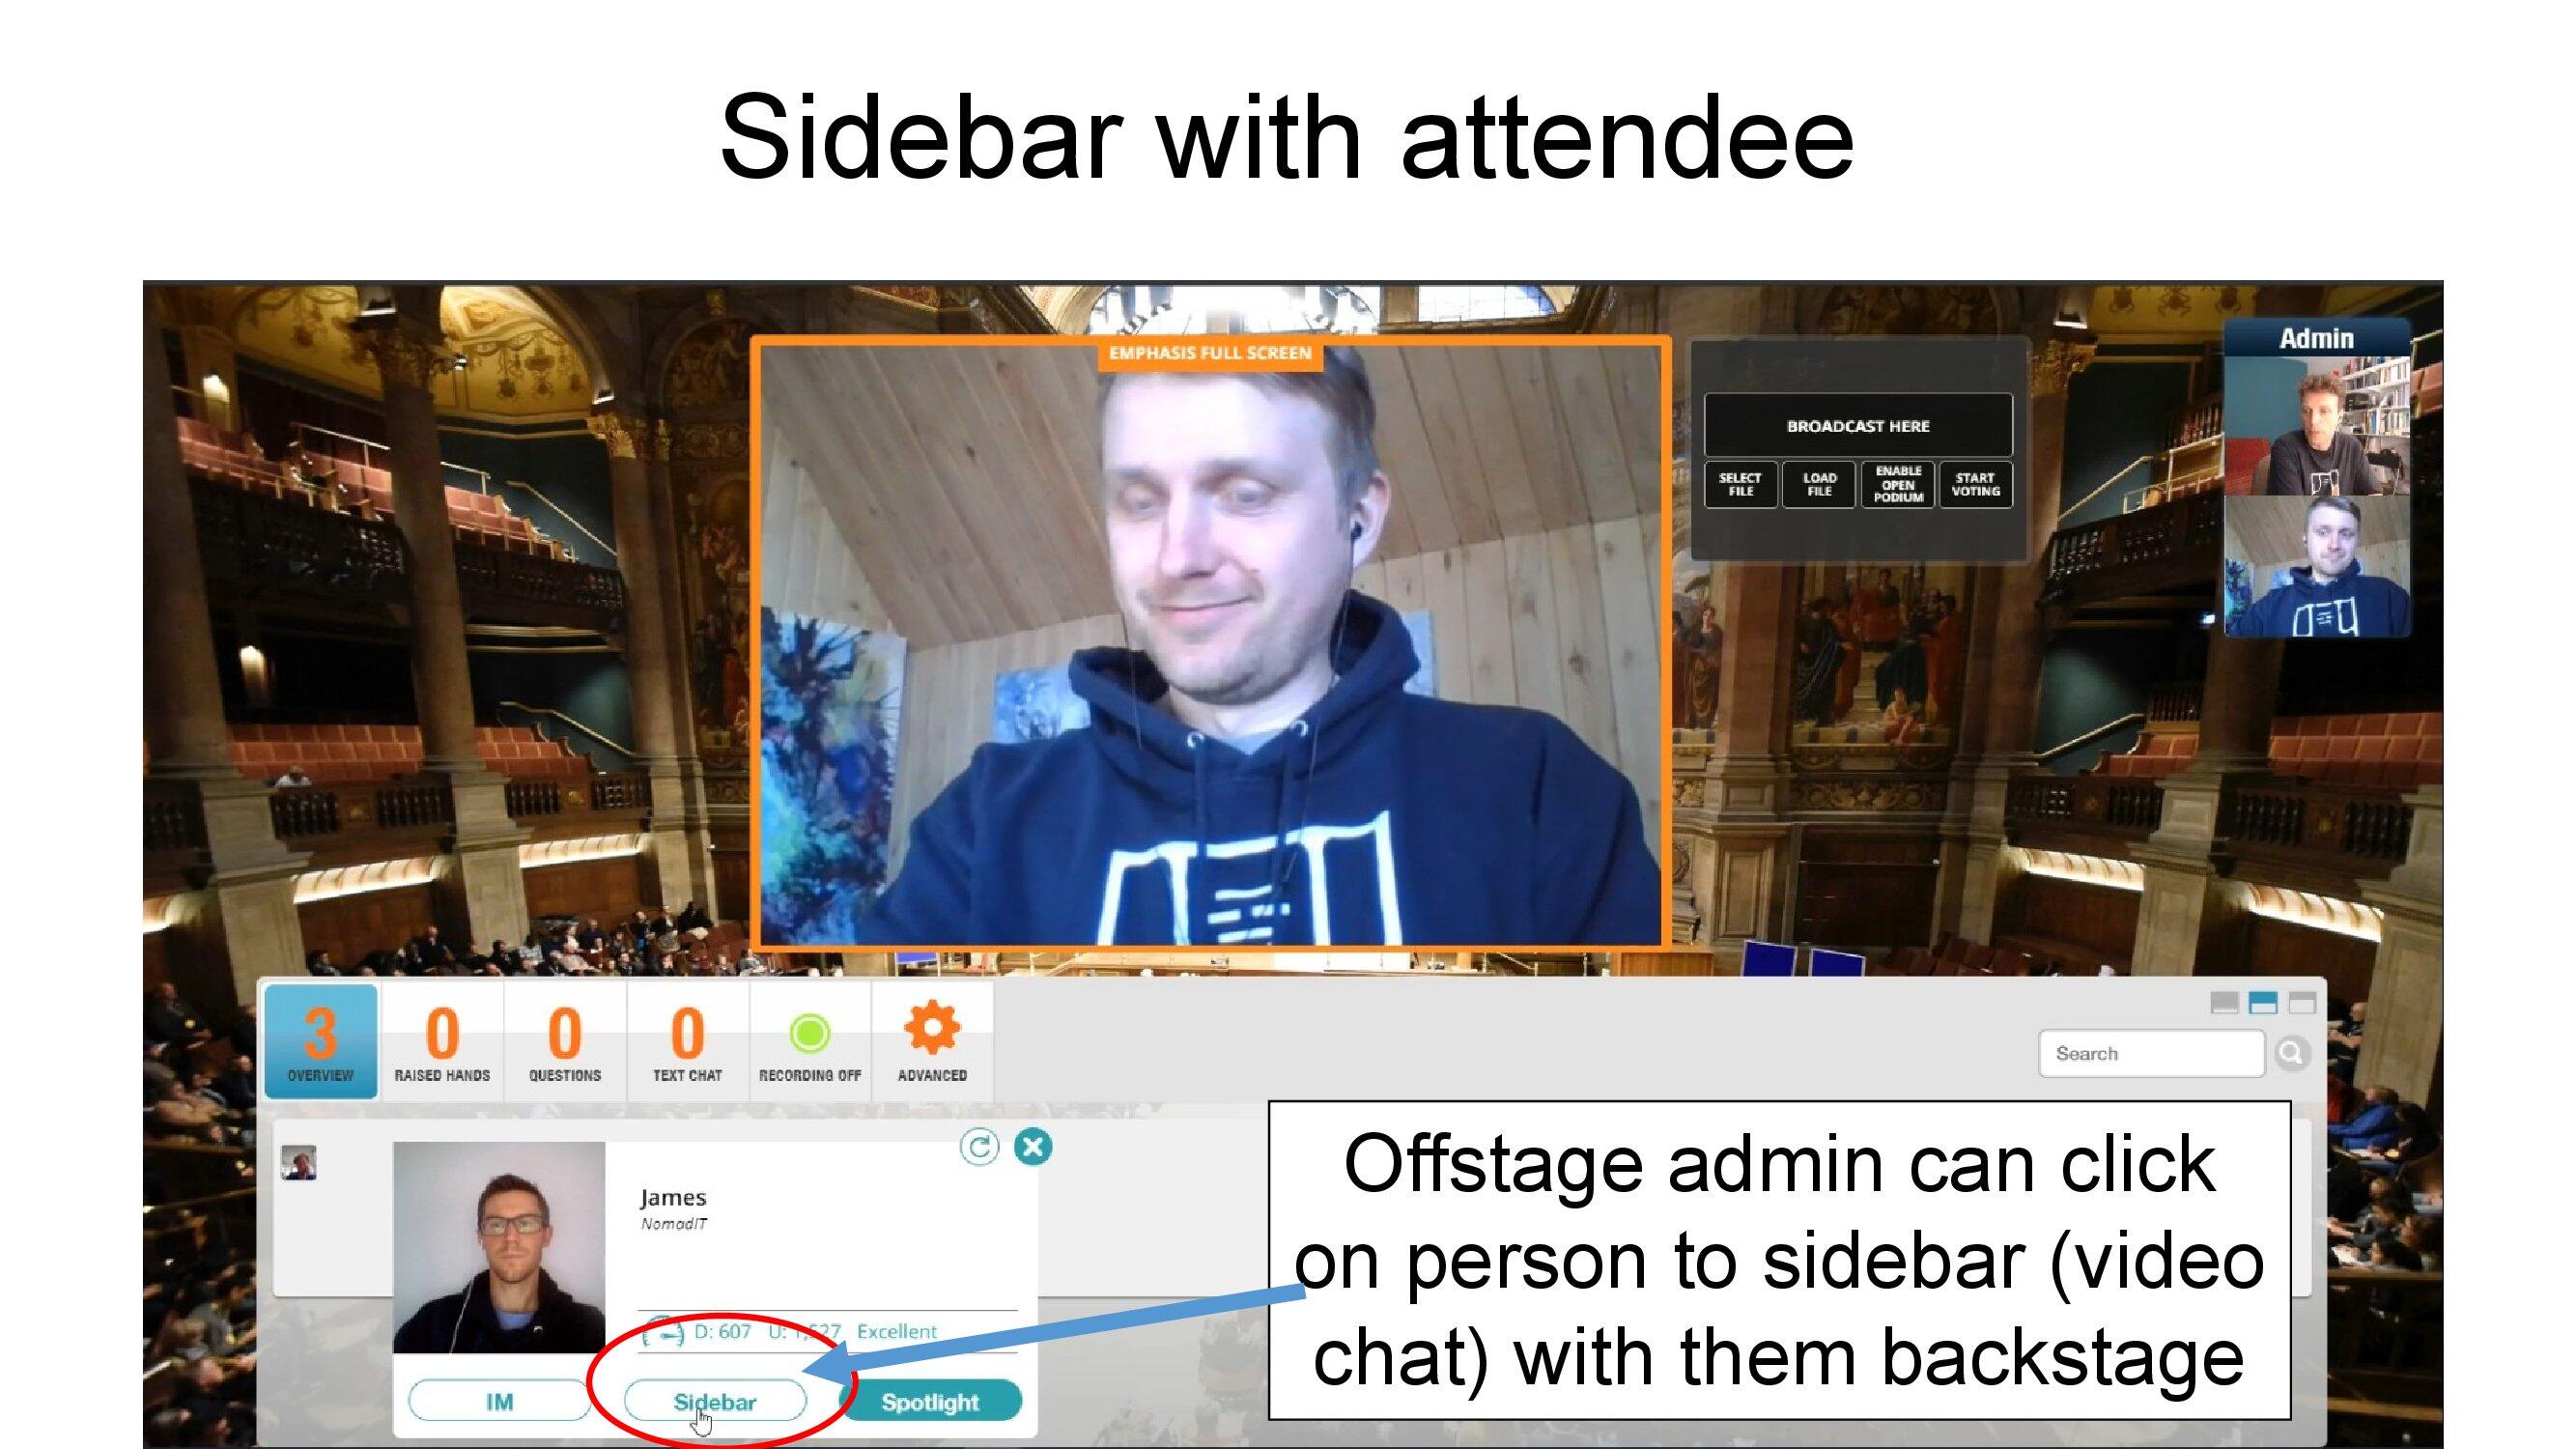
It is possible to use the sidebar feature to check an attendee's cam/mic settings and connection before spotlighting to stage. The admin doing this has to be off-stage.
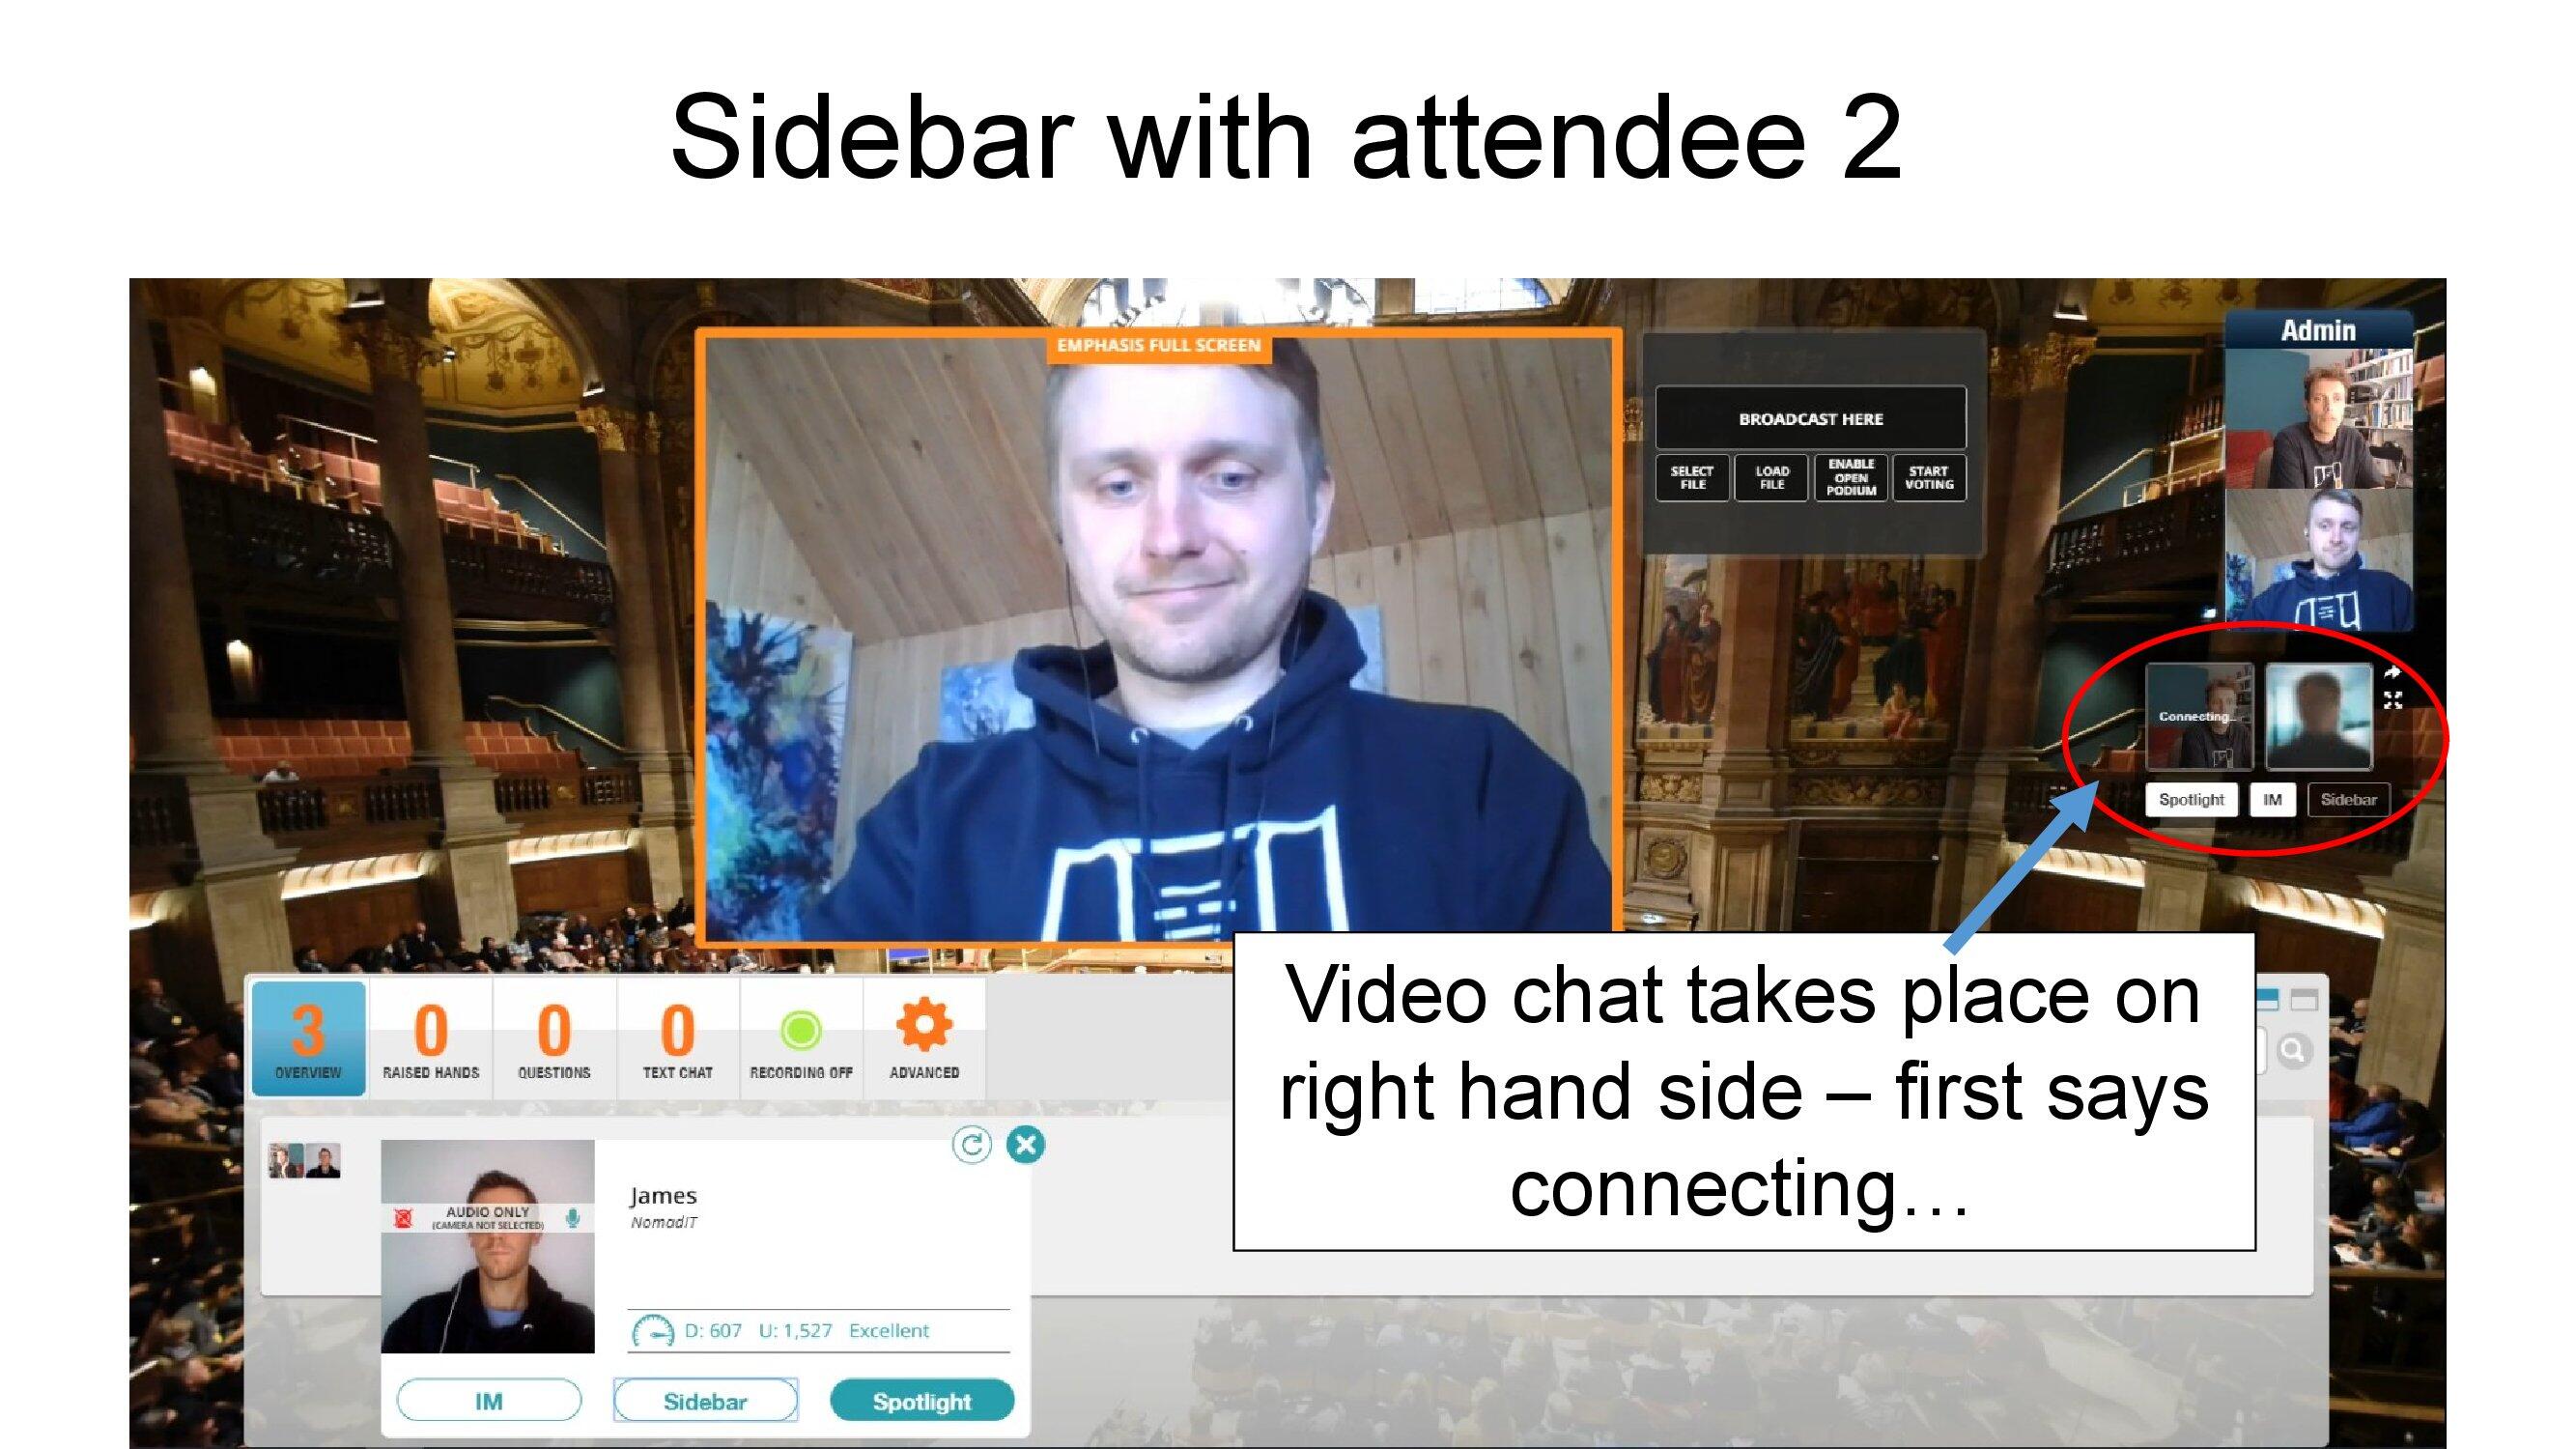
Sidebar initiates a video chat back-stage.
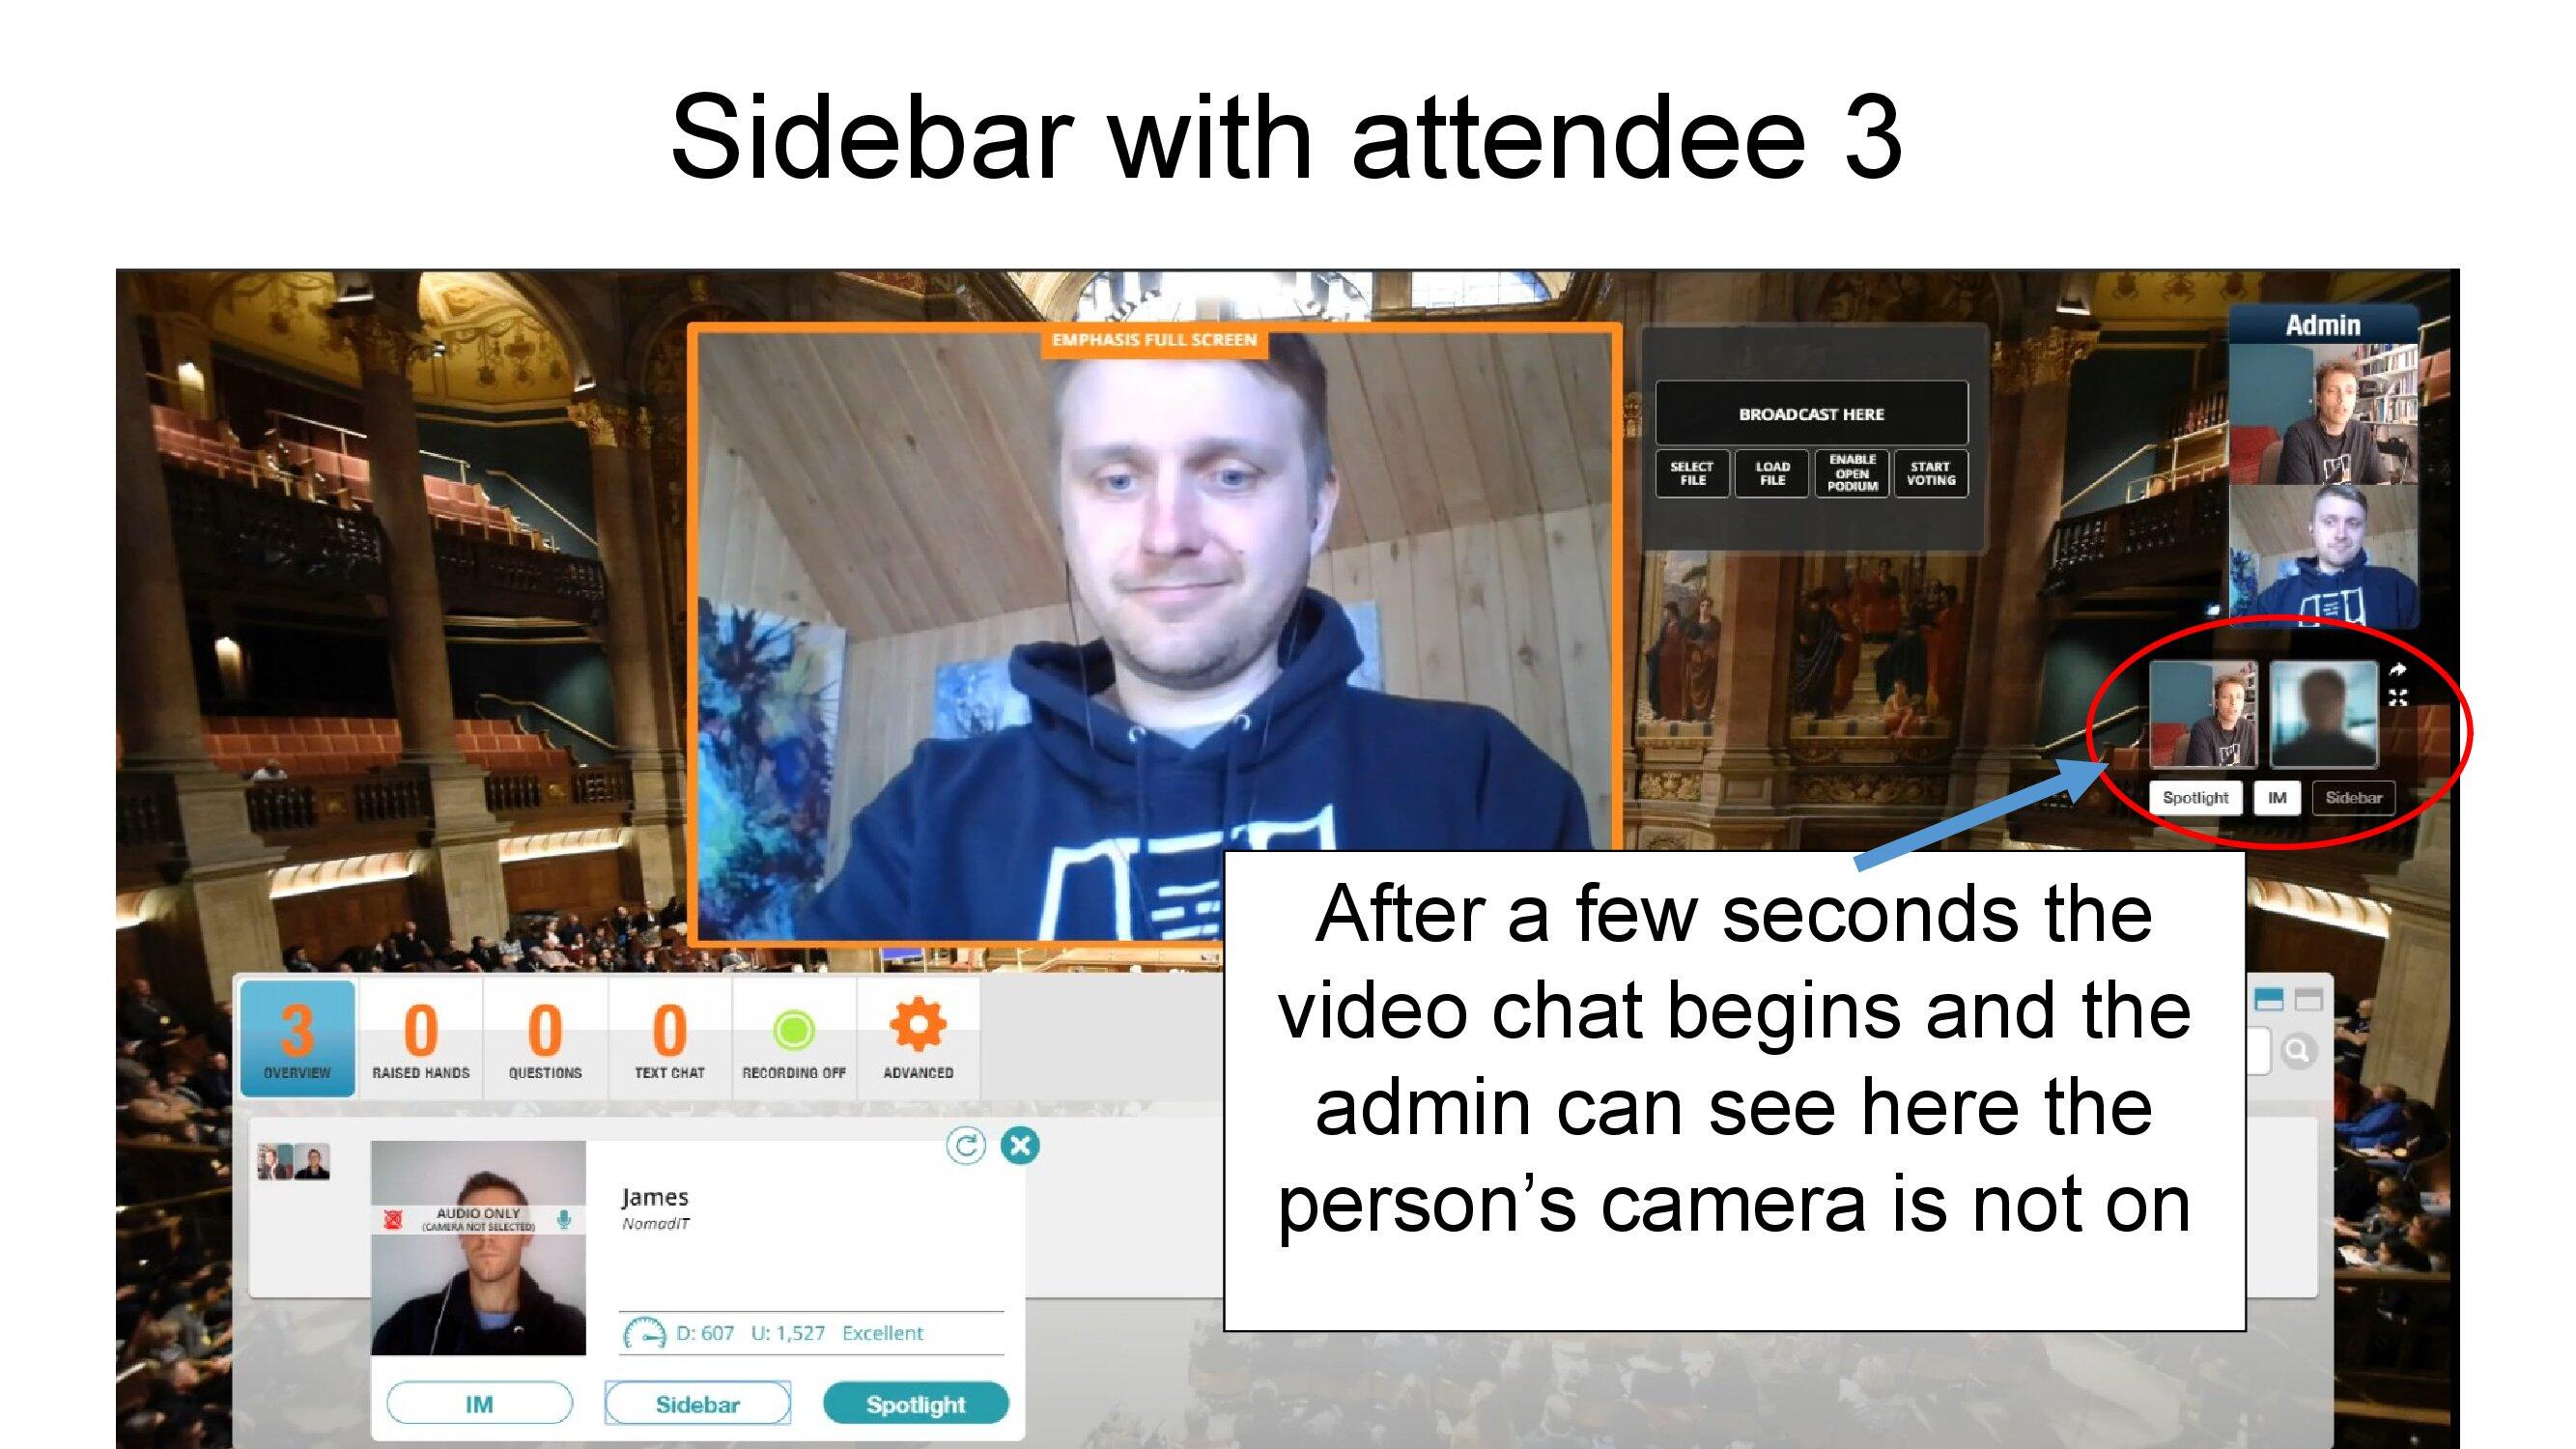
Sidebarring gives an opportunity to help the attendee turn on their camera and mic.
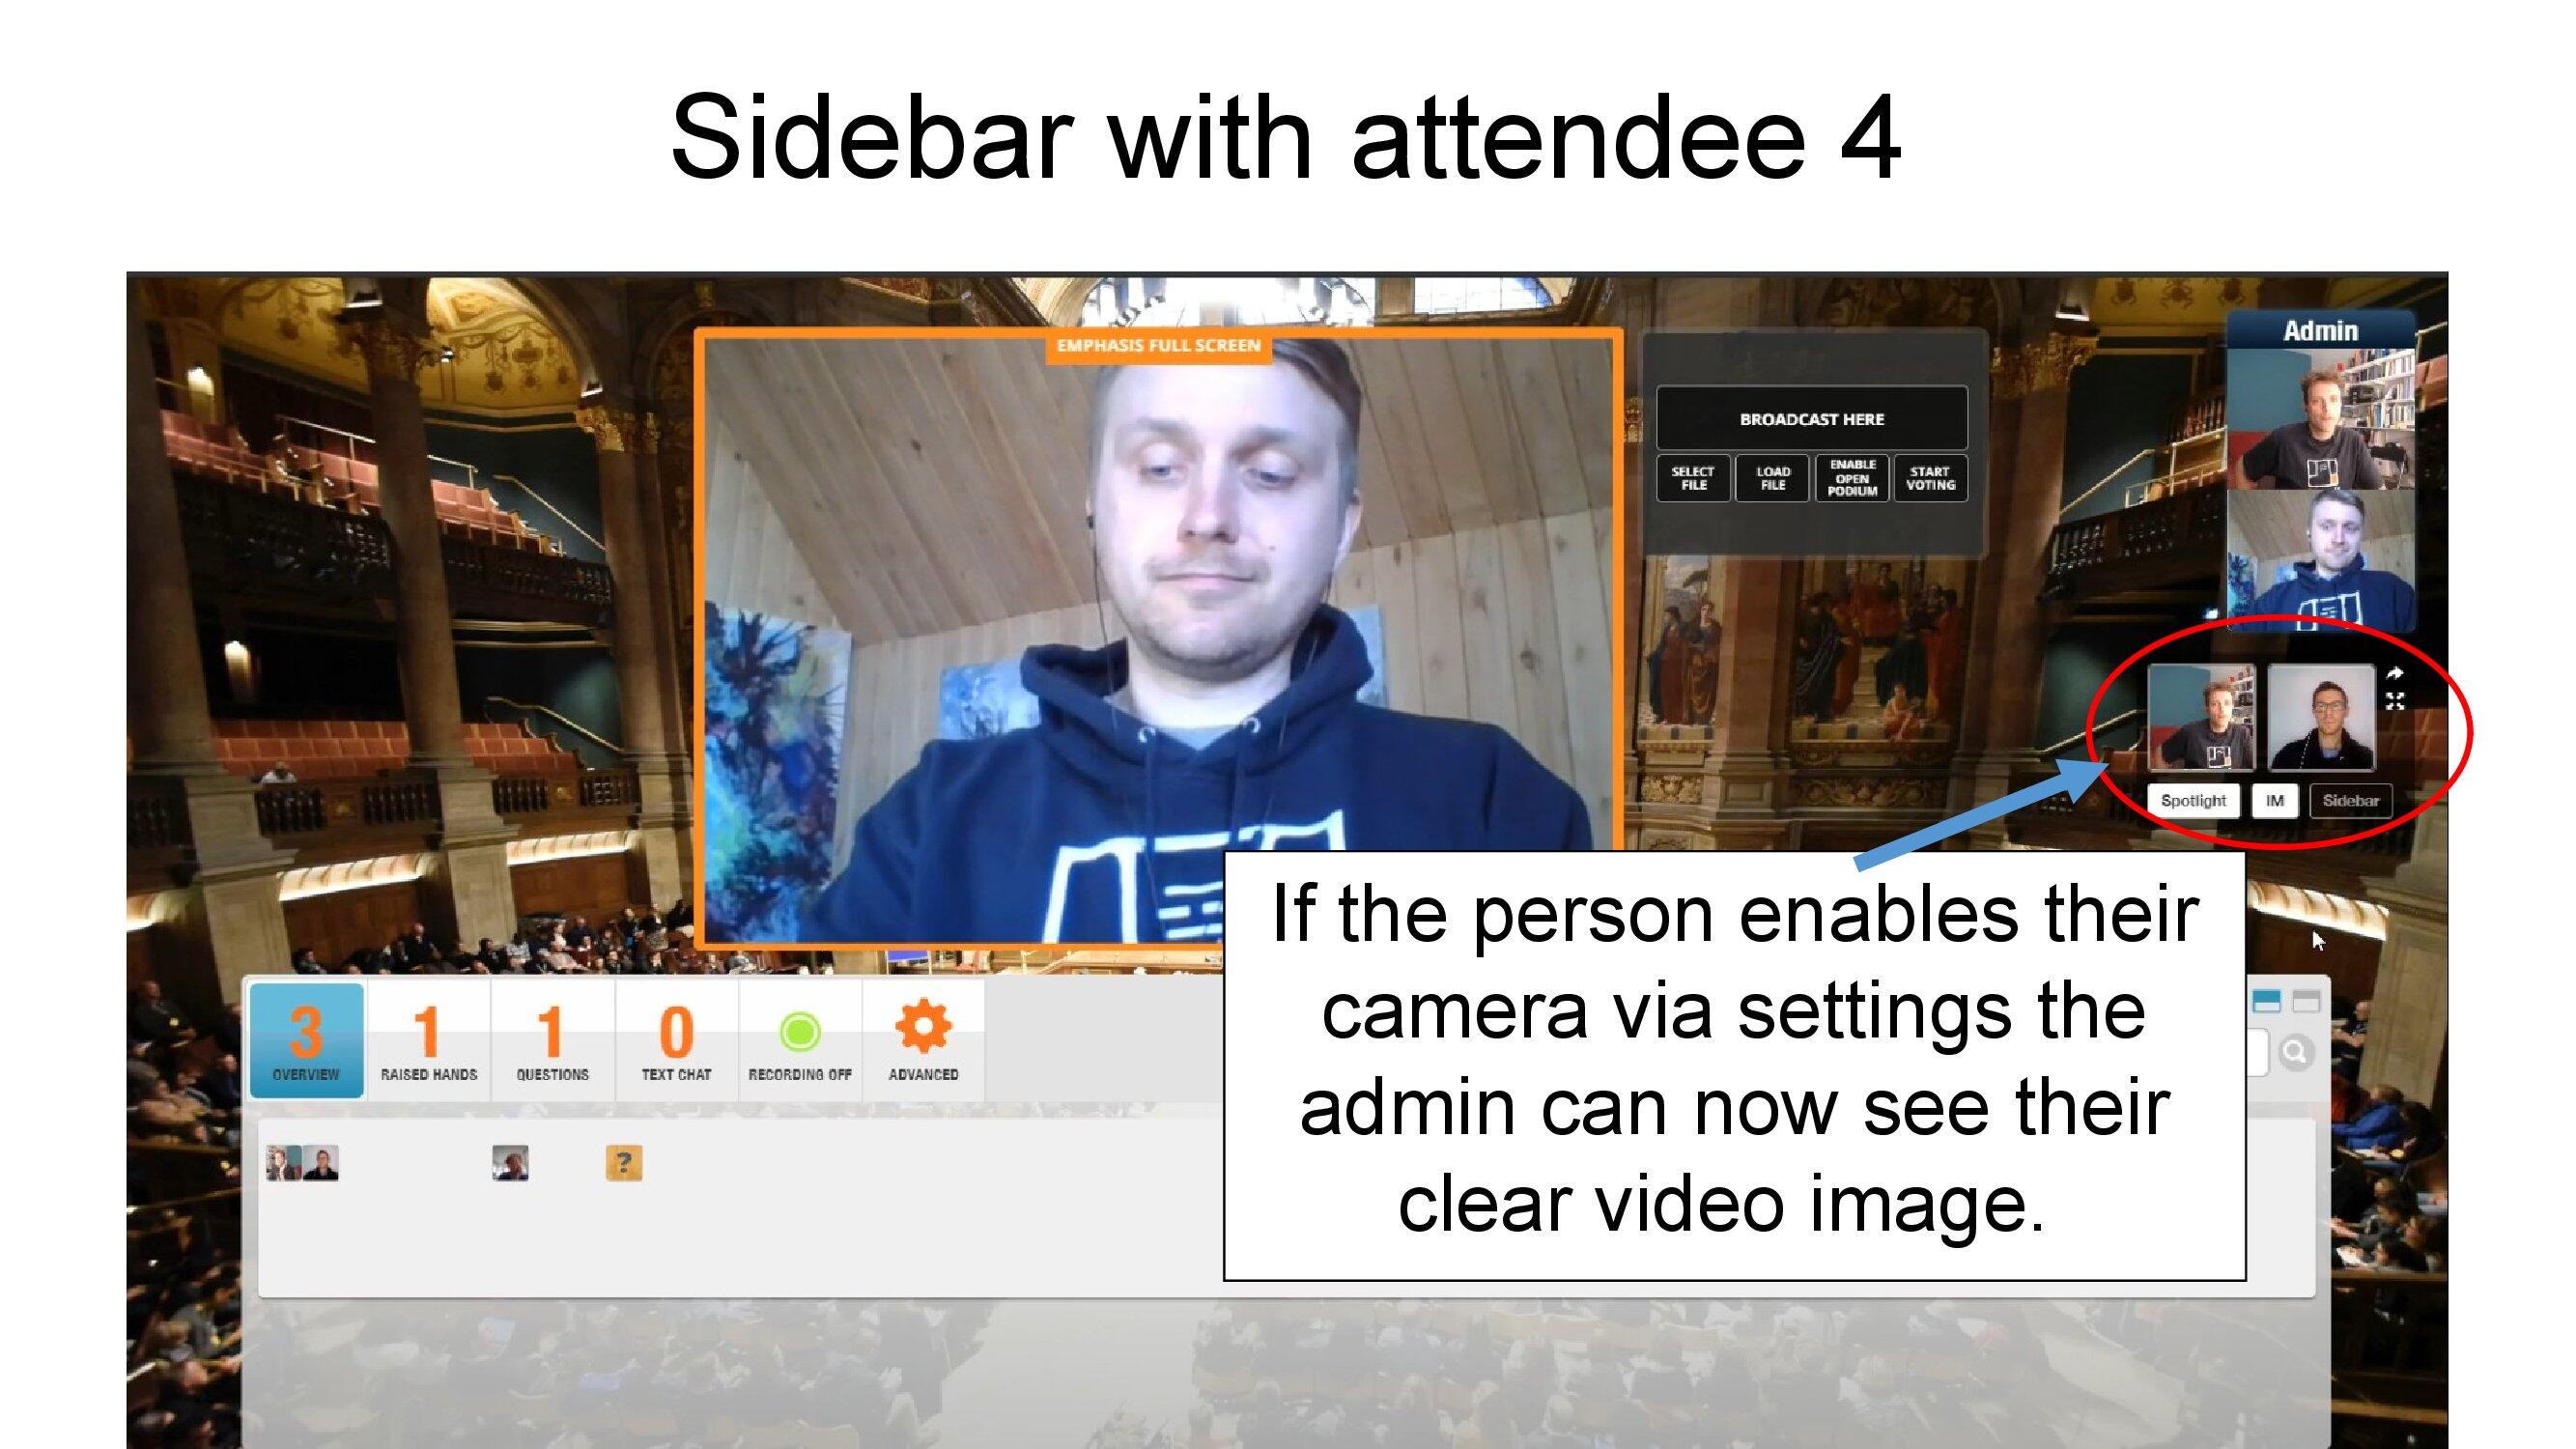
Conversation in the sidebar does not interrupt the stage.
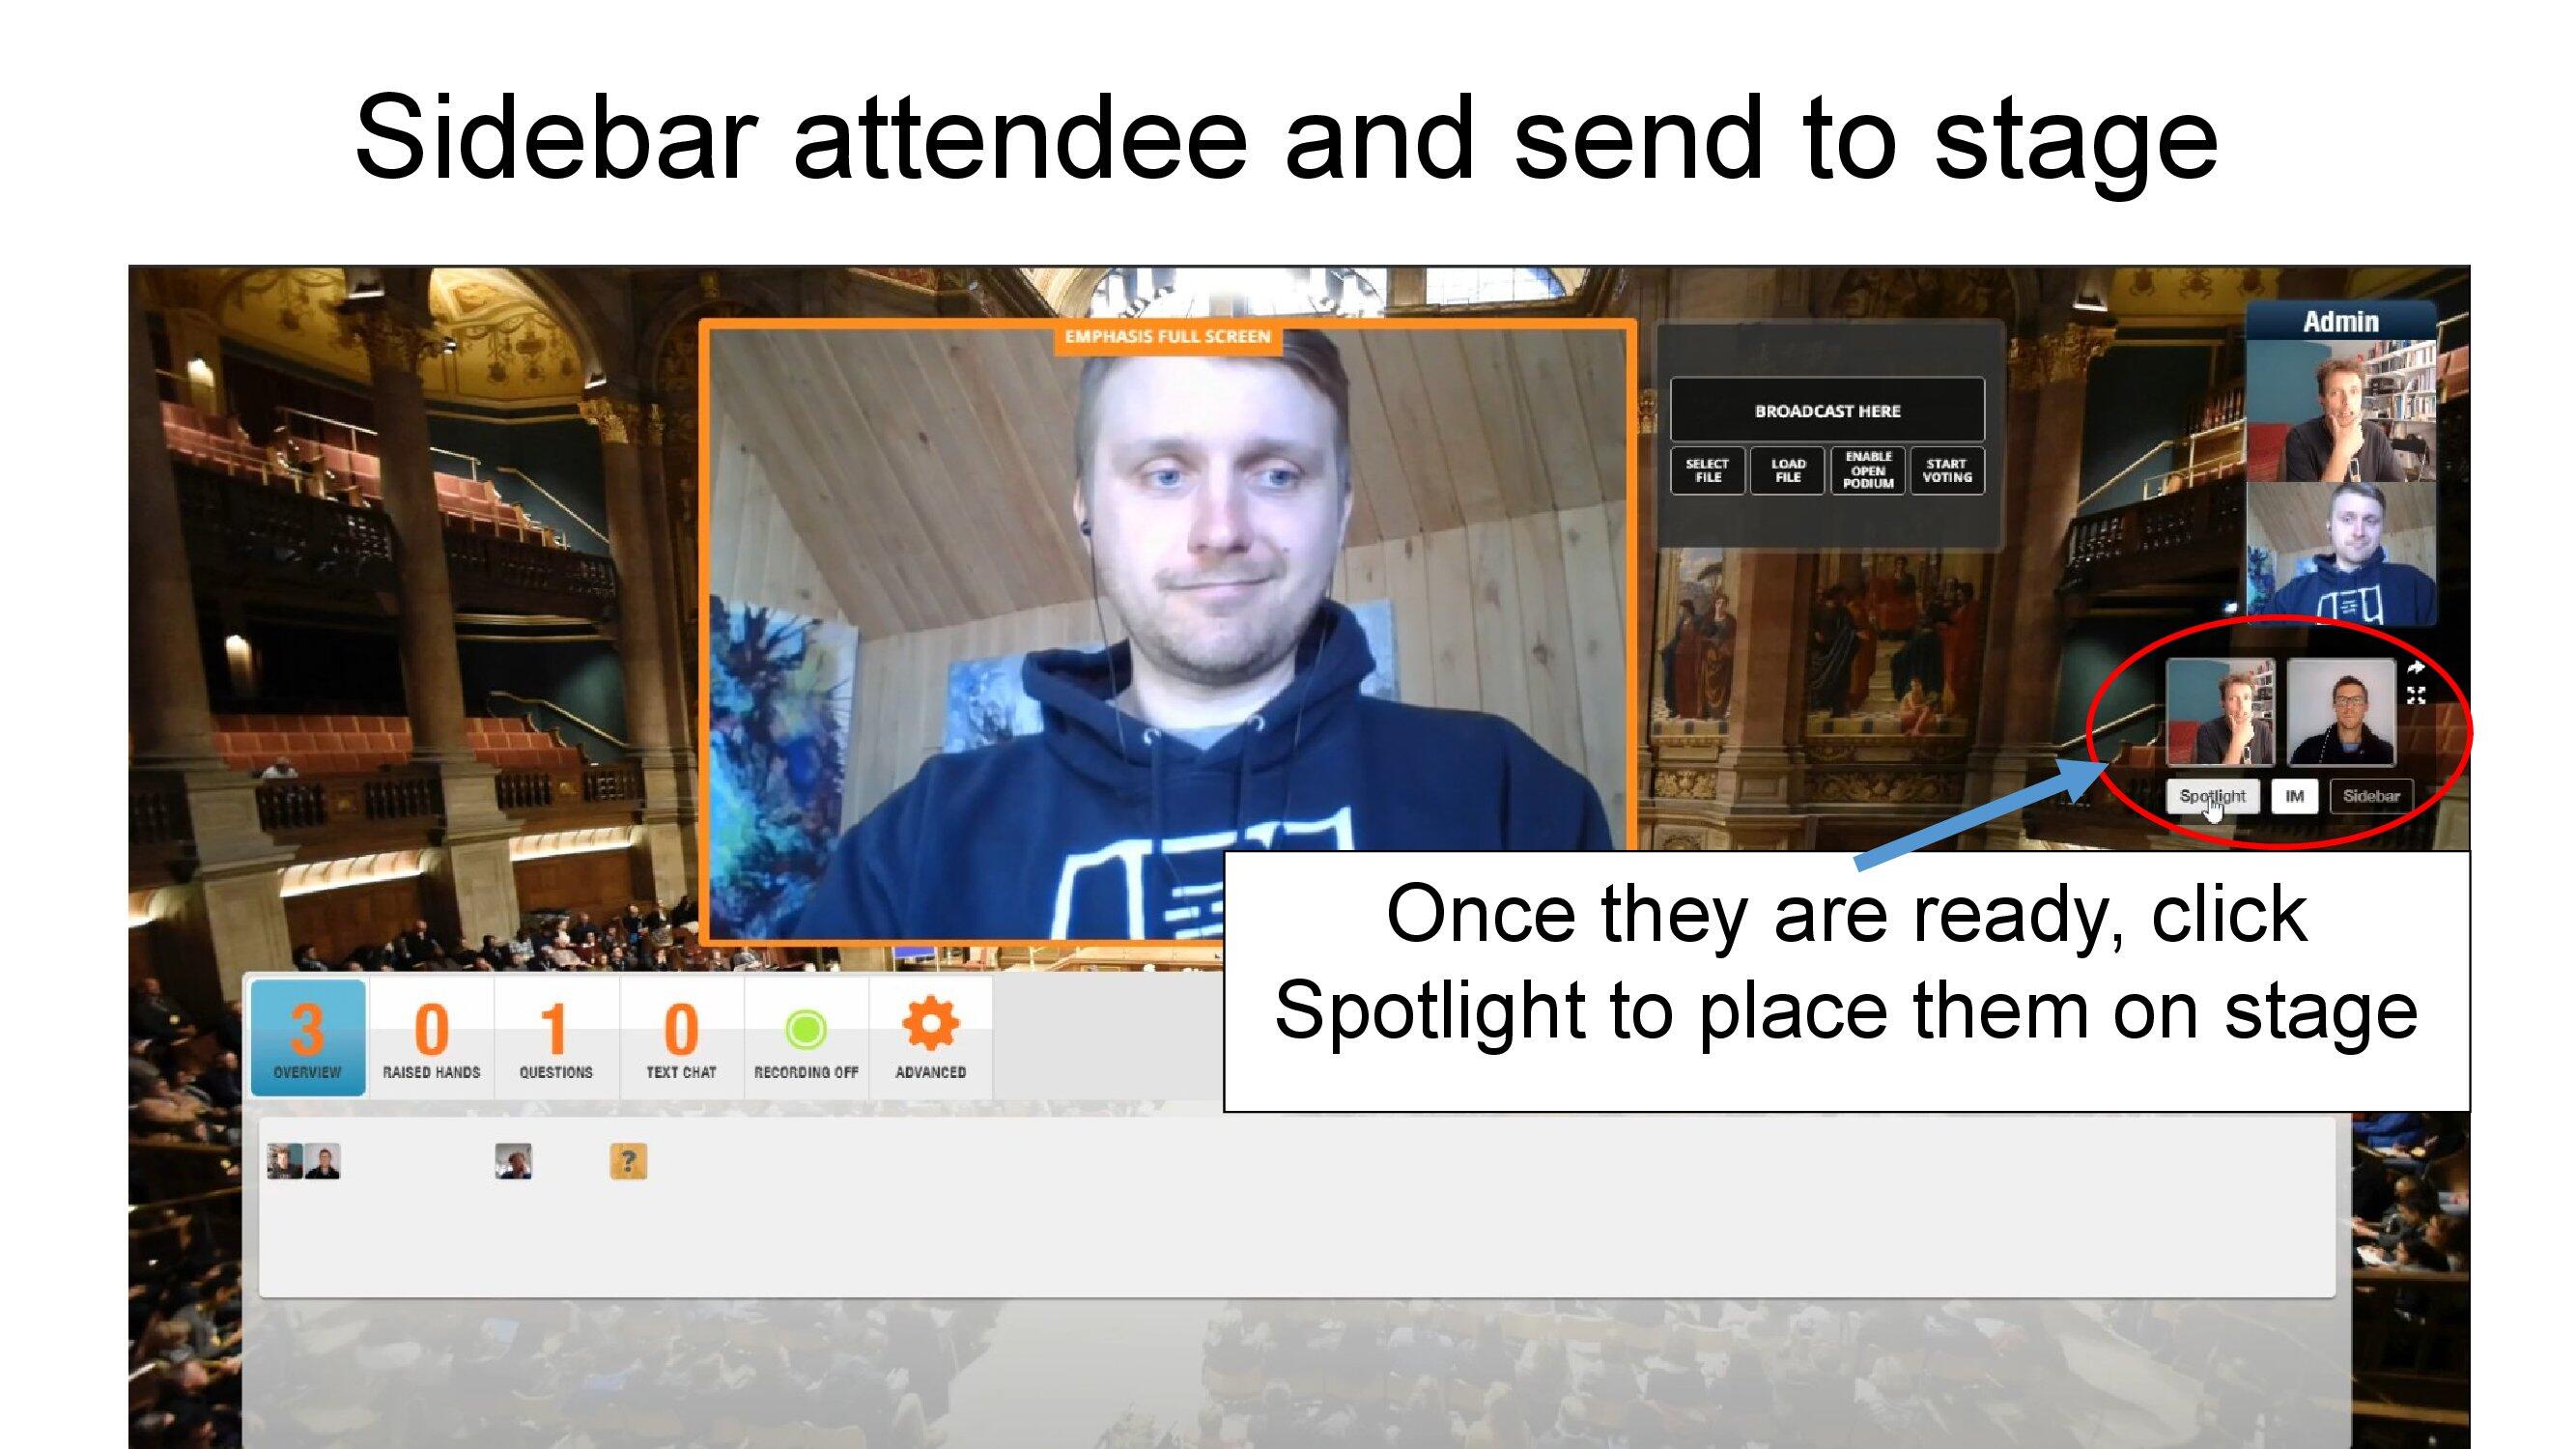
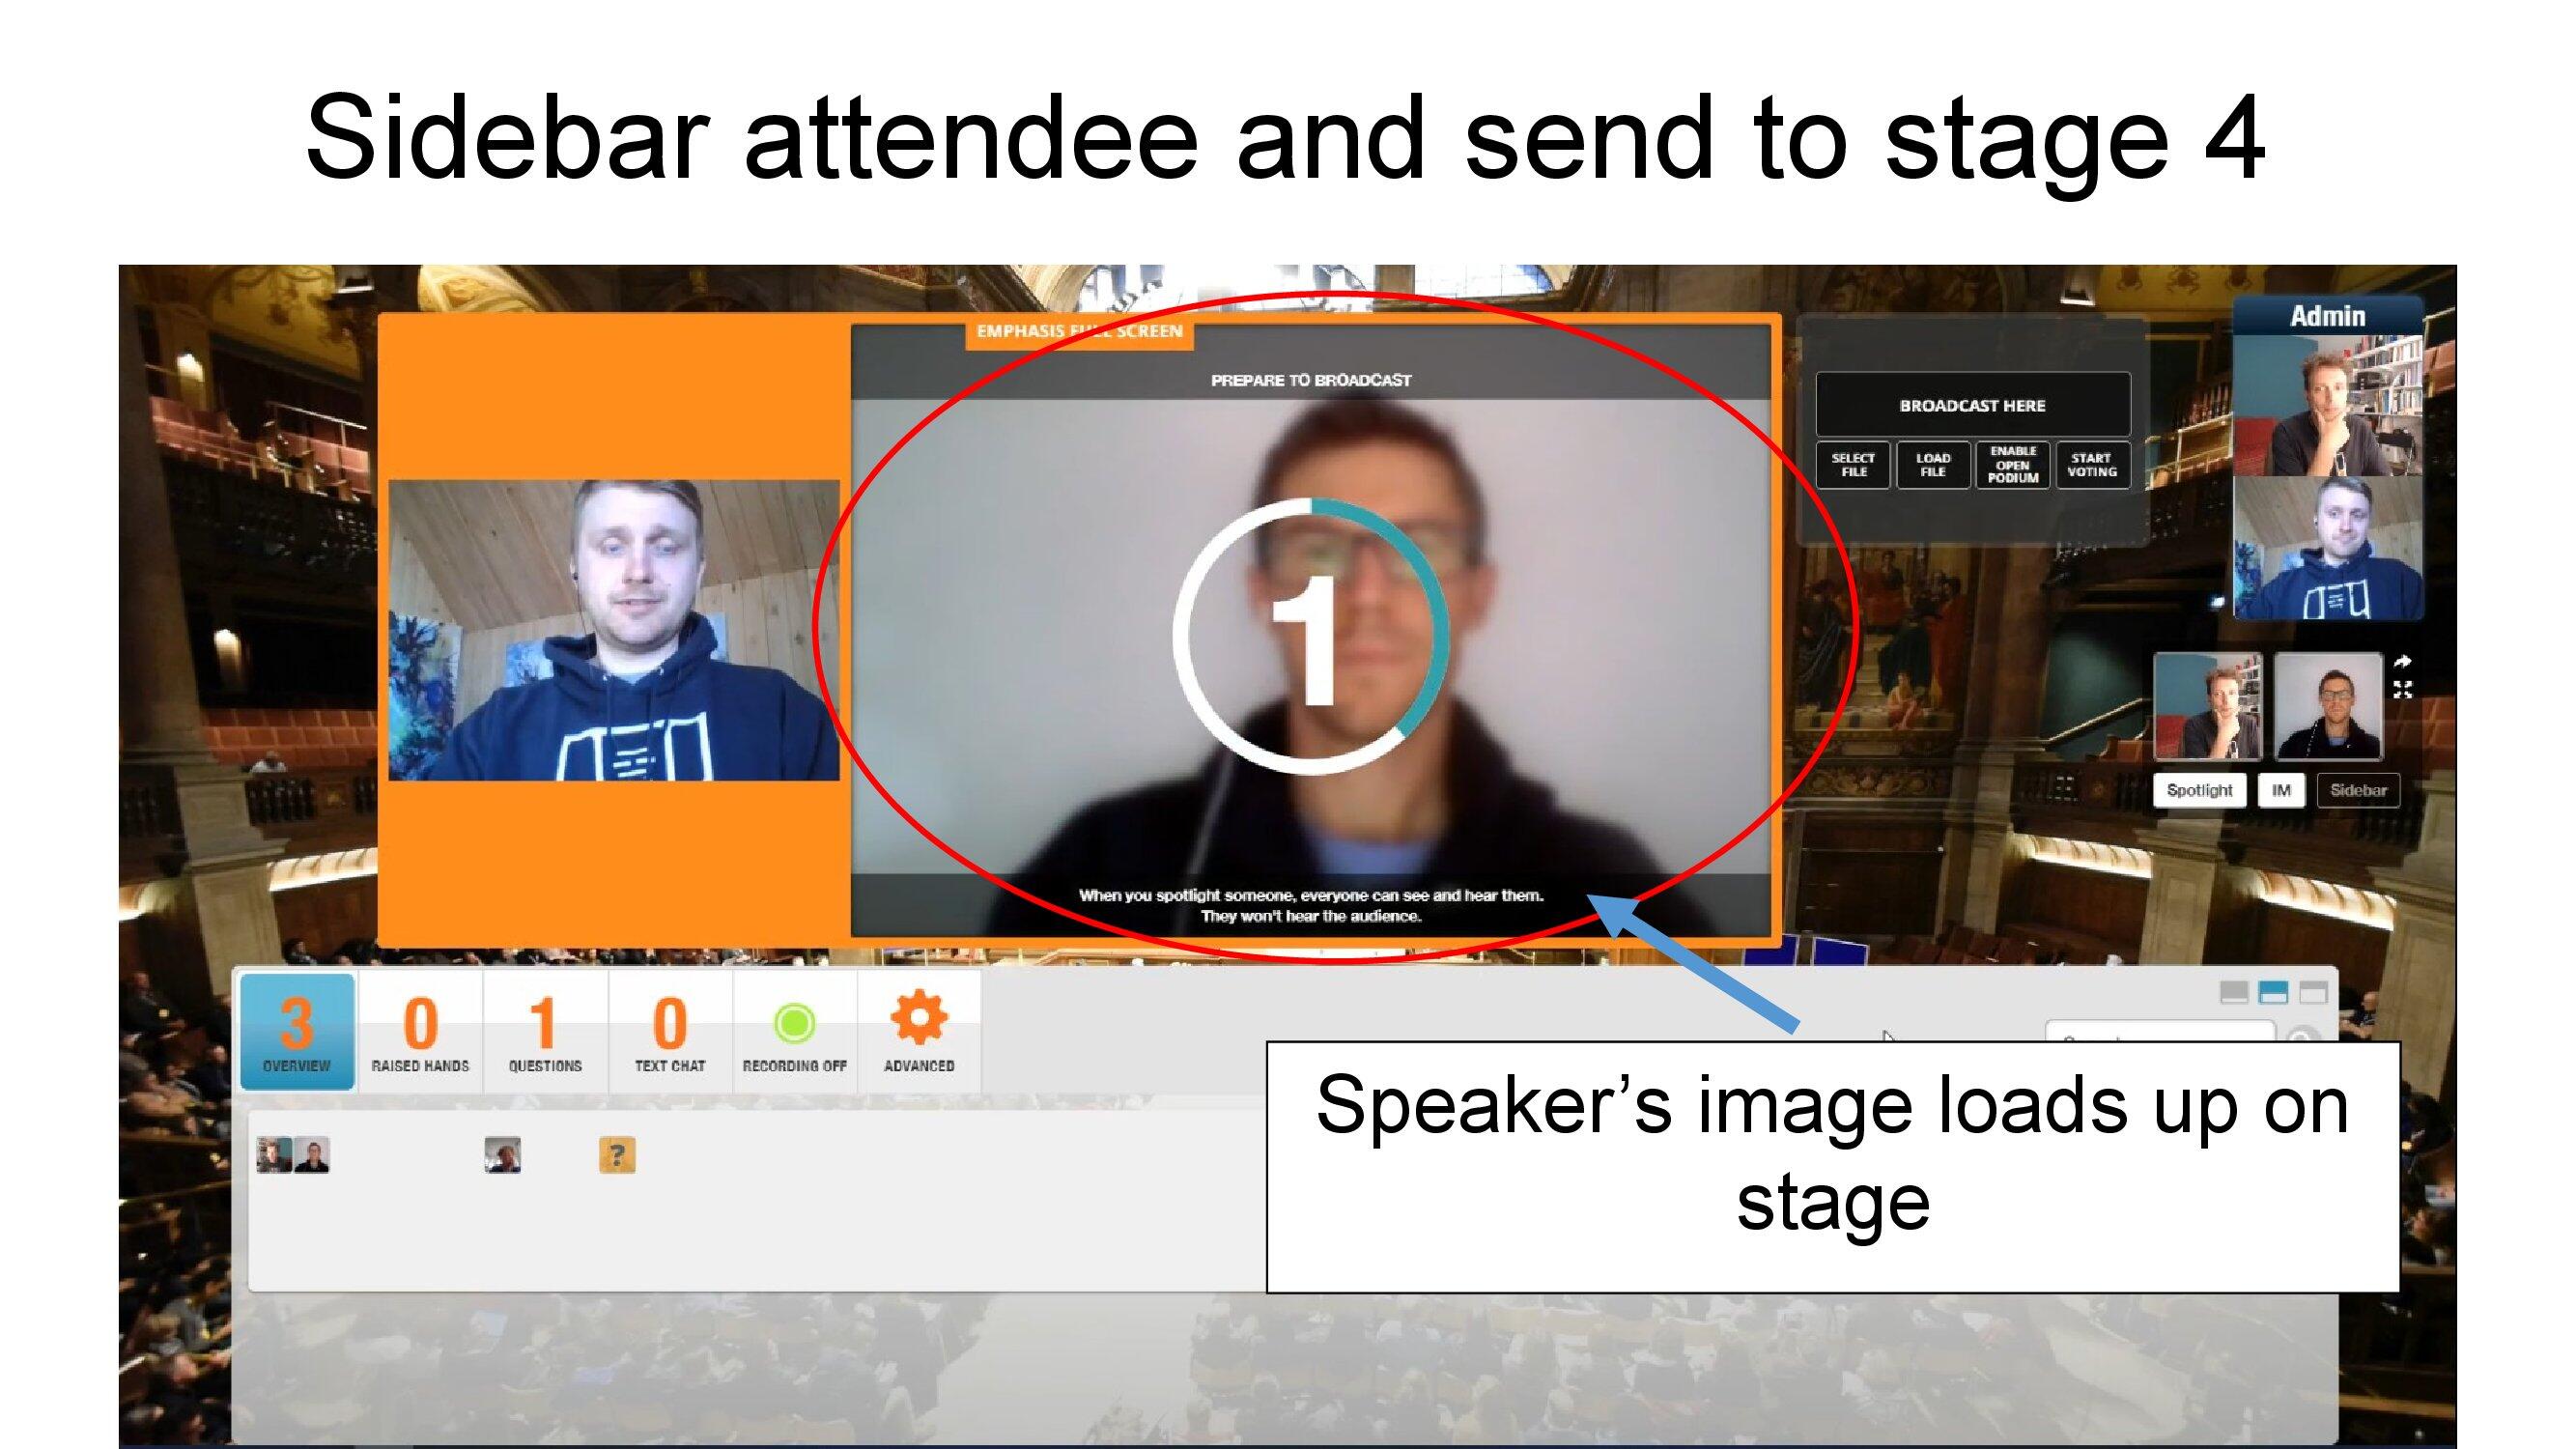
An admin can spotlight a sidebar participant directly to the stage.
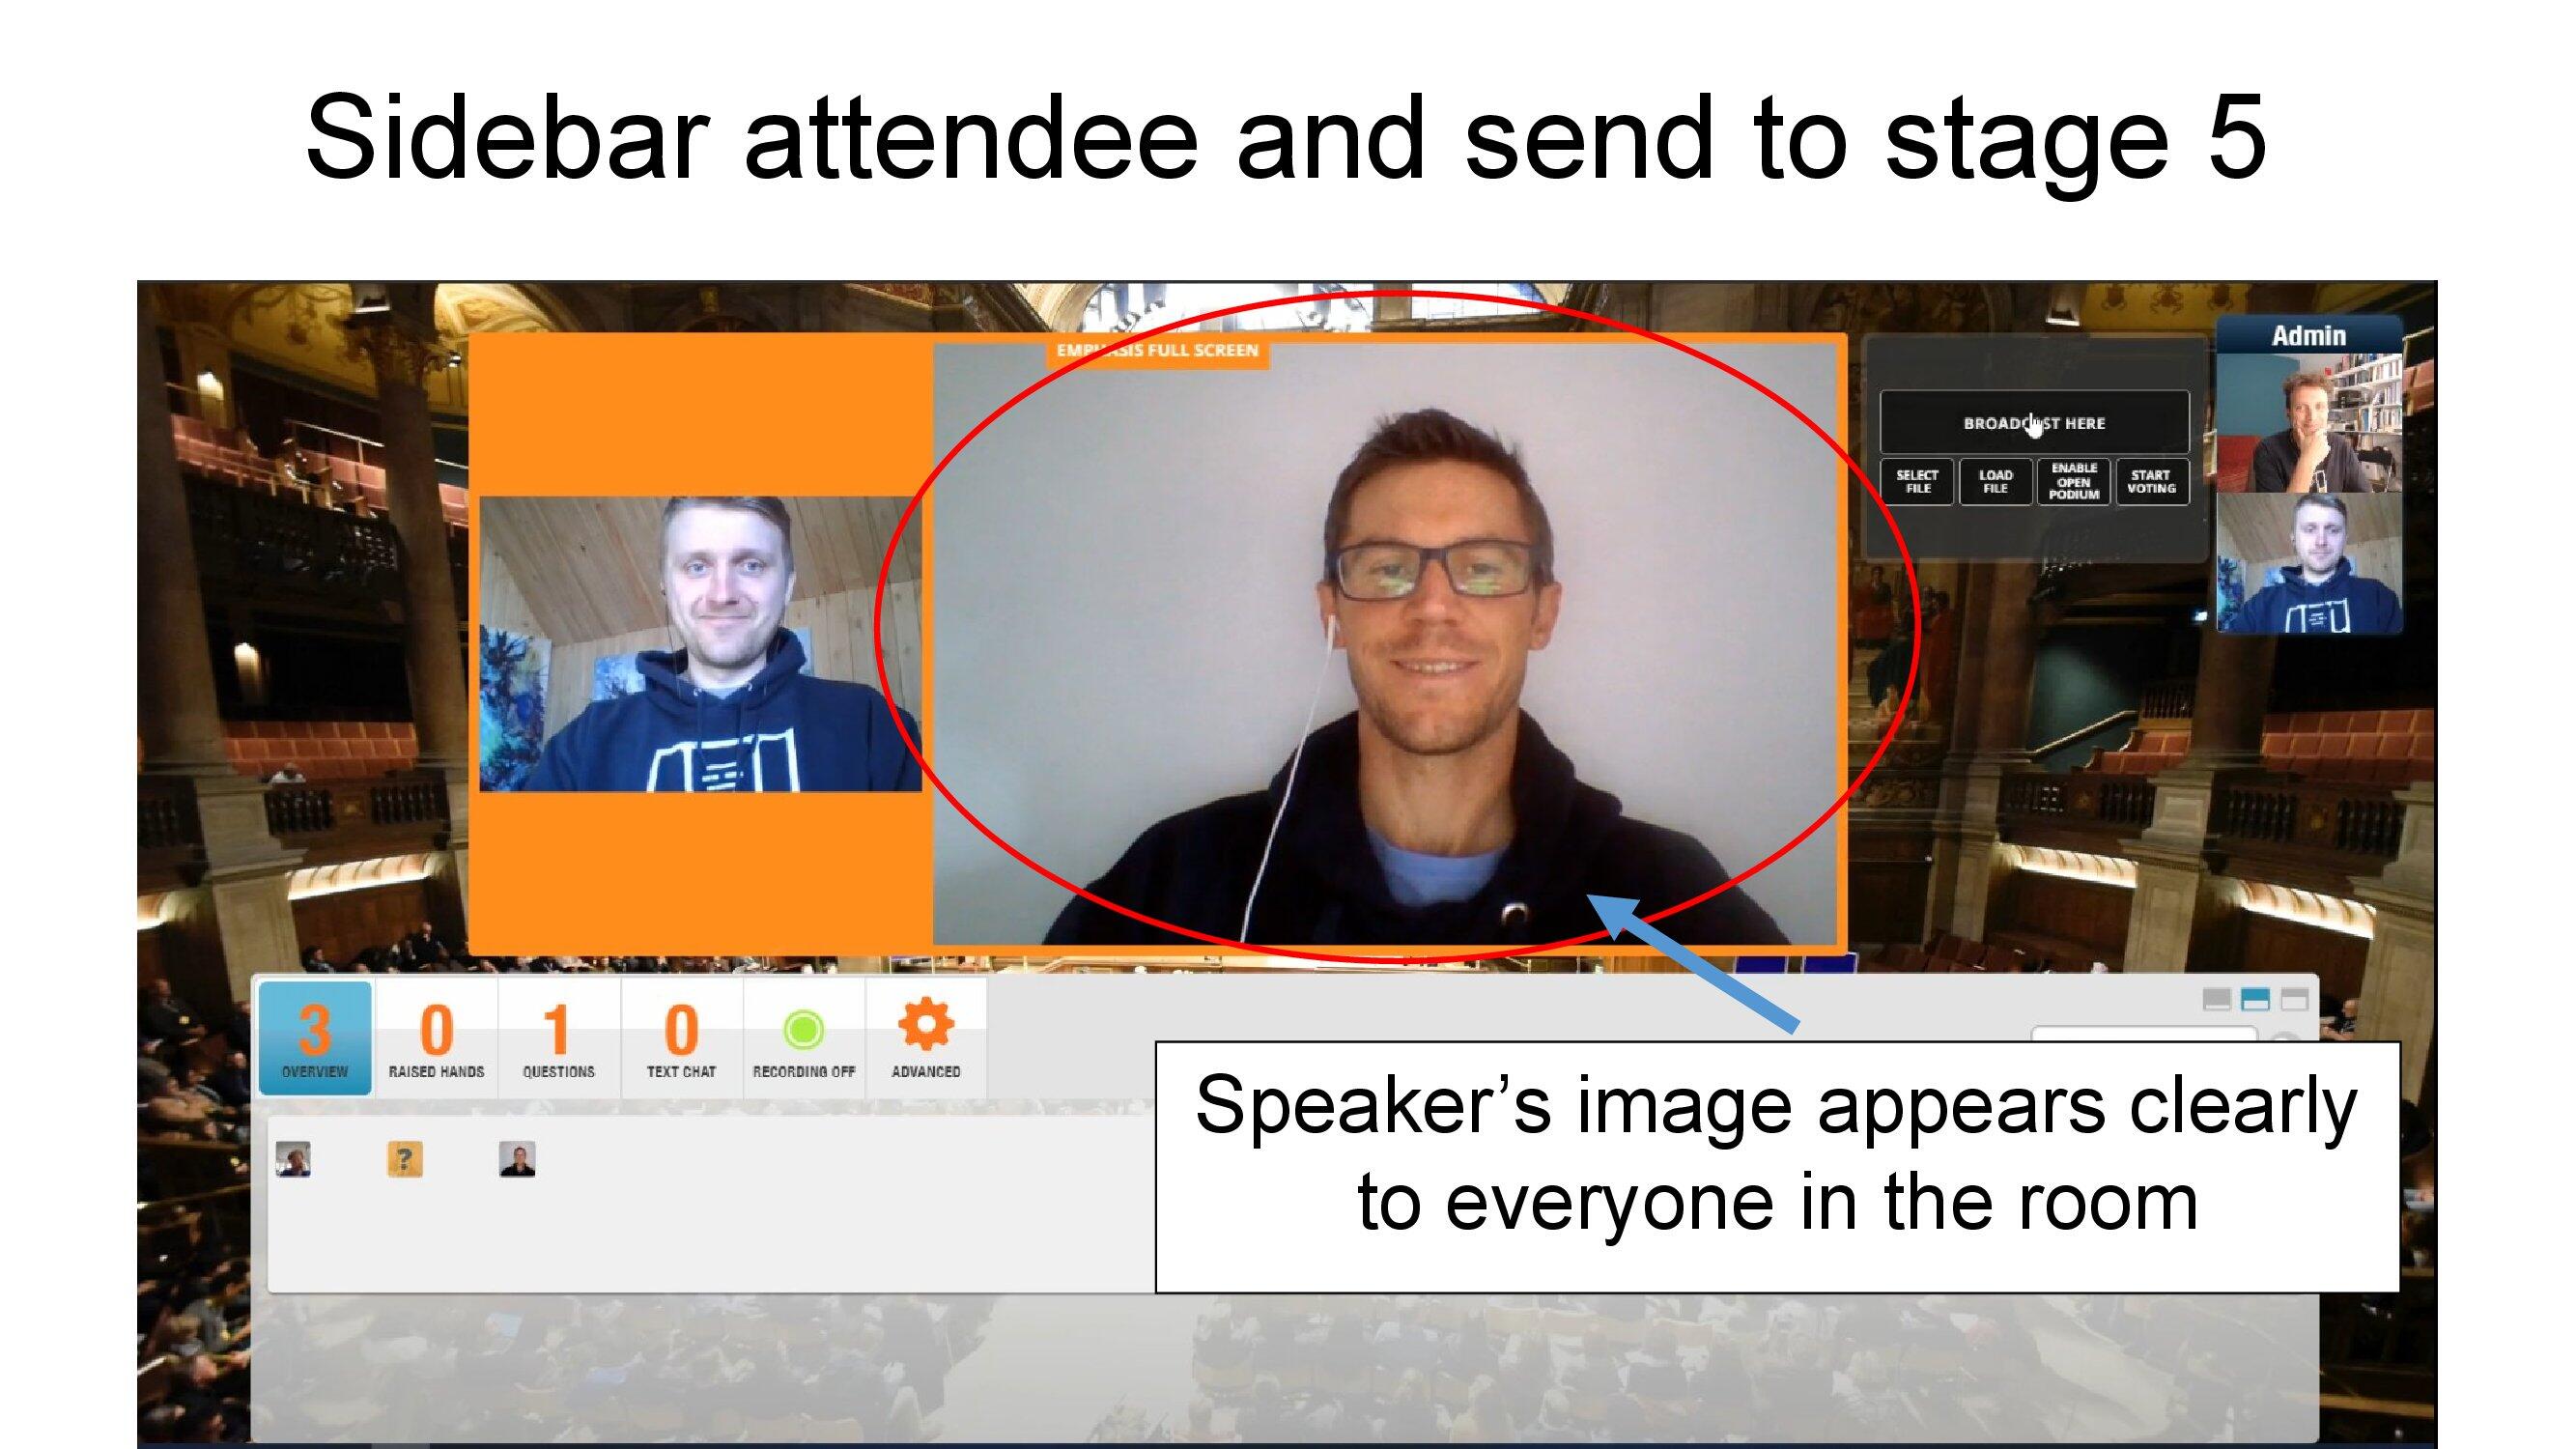
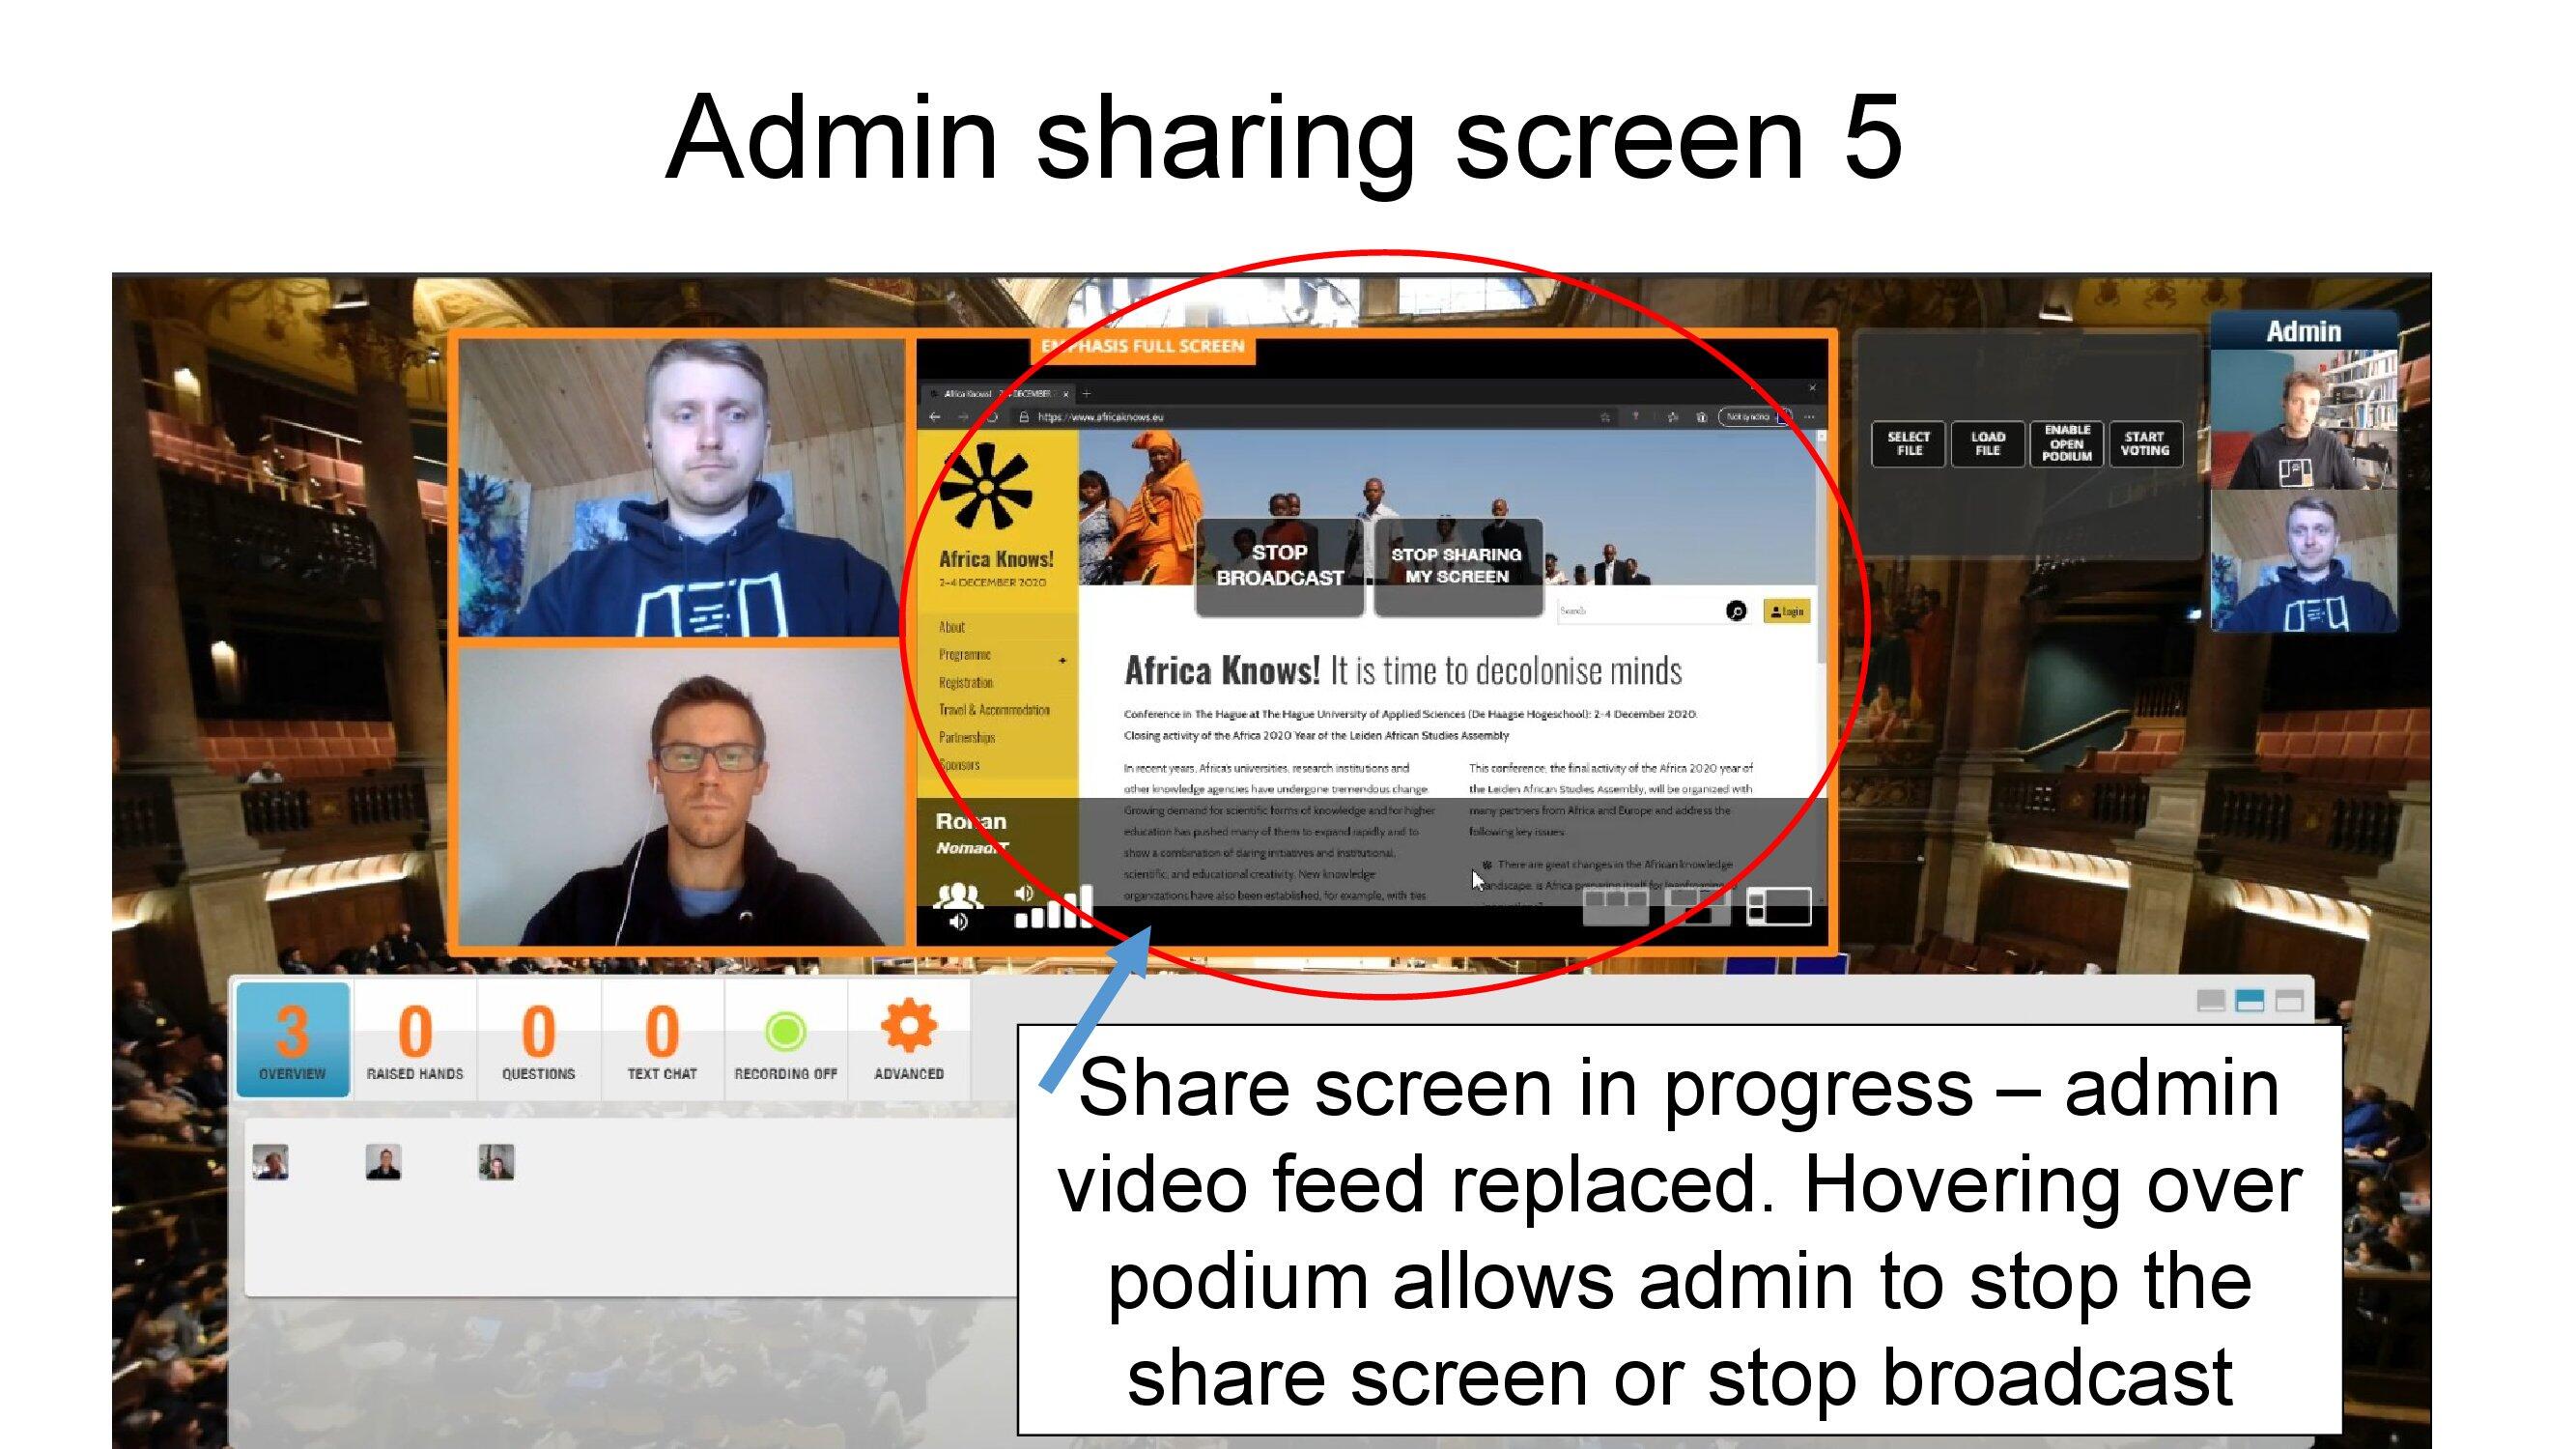
8. Admin sharing screen
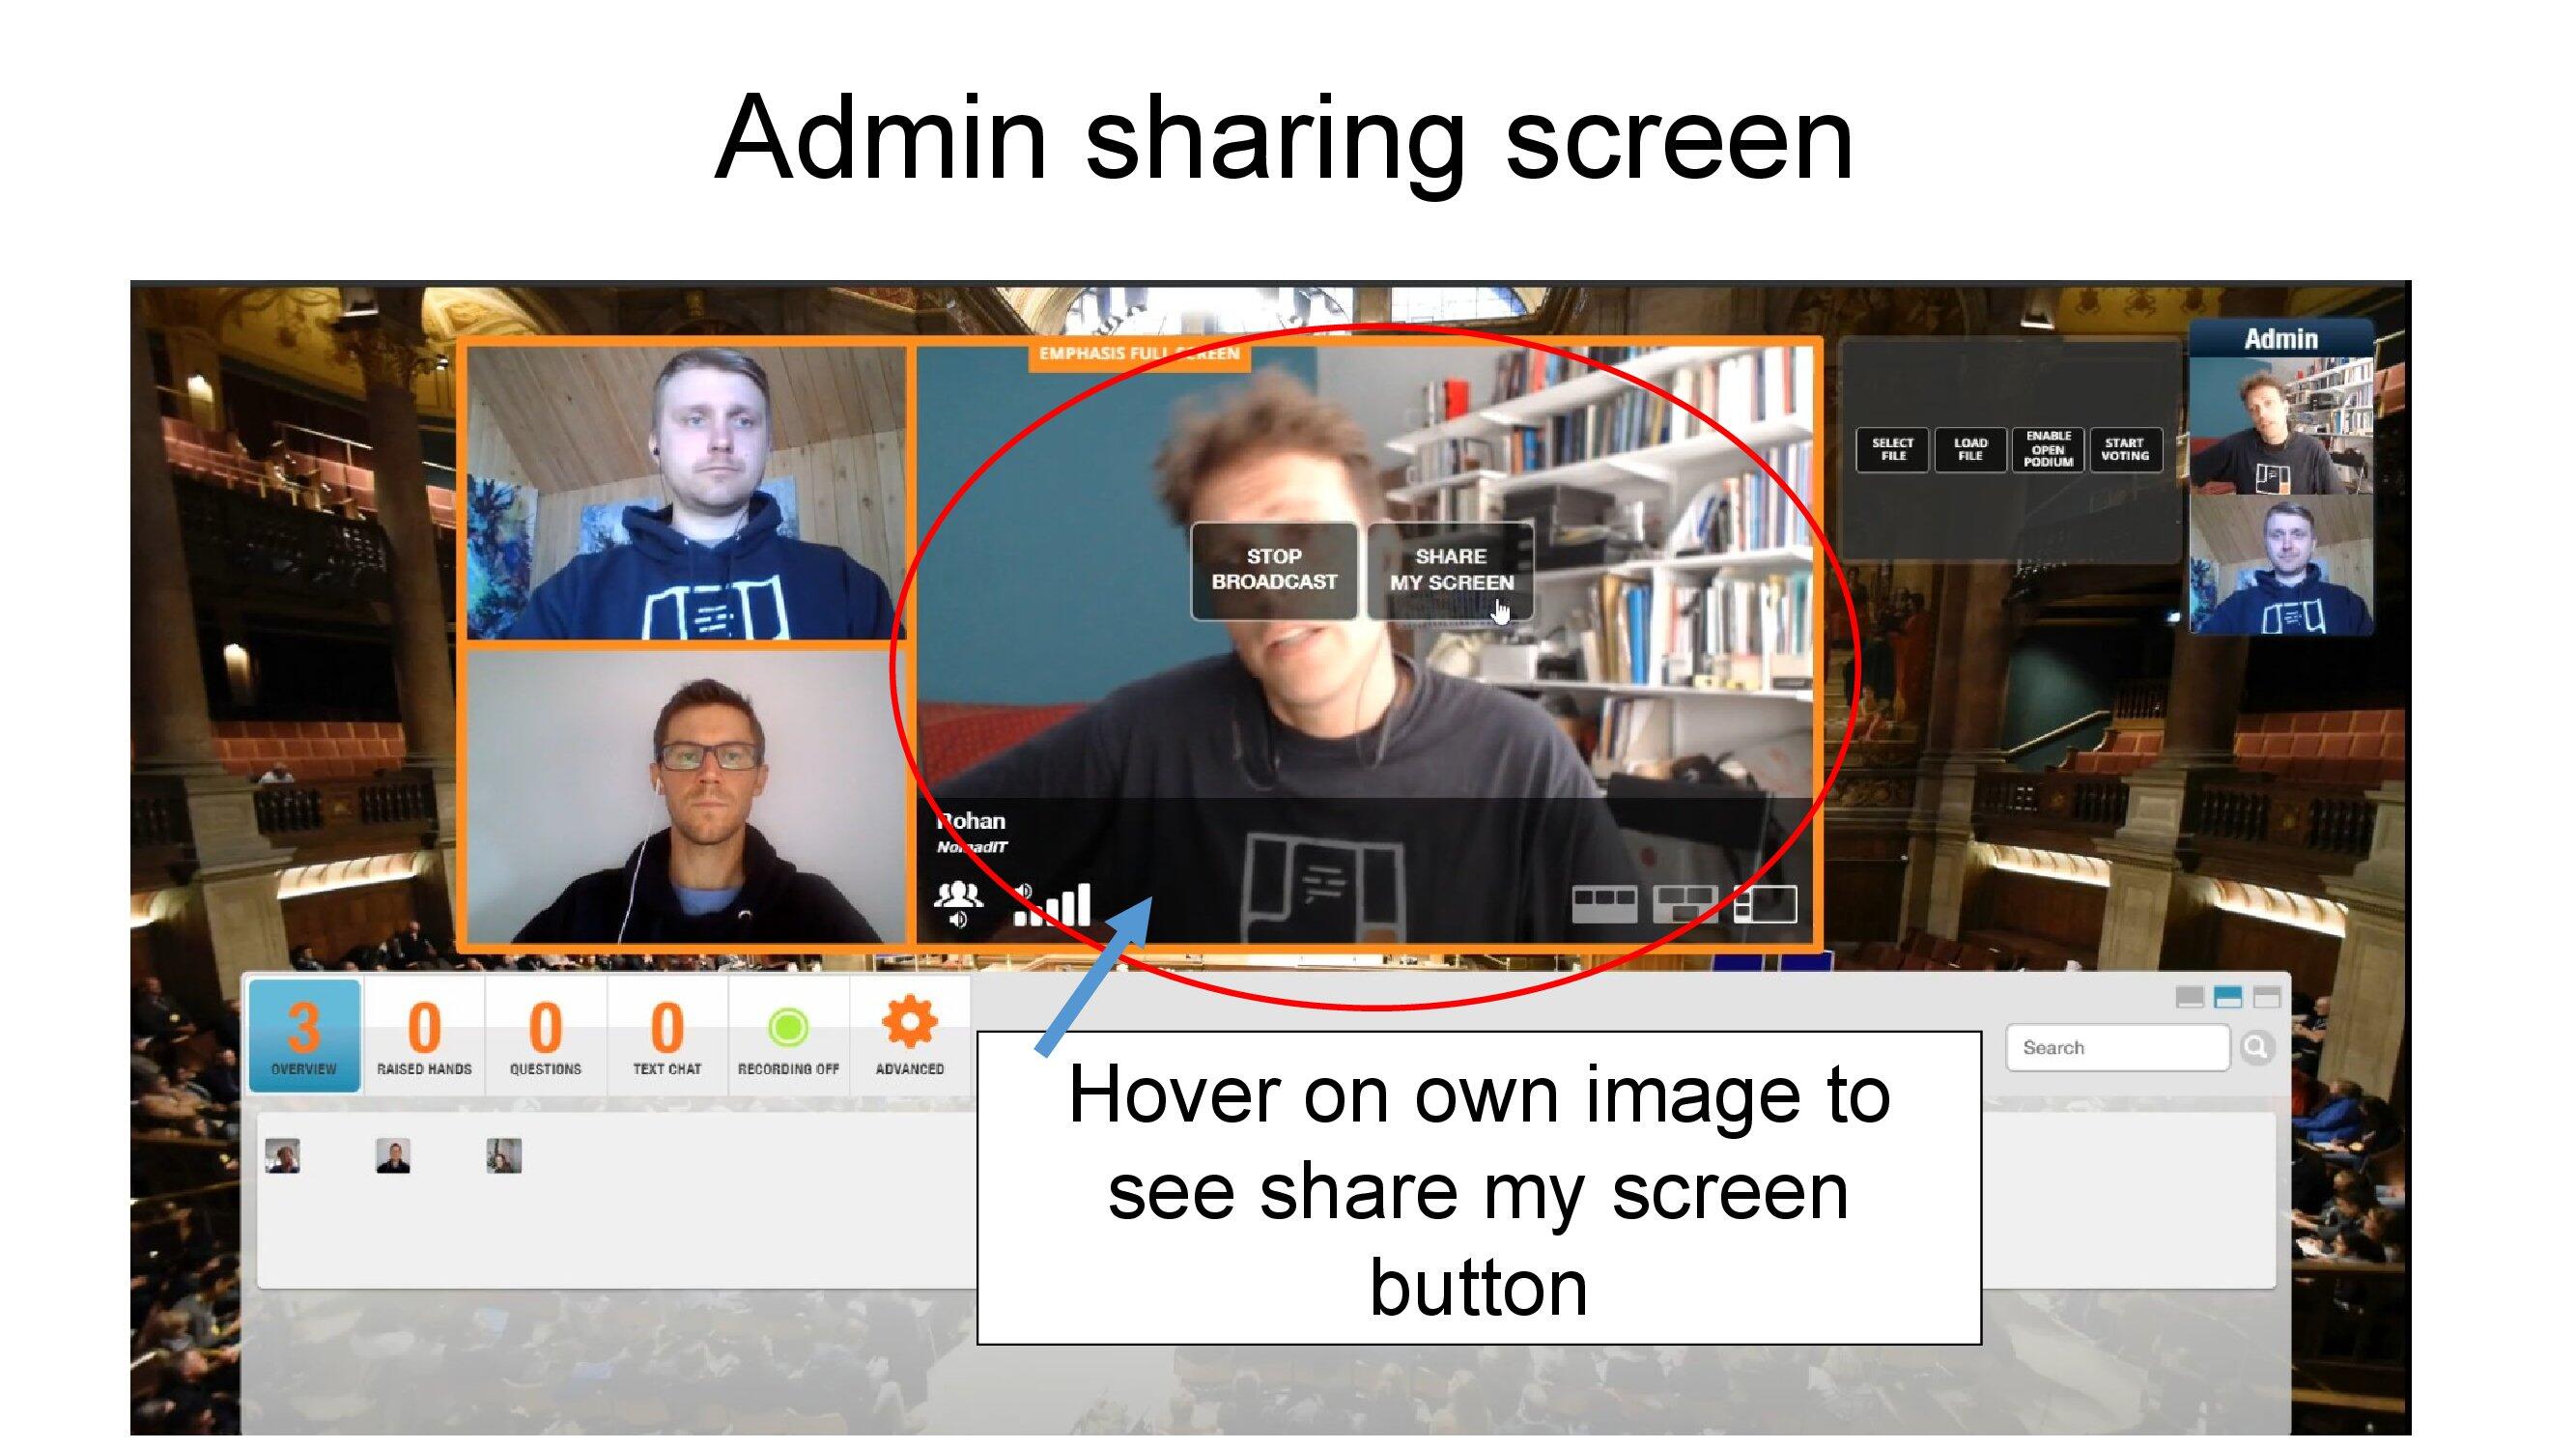
While we advise using pre-loaded files, an admin can also share their screen.
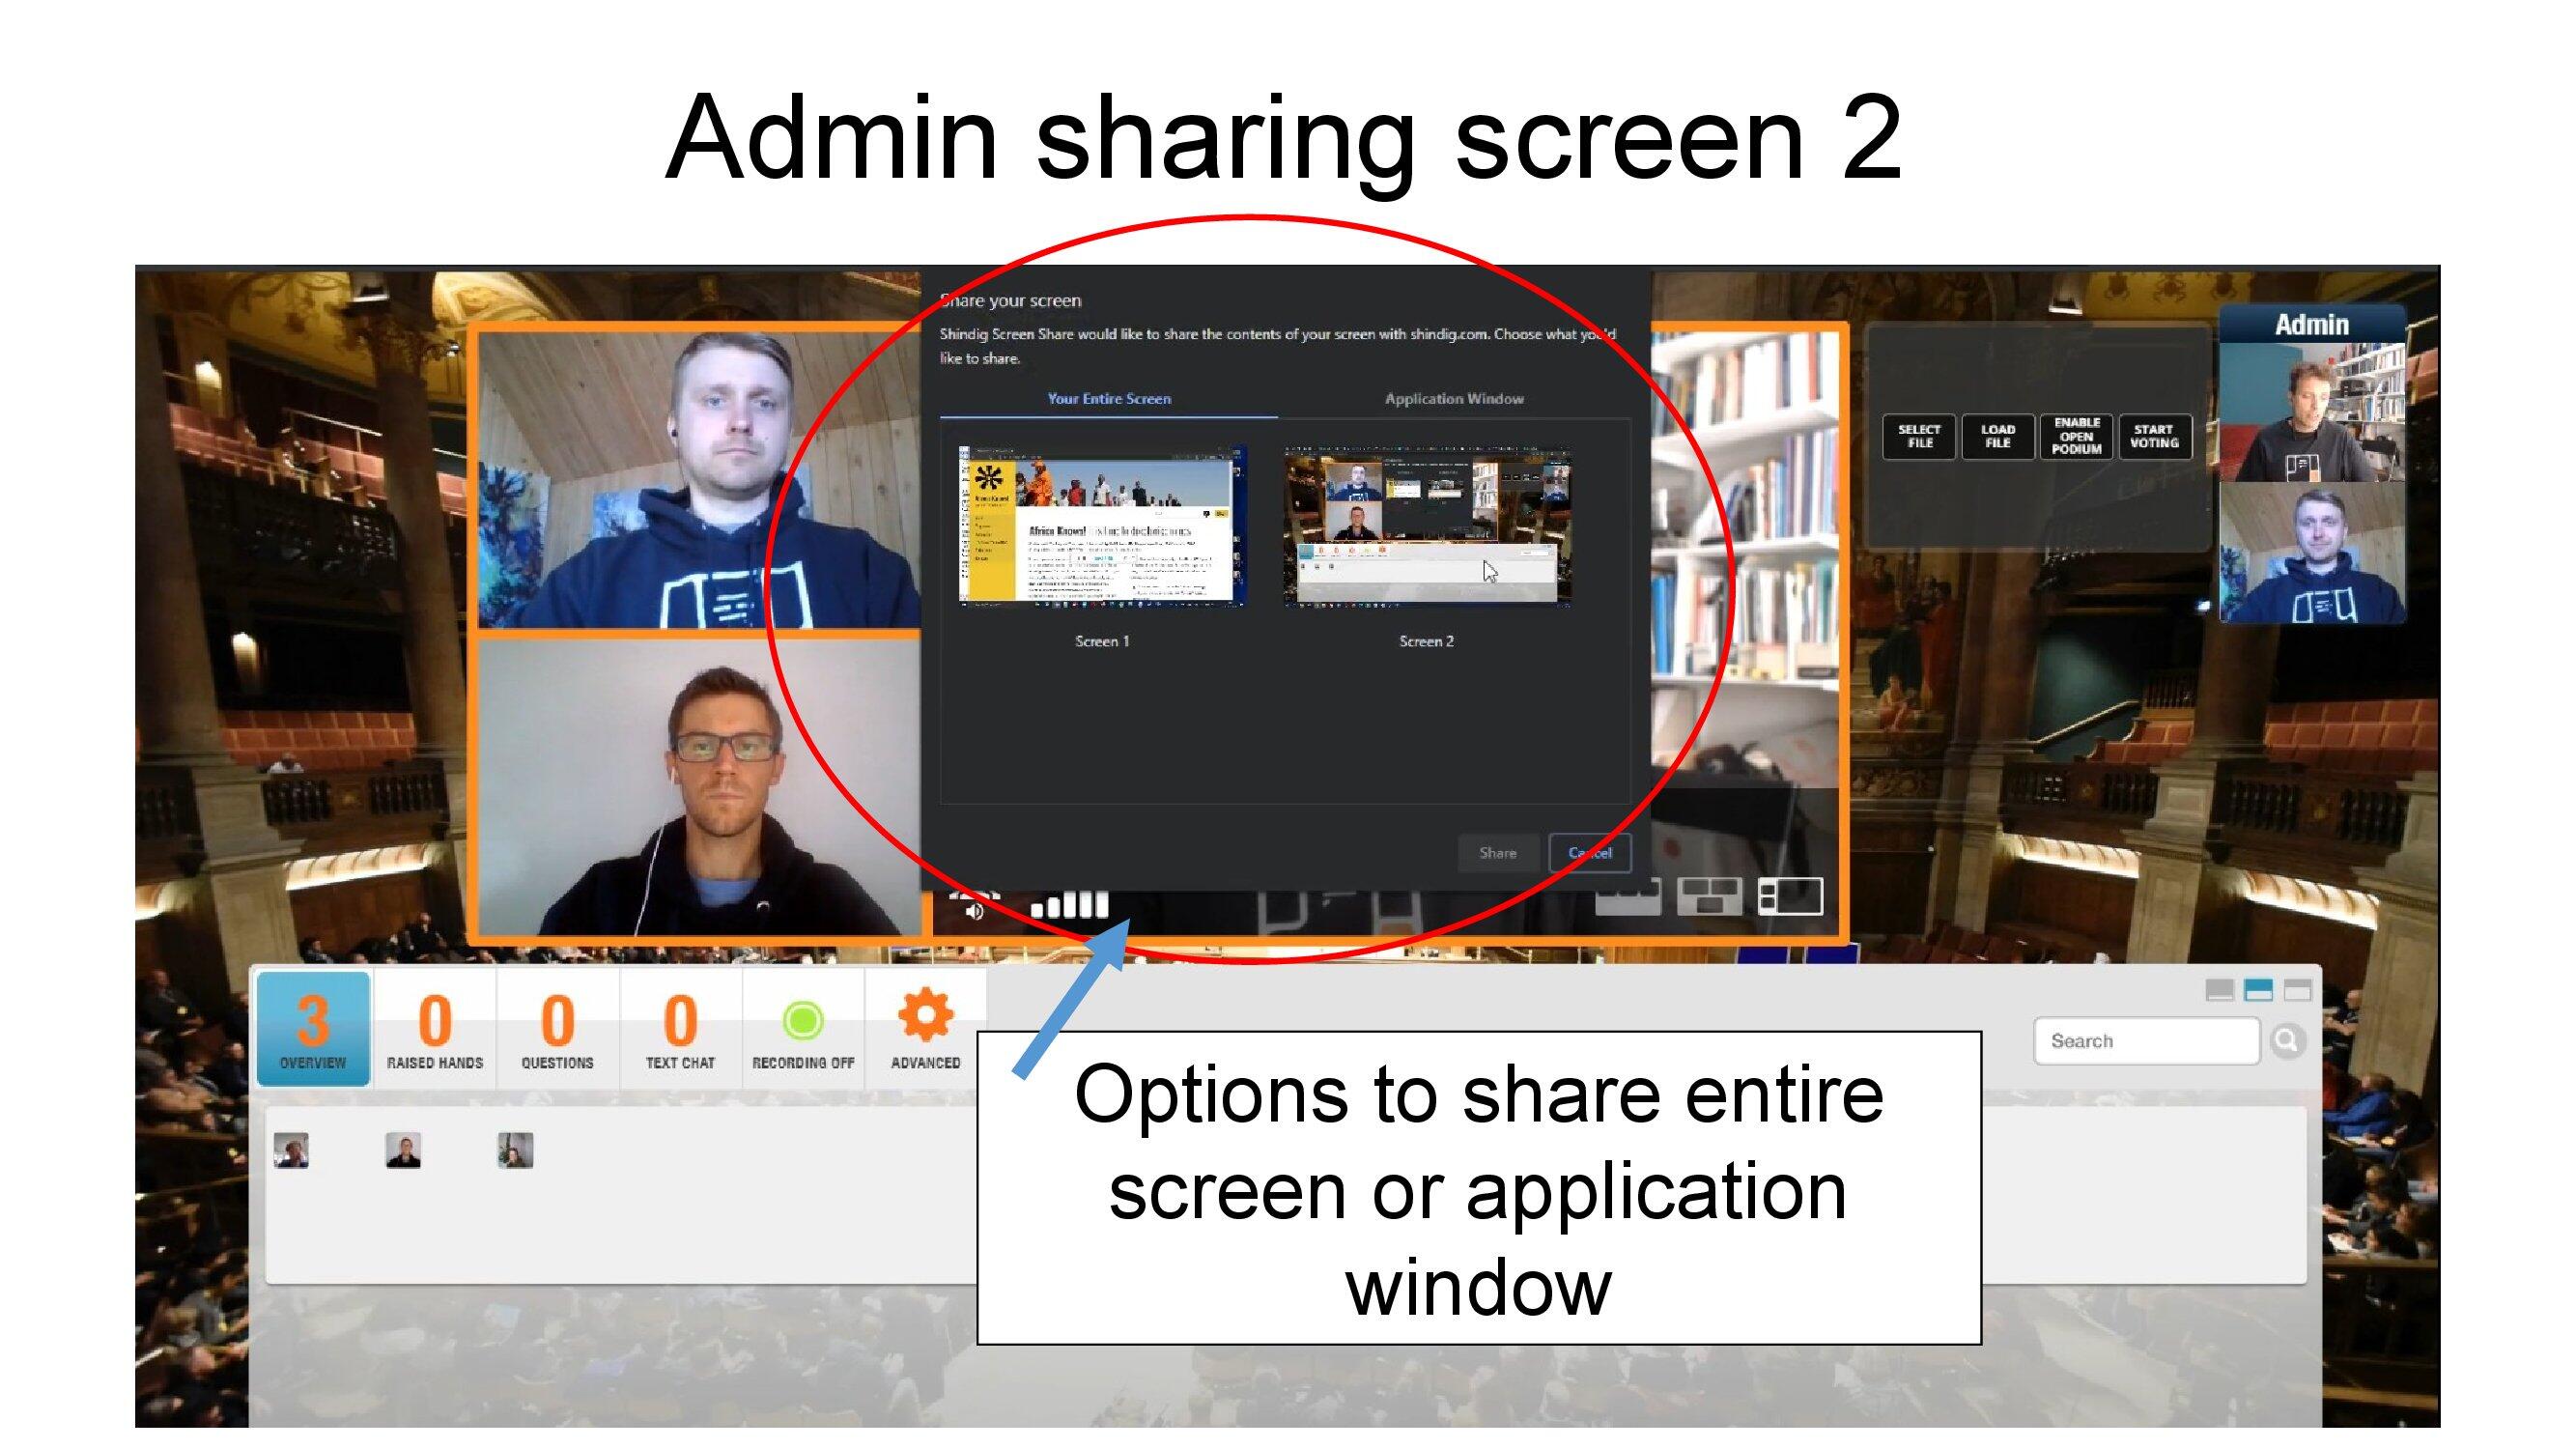
A dialogue box allows you to choose what to share.
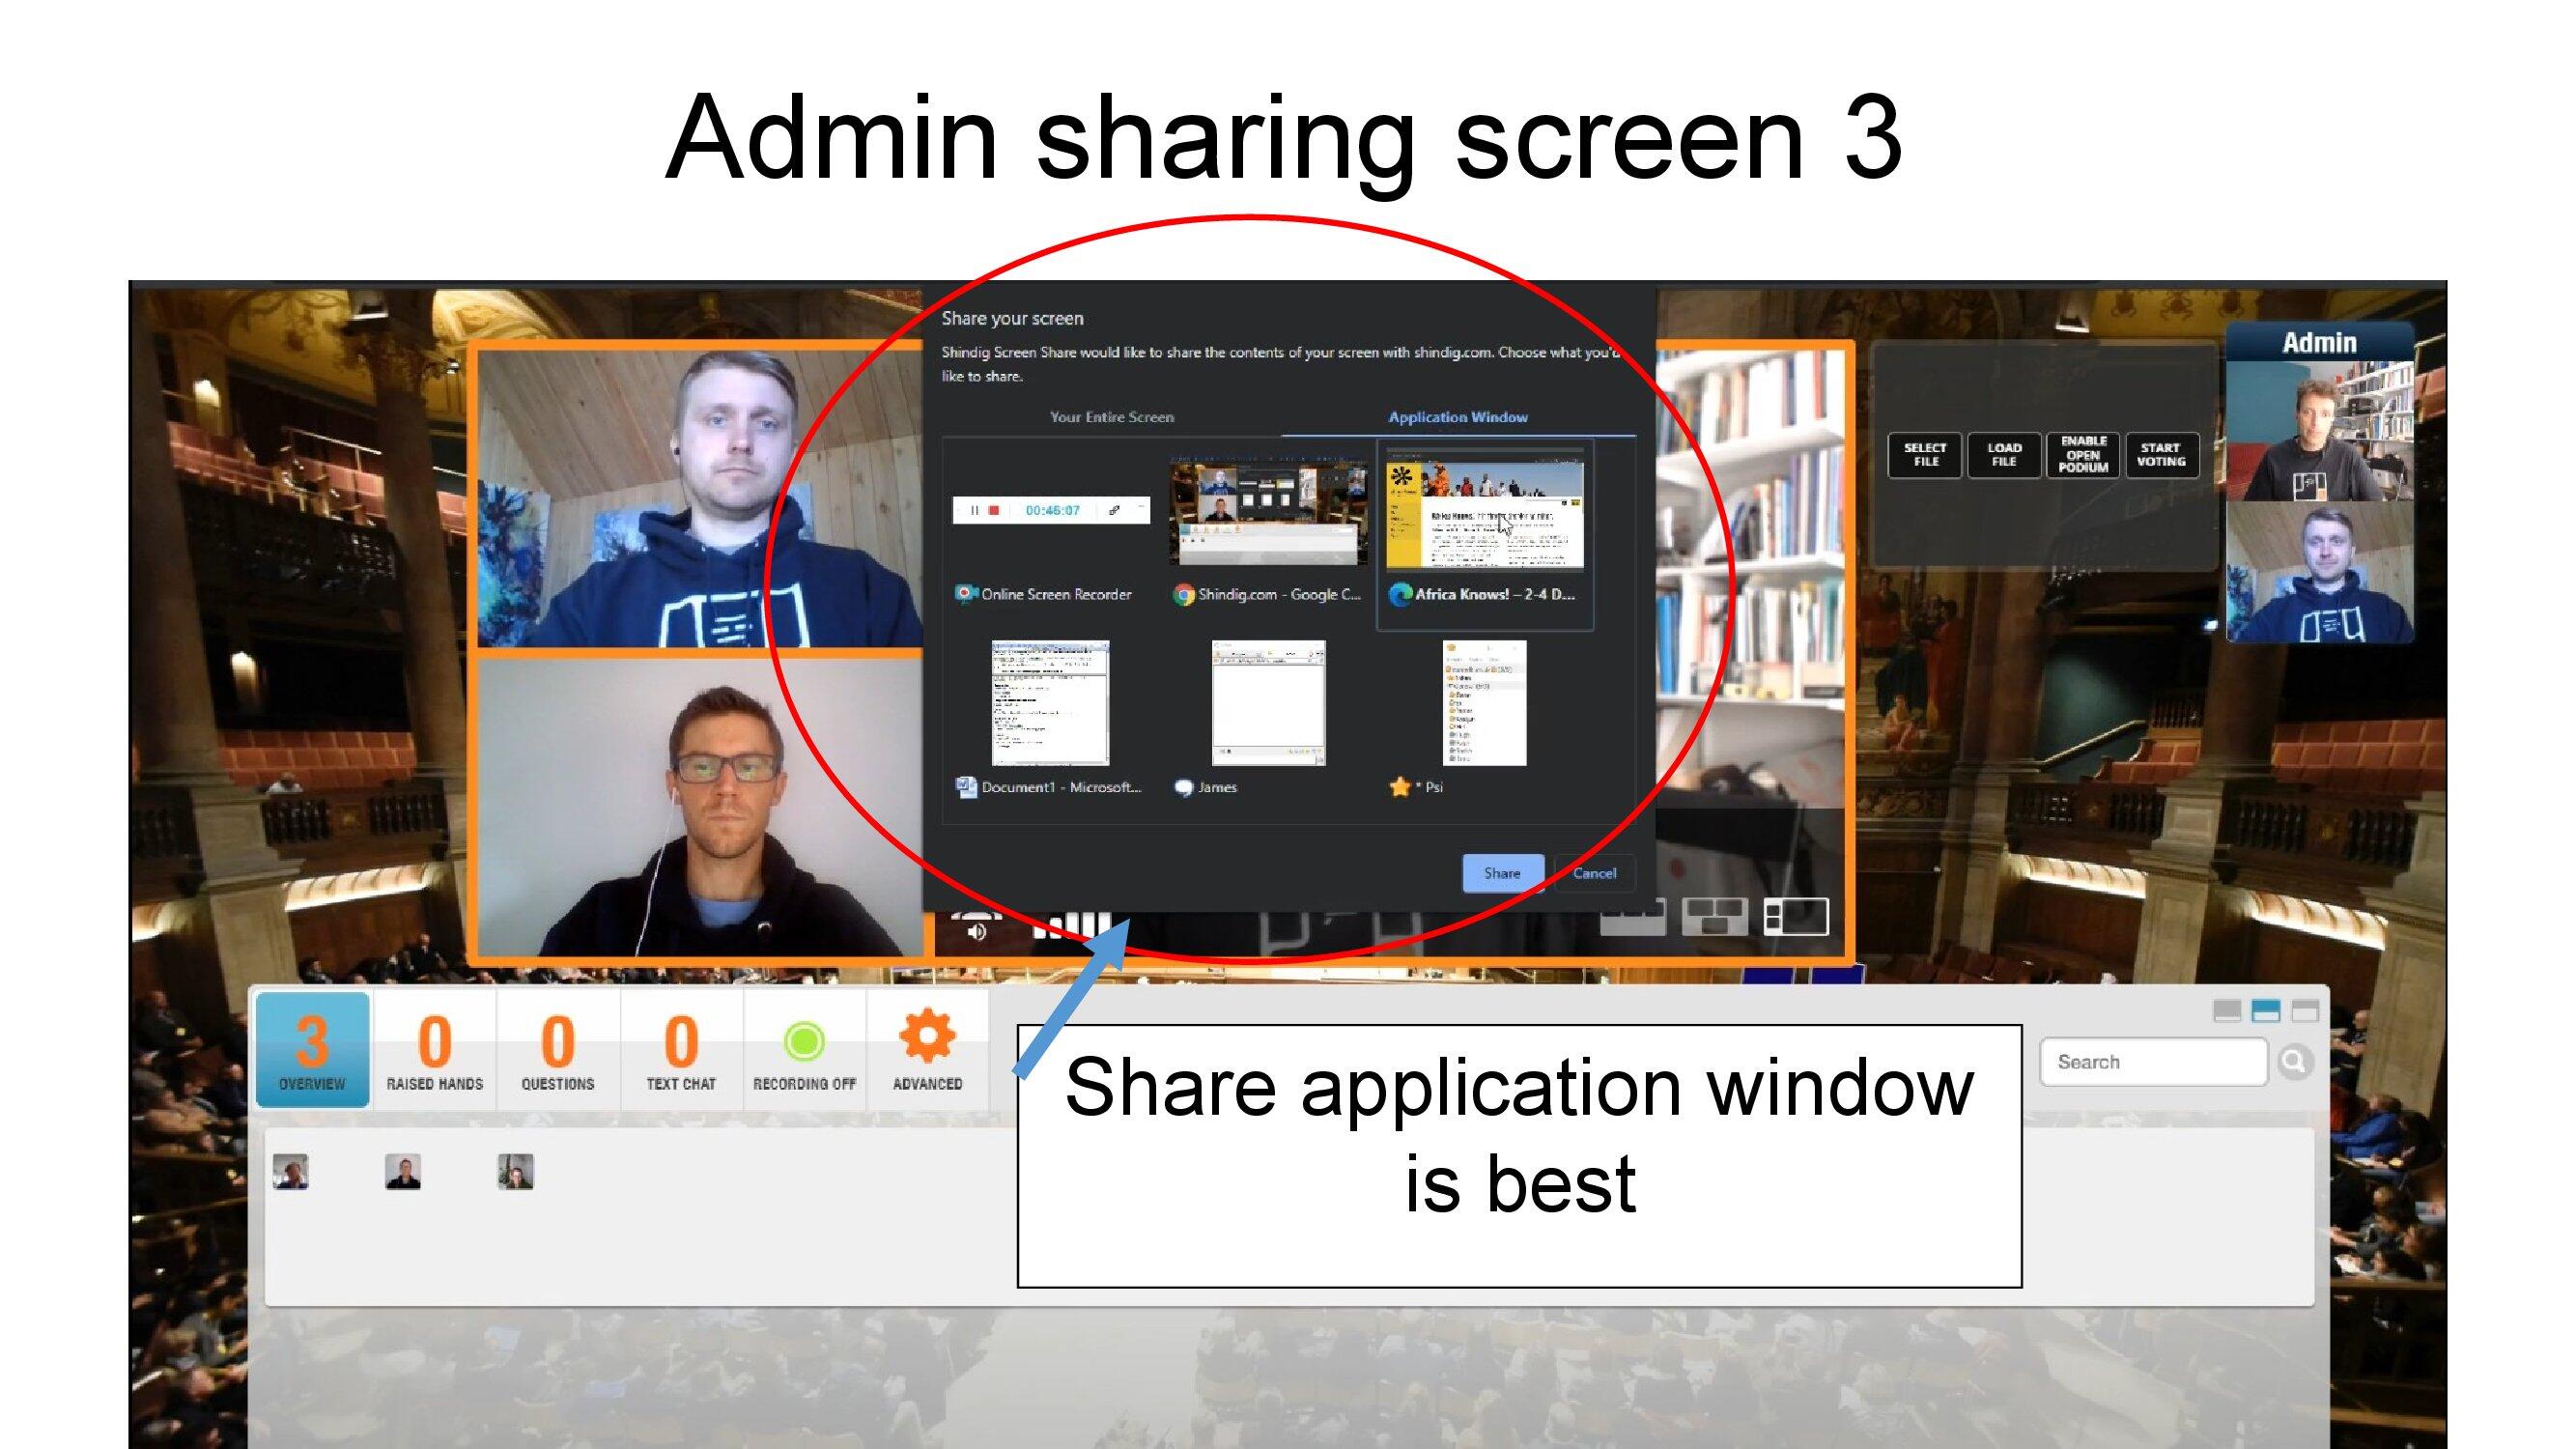
We'd advise selecting a specific application/programme.
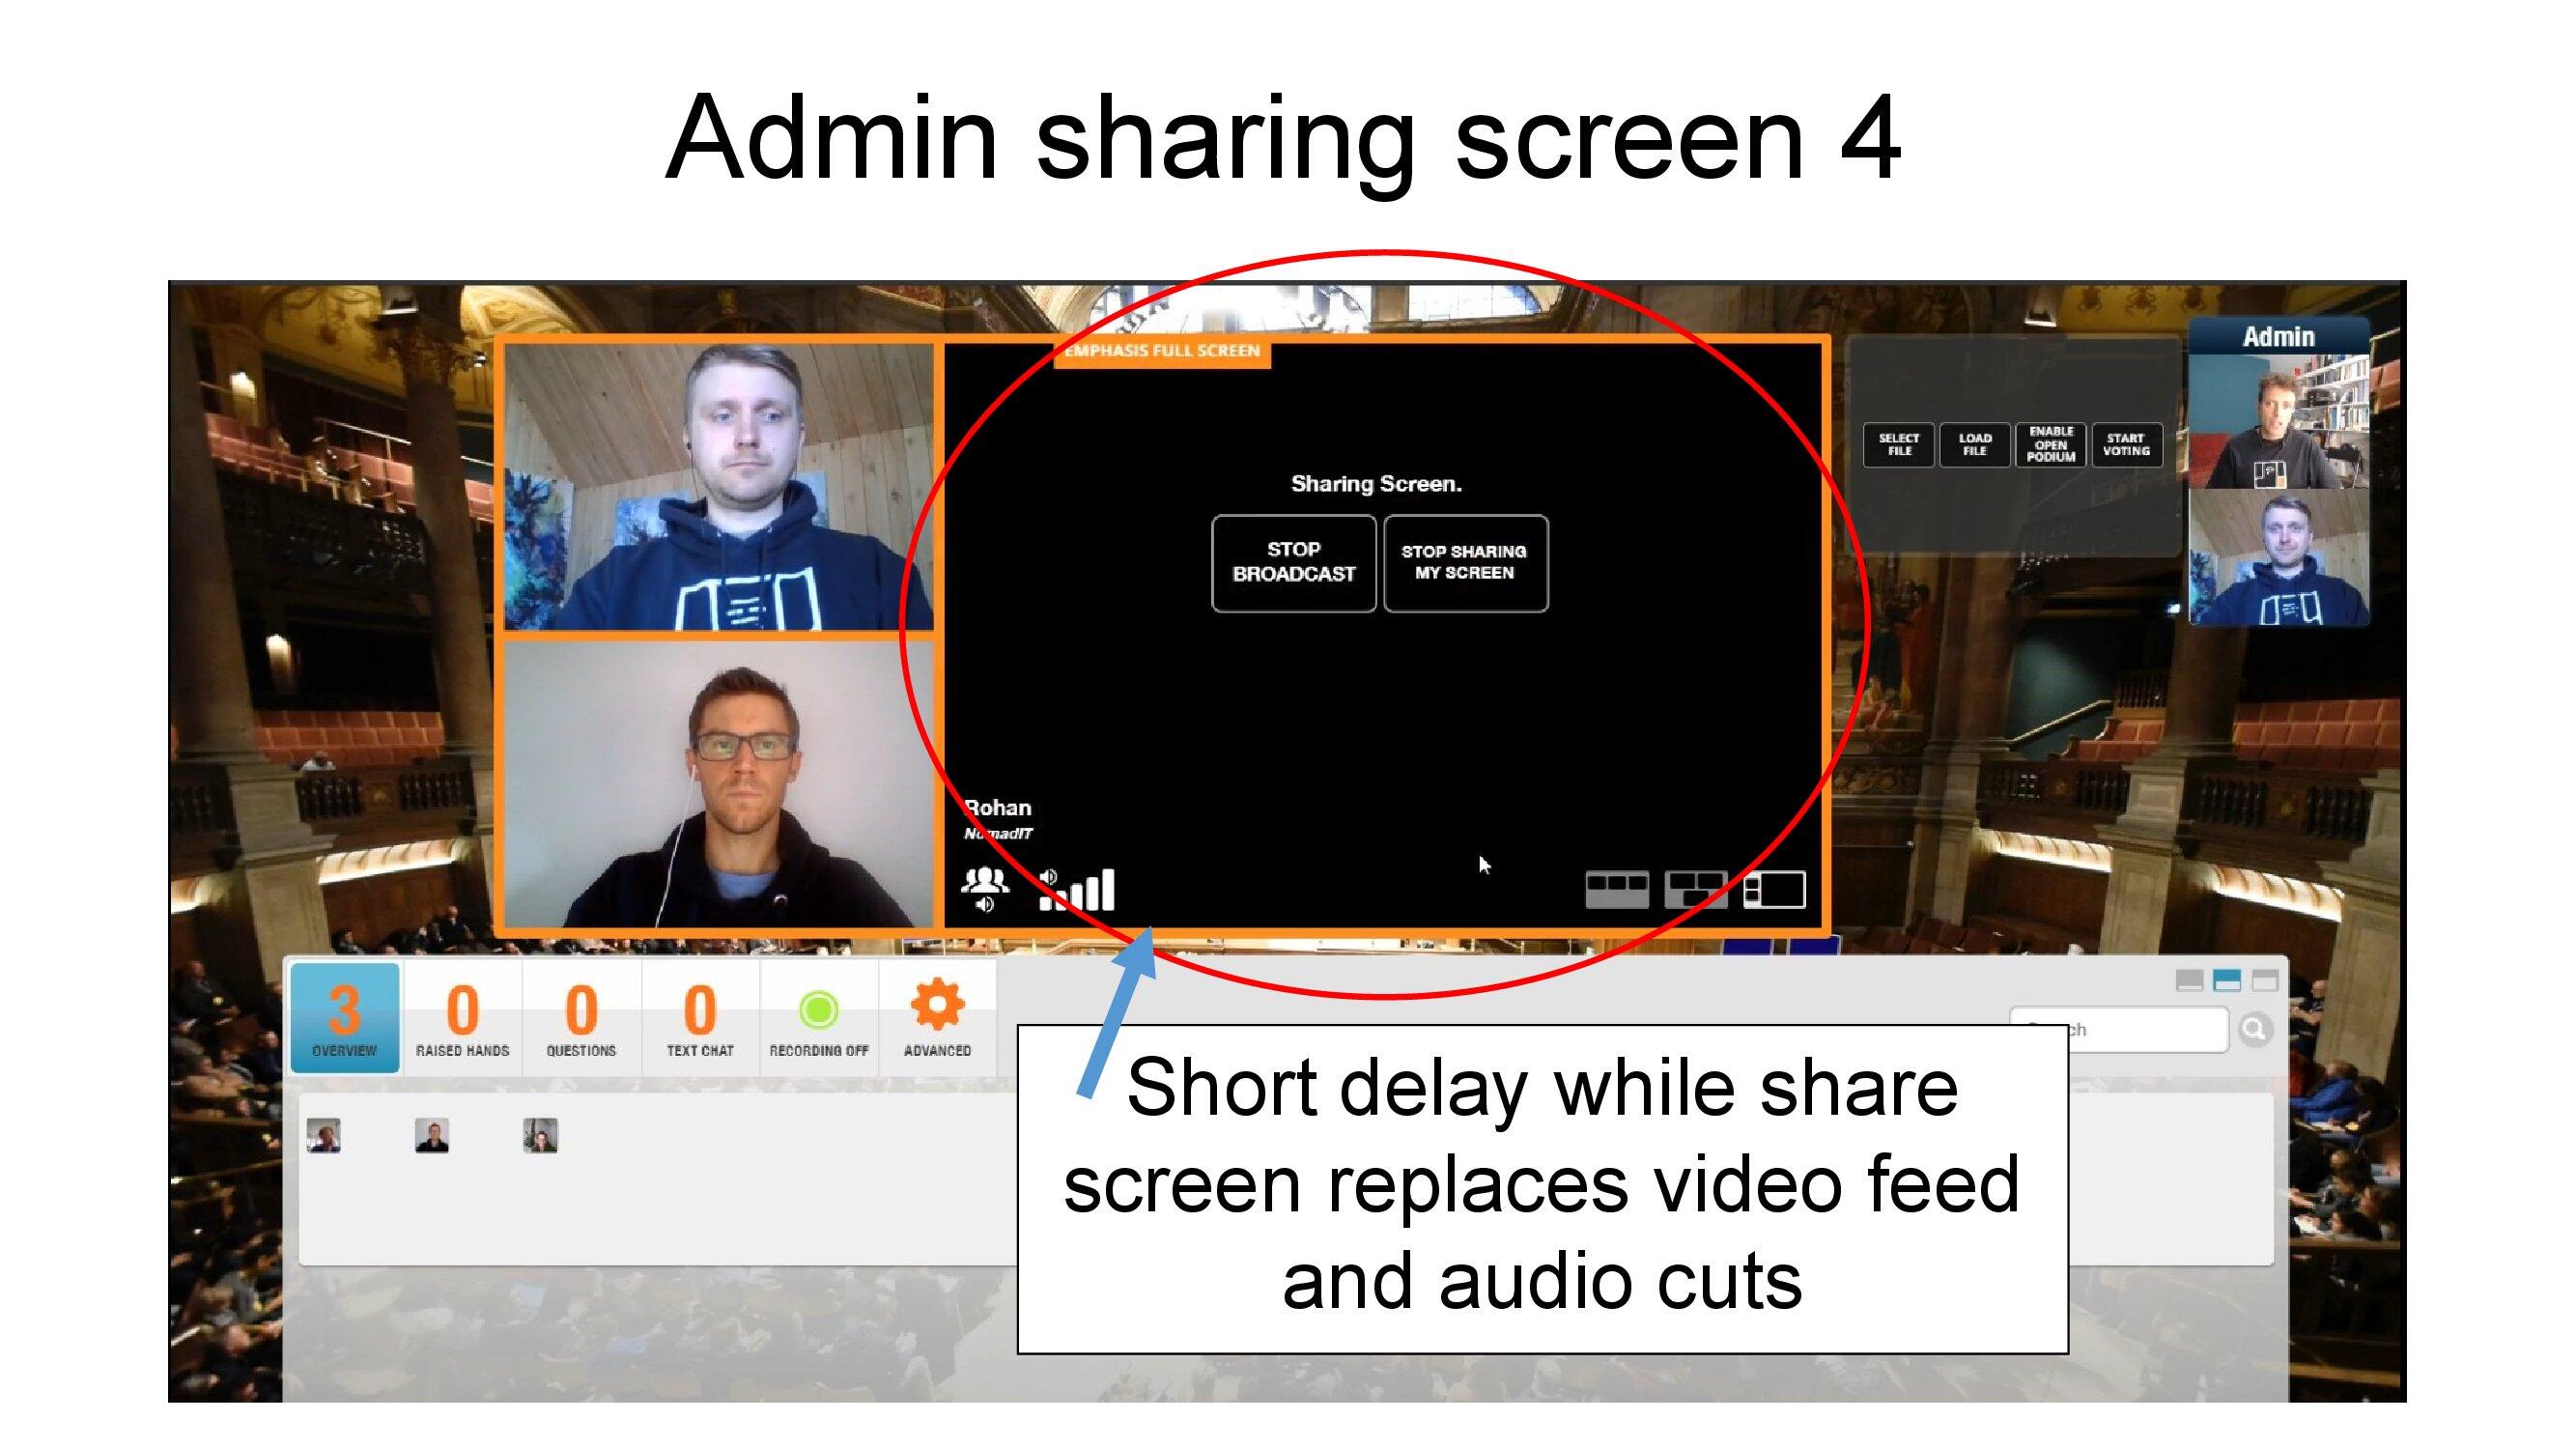
As your podium switches to display your screen-share, your video will disappear from stage until you end screen share. There is a momentary loss of audio feed, while transitioning in/out of screen share. So pause speaking for a second.
