A general guide to using Shindig
This visual guide aims to acquaint you with the Shindig software and audience experience. All attending our online conferences should take time to review this guide.
The first thing we'd advise is to run through this 10-minute interactive demo of the Shindig environment. Having done that we'd suggest reading the content below to see how this applies to use in an academic conference.
Lastly, you may also watch this video which gives a demonstration of the environment (with commentary).
Shindig can be accessed in your browser using Chrome, Firefox, Safari or Edge - albeit we've seen best performance to-date in Chrome. It is also possible to access it on a mobile device.
1. Shindig basics
You can use the site navigation to jump to different sections of this page, relating to different aspects of the platform.
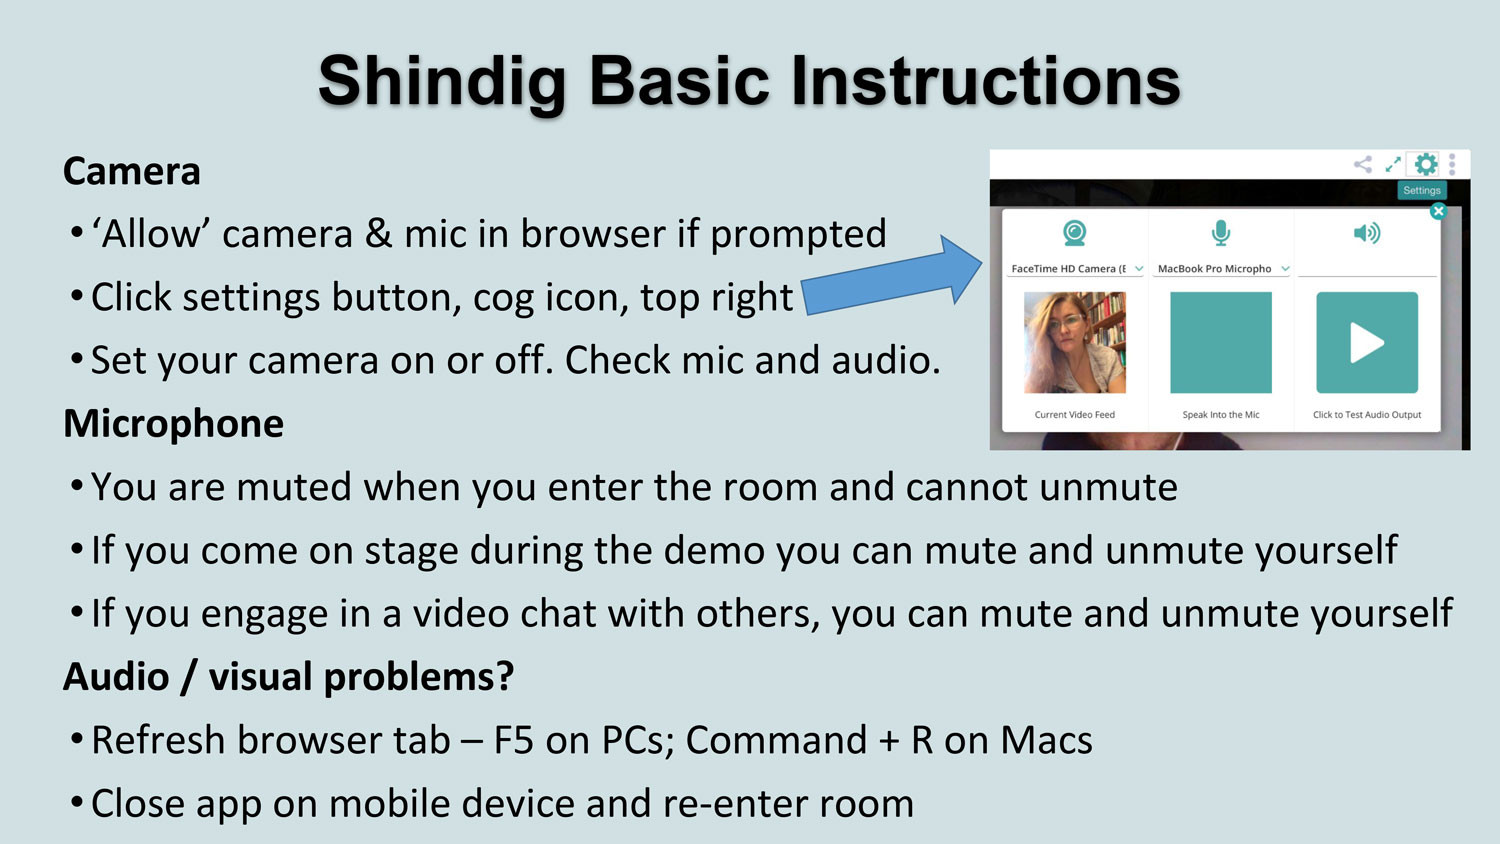
We propose that all panels display this slide at the beginning, so that those entering the session are clear how to sort out their privacy, etc.
2. Introduction
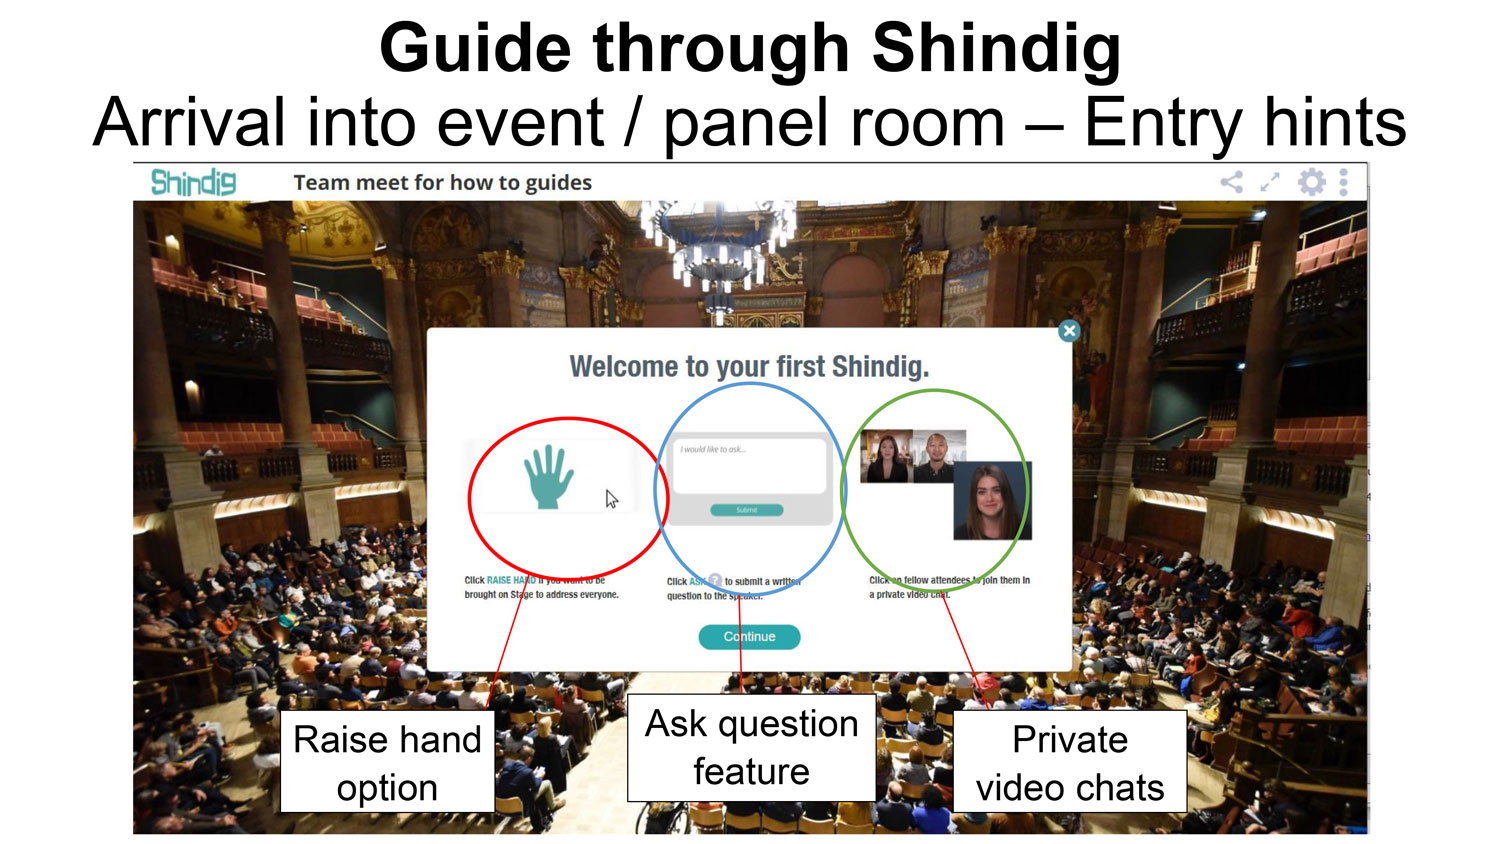
When you first enter a Shindig, there is an automated display of the key functionality for interacting with others.
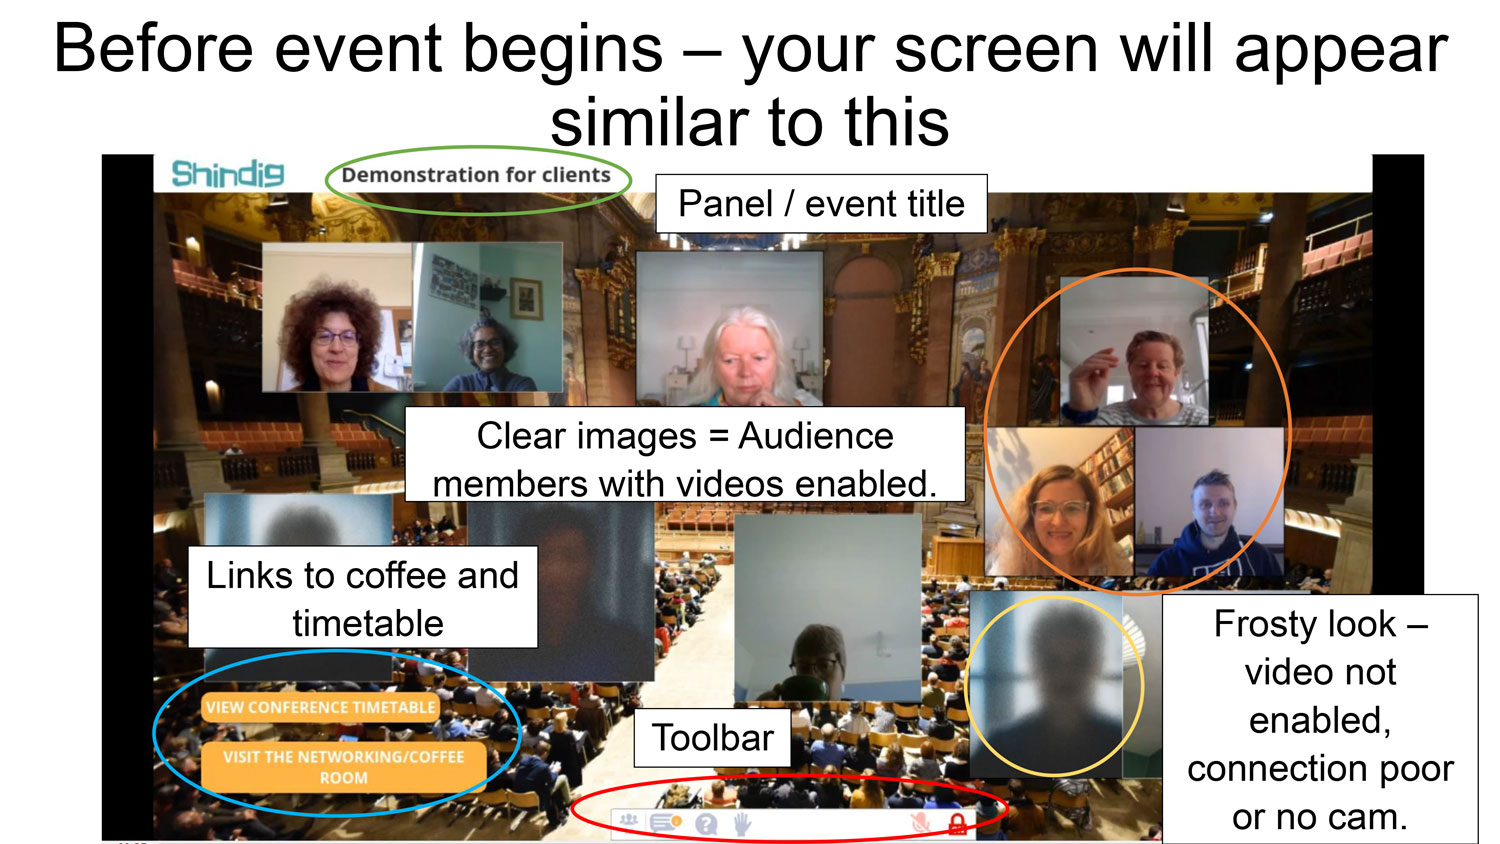
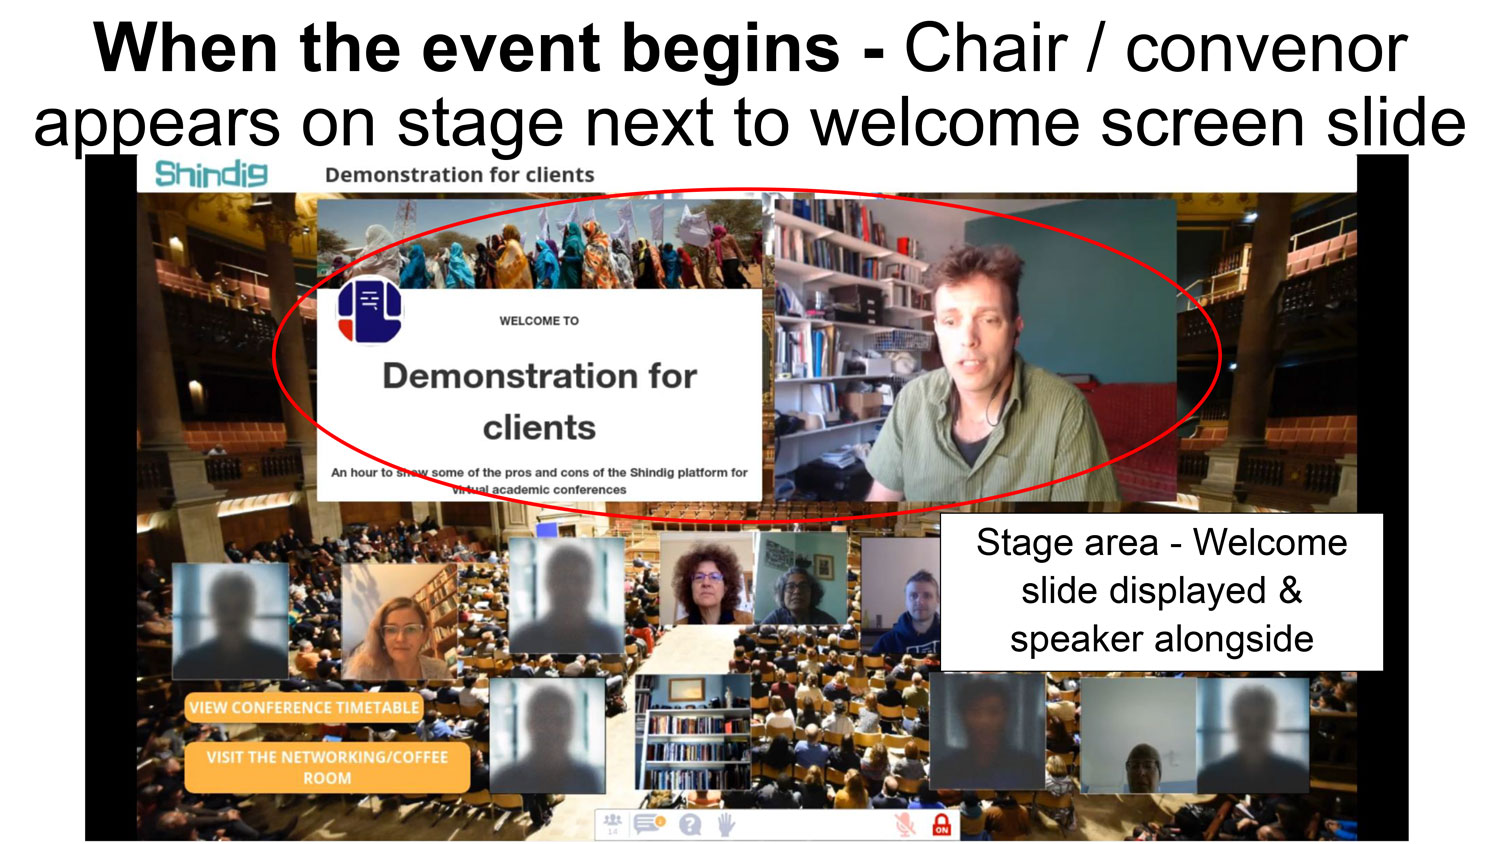
On entry to a session there may be nothing yet up on the 'stage', so you will see just attendees and some links.
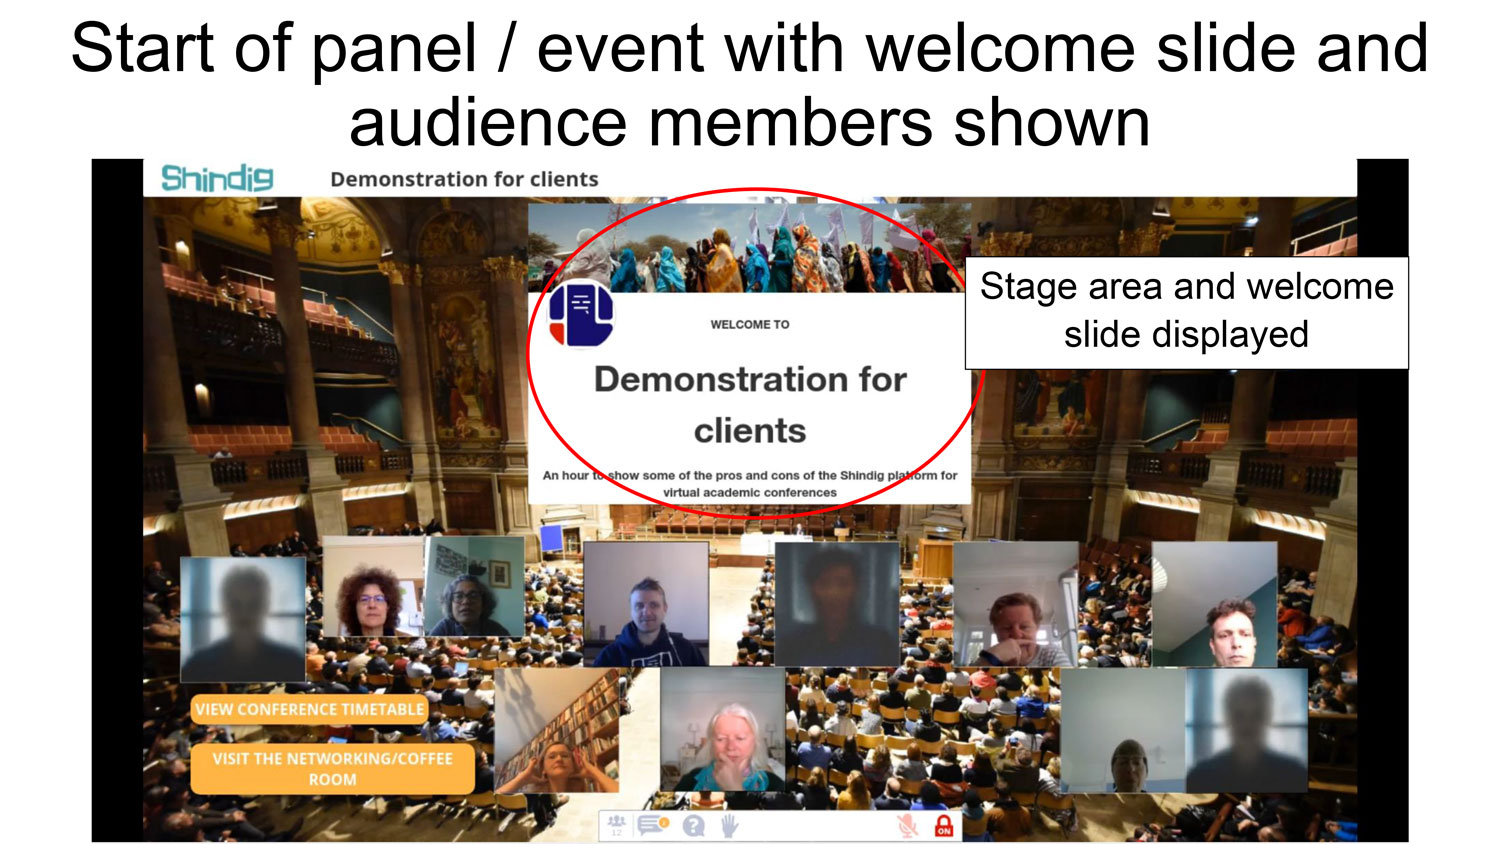
Shindig has an automated welcome slide which can be displayed at the beginning to reassure delegates that they are in the right room!
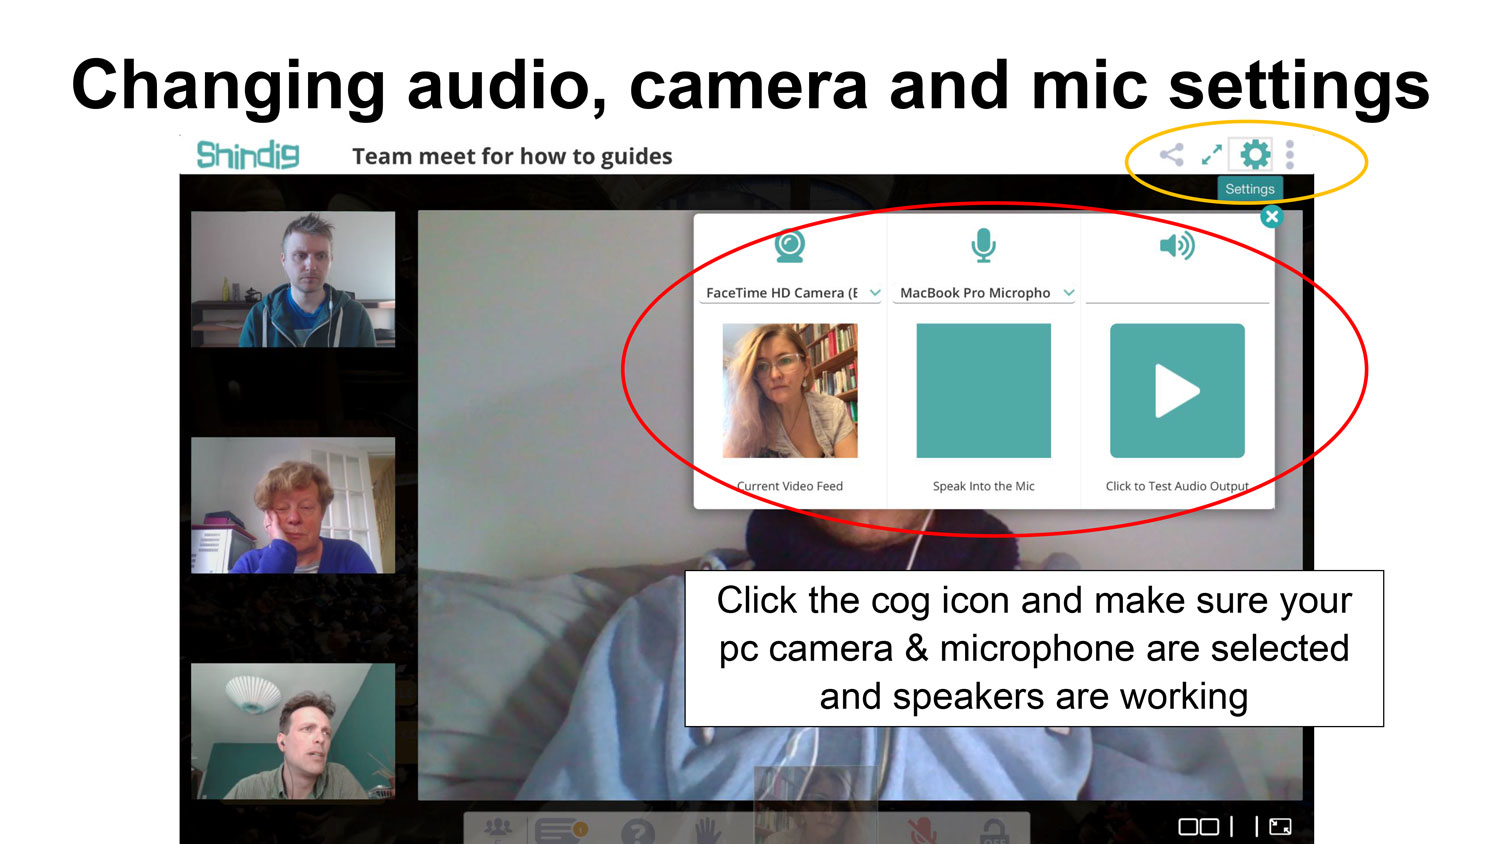
Attendees can use the gear/cog icon to troubleshoot camera/mic issues.
3. Background
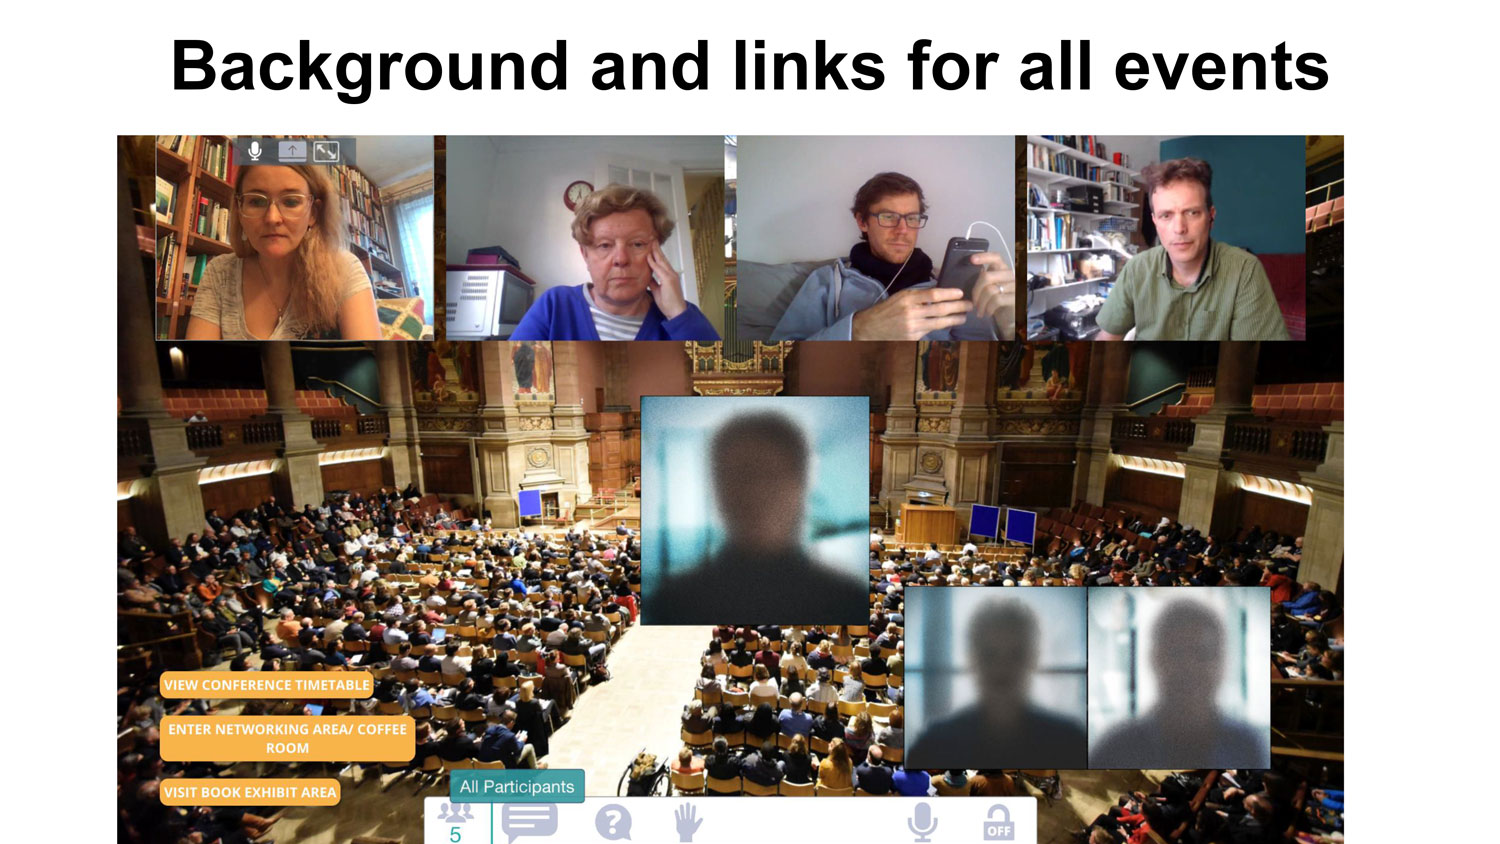
The background image displayed in each session is customisable and we will use images to convey a sense of the conference hosts' location. If a panel requires a special background these should be sent to us as a 1920 x 1080 pixels jpg.
4. Views
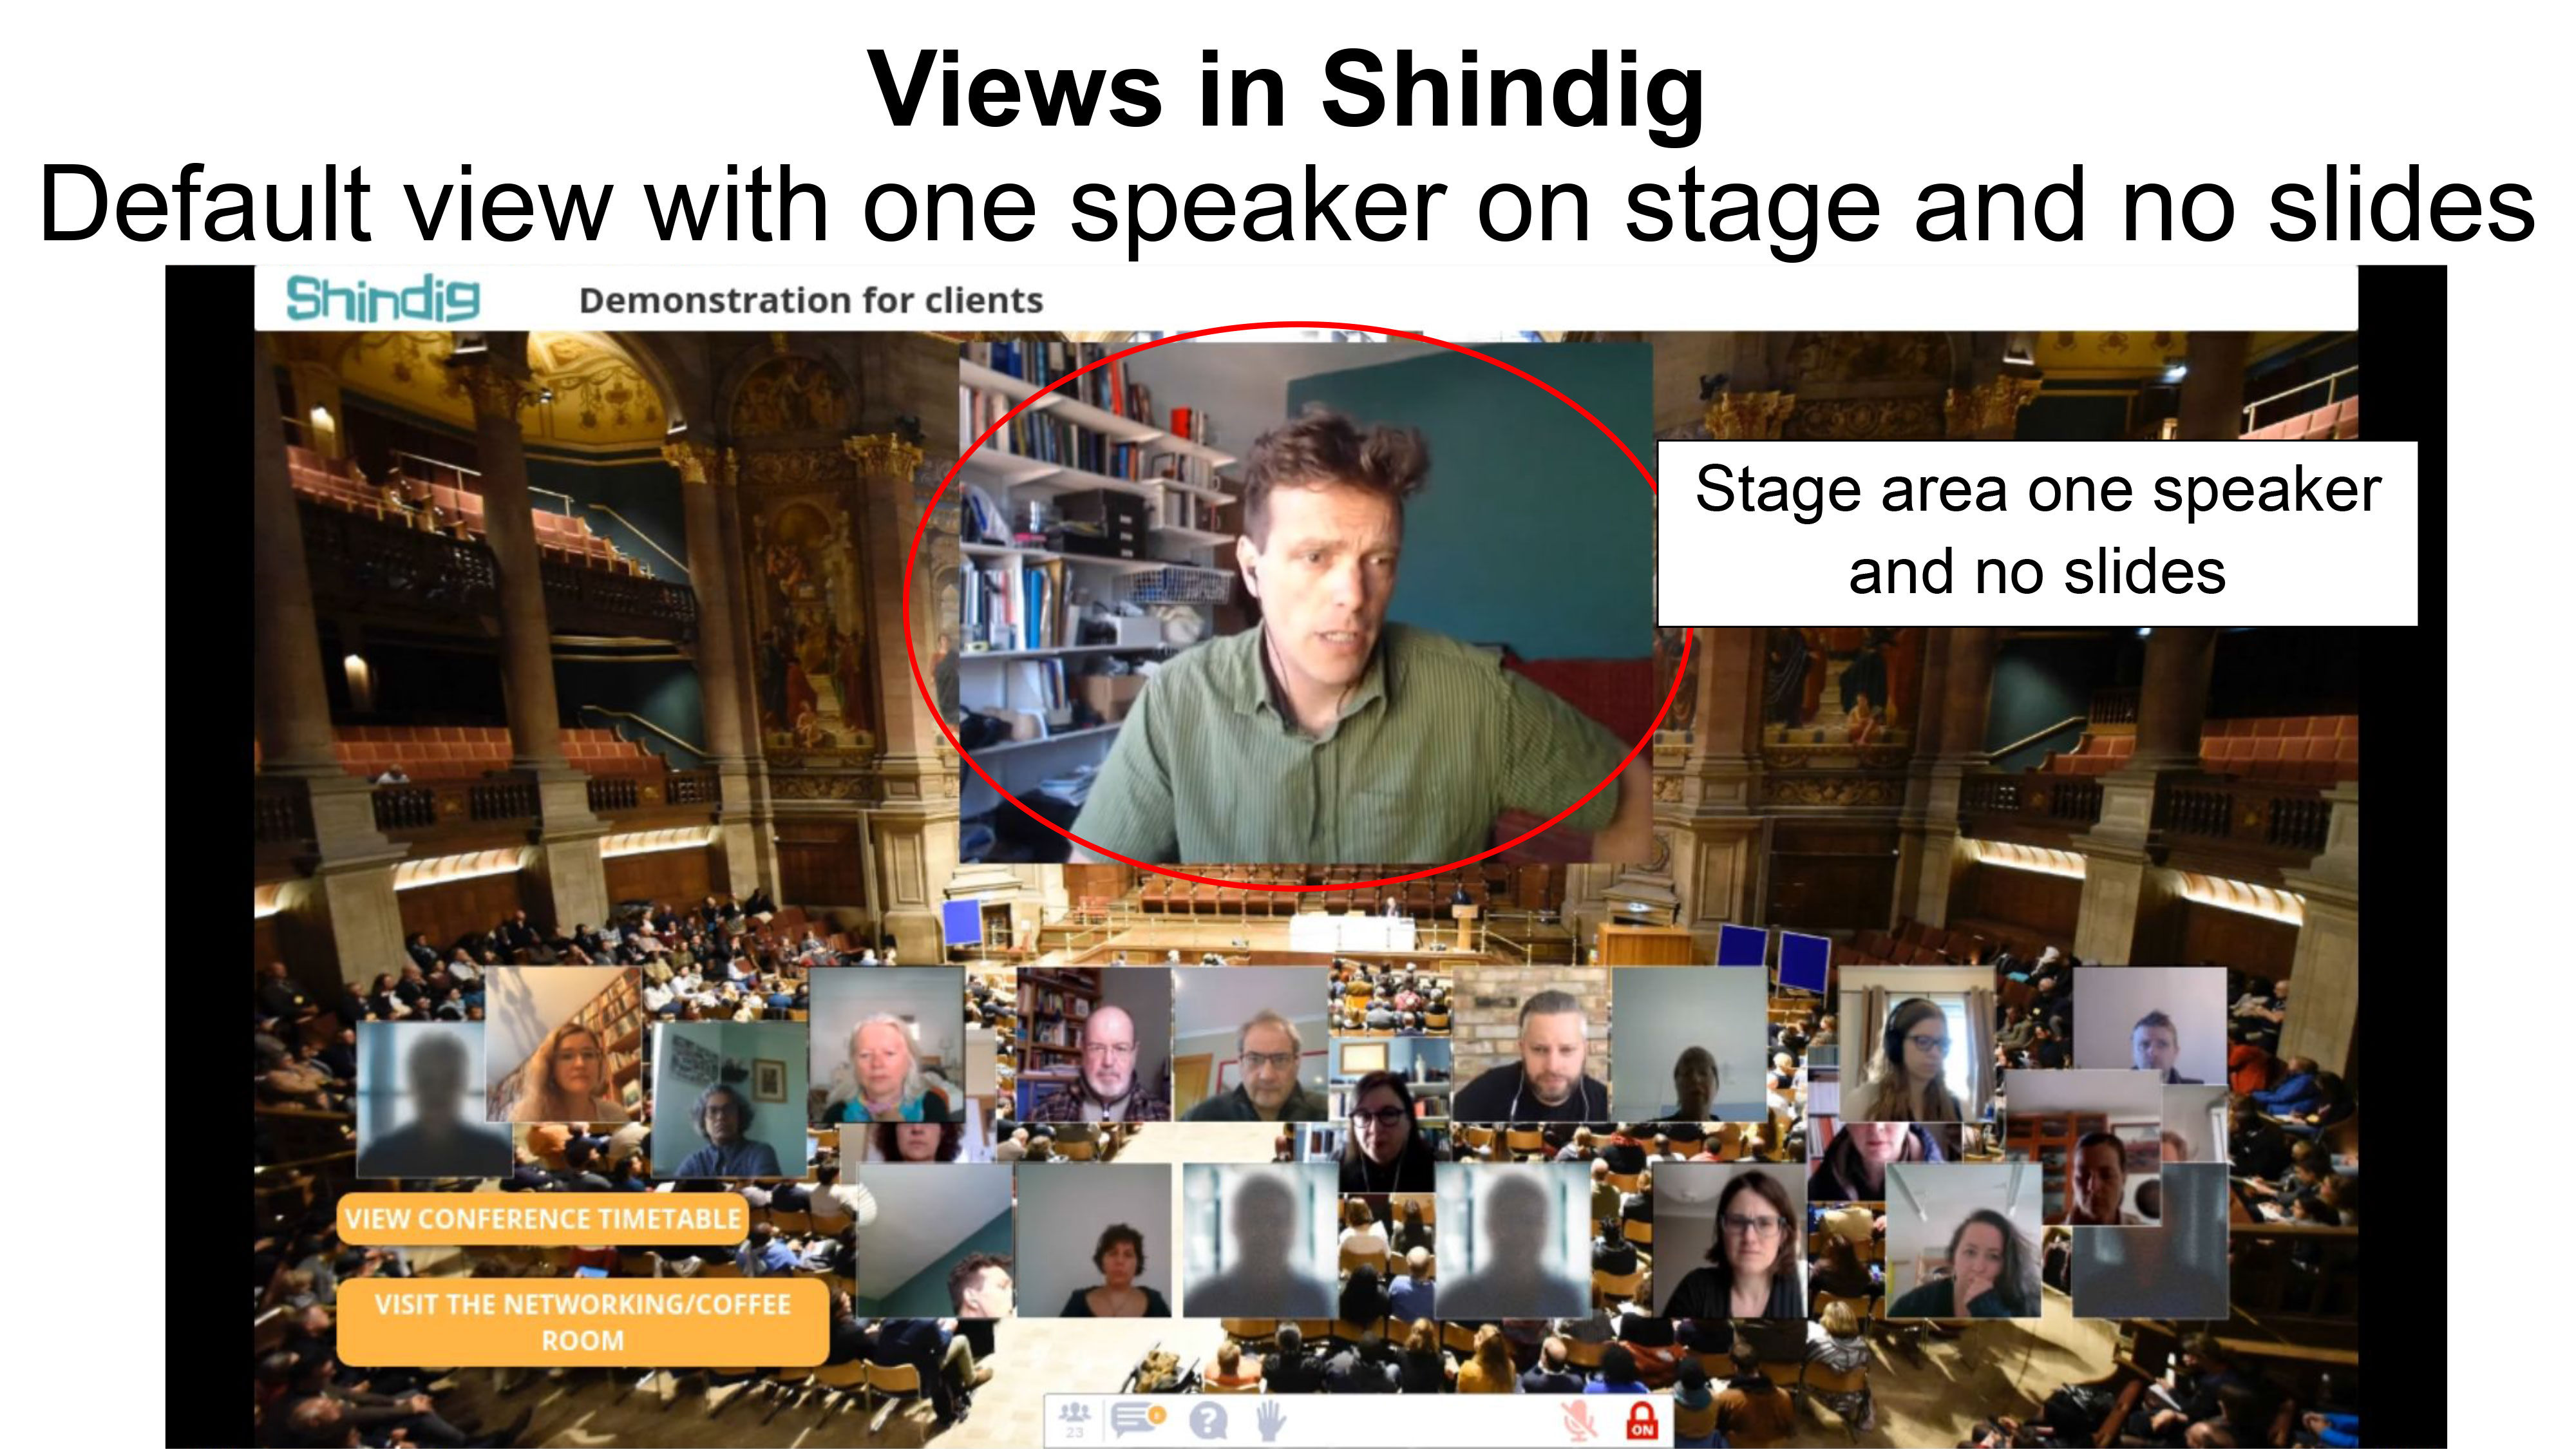
The attendee thumbnails move around and you cannot stop that. On the left will be links to open the conference timetable, go to the coffee room, or visit the exhibitors.
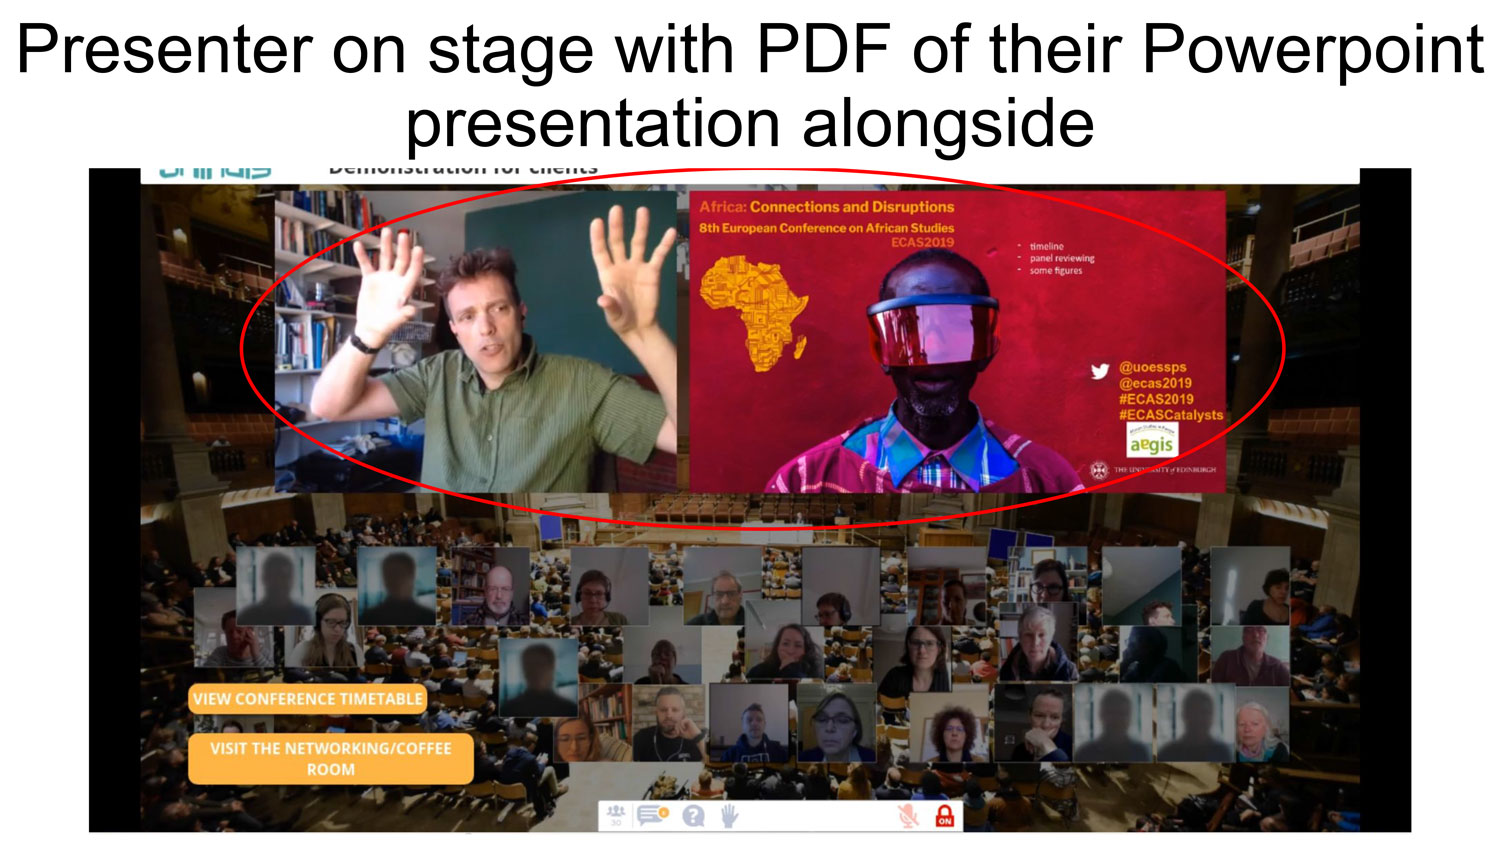
If you have a large enough screen or great eyesight you may be able to watch a presentation in the default view and see the slide detail. Otherwise you should move to a full screen view.
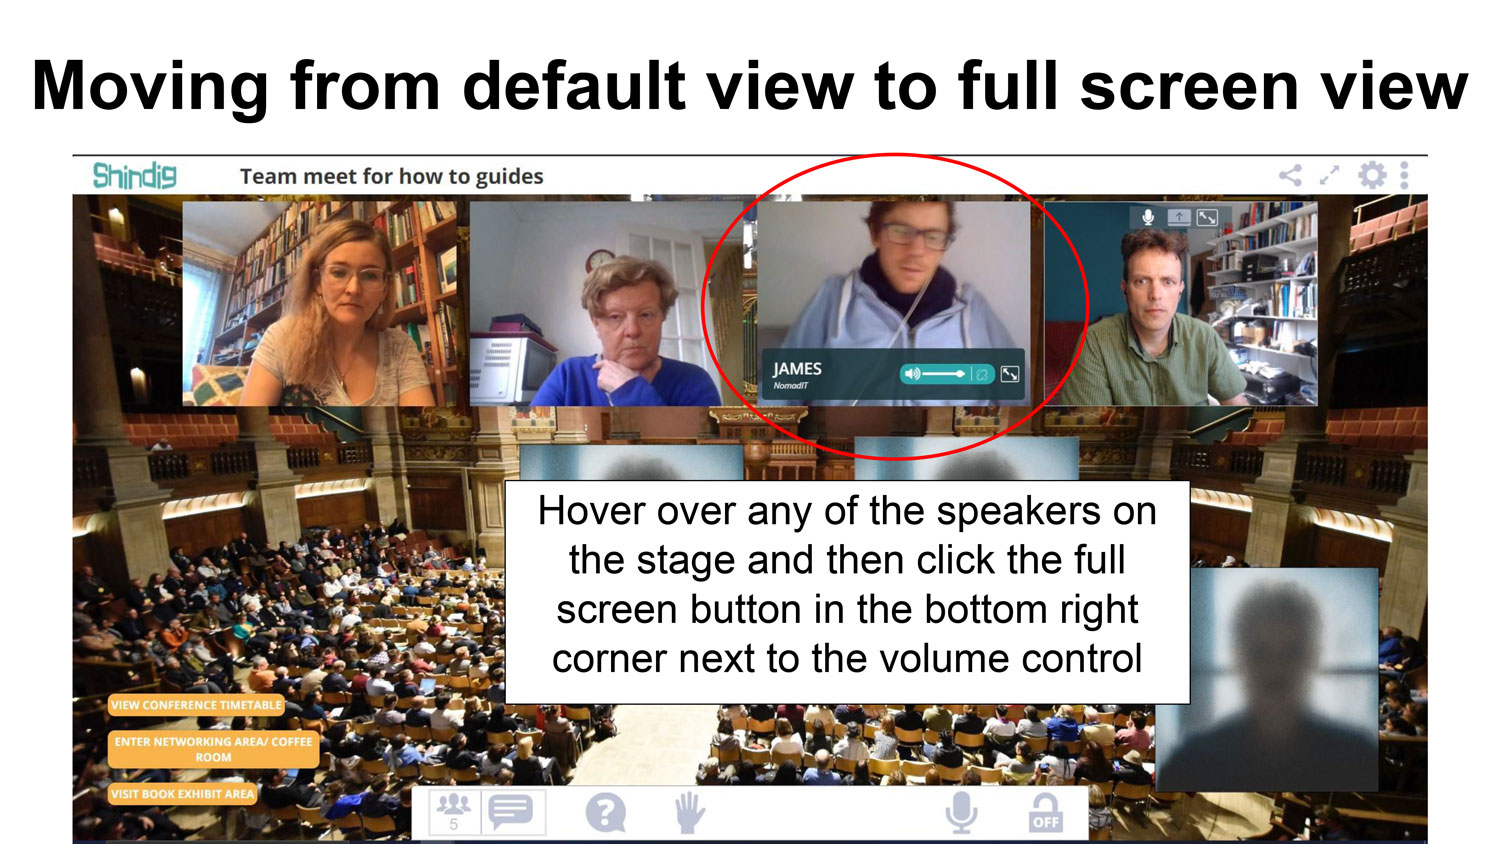
When the administrator changes the view it will change your view. But you can then choose your own preference.
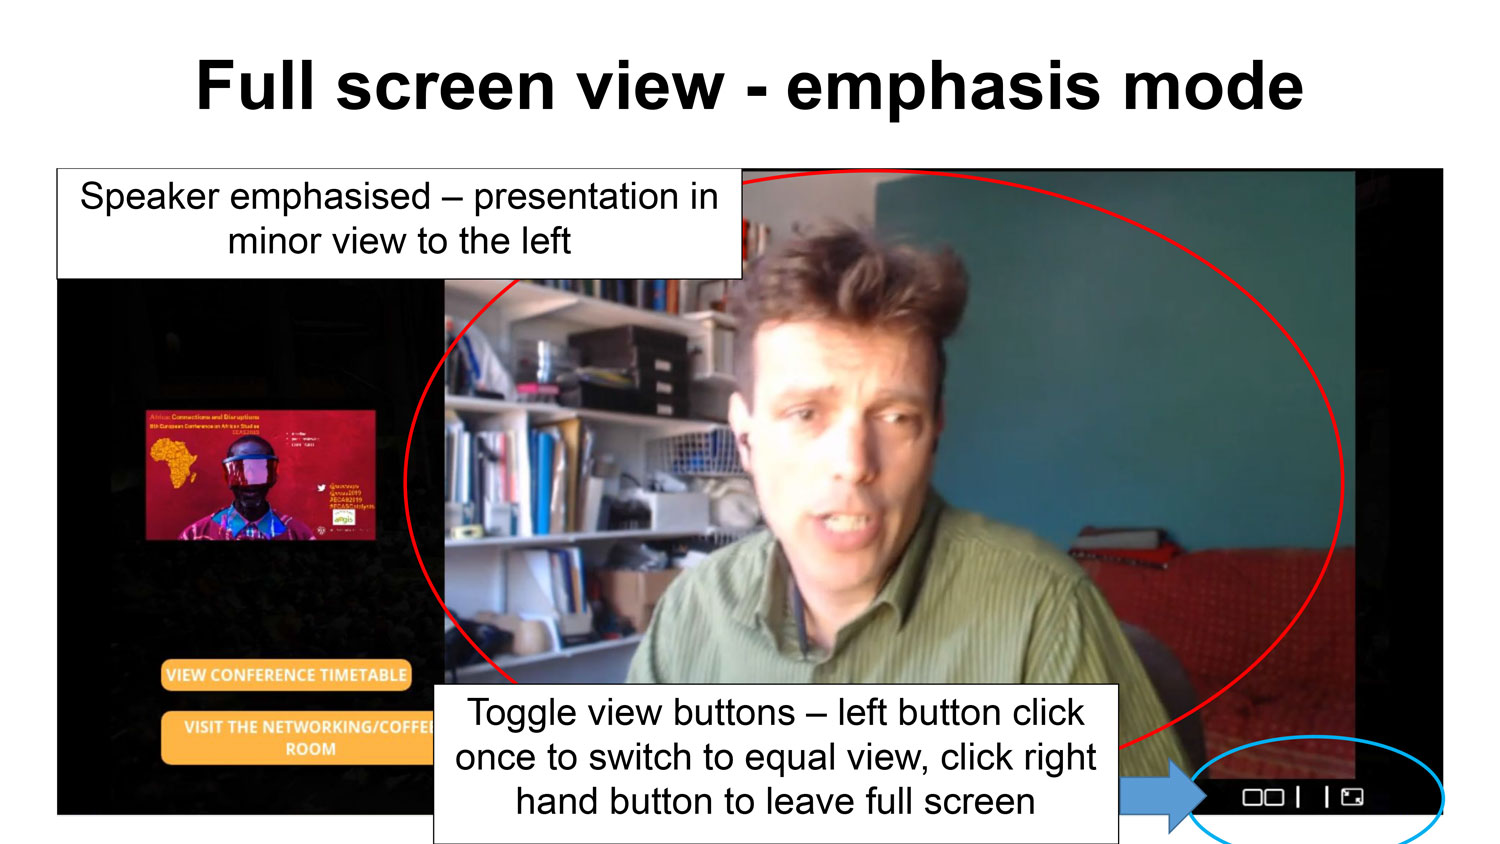
Full screen offers two versions. Emphasis mode may be the preferable view for presenters or their slides.
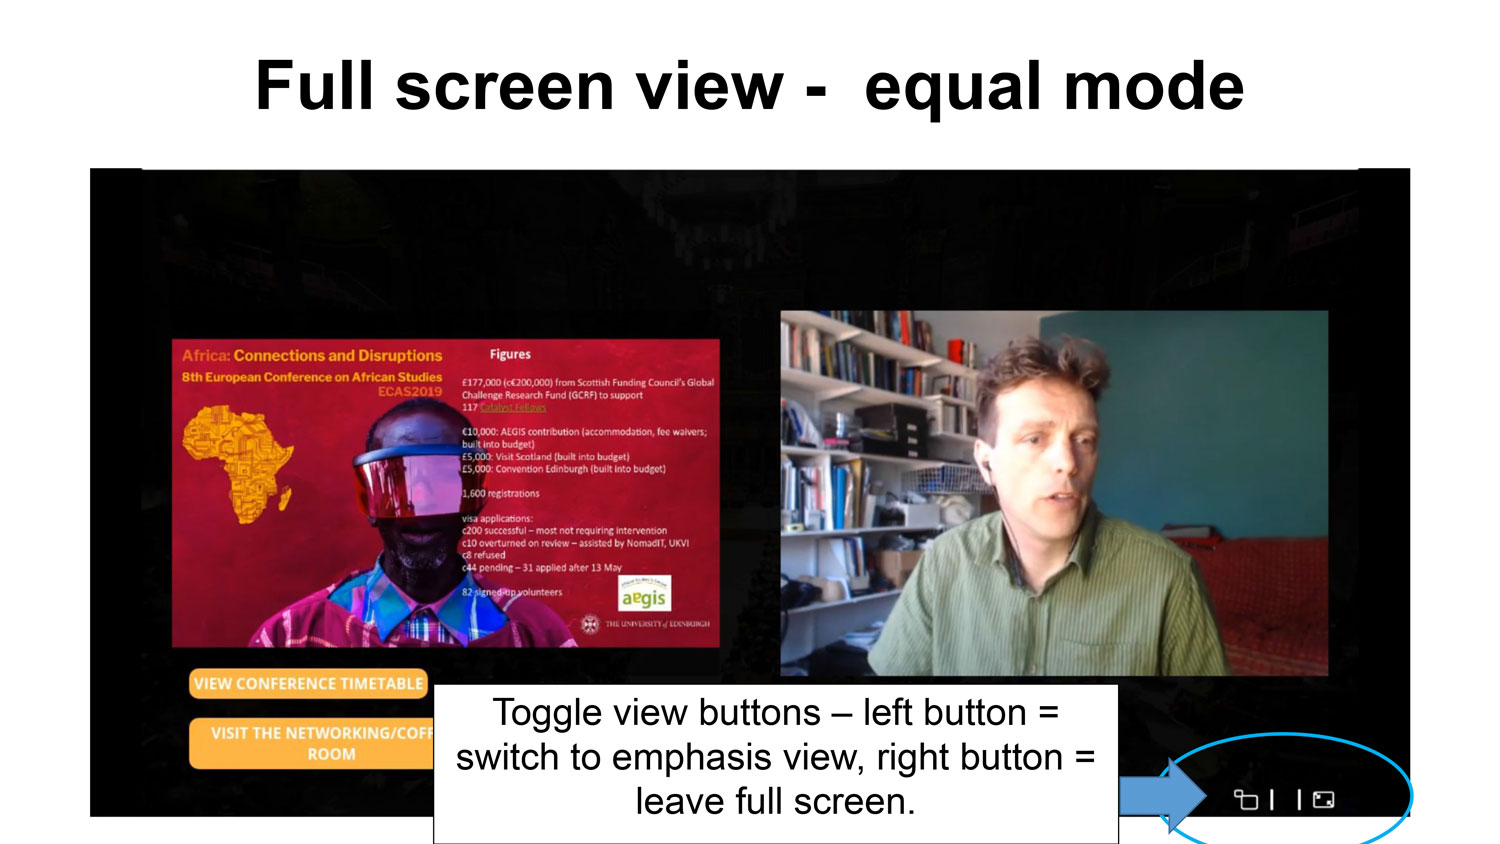
Equal mode is the other full-screen option.
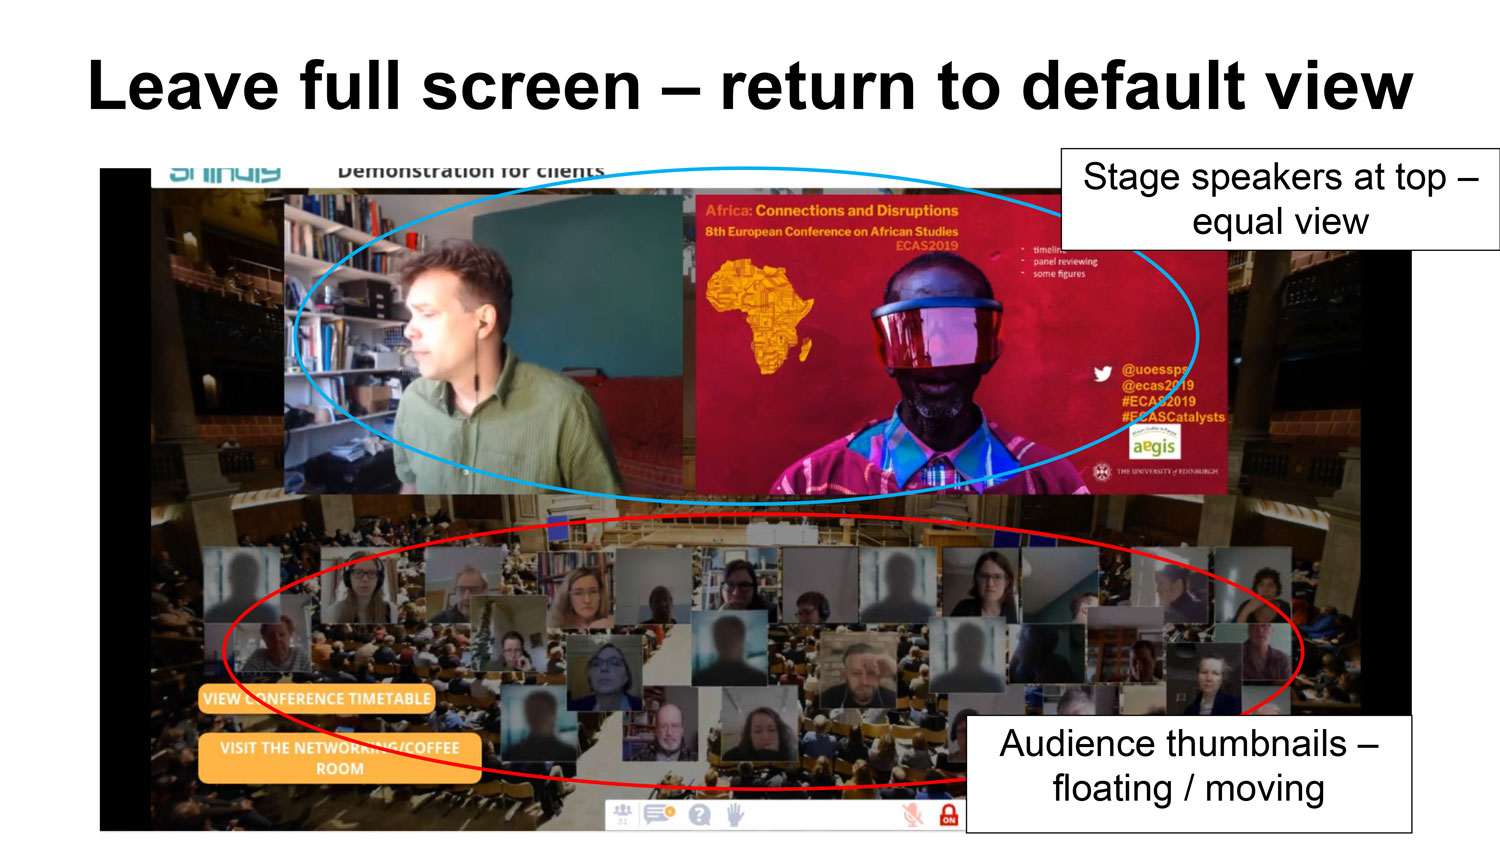
Returning to default view allows you to see the floating attendee thumbnails, but also gives space to expand your toolbar without obscuring the presentations.
5. Video chats
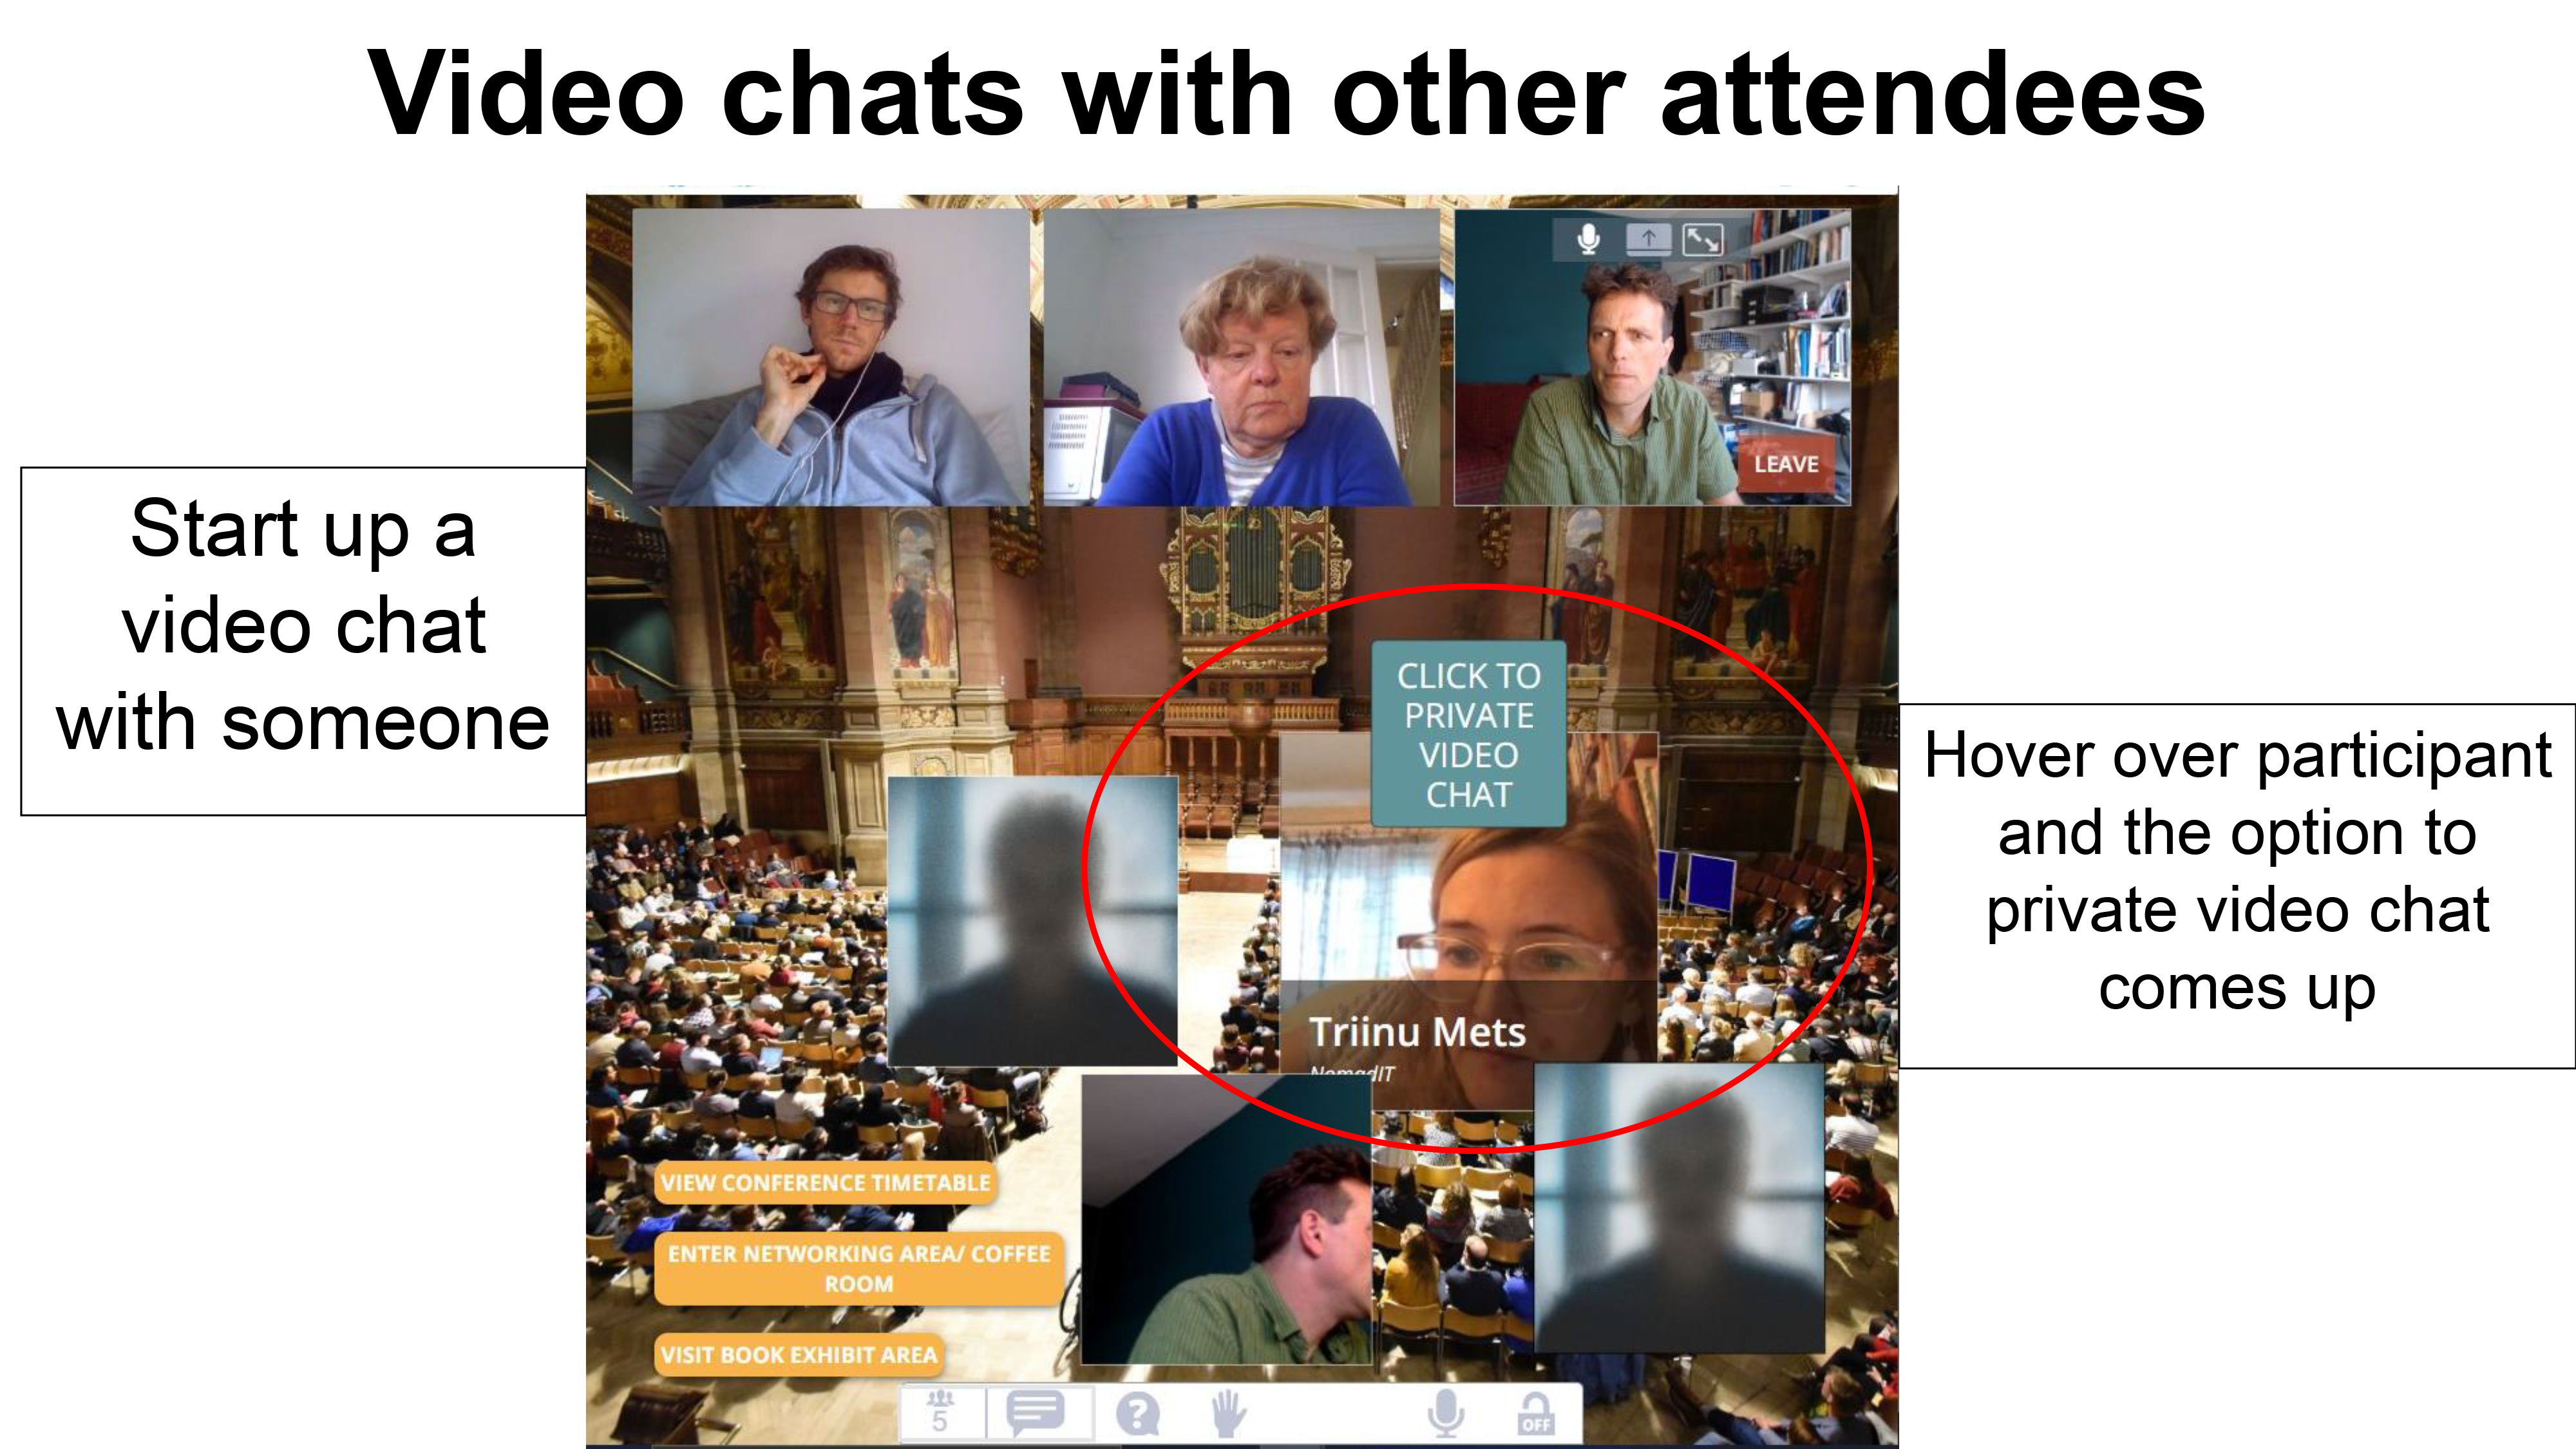
Mousing-over thumbnails in default view allows quick access to video calling other attendees.
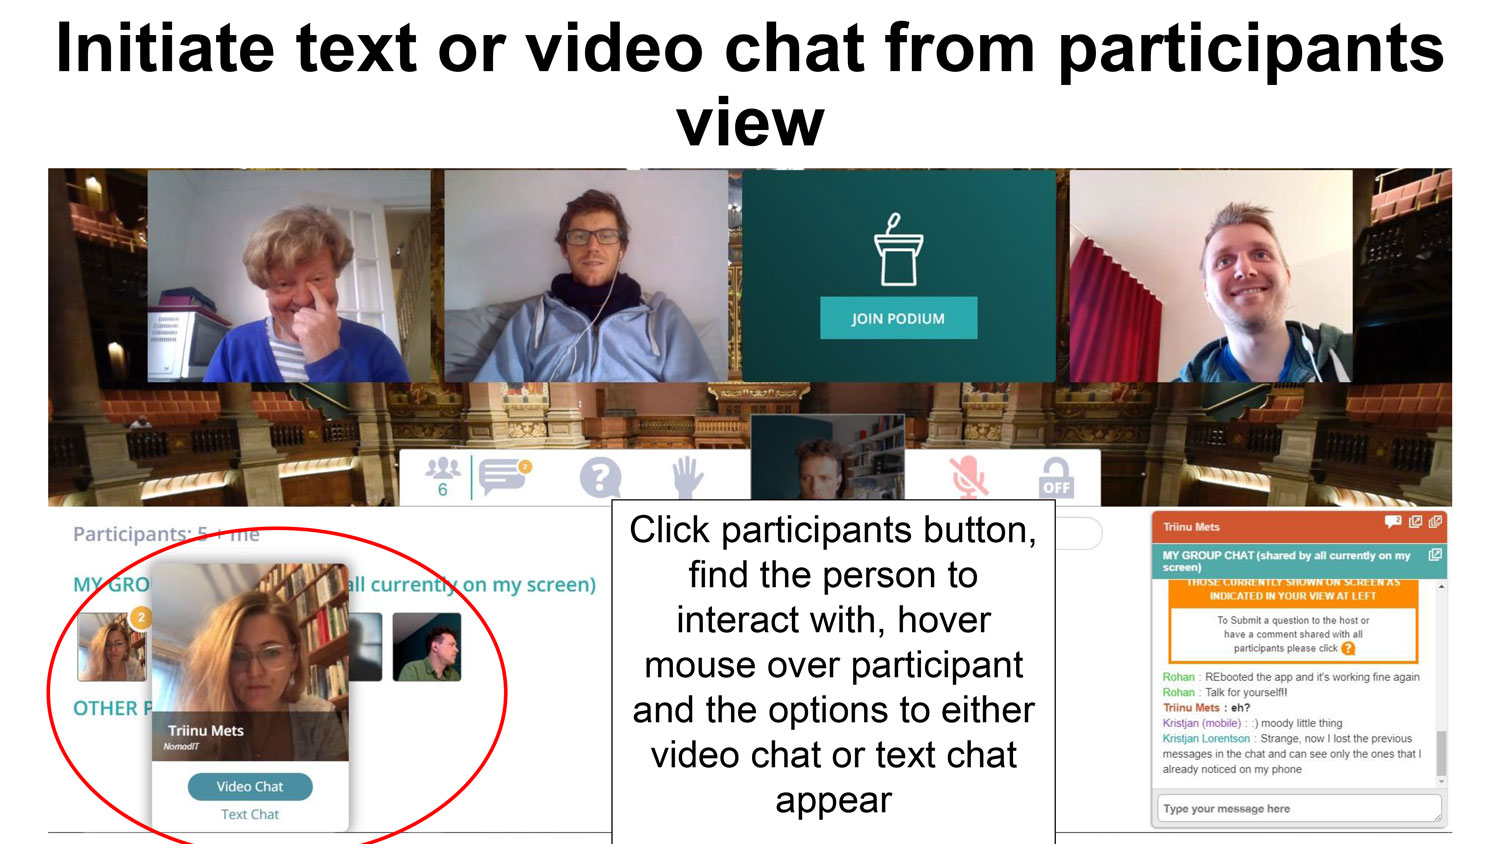
Alternatively, click on the participants icon on the toolbar to expand the bar and then search for colleagues by mousing-over thumbnails or using the search bar.
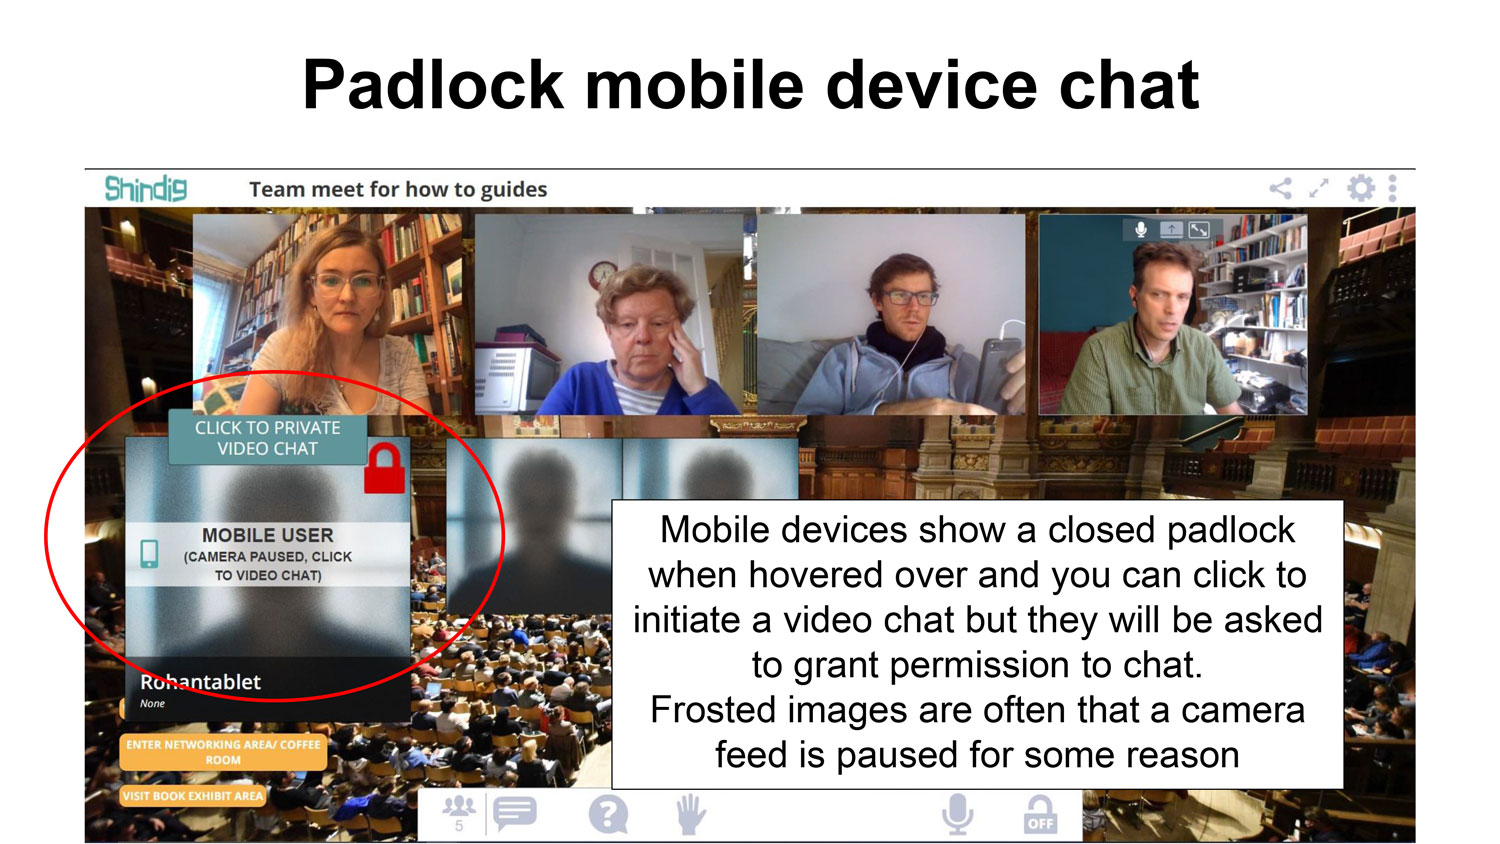
We will enable padlocks on entry by default. If you remove your padlock, attendees will be able to connect with you over video without you being prompted. We suggest you leave the padlock enabled.
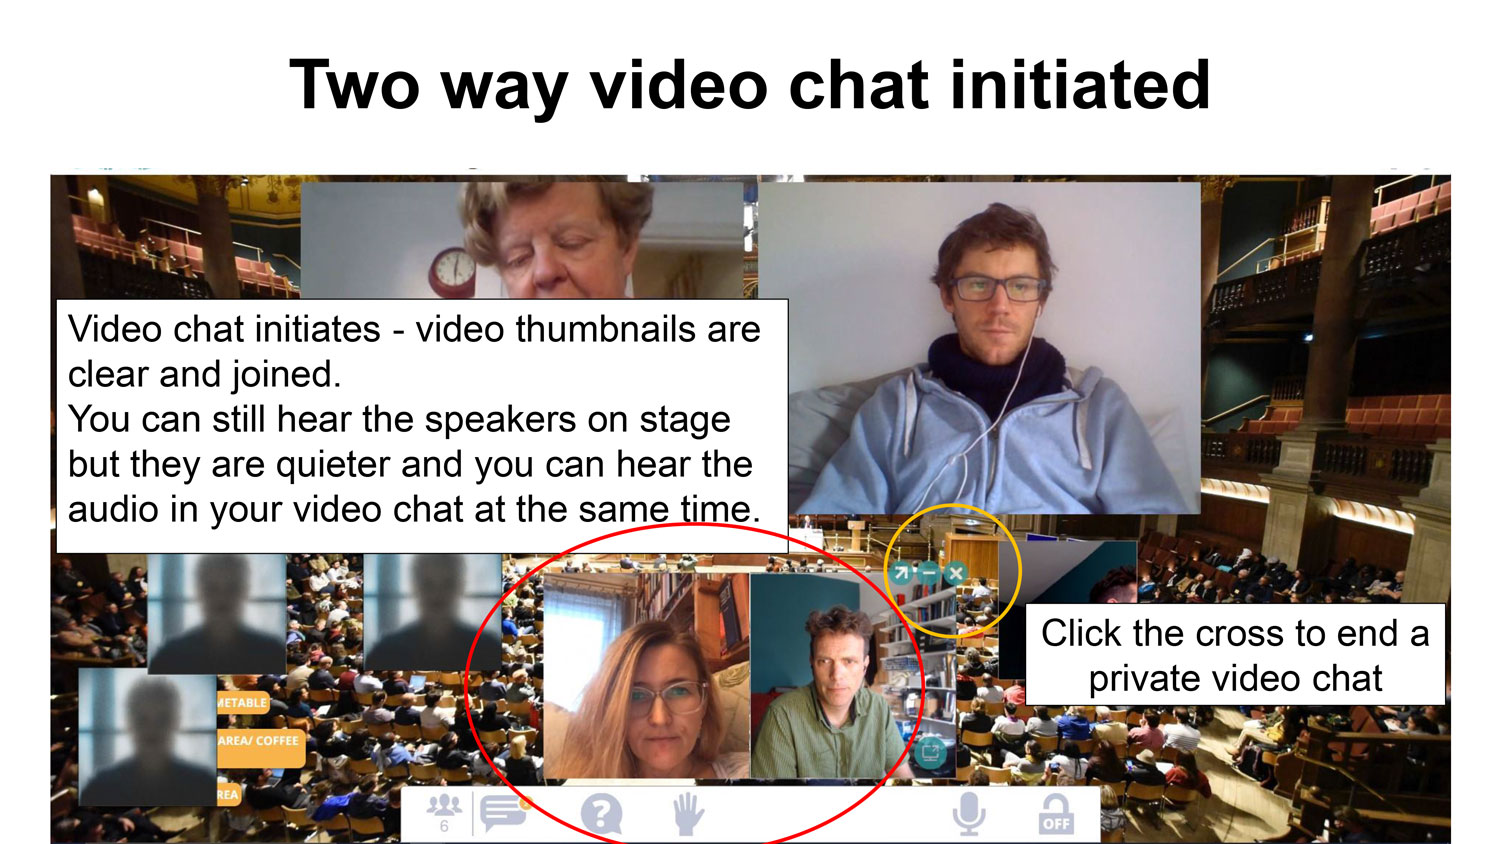
Your private video chats are not recorded and cannot be heard by others.
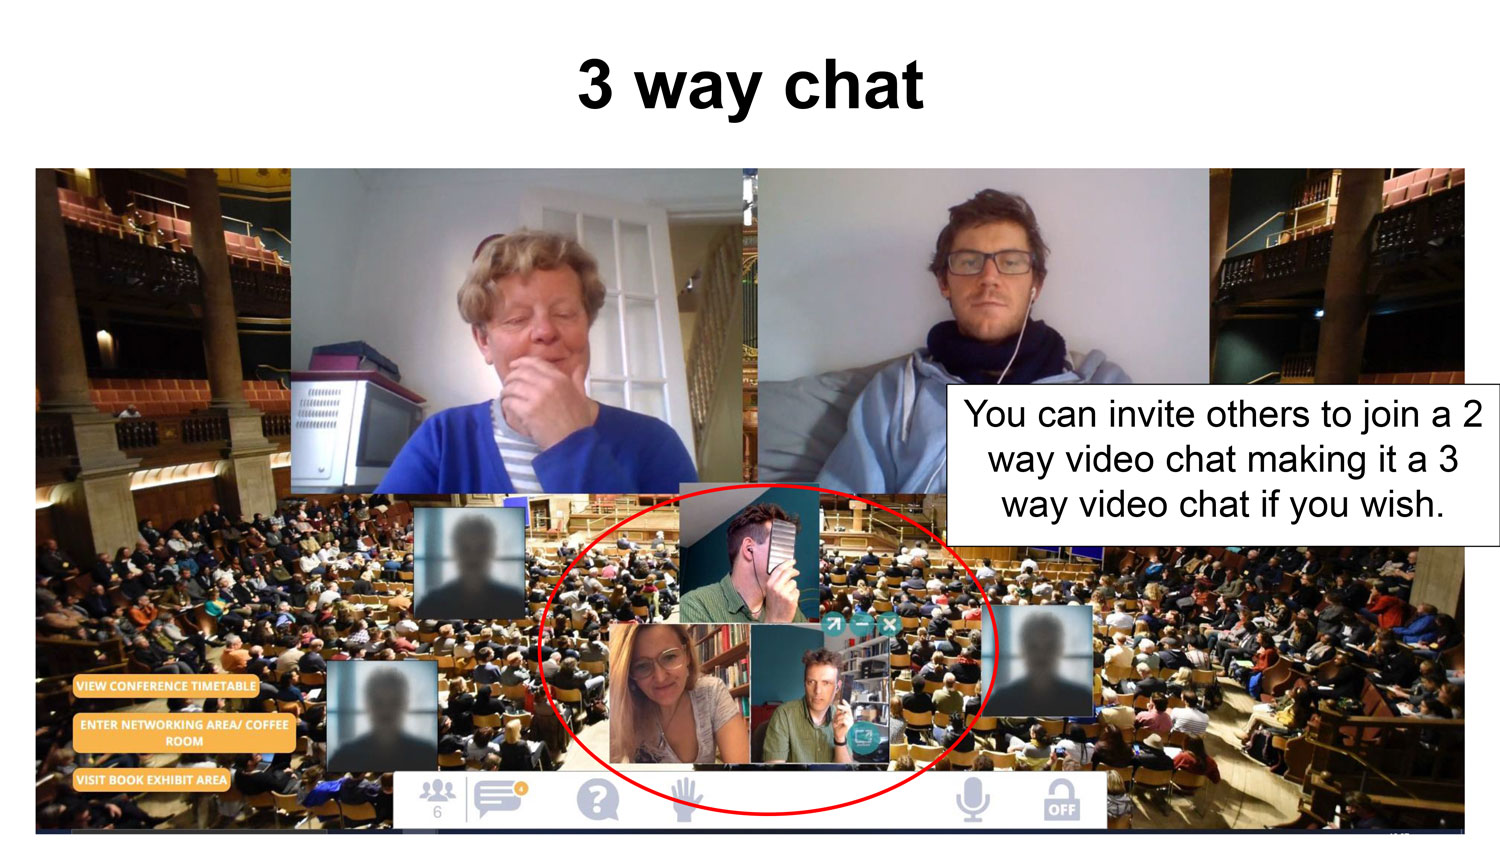
You can have a video chat with up to 5 other attendees at once.
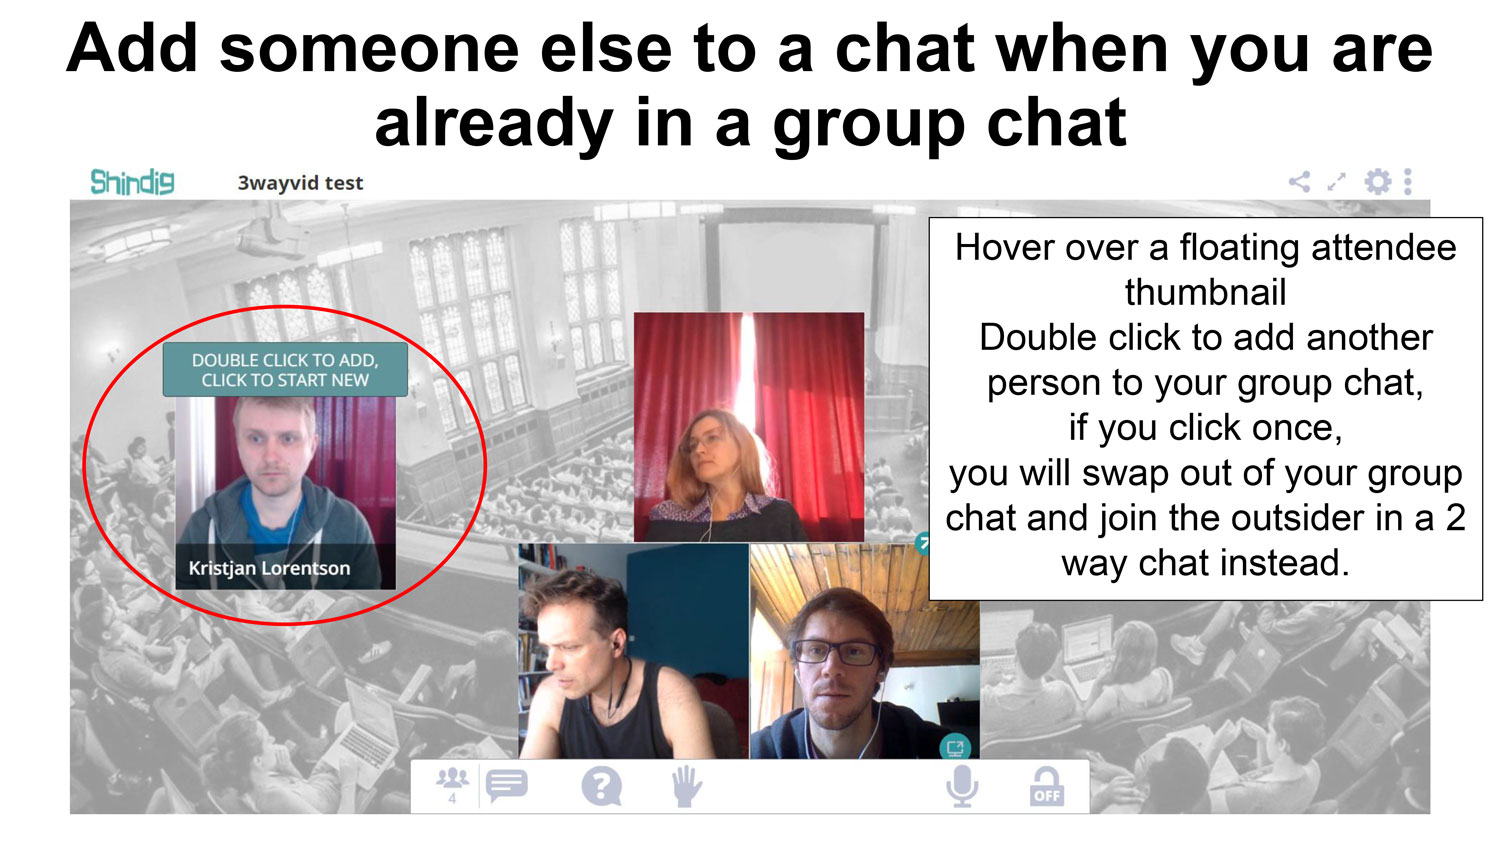
Once in a chat you can add others or leave to chat with someone else.
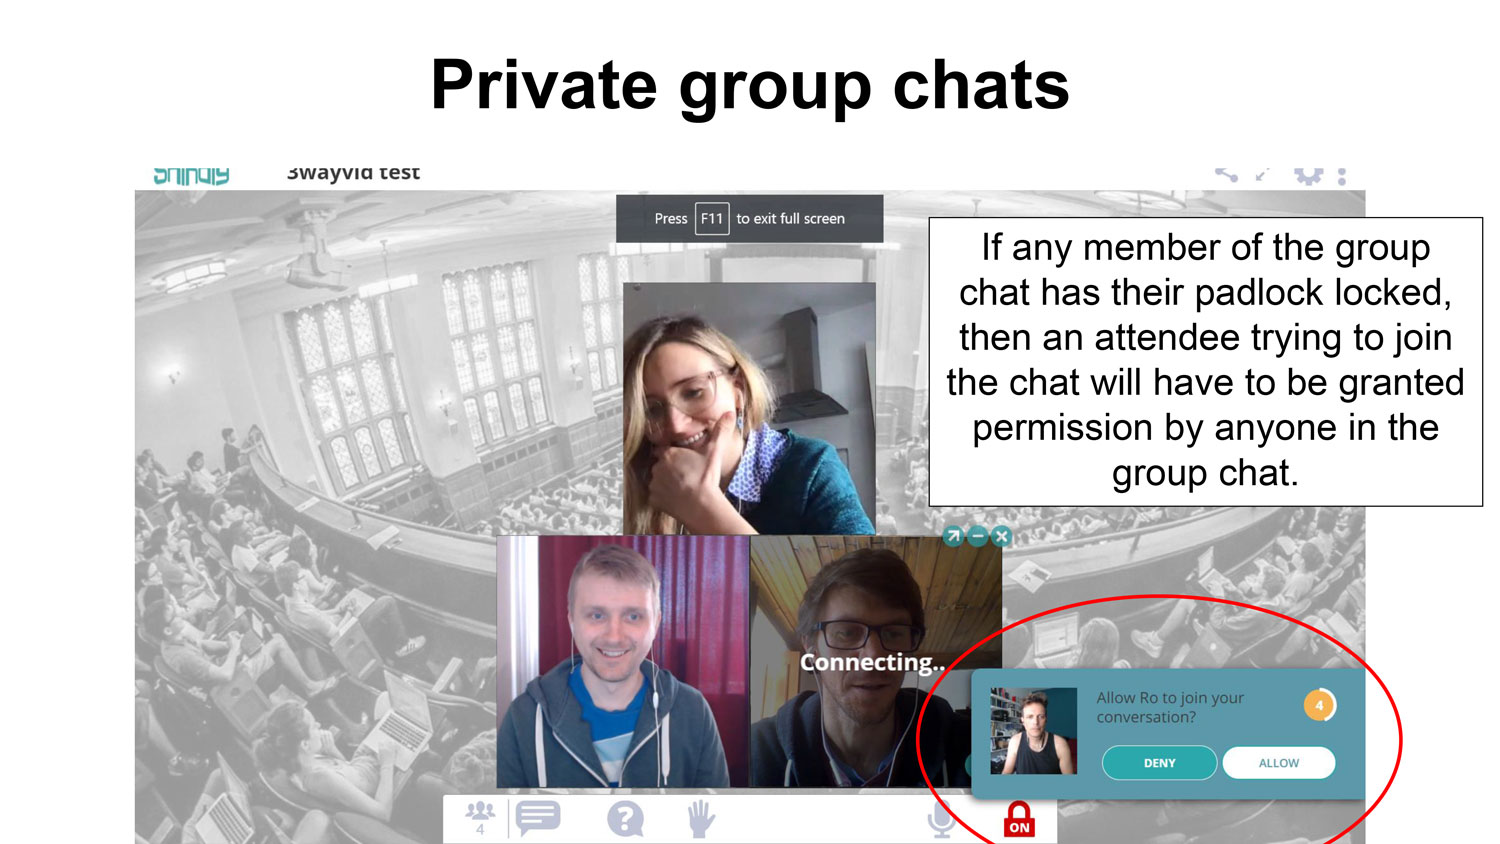
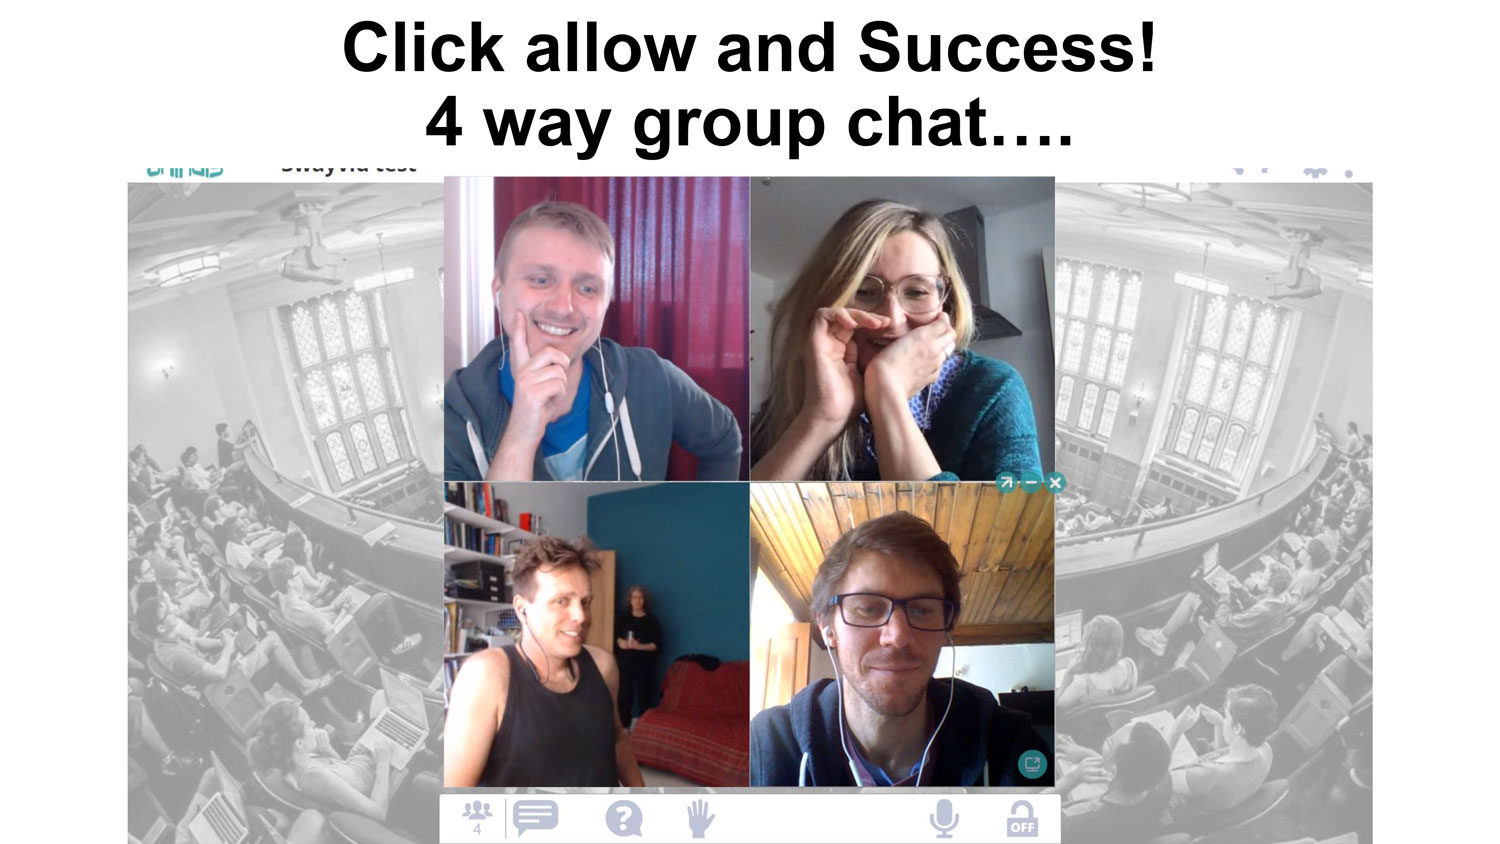
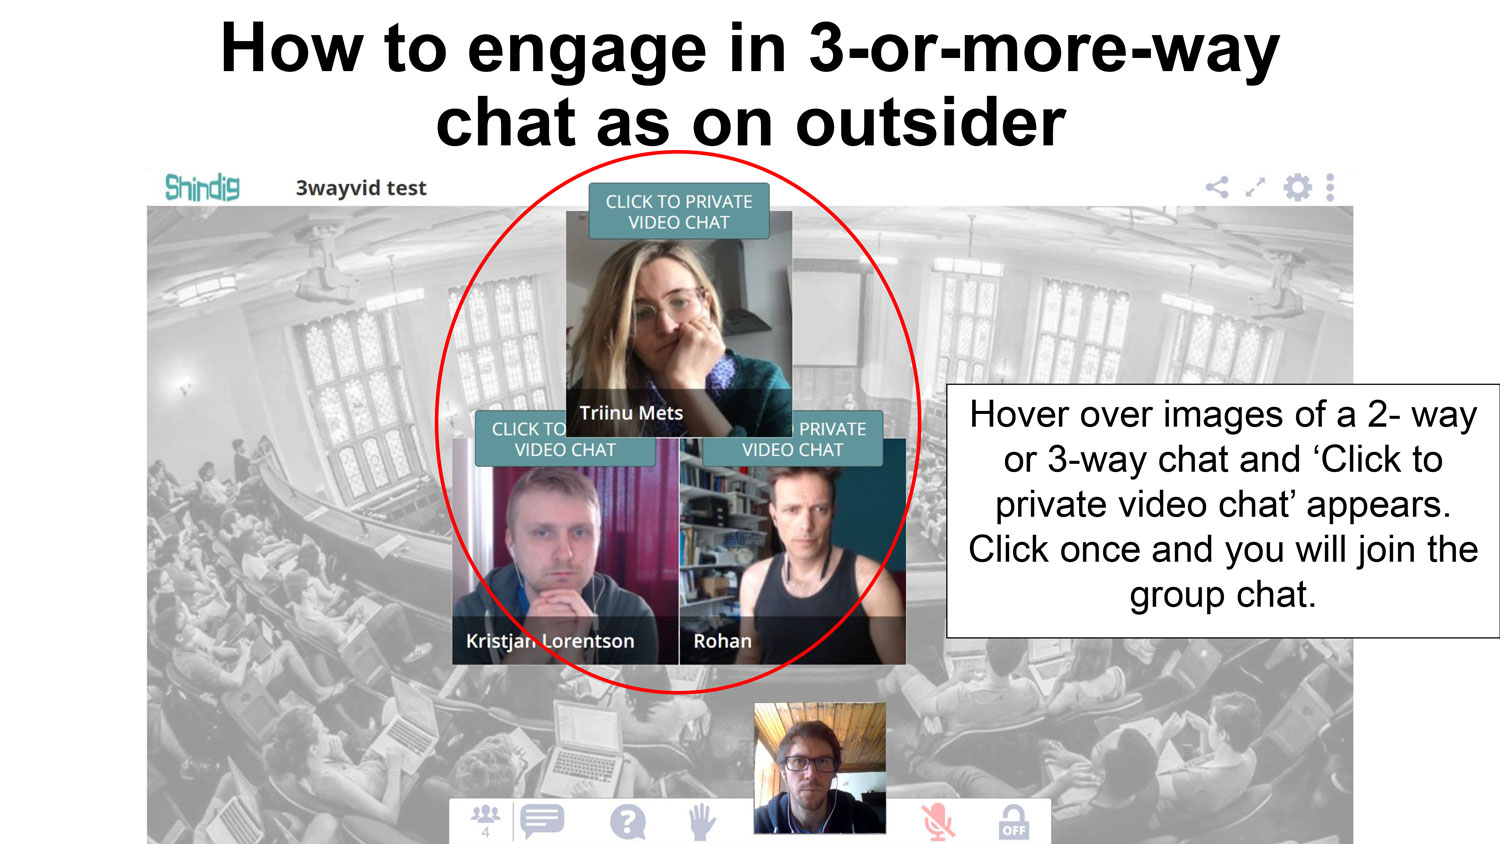
You can see paired/grouped attendees having video chats in the default view and you can seek to join colleagues.
6. Toolbar
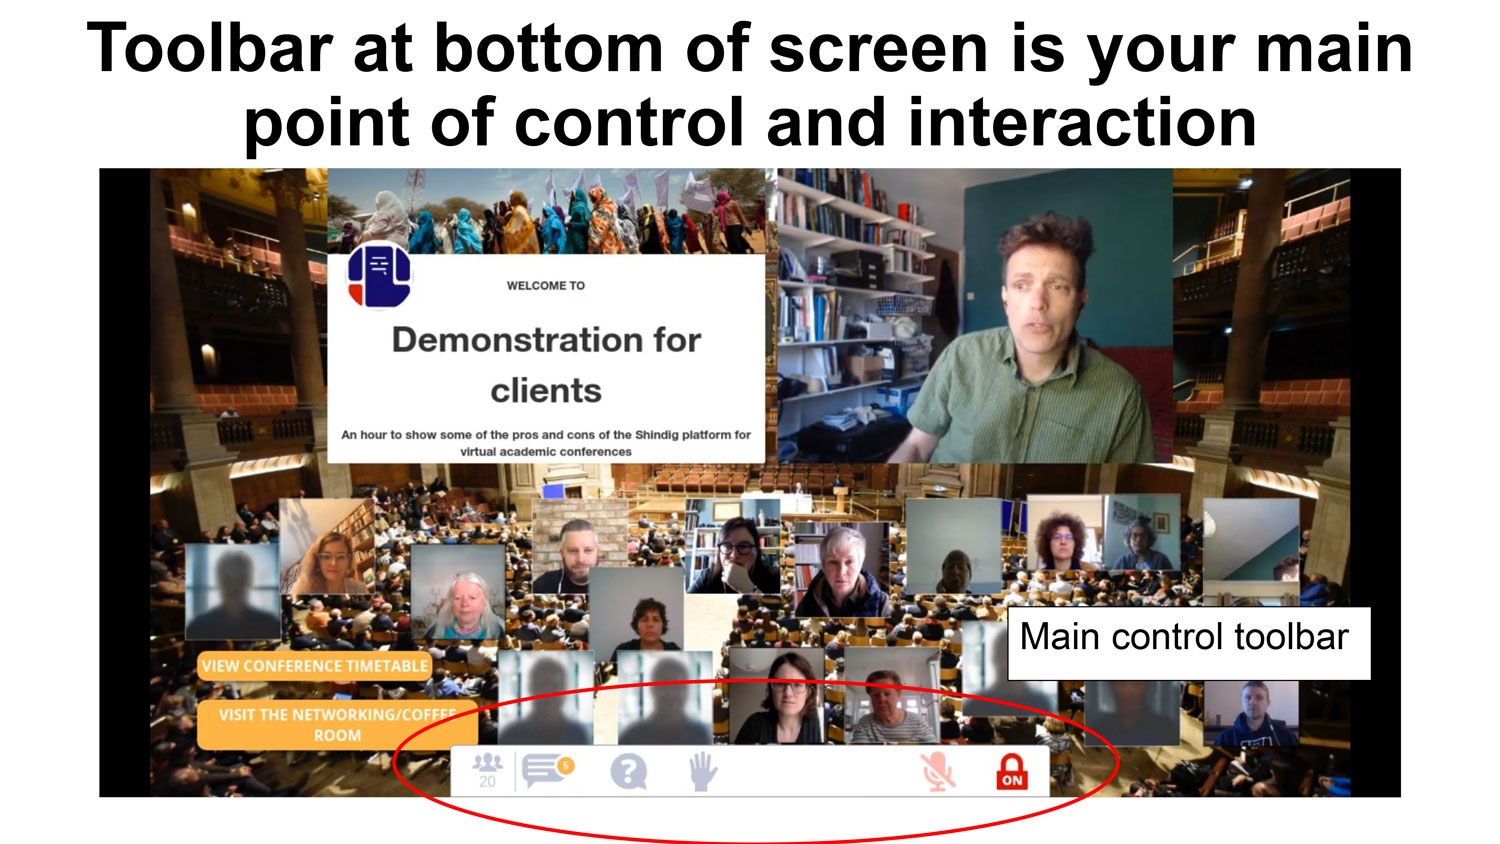
Initially contracted, clicking on the toolbar will expand it. Click again to contract it.
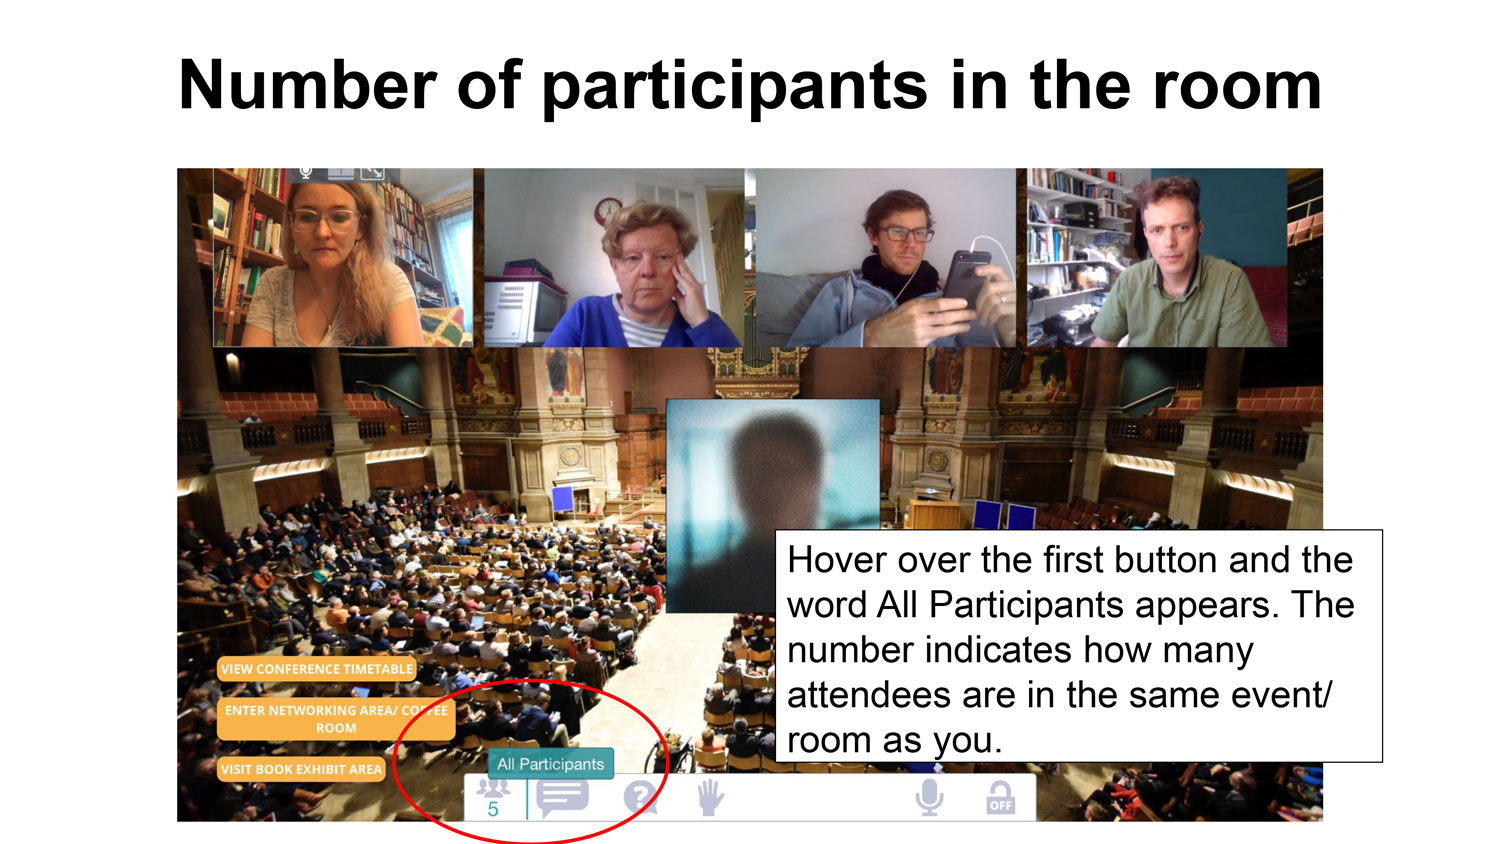
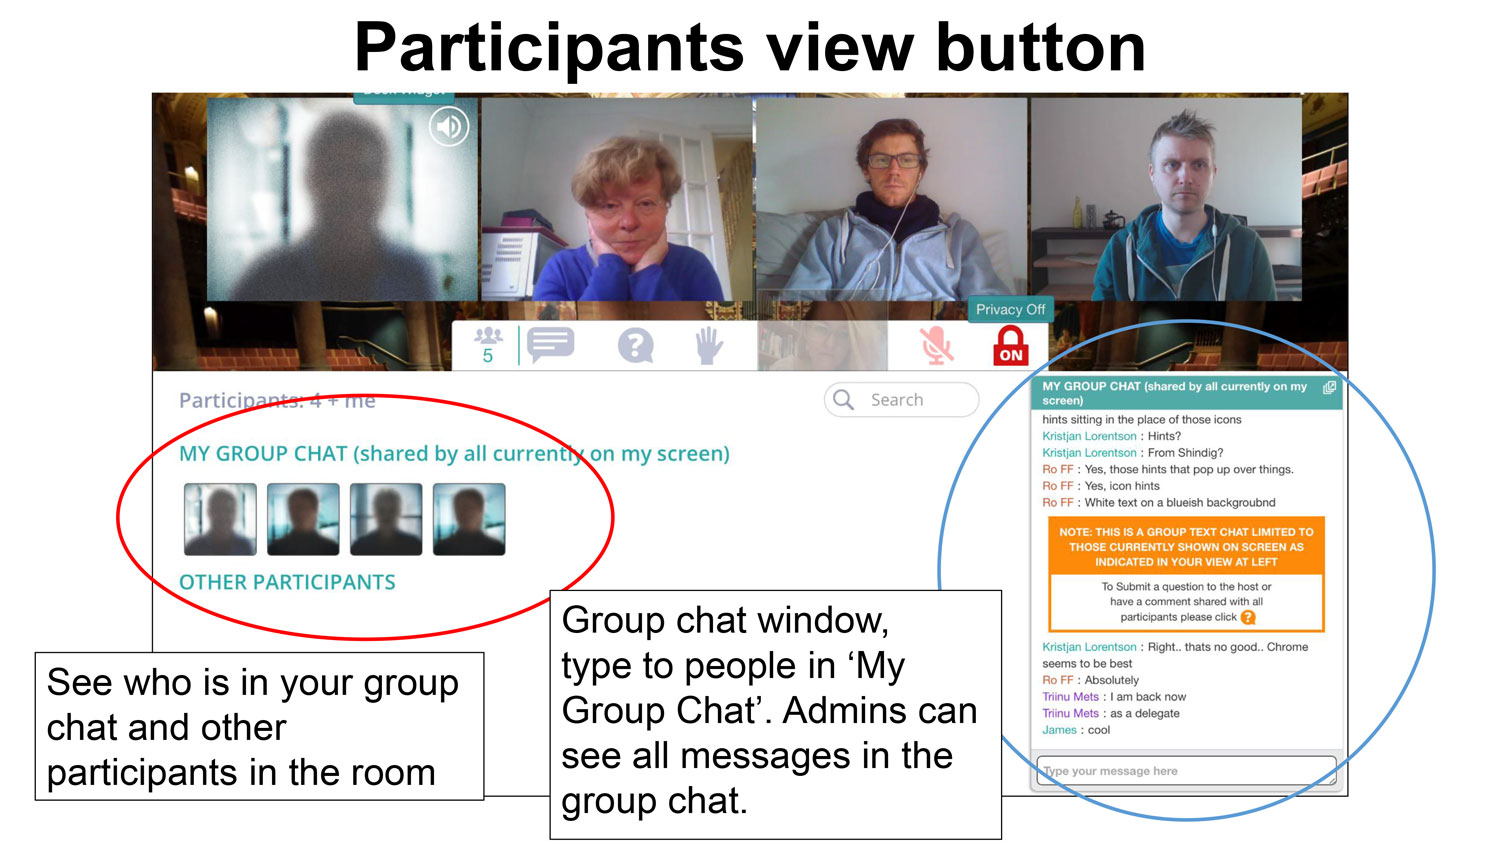
Mouse-over participant thumbnails or search by name in the search bar. Admins will not be listed here. Use the group chat to make general comments, or seek technical support. Questions for panelists should NOT go here.
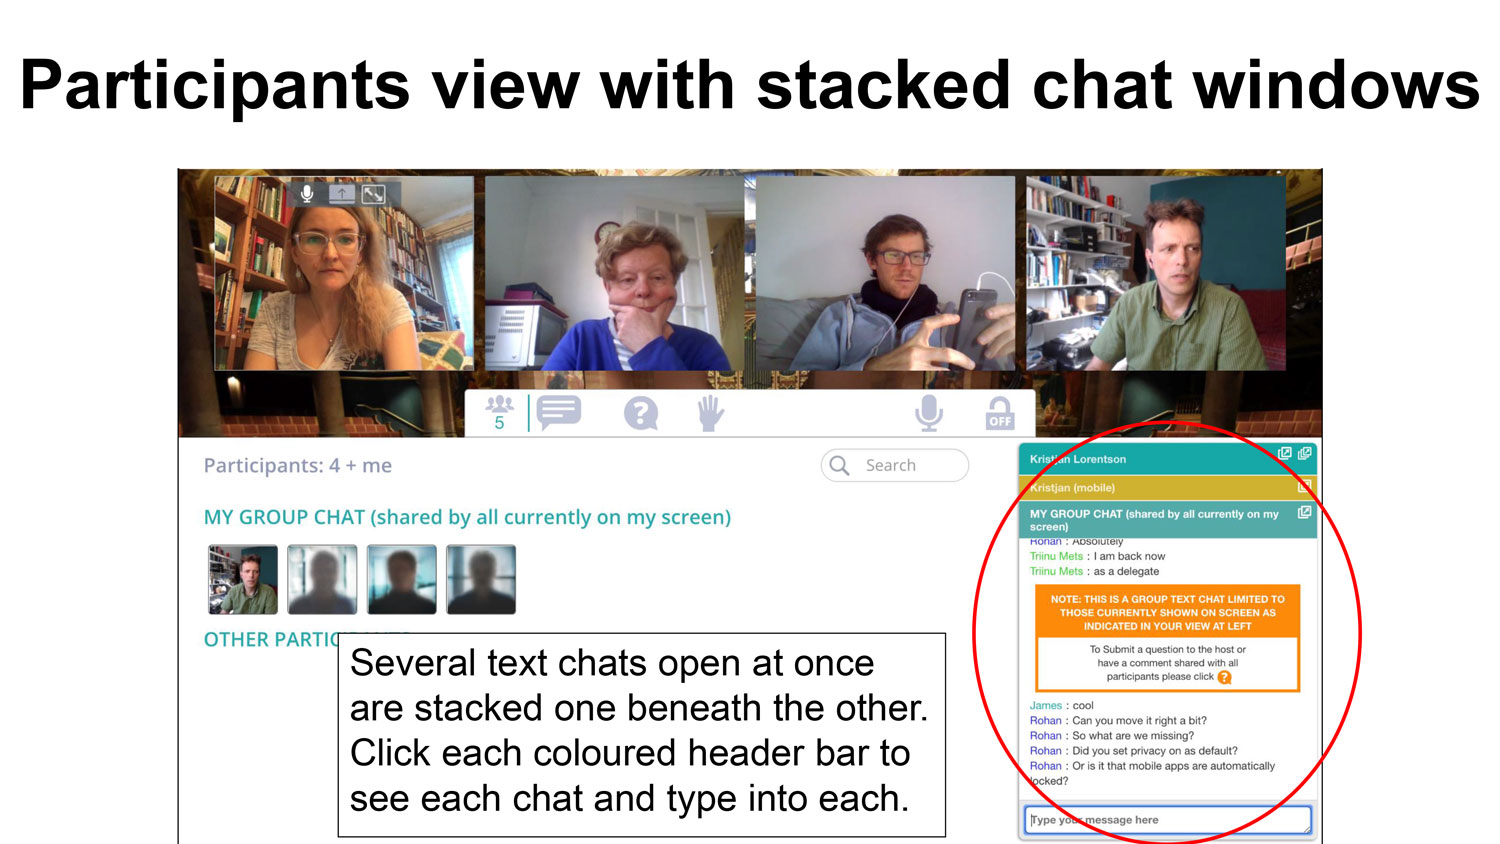
Each chat has a title bar indicating who is in the chat, with a different coloured background. After you've requested tech support, an admin will message you directly, outside of the group chat.
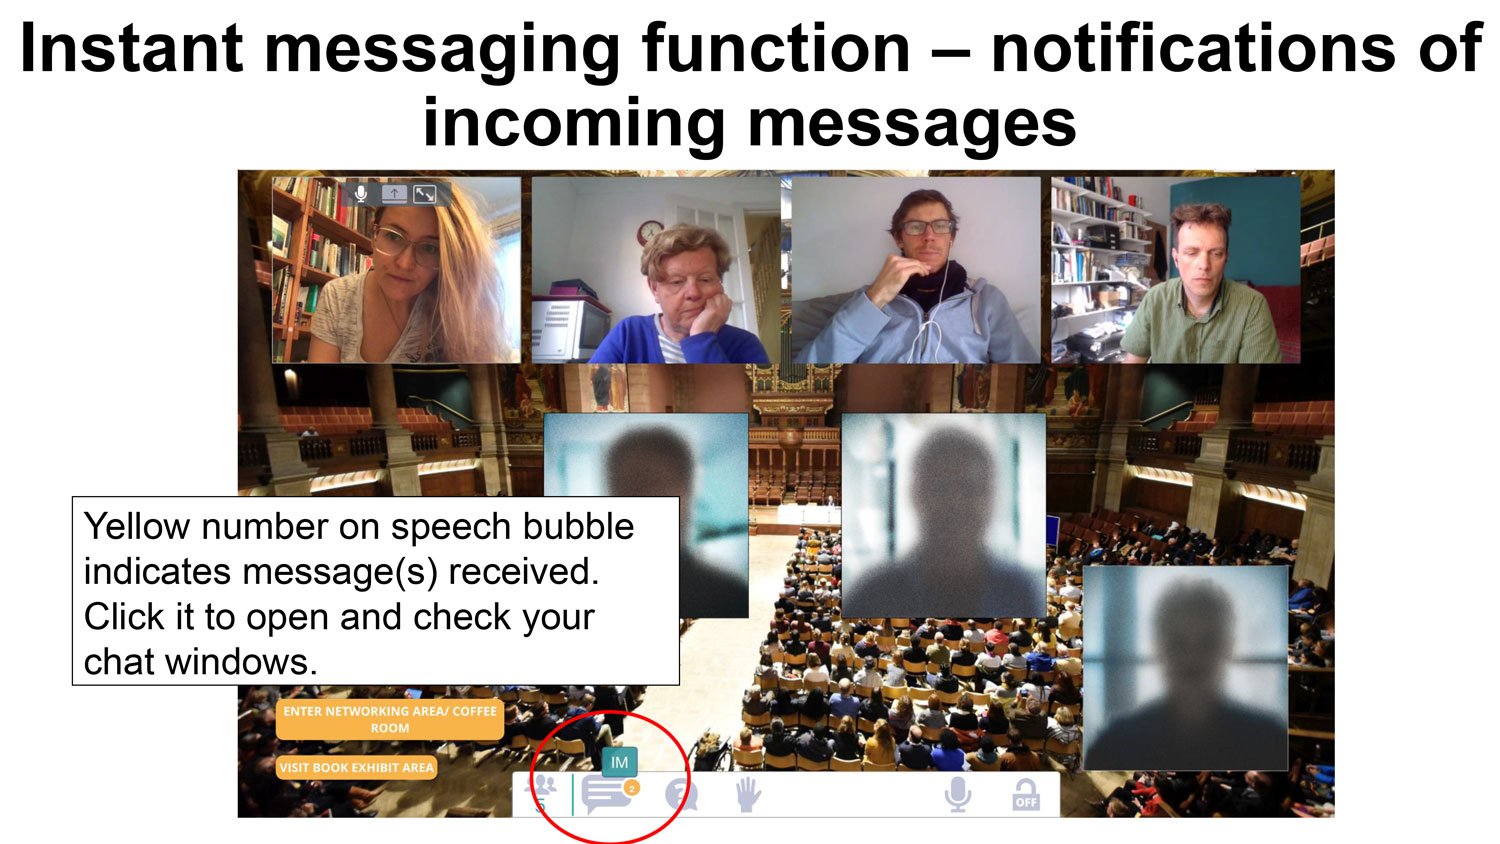
When the toolbar is contracted the notification of incoming messages is a discreet number on the speech bubble icon.
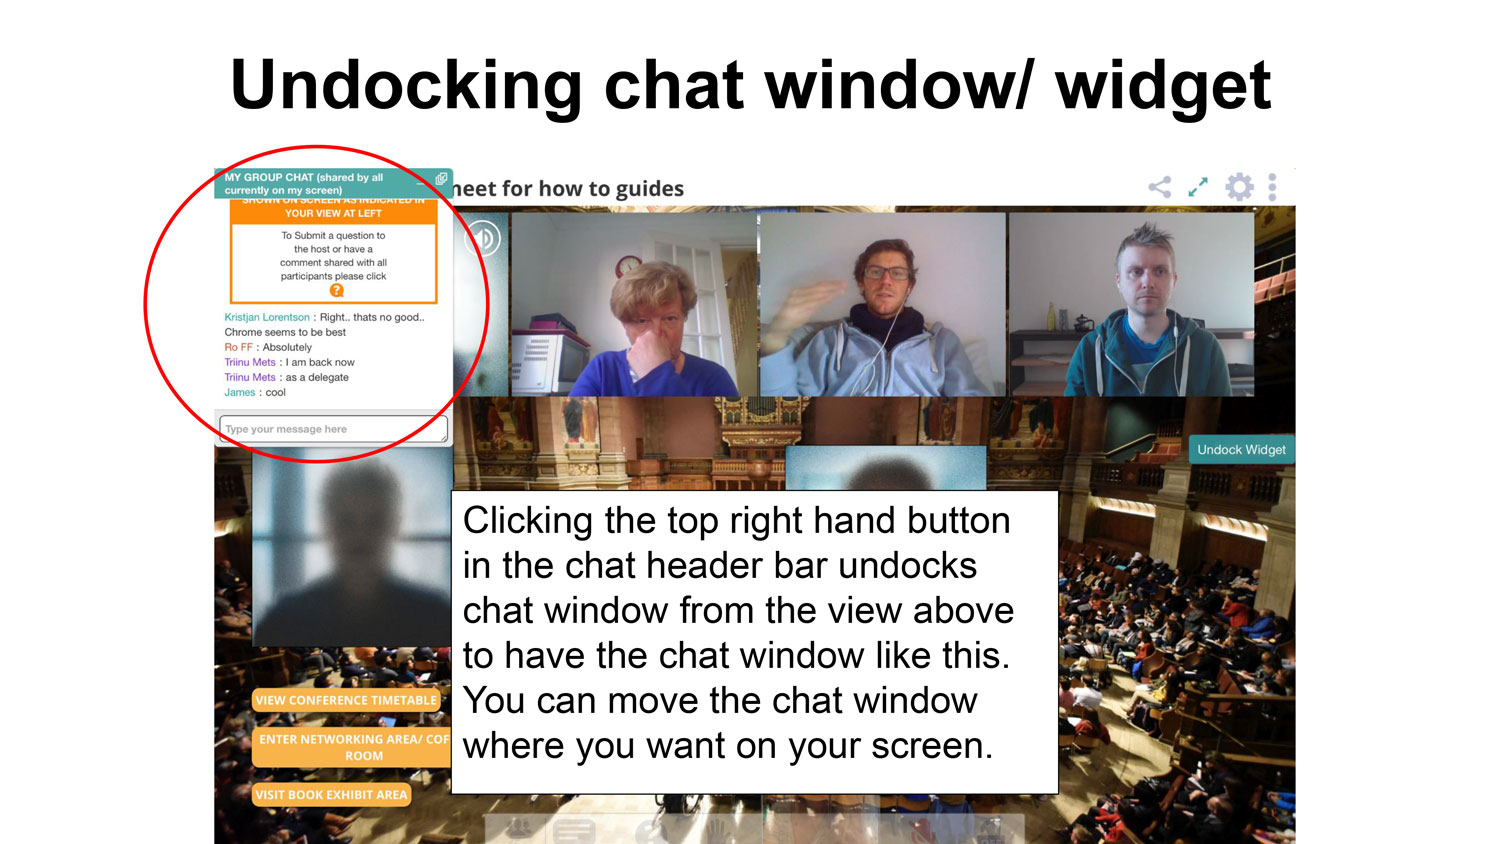
If expanding/contracting the toolbar to monitor chats is irritating, you can undock the chats.
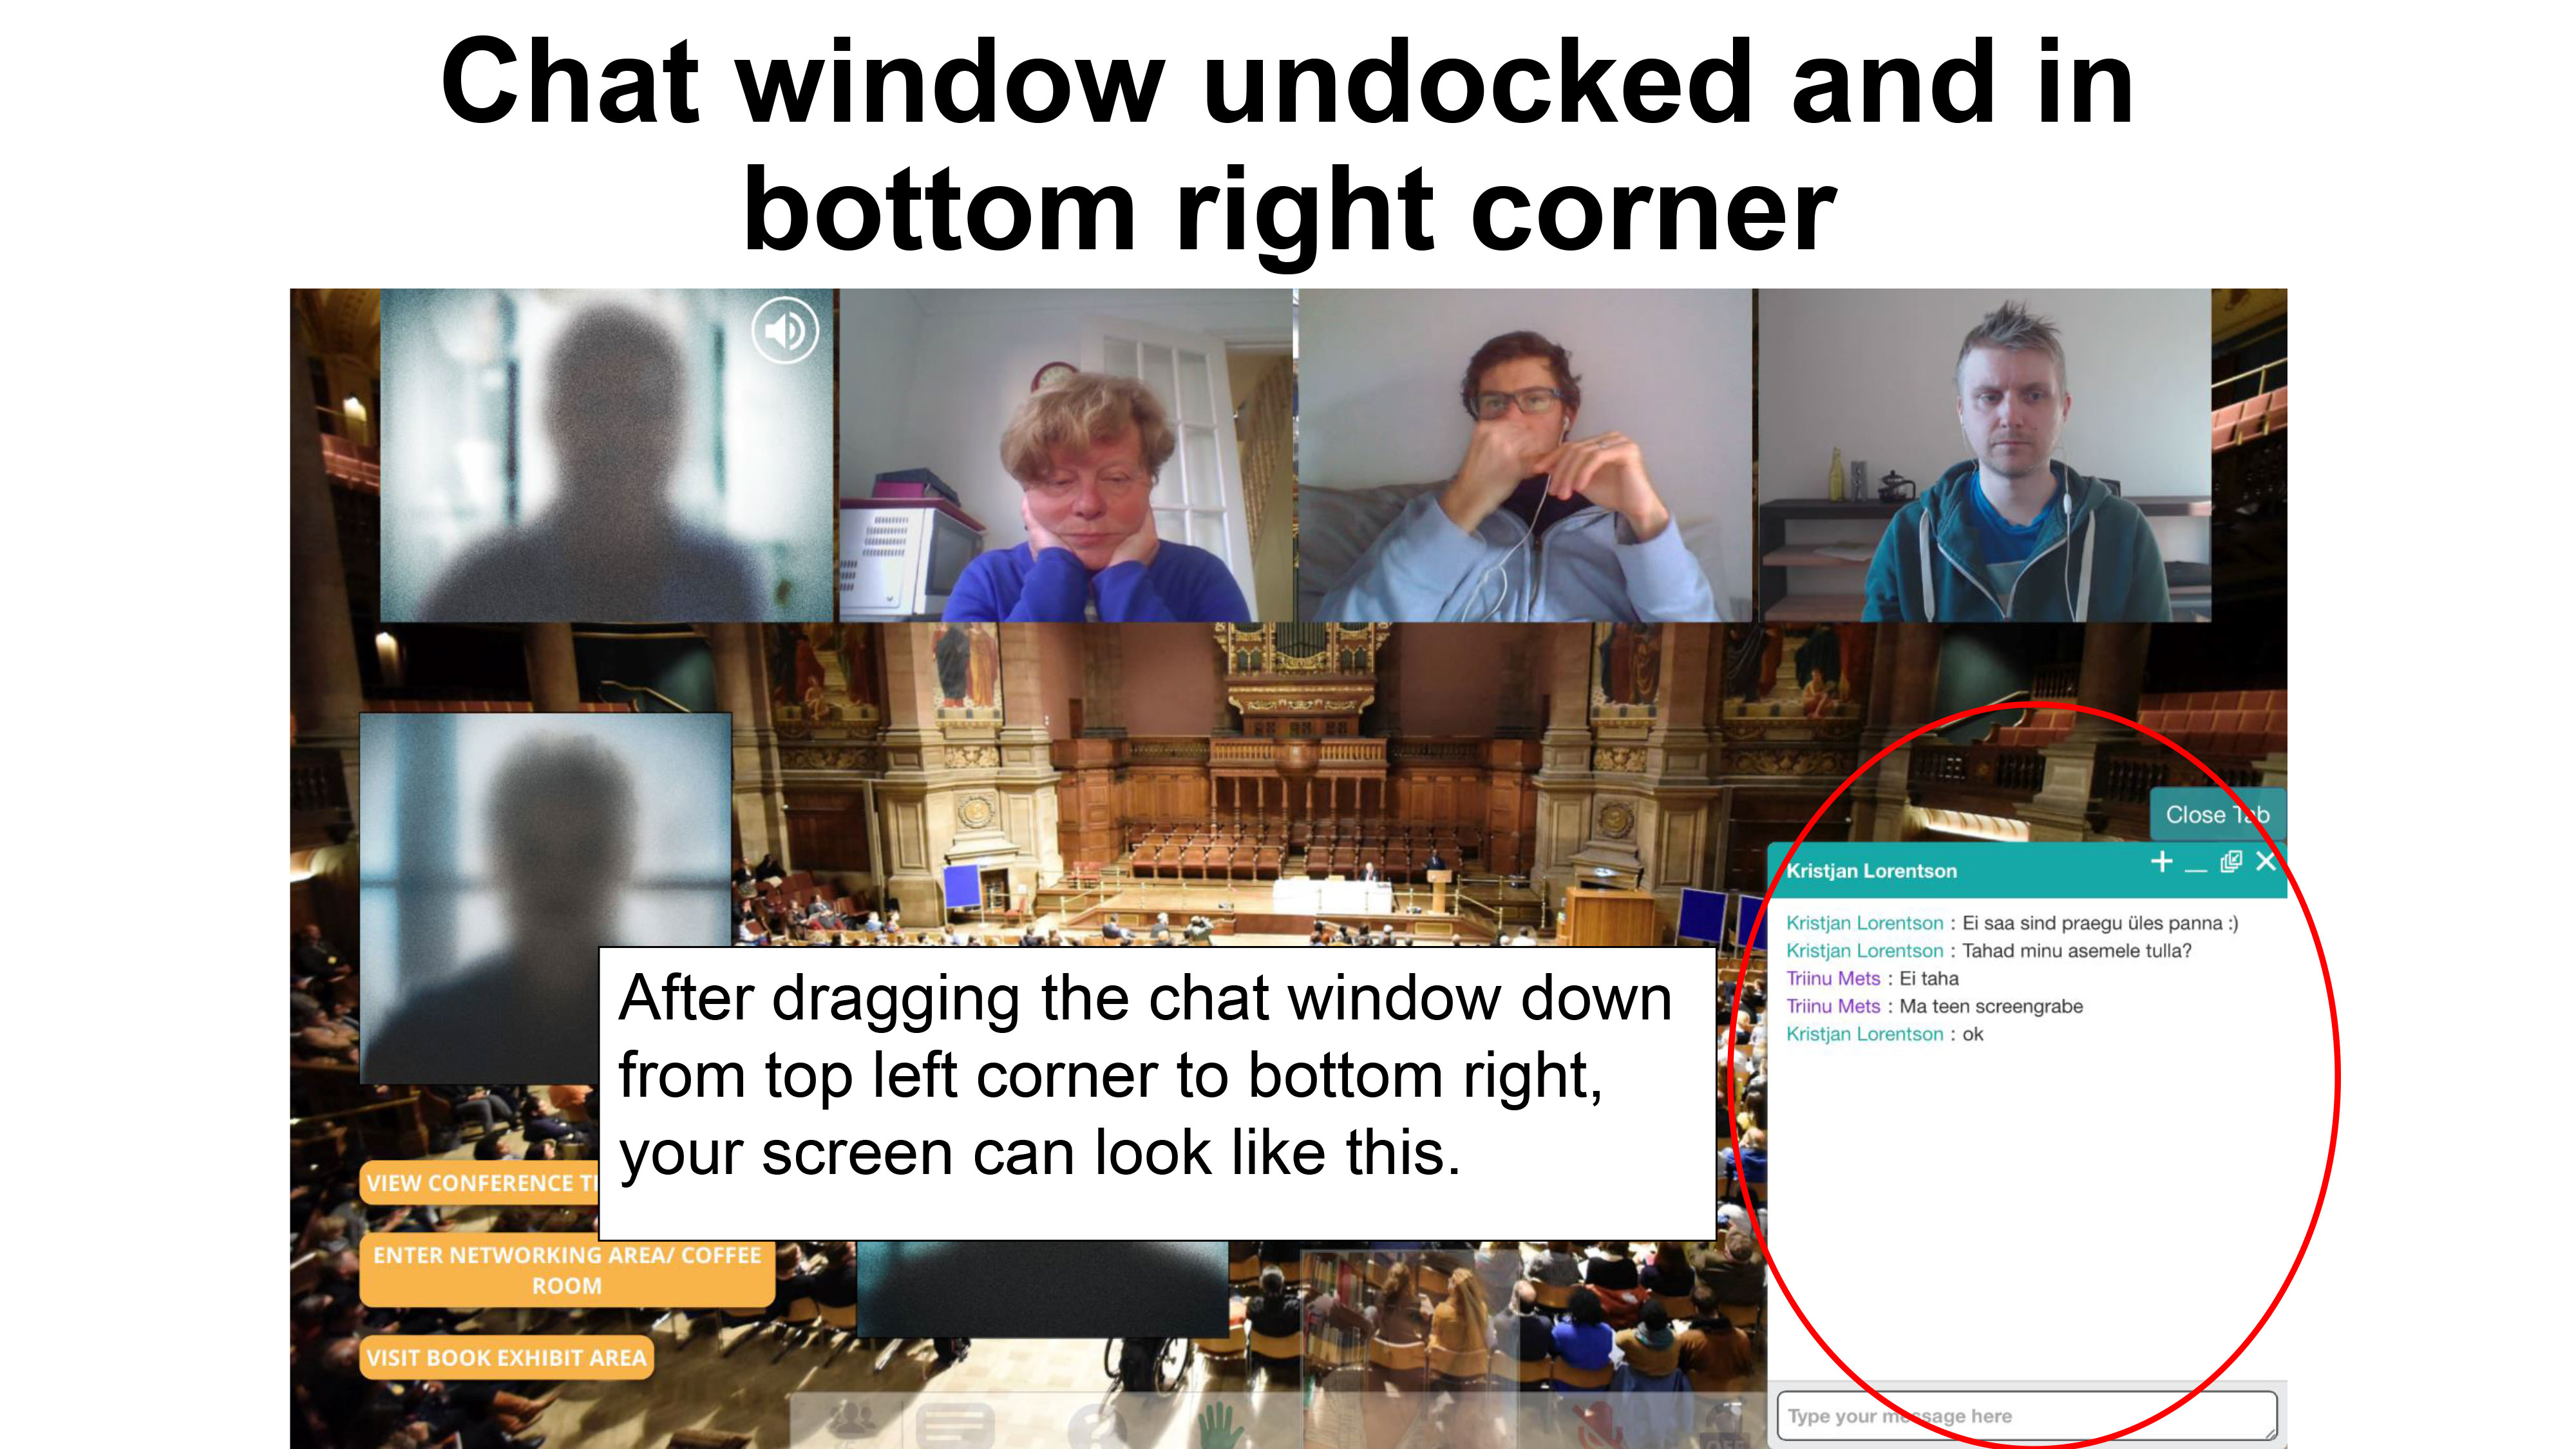
You can then move the chats around your browser tab.
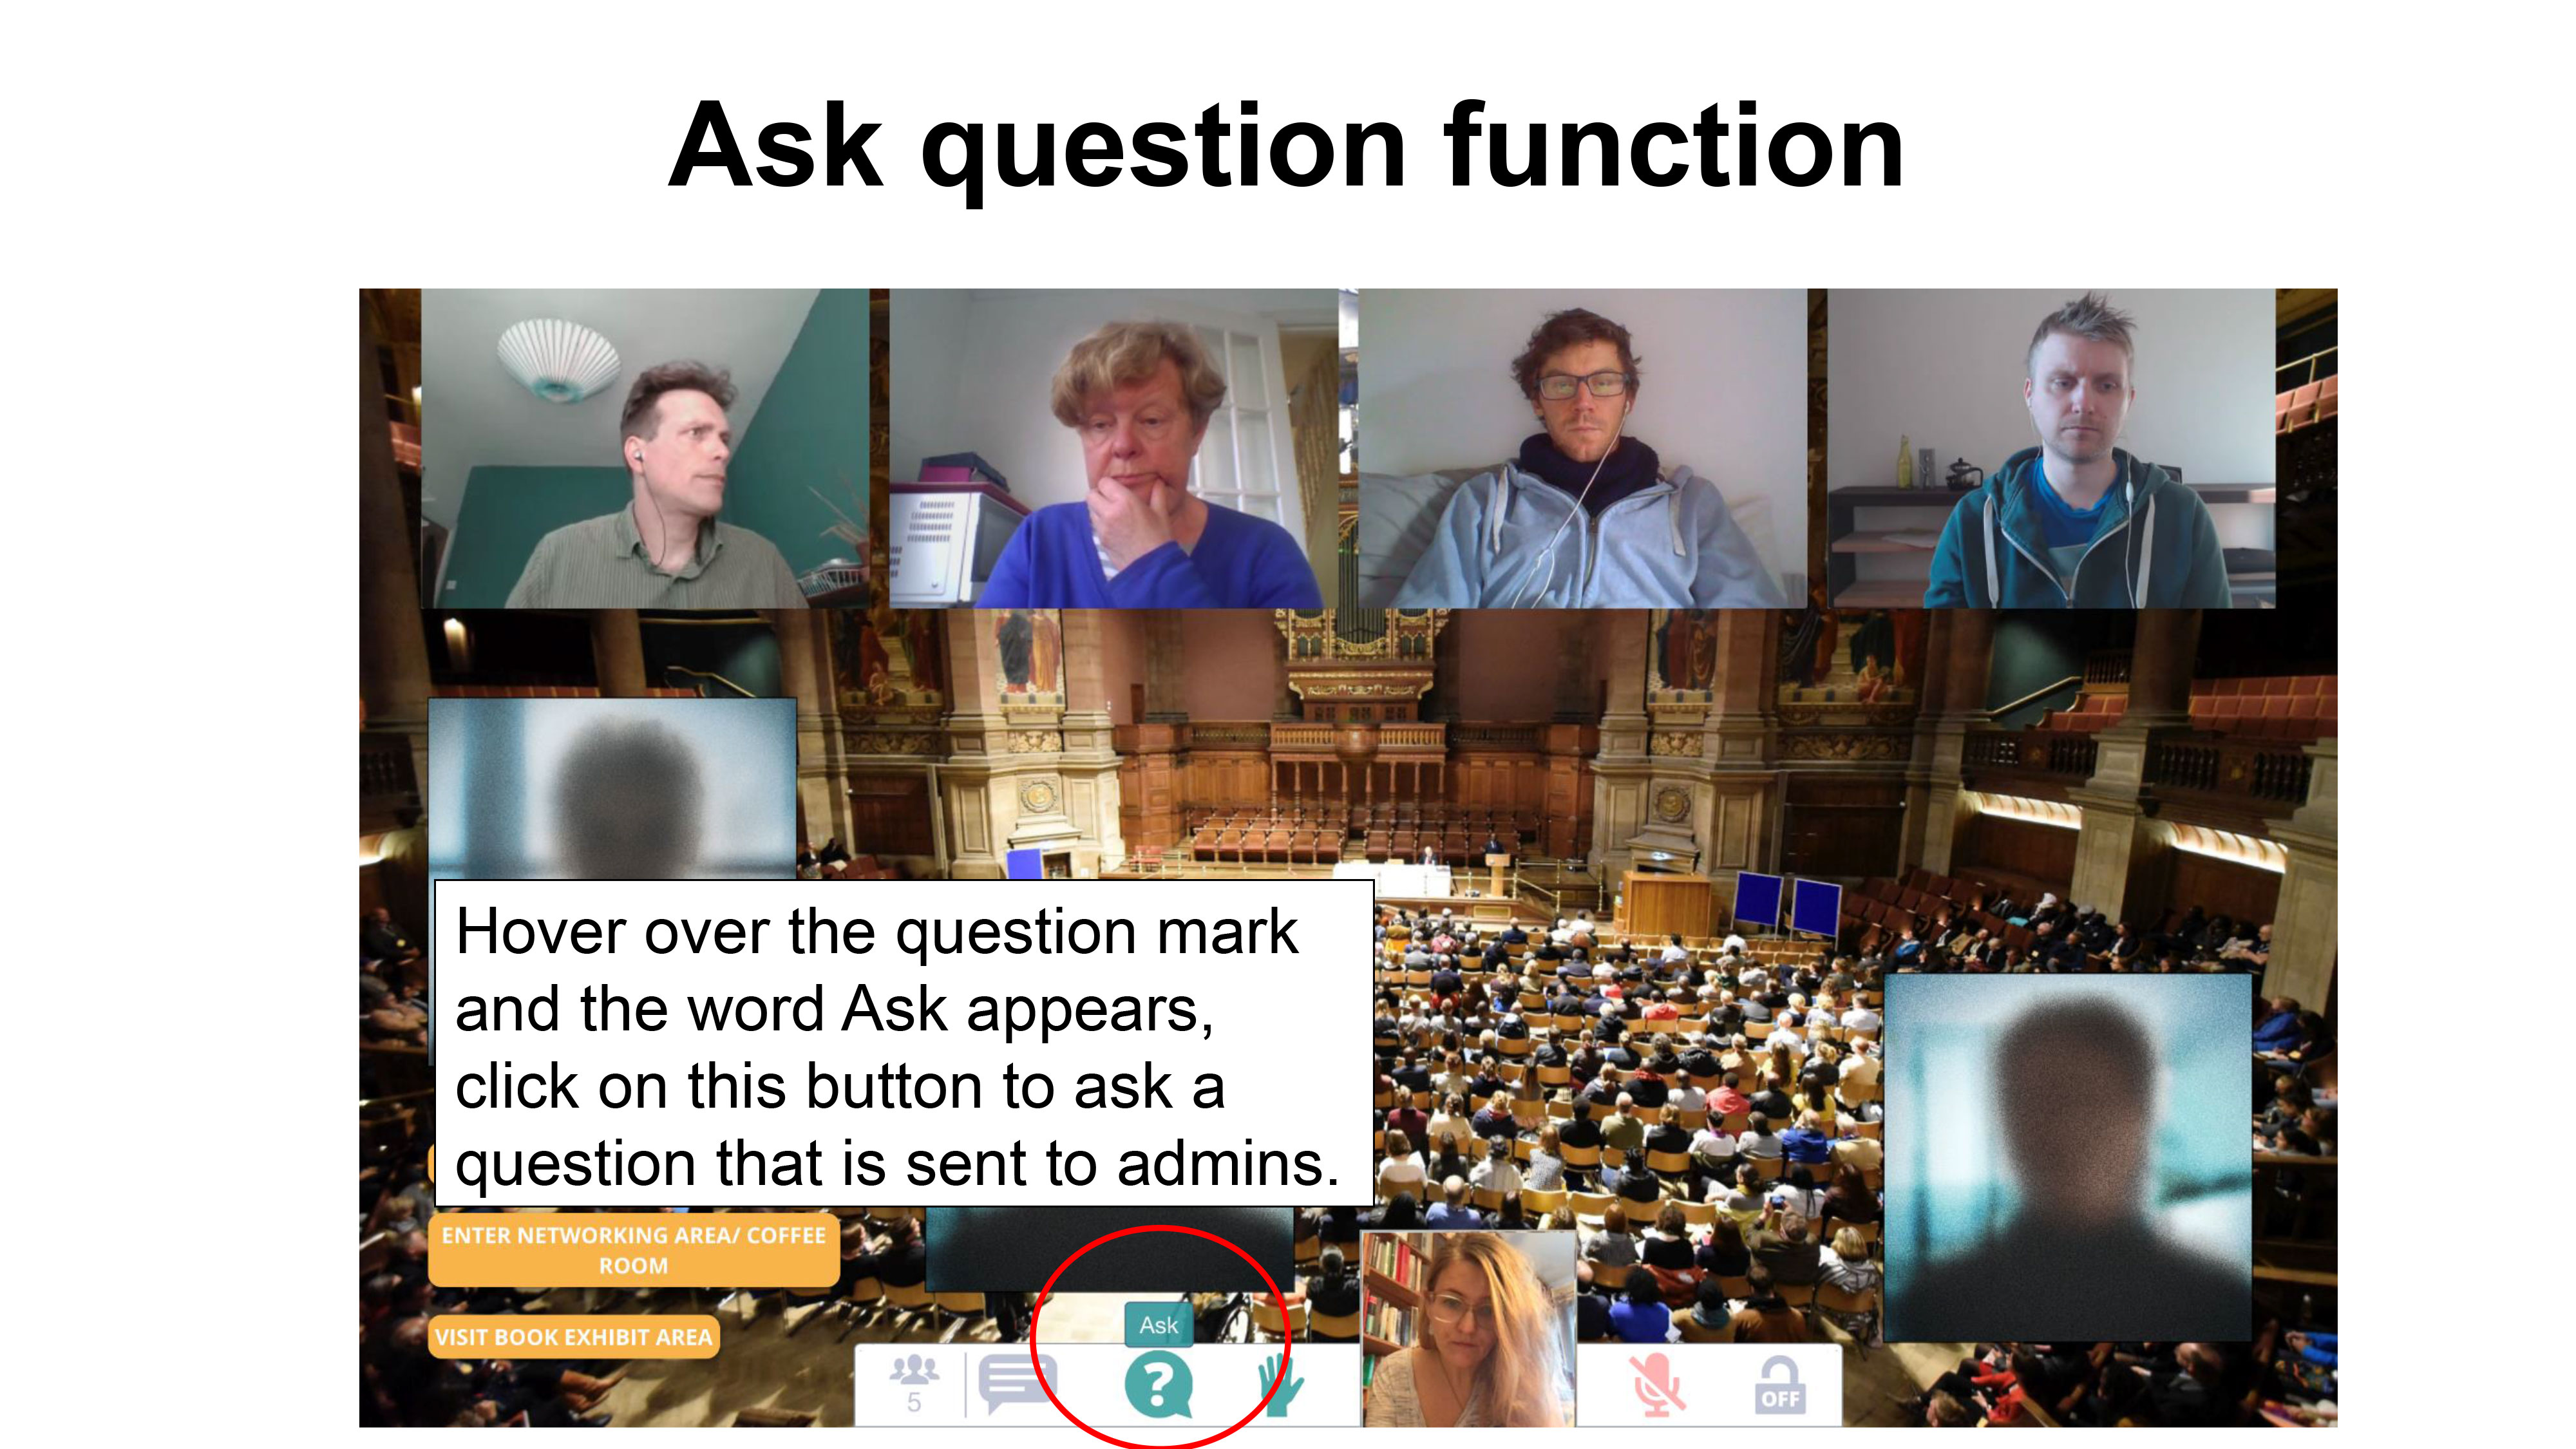
The question functionality is where you submit questions on panel content to the panelists. These can only be seen by the admins, who may subsequently publish these.
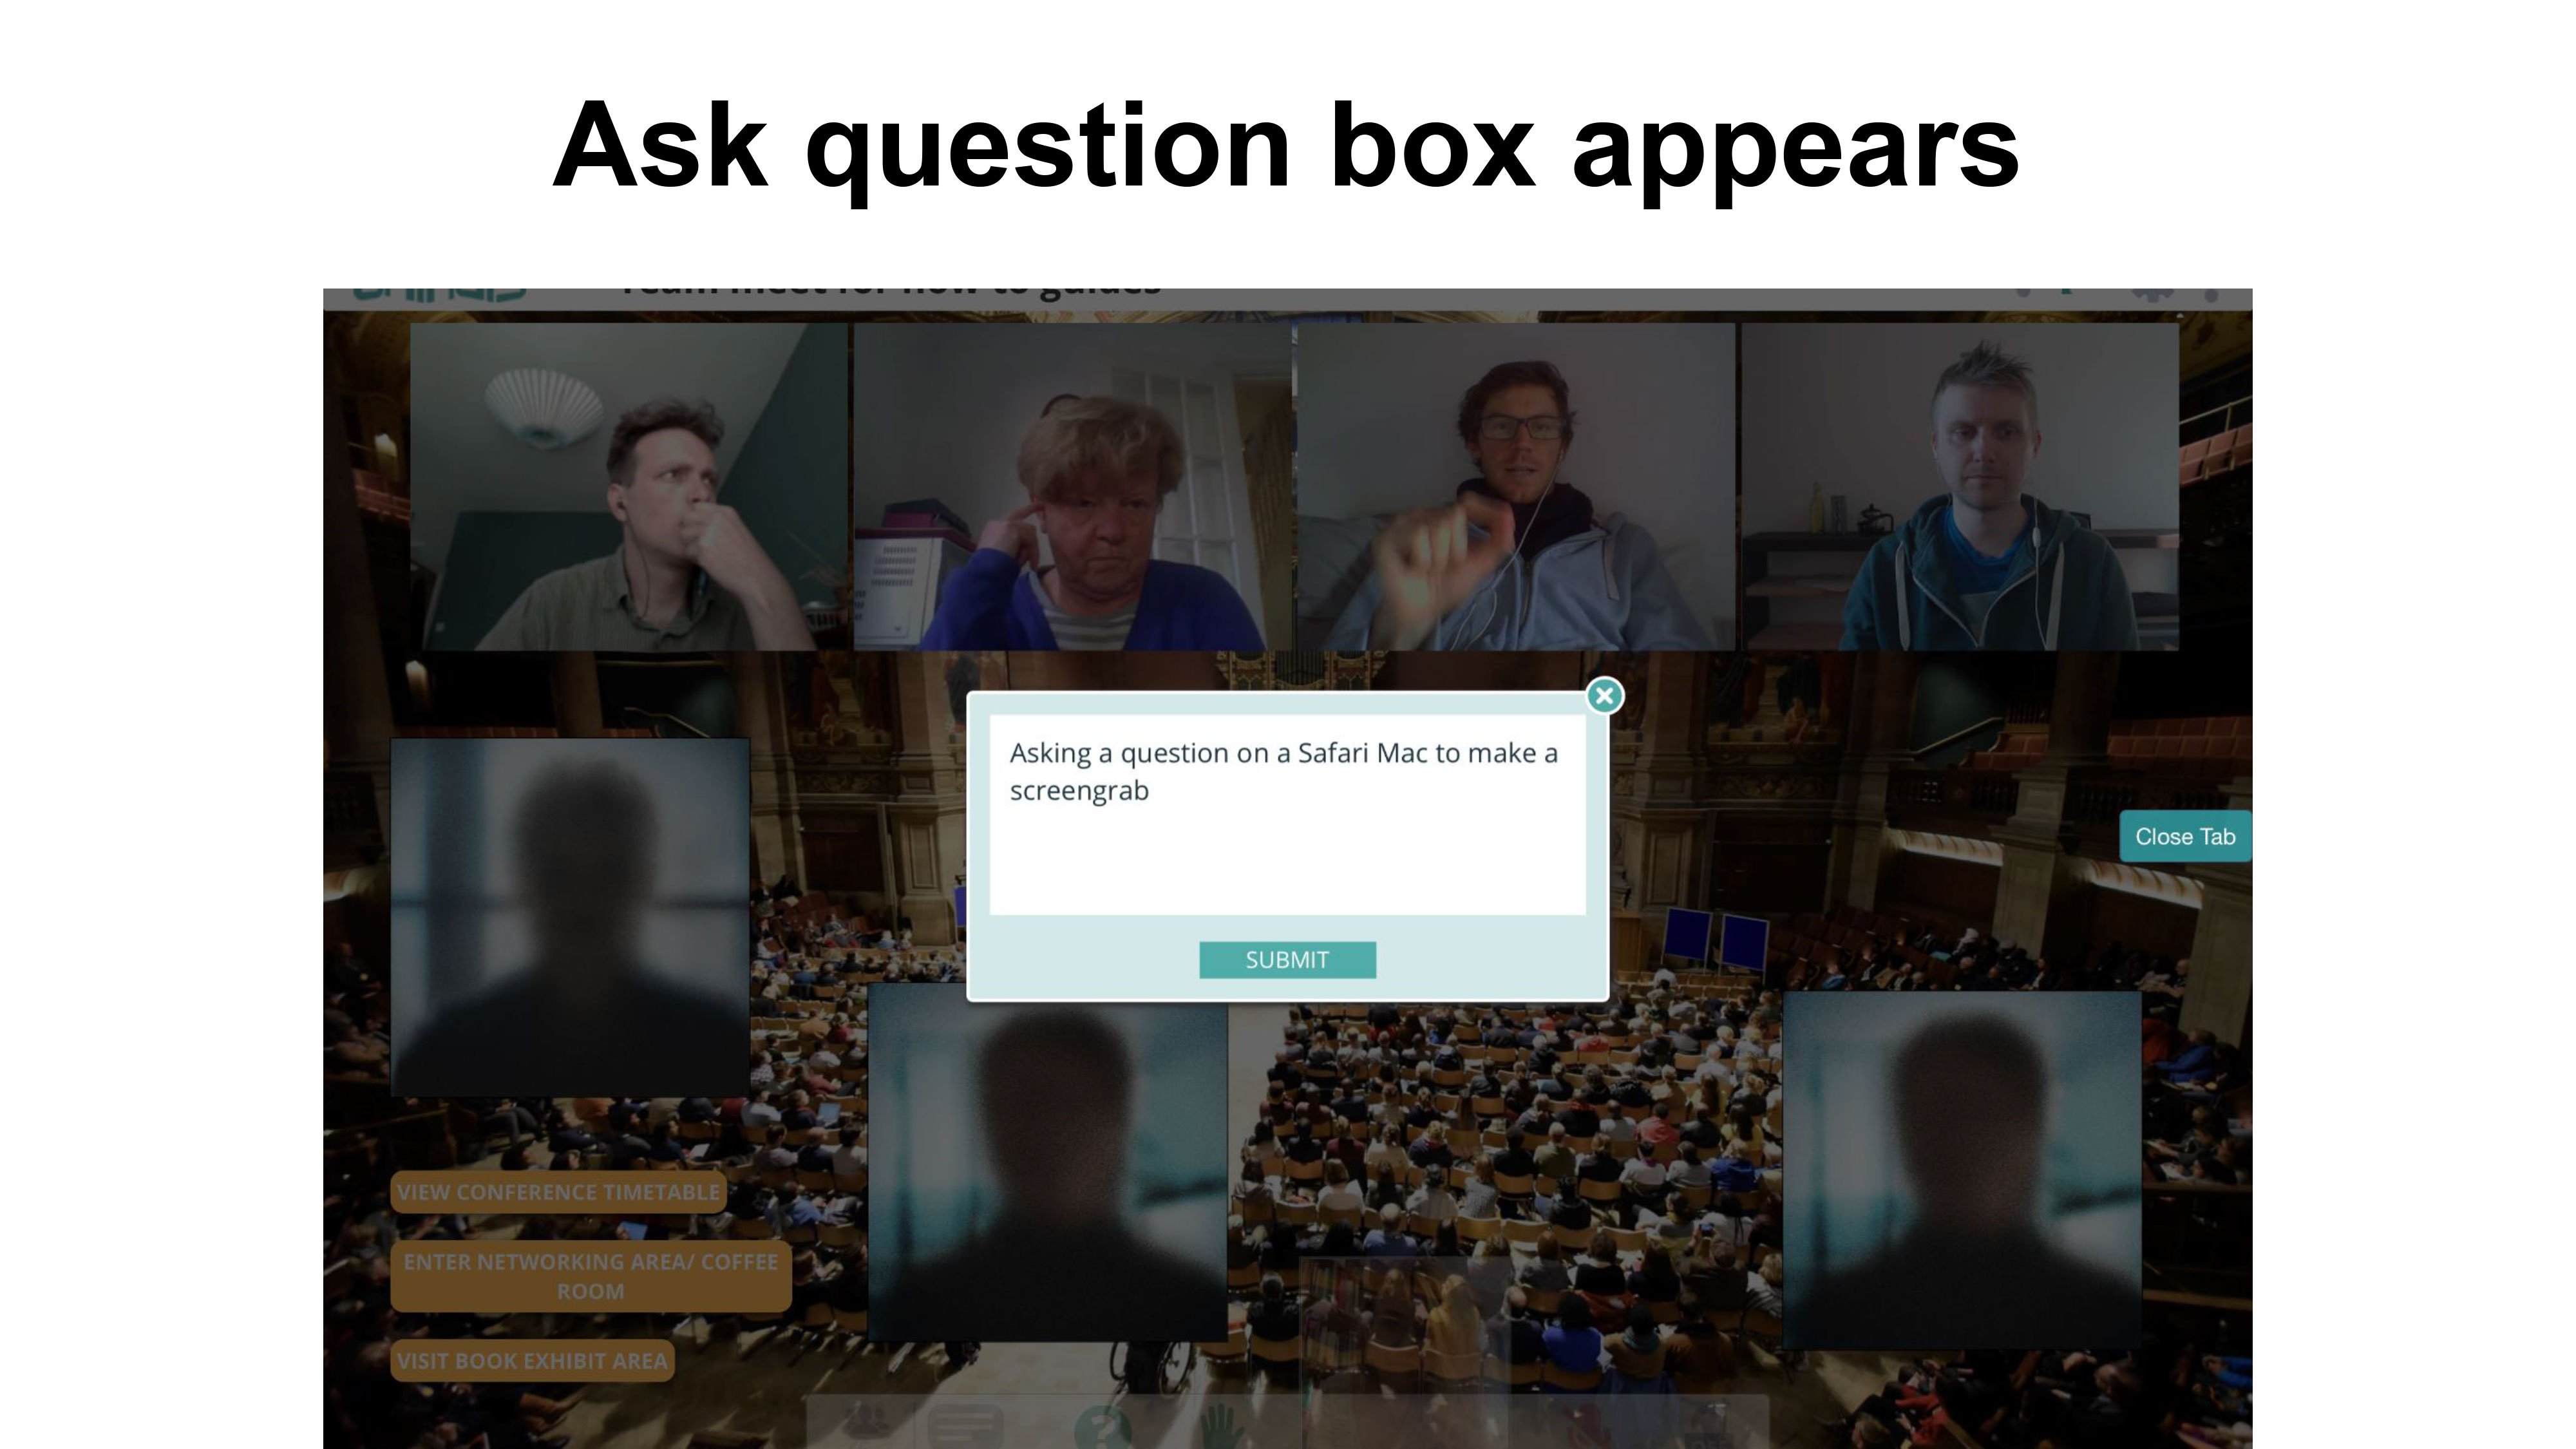
Having entered your question into the box and submitted it you can no longer see your question.
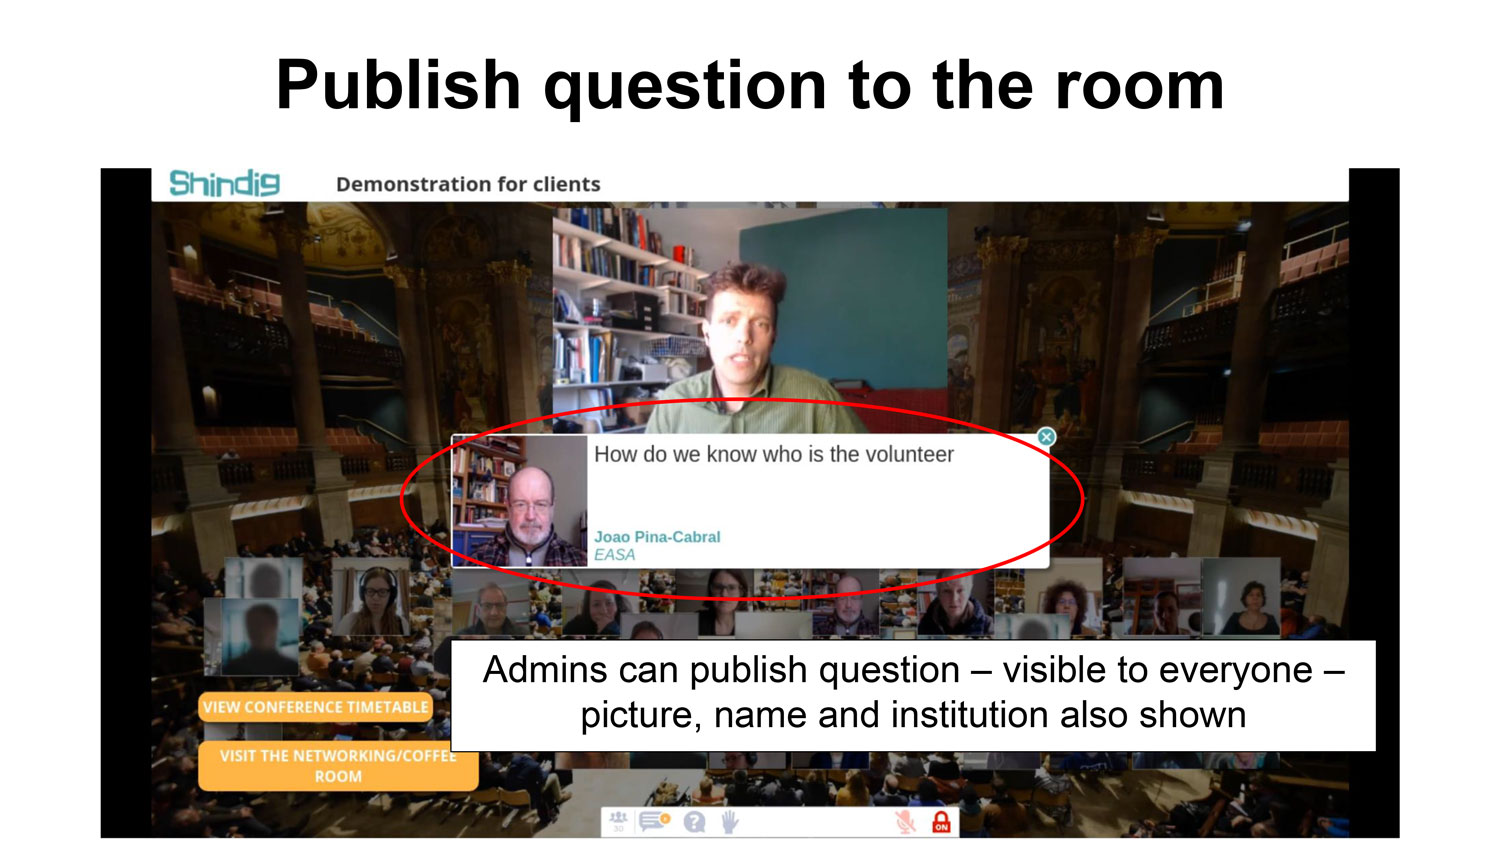
Published questions, along with a thumbnail of the questioner, can be seen for a few seconds by all in the room.
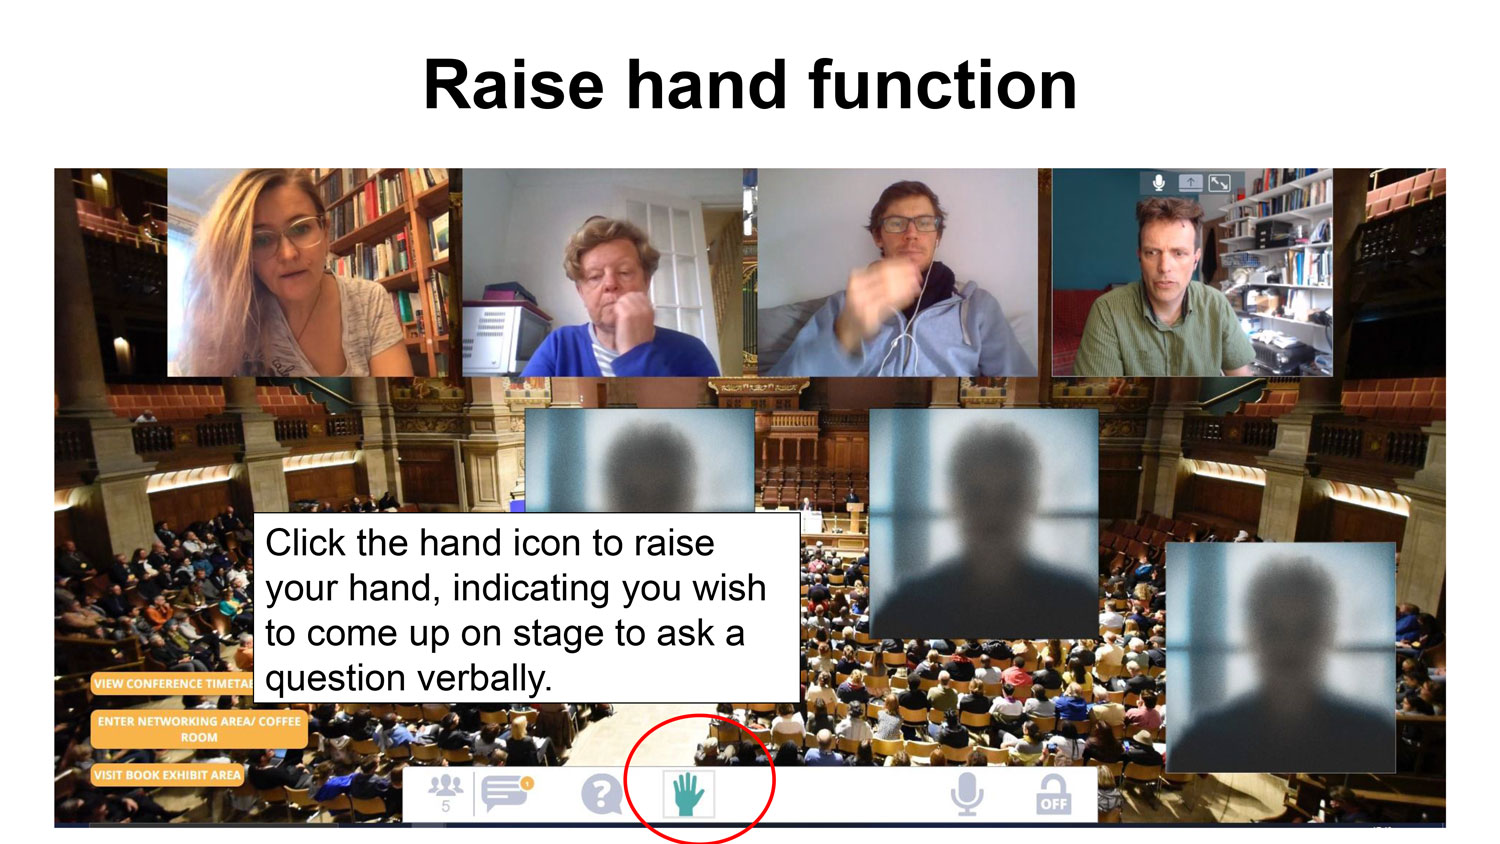
Raise your hand if you wish to be brought onto the stage to raise or answer (if a panelist) a question.
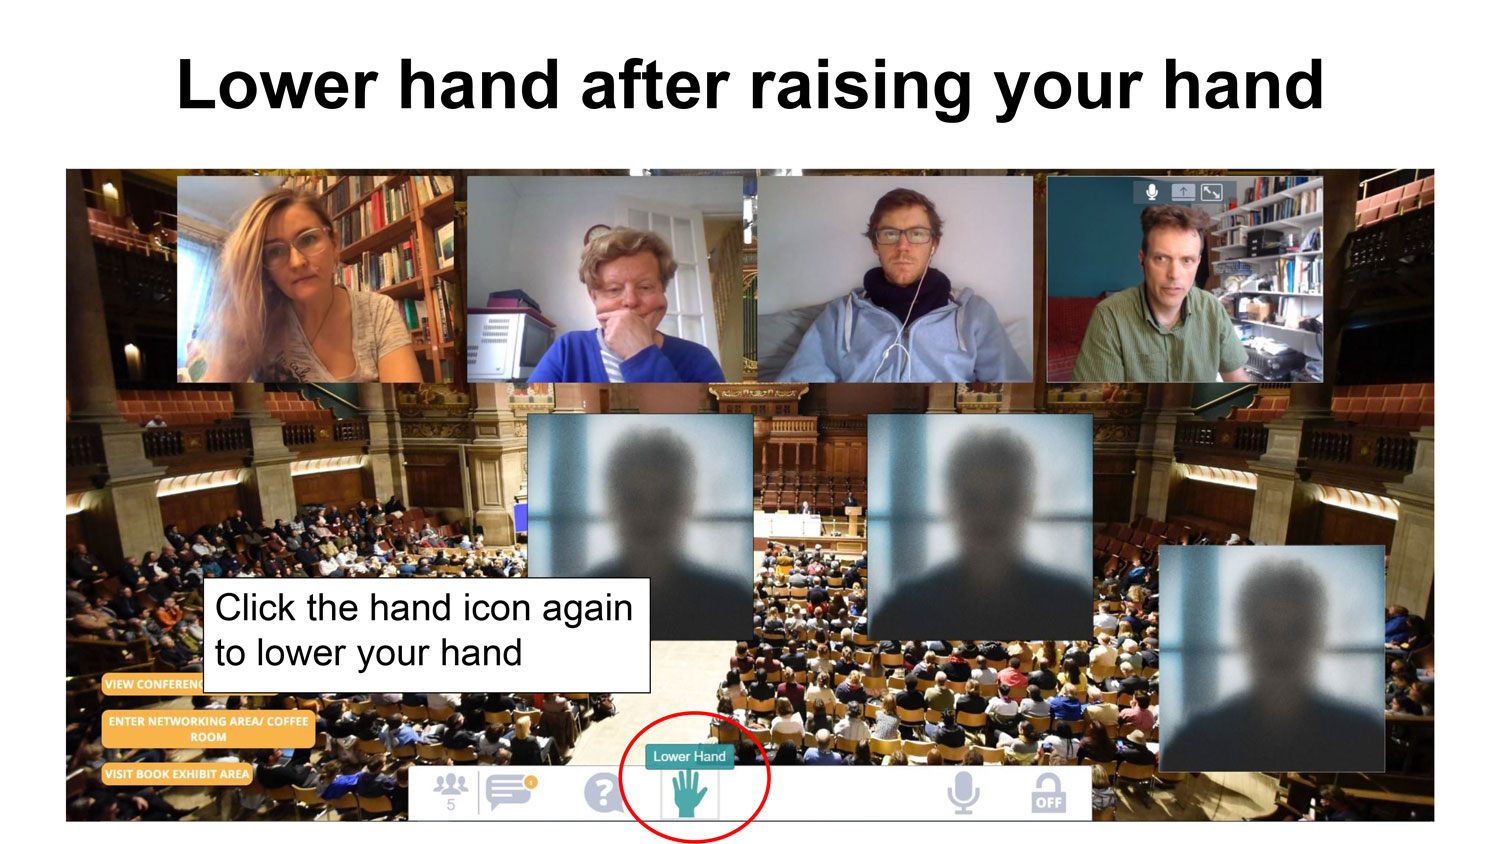
The raise/lower hand icon is a toggle.
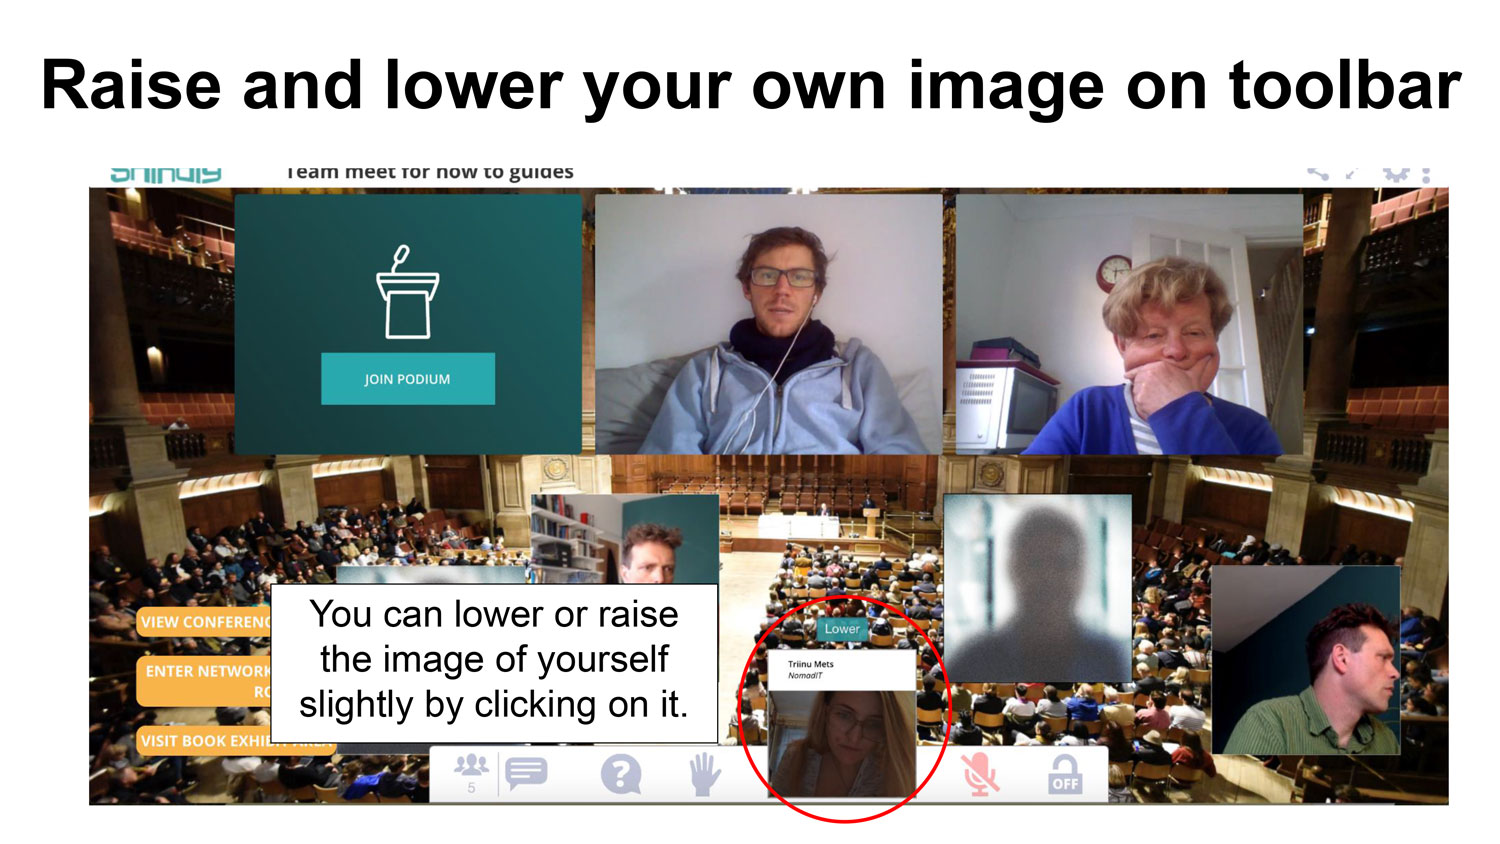
Do not worry: your thumbnail image does not cover a toolbar icon.
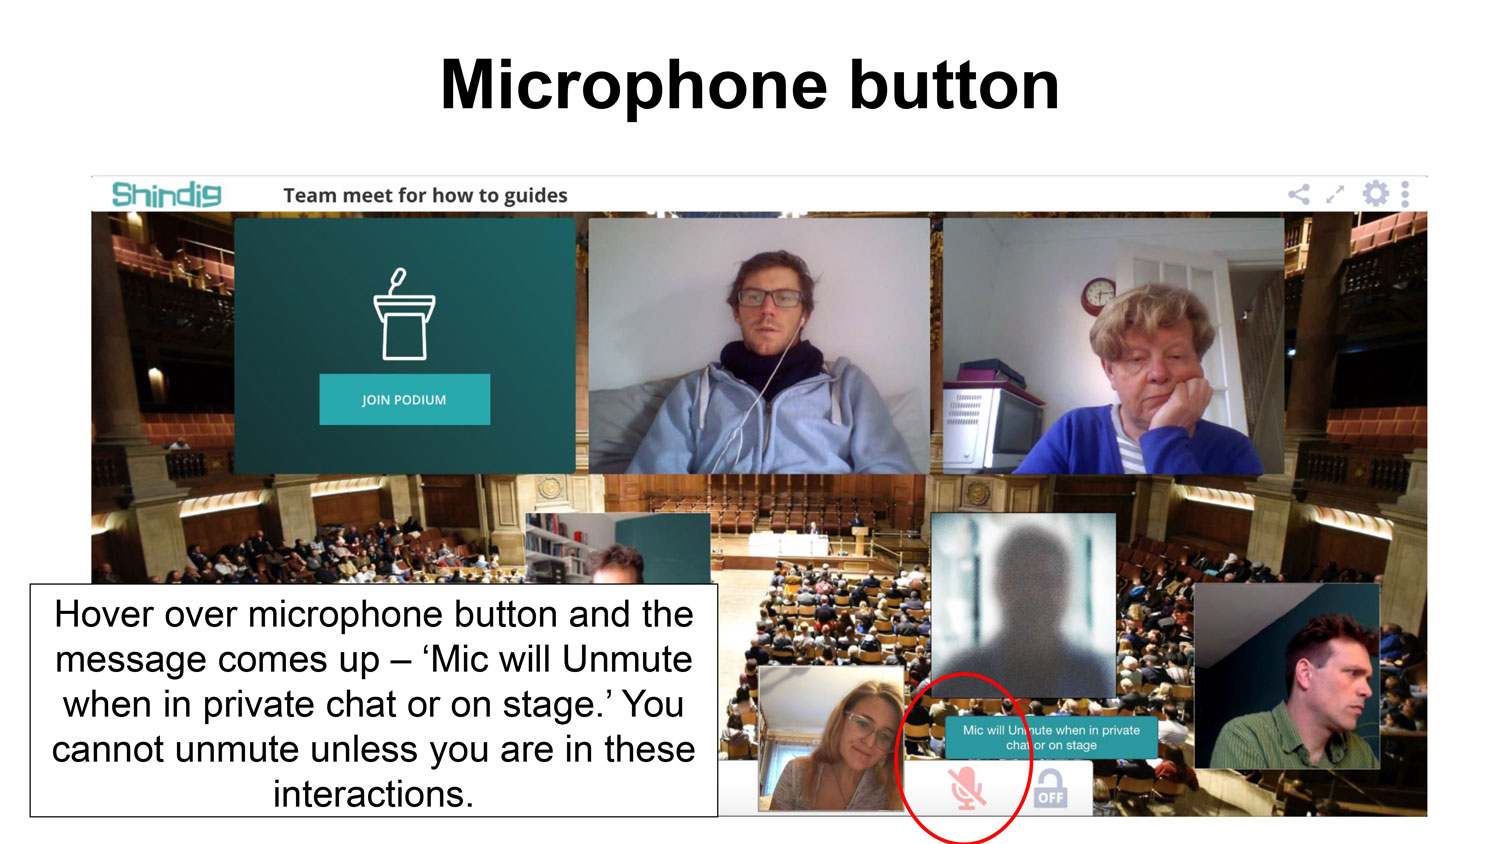
The mute toggle button is for when in video chats or on stage.
7. Stage area
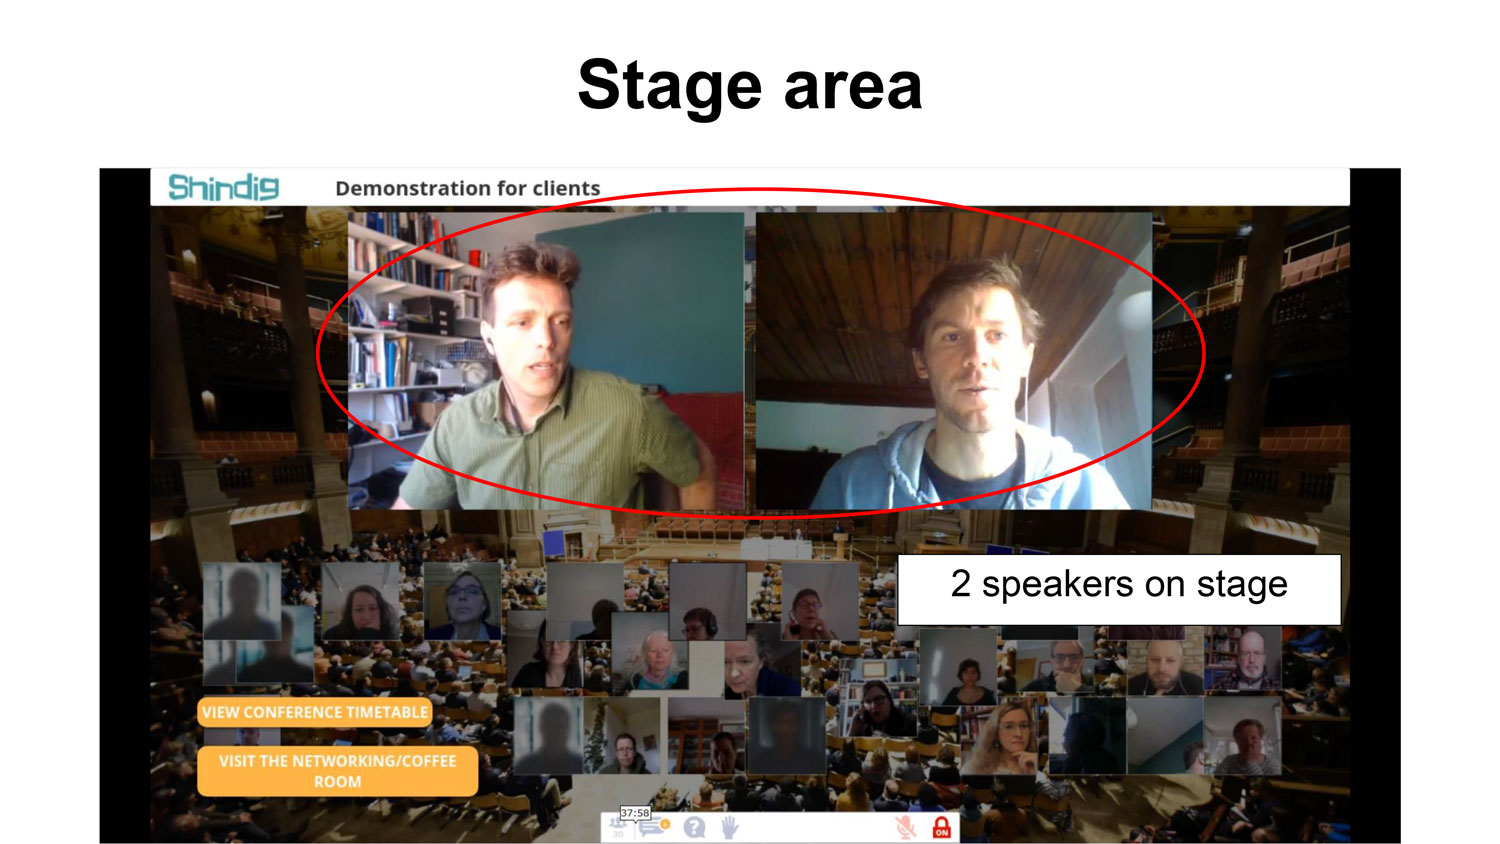
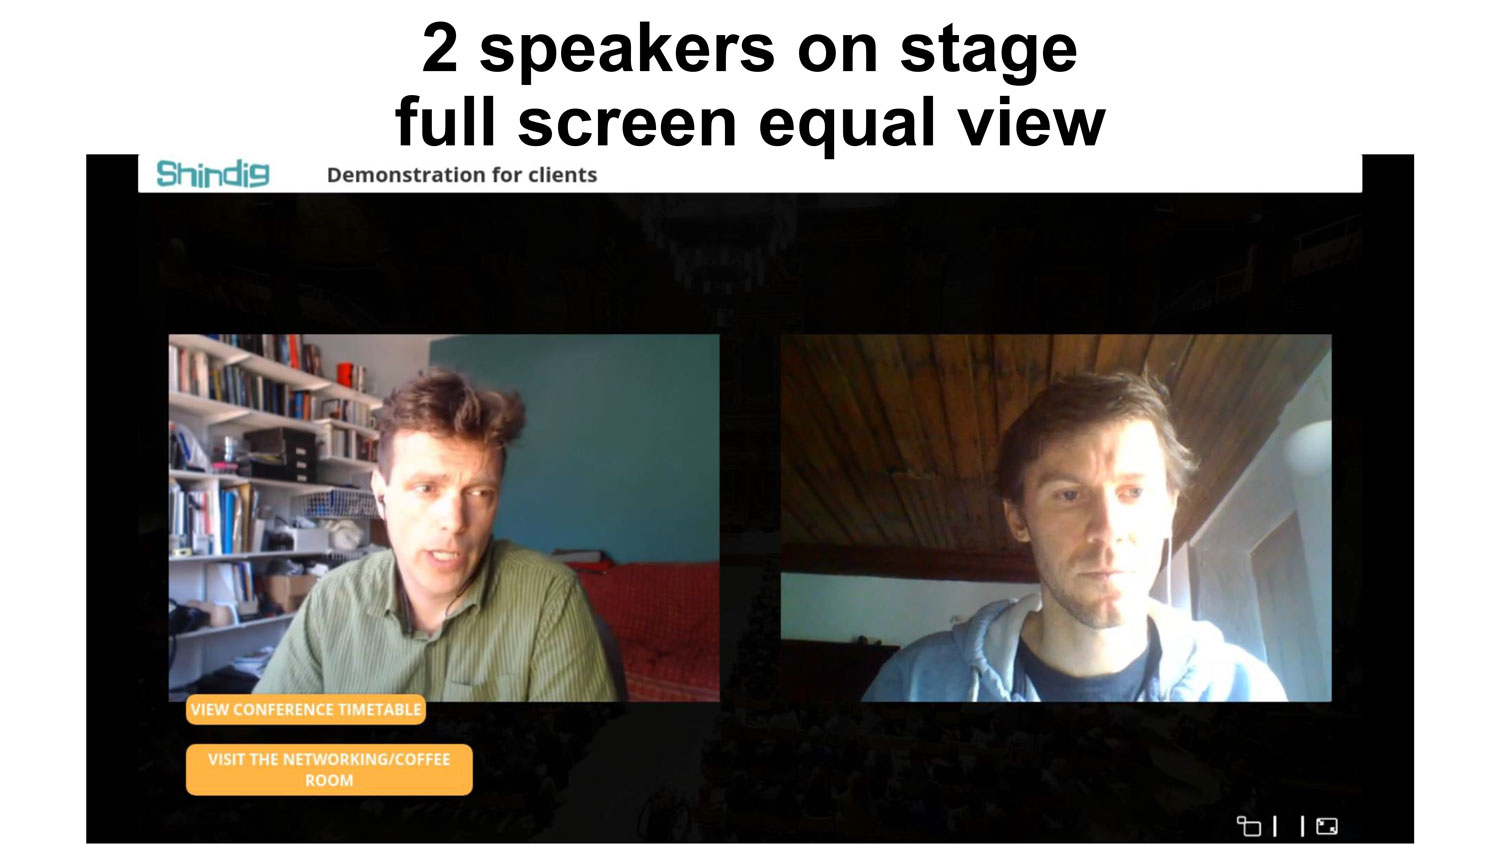
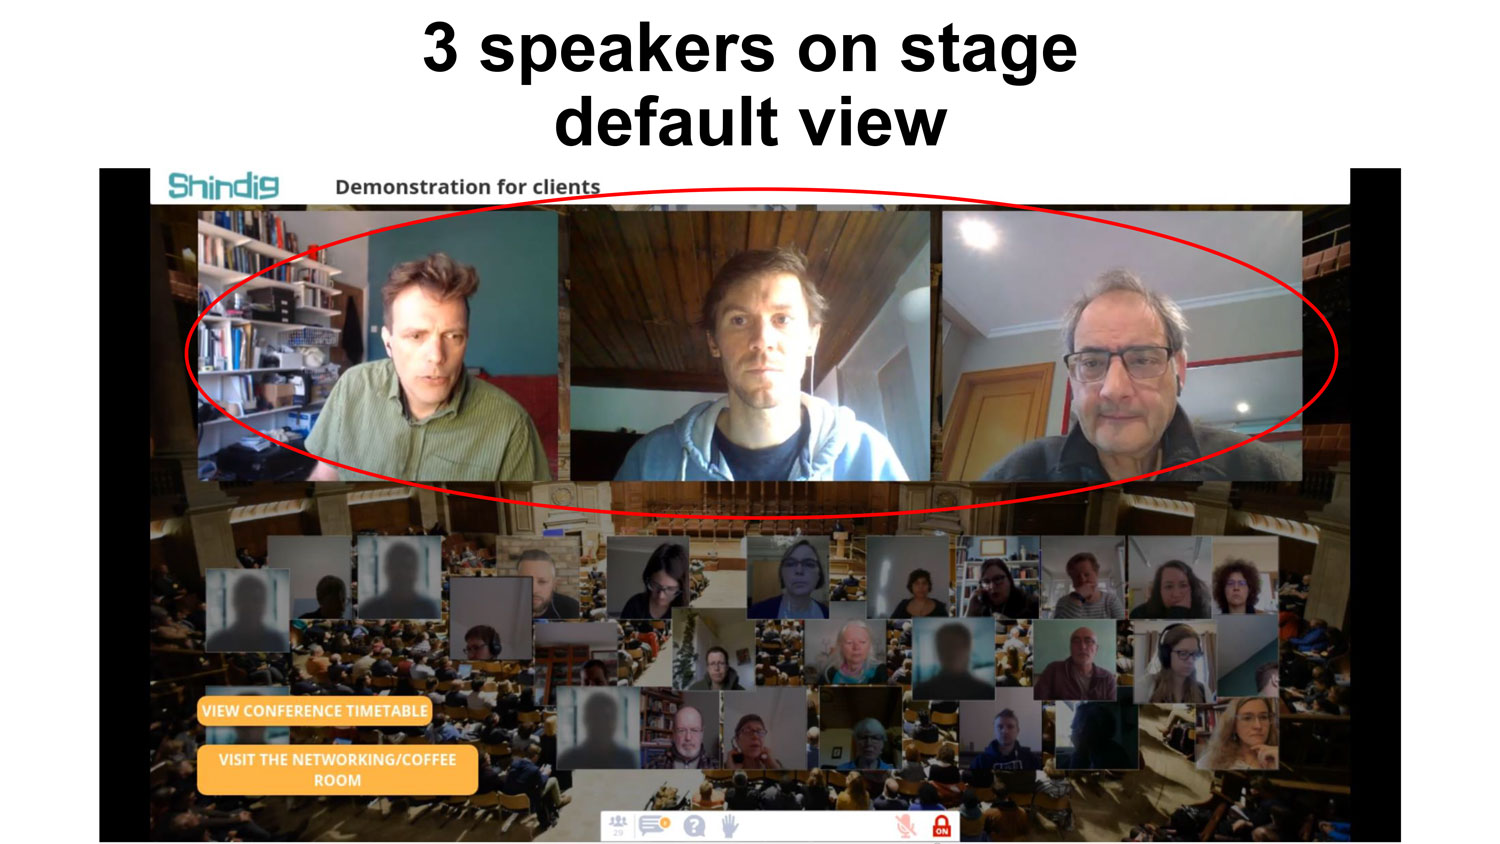
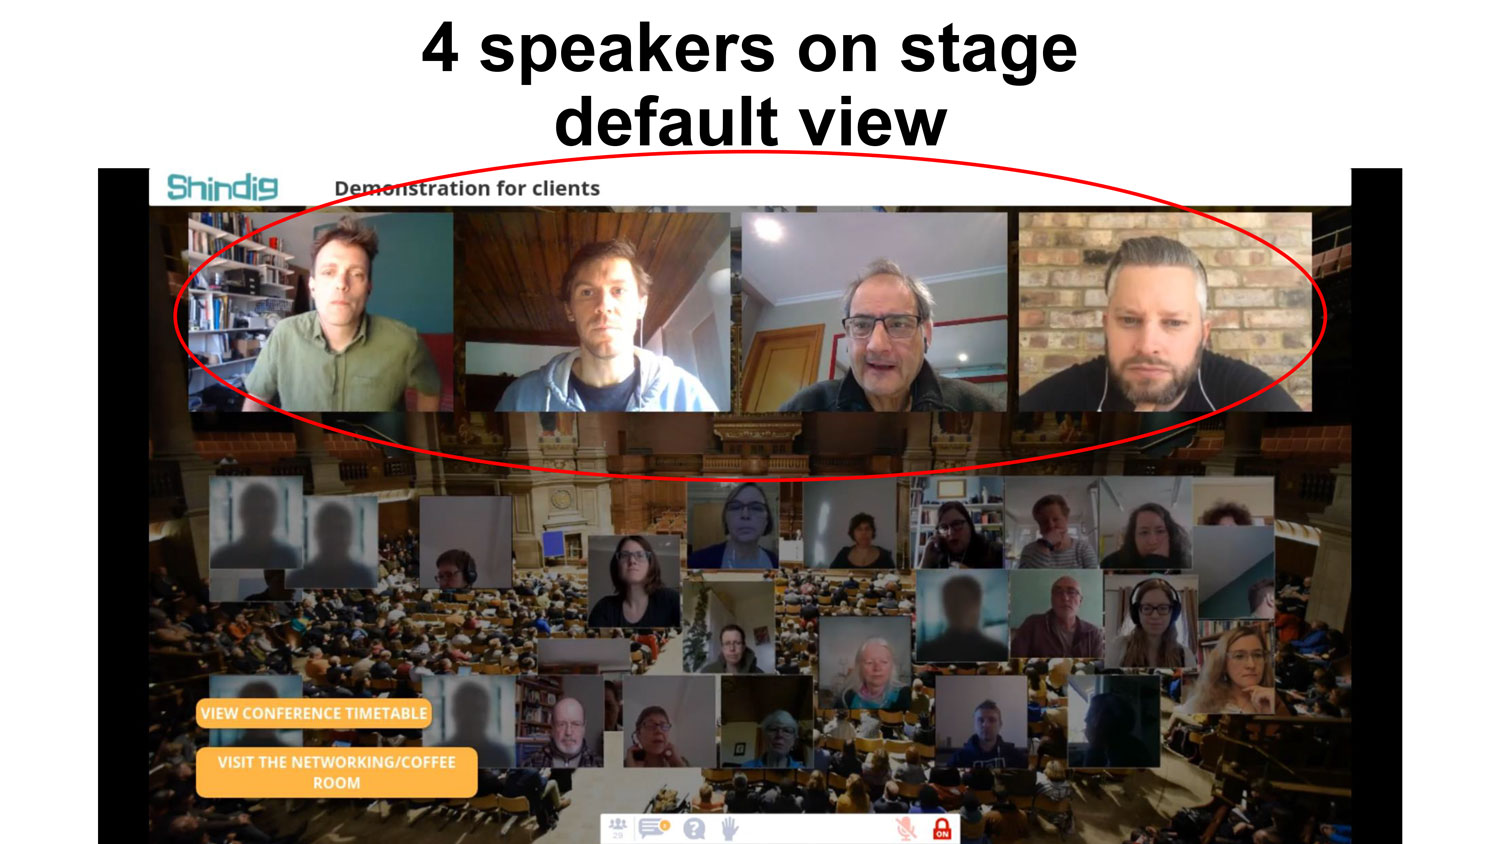
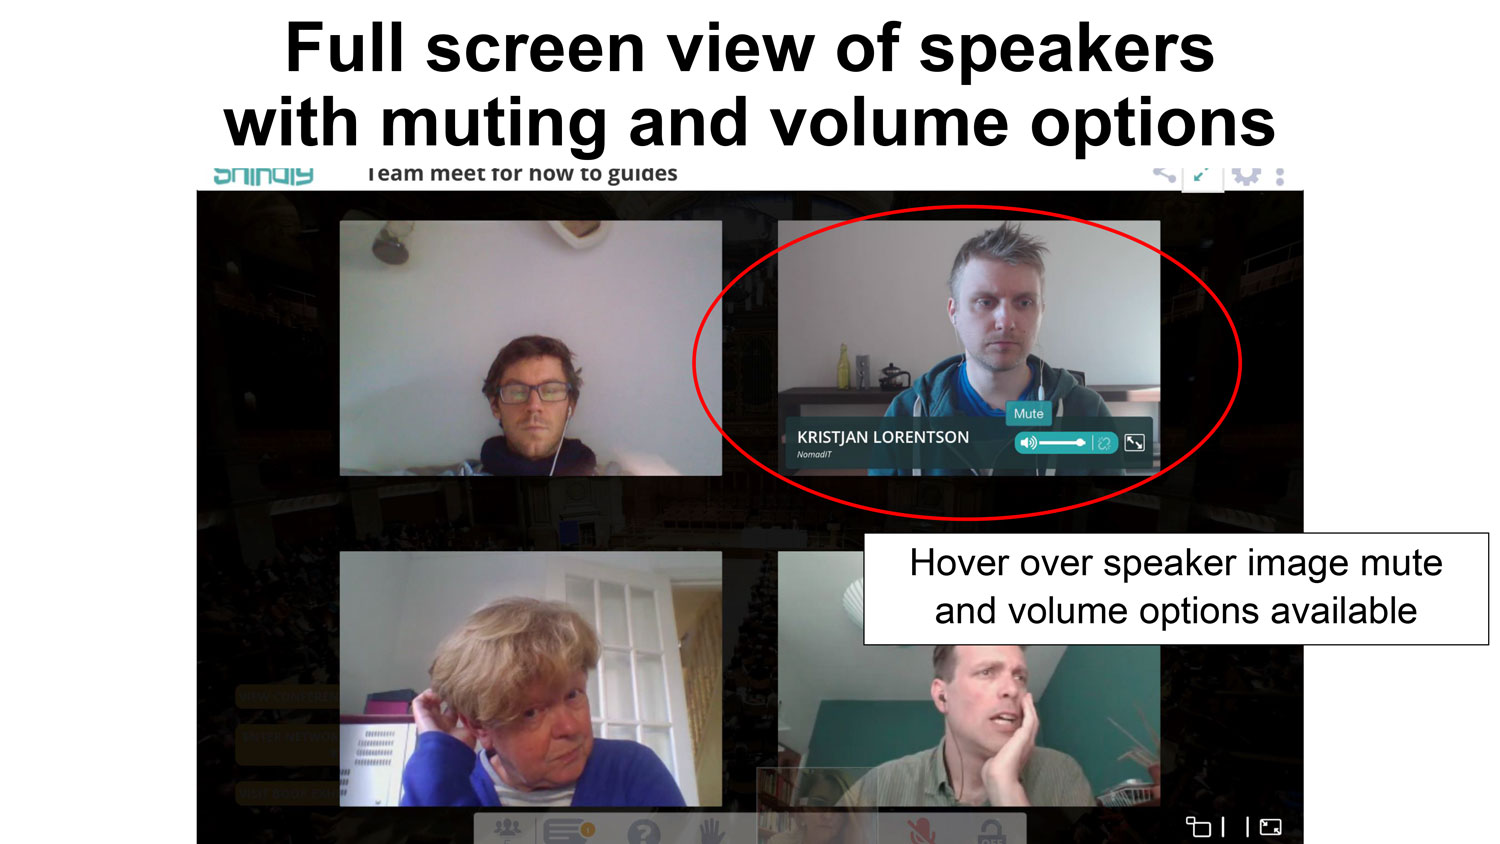
Attendees can alter the volume/mute each podium independently, if required.
8. Panel formats
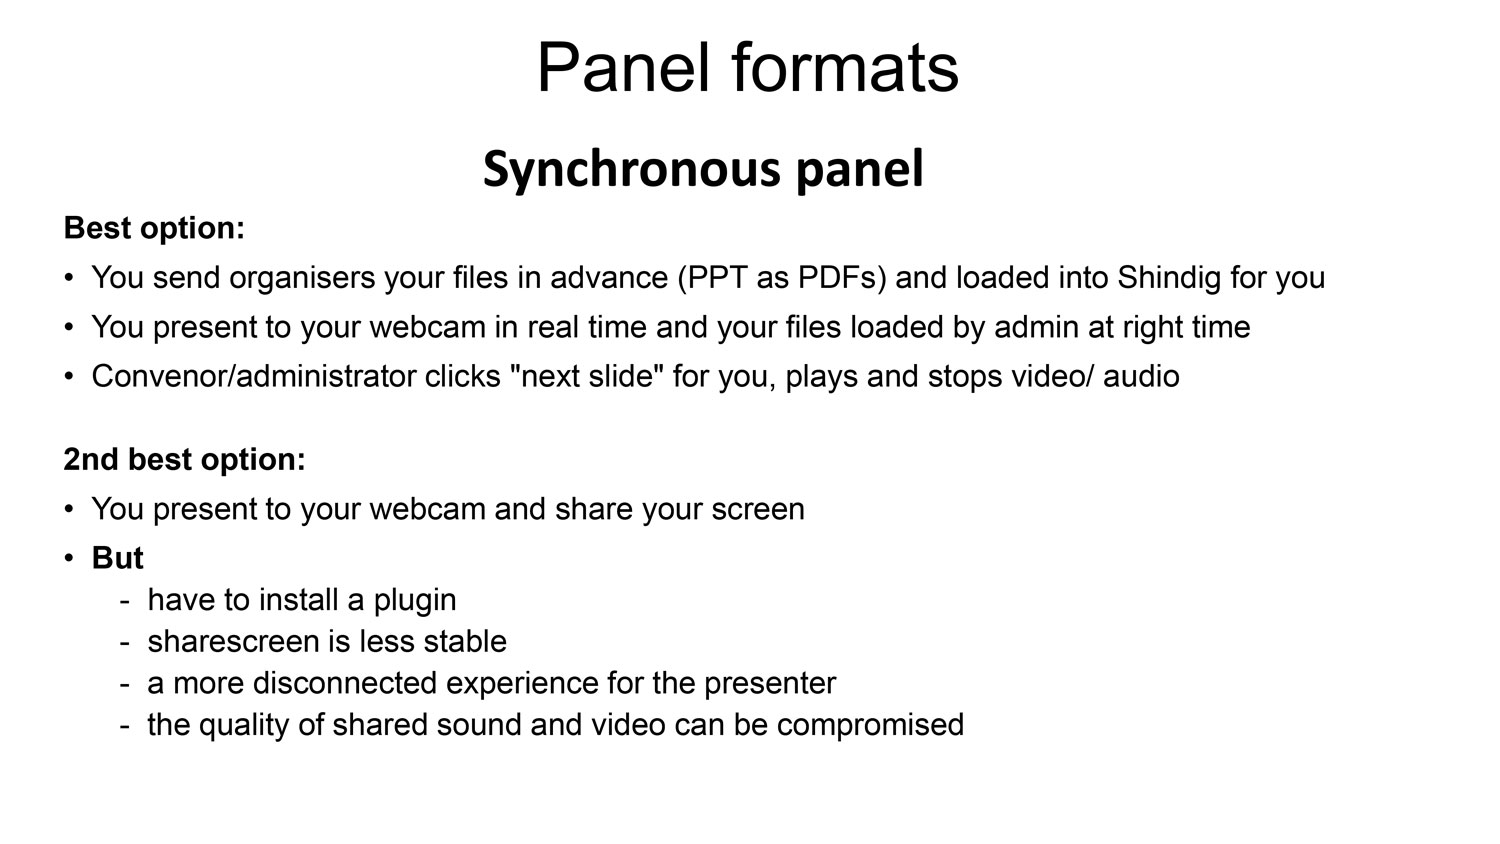
Synchronous panels are closest to conventional F2F conference panels. However presentation slides need sending in advance. We can pre-load materials in Shindig as PDFs, mp3s or mp4s. Slides should be set up in PowerPoint as "Wide screen (16:9)" (in the Design tab, Slide size); in Libre Office use custom dimensions of 33.87cm x 22cm. We're awaiting specs for audio/video files.
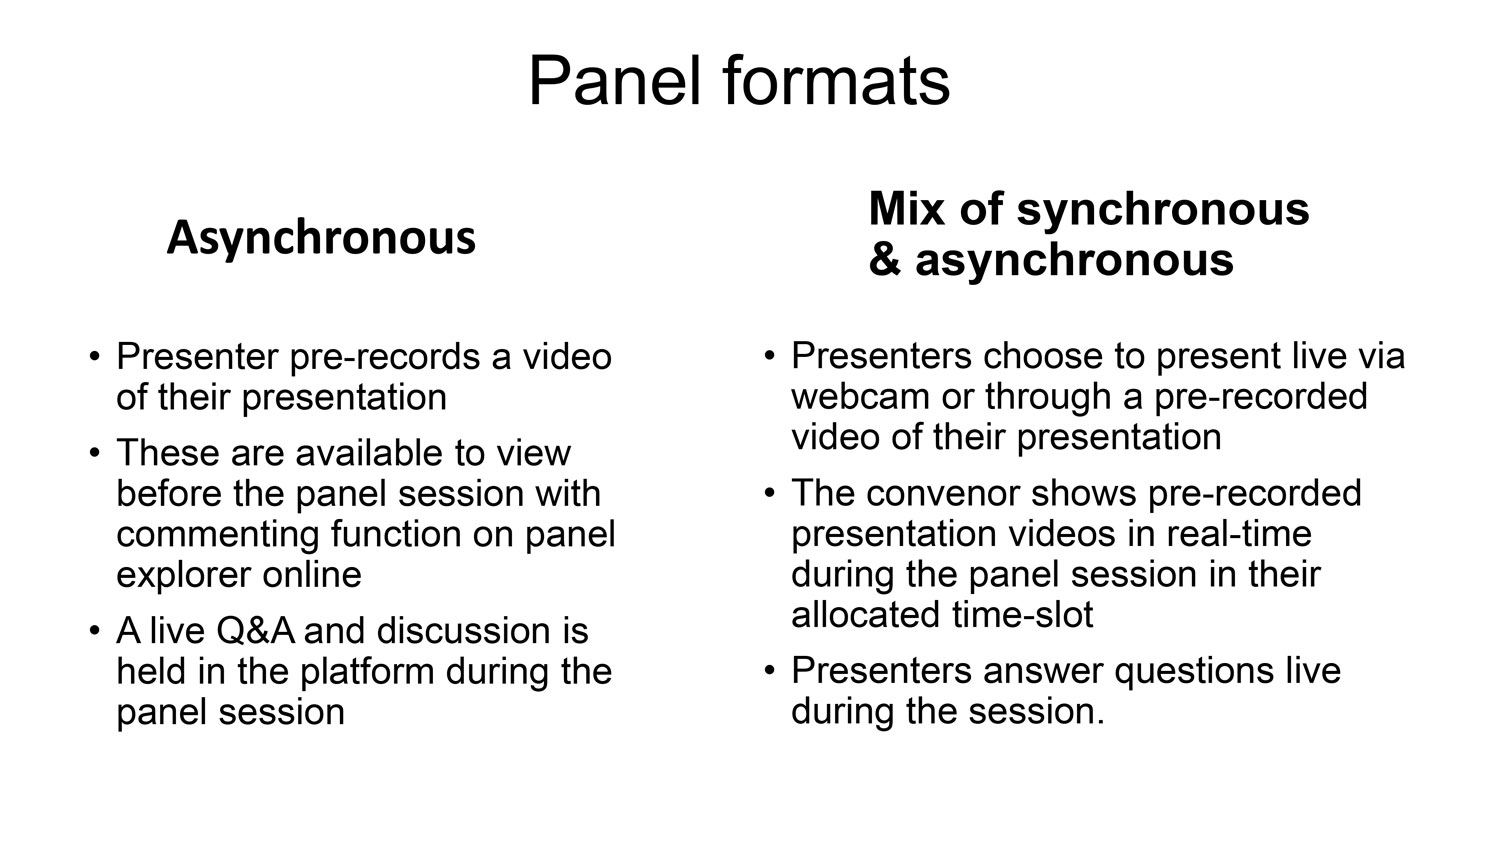
Virtual conferences offer wider possibilities to benefit from web delivery: pre-recorded presentations displayed prior to the event help both those on far-flung timezones, those with intermittent connectivity, but also with 'online fatigue' as the presentations can be viewed over several shorter periods ahead of the live discussion. Panelists are invited to consider these new options as a way of increasing/improving engagement.
9. Screen sharing
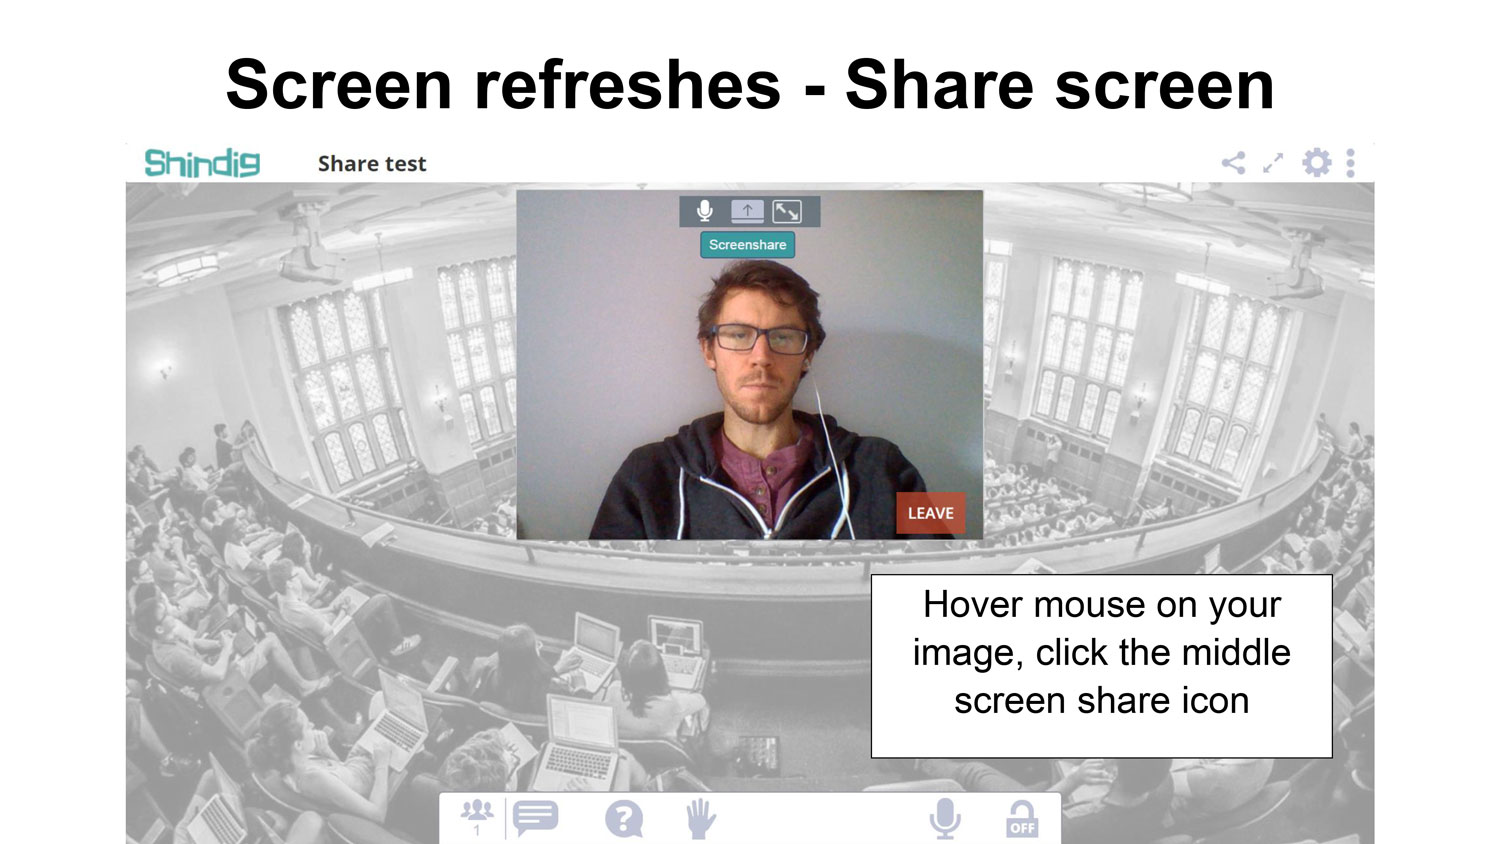
To share screen mouse-over the podium and select the screen share icon.
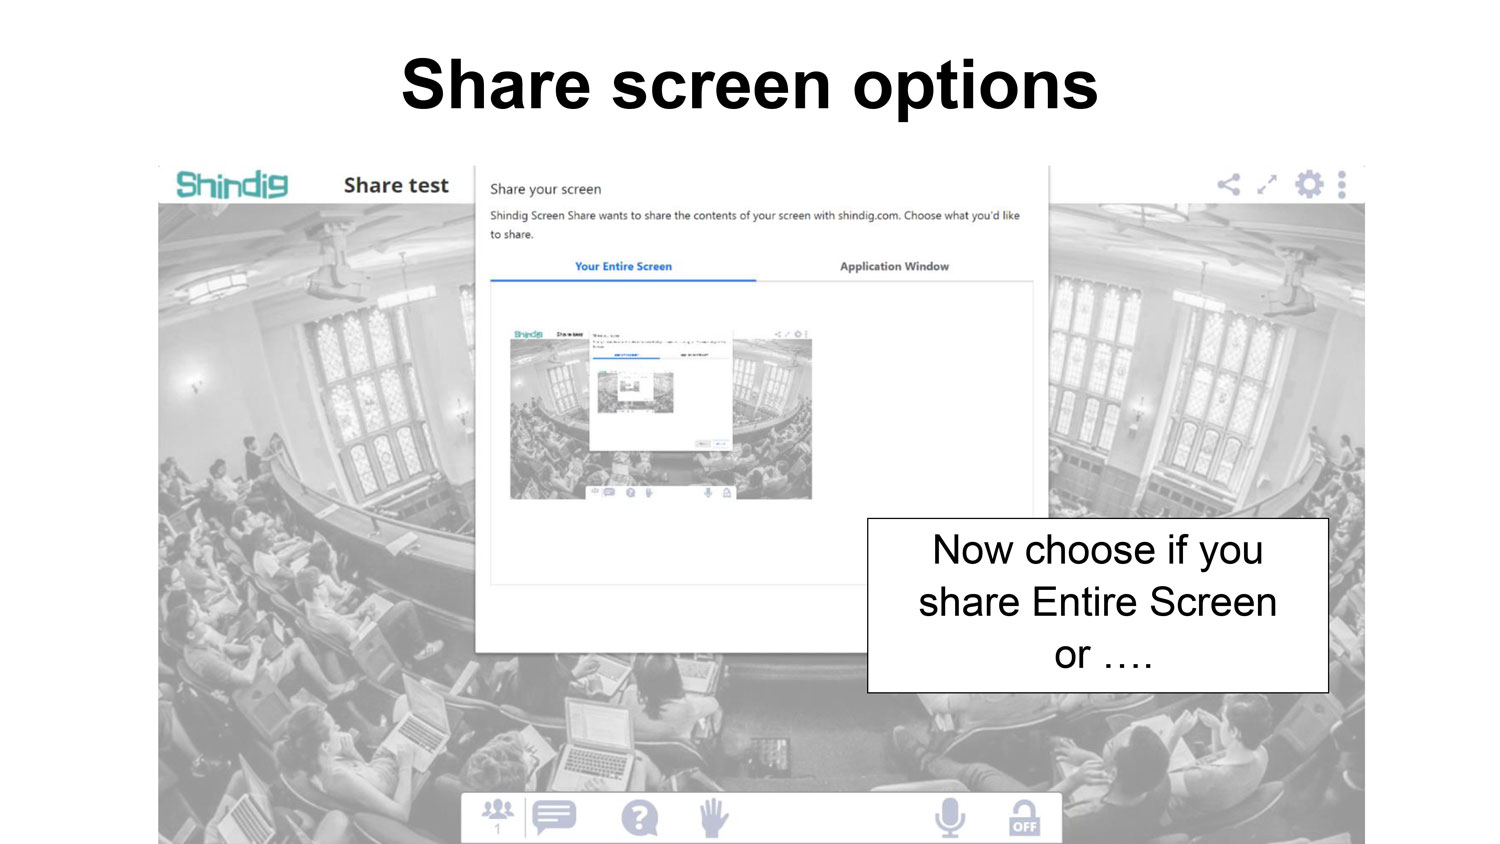
You can opt to share the whole desktop, or select a specific programme/application. We'd advise the latter.
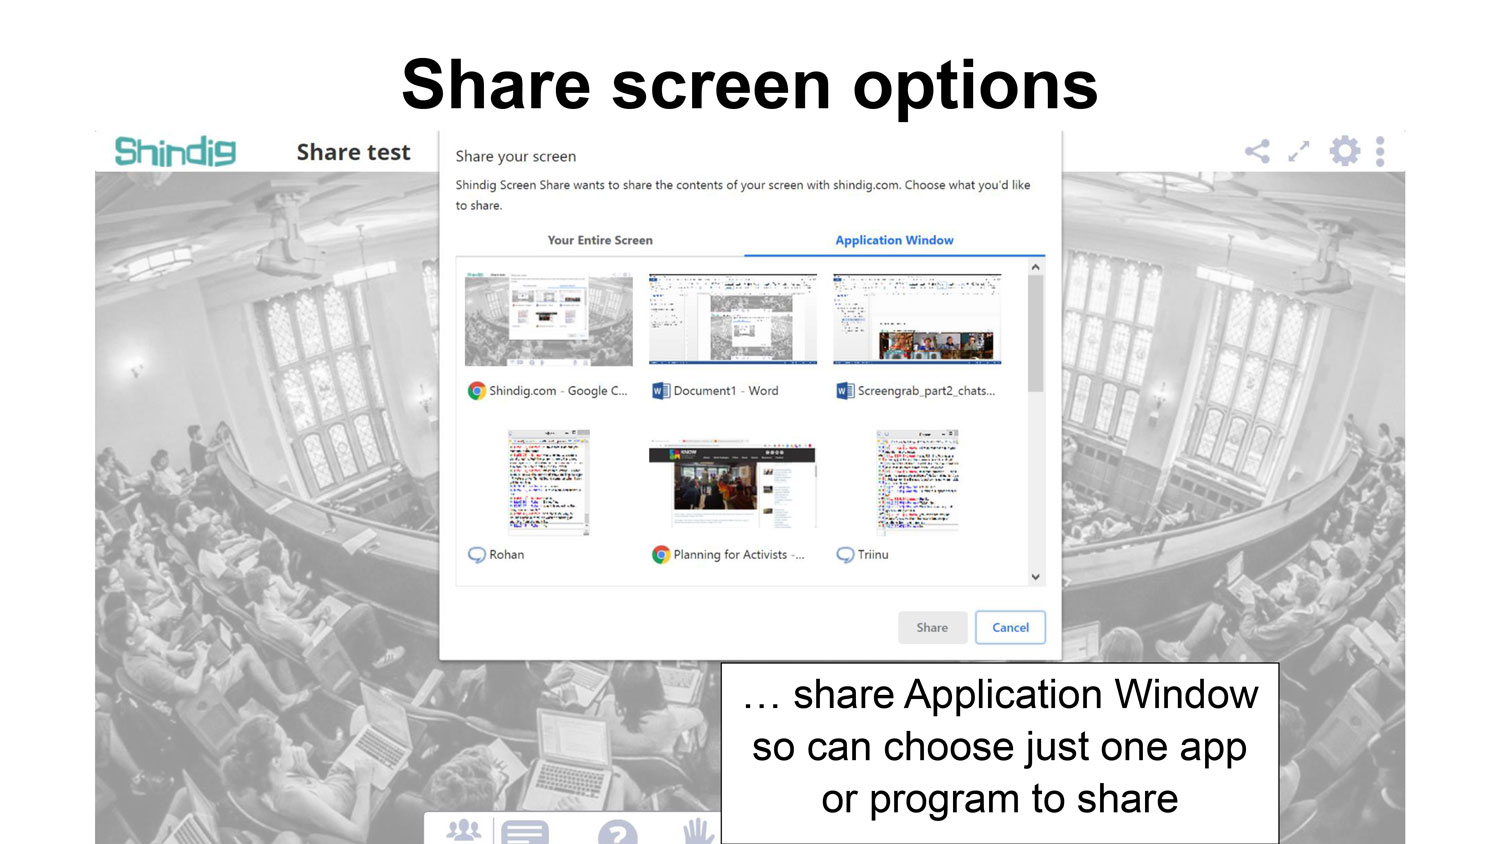
Suitable applications for sharing are web browsers or applications that do not involve video/audio. We reiterate that the best way to present materials in Shindig is to load them in advance as PDFs, mp3s or mp4s.
10. Timetable
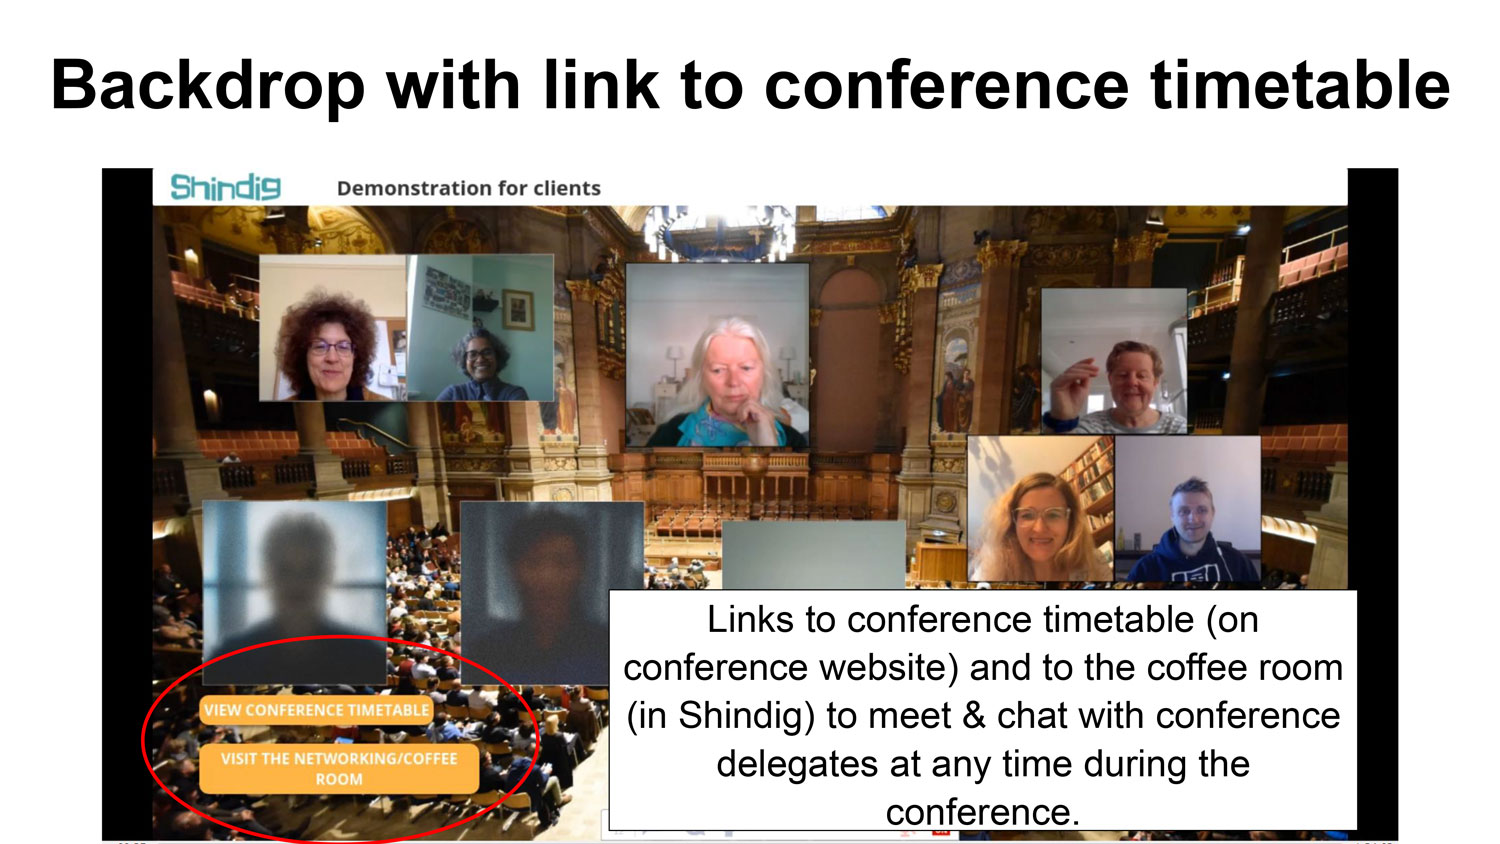
Each Shindig session will be set up with a link back to the conference timetable page which will be how delegates will navigate all events and gain access to each virtual room.
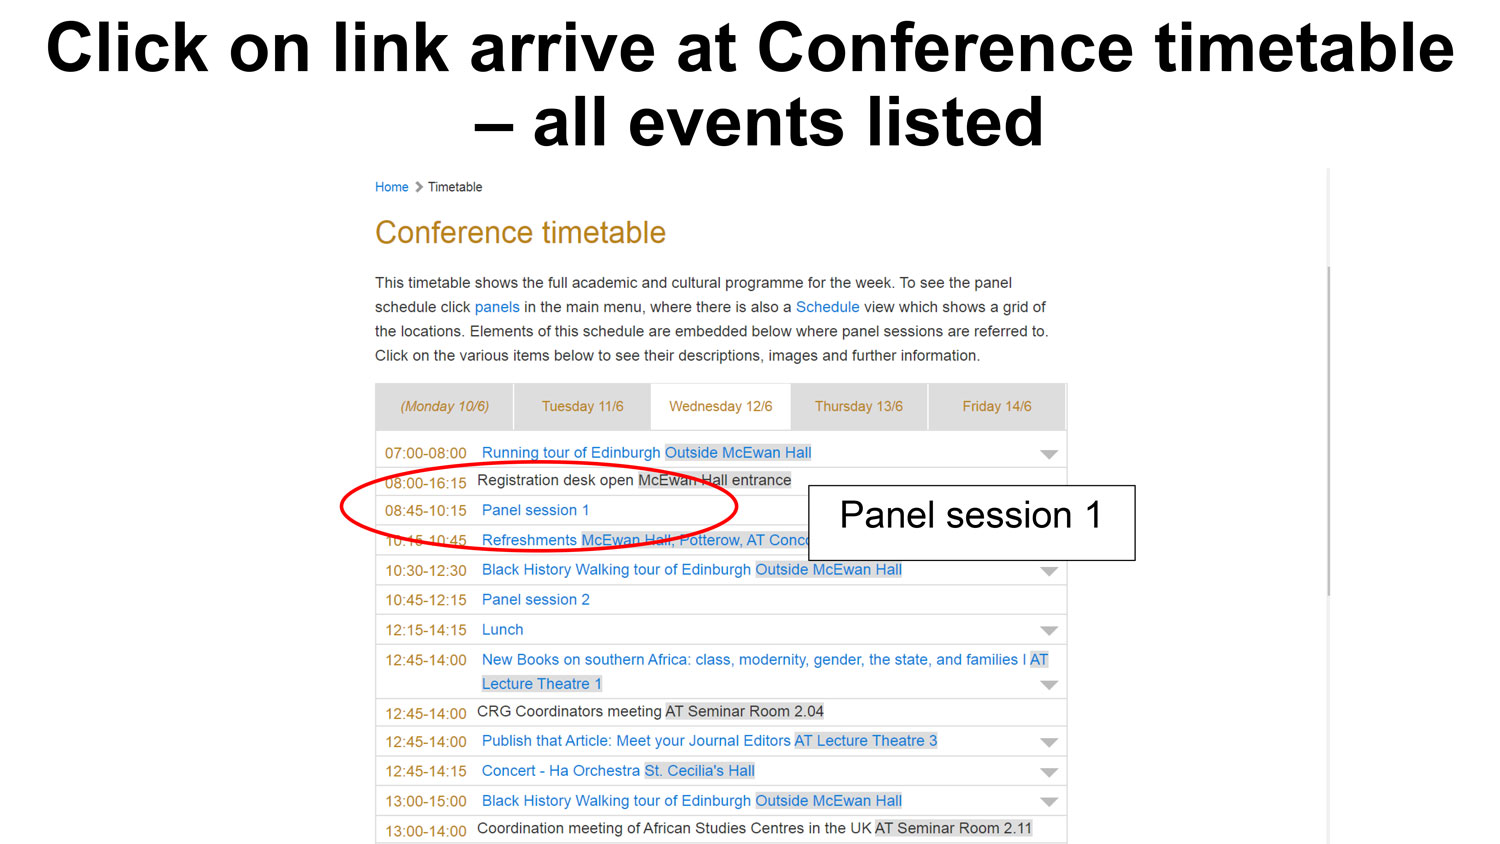
The conference timetable will have direct links to the virtual rooms.
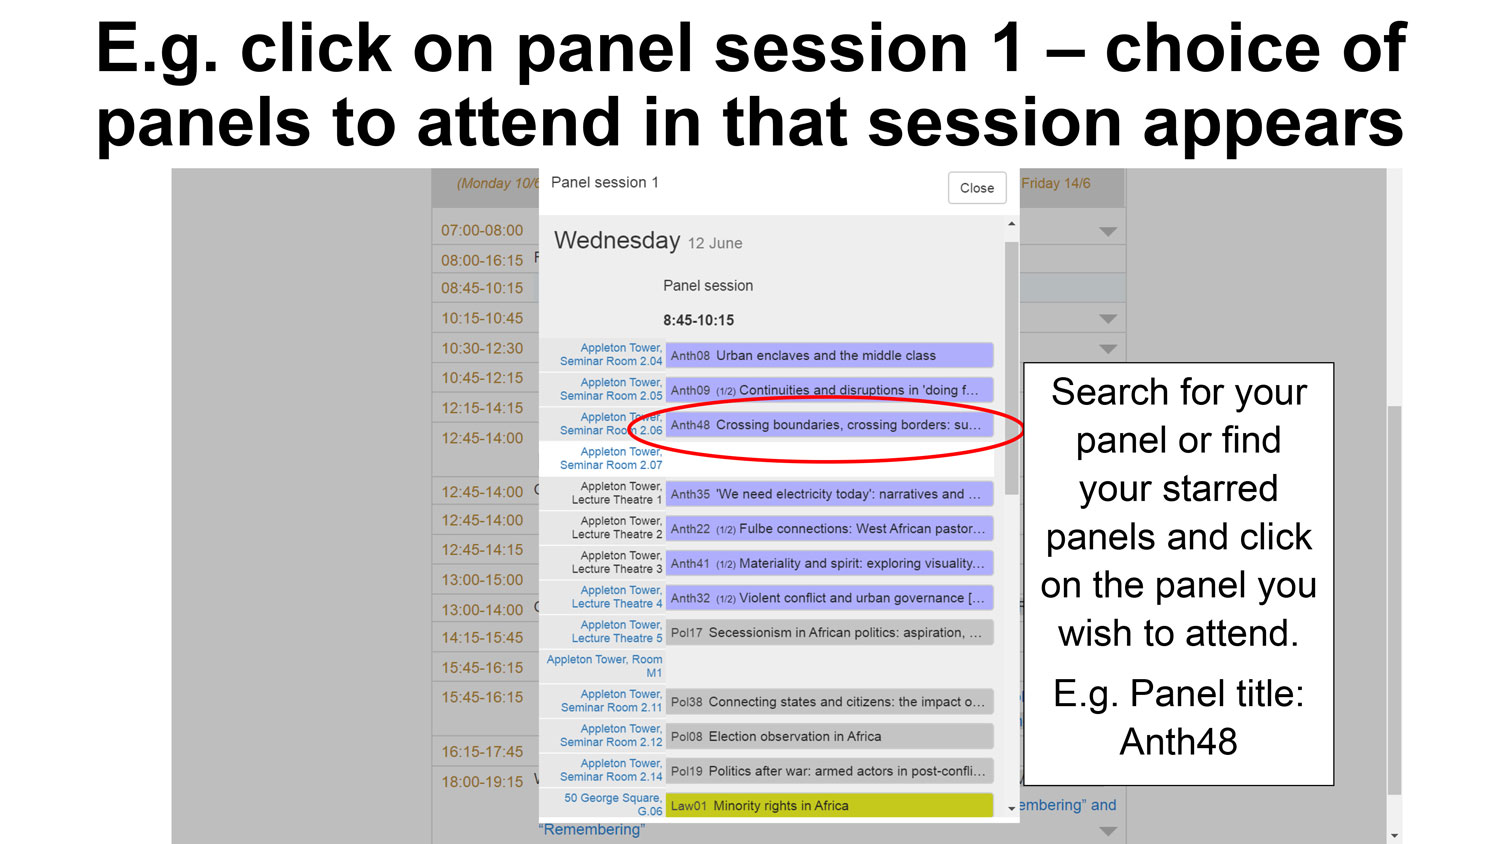
The conference timetable also has links to the panel explorer which allows viewers to drill down to panel detail.
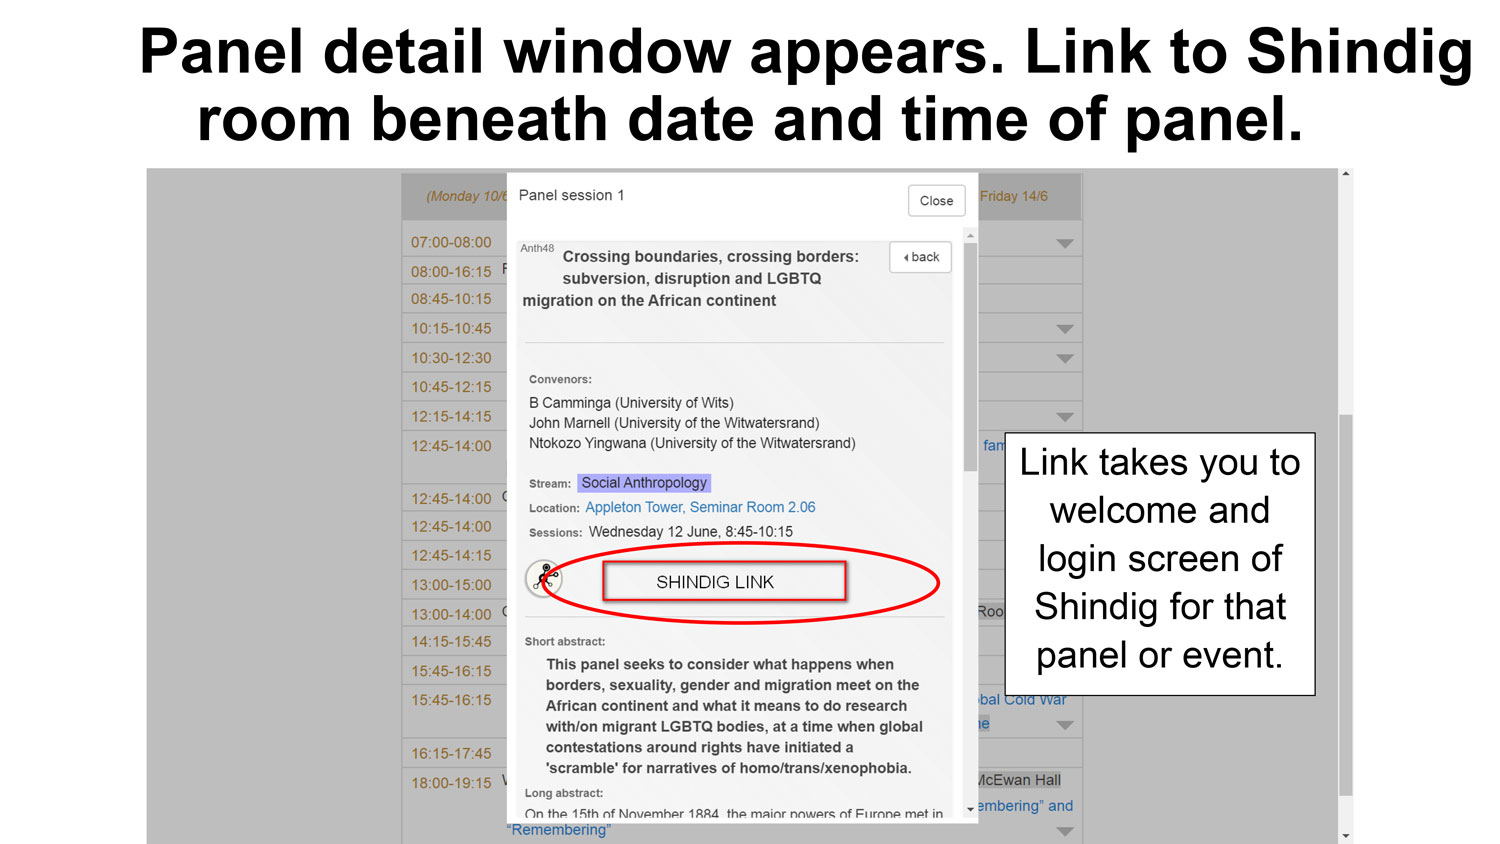
The panel page displays the panel & paper abstracts, any embedded pre-recorded content, text-based questions/comments, and a link to the virtual room.
11. Best setup
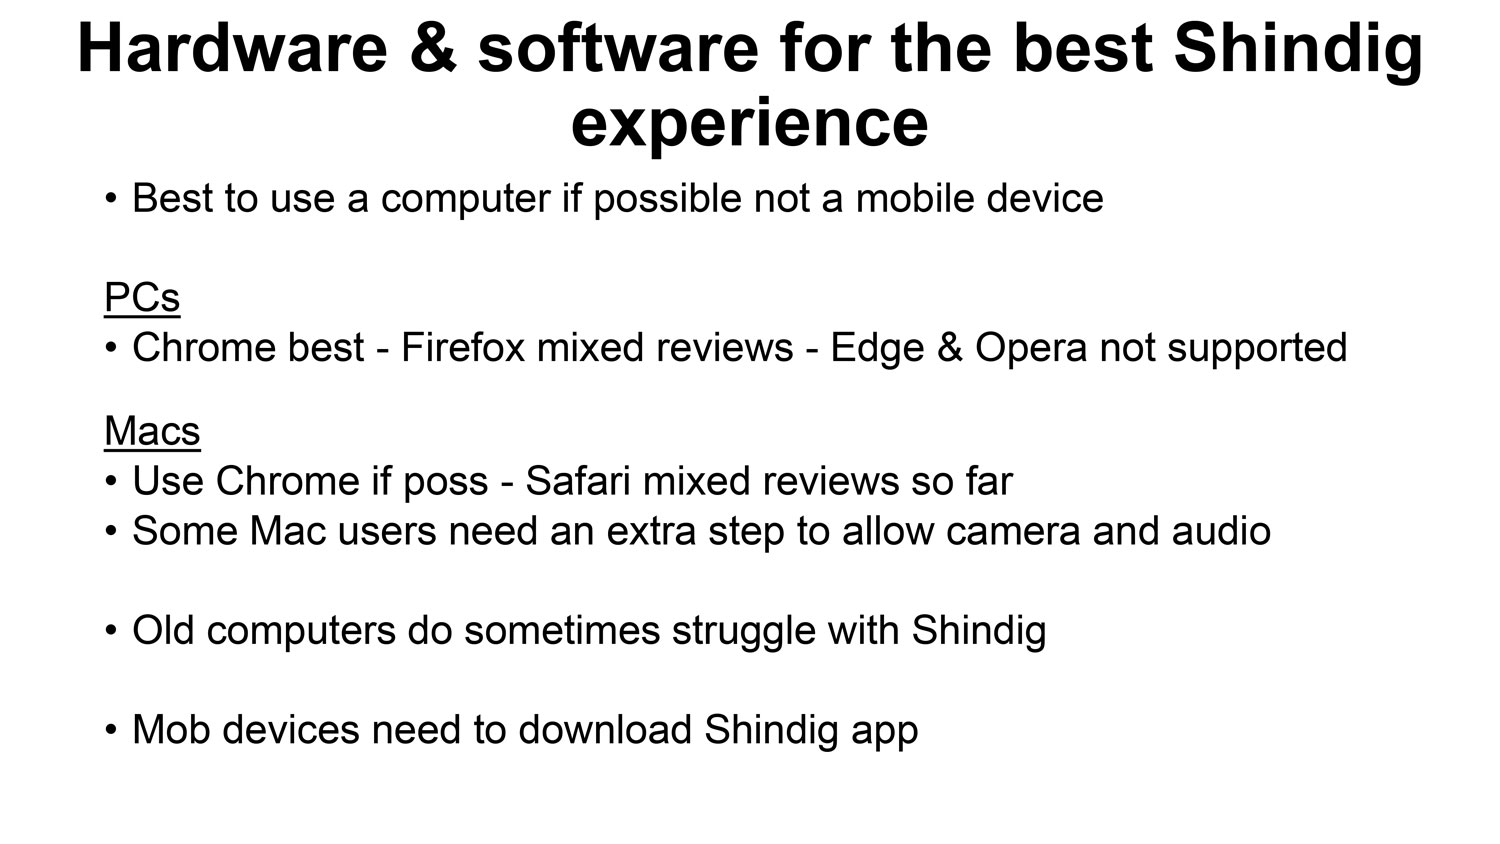
To make the most of a virtual conference we'd advise using a device with the largest screen area you can manage.
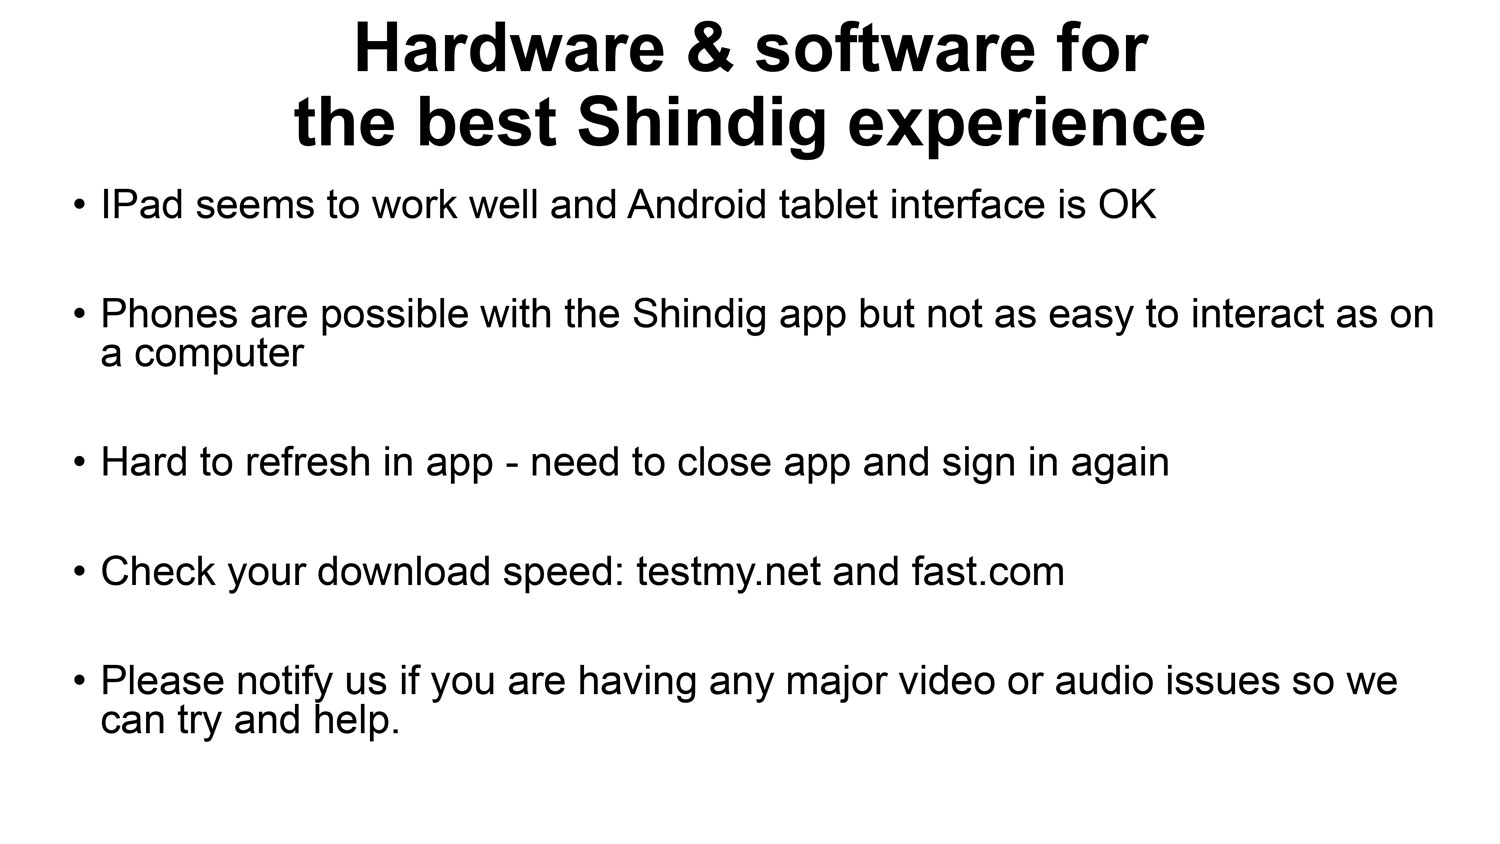
We advise ensuring you've attended at least one Shindig session in advance of the conference to ensure you know what works - sufficiently in advance so as to arrange to borrow equipment or, if possible, to relocate to a stronger connection for the event.
12. End panel
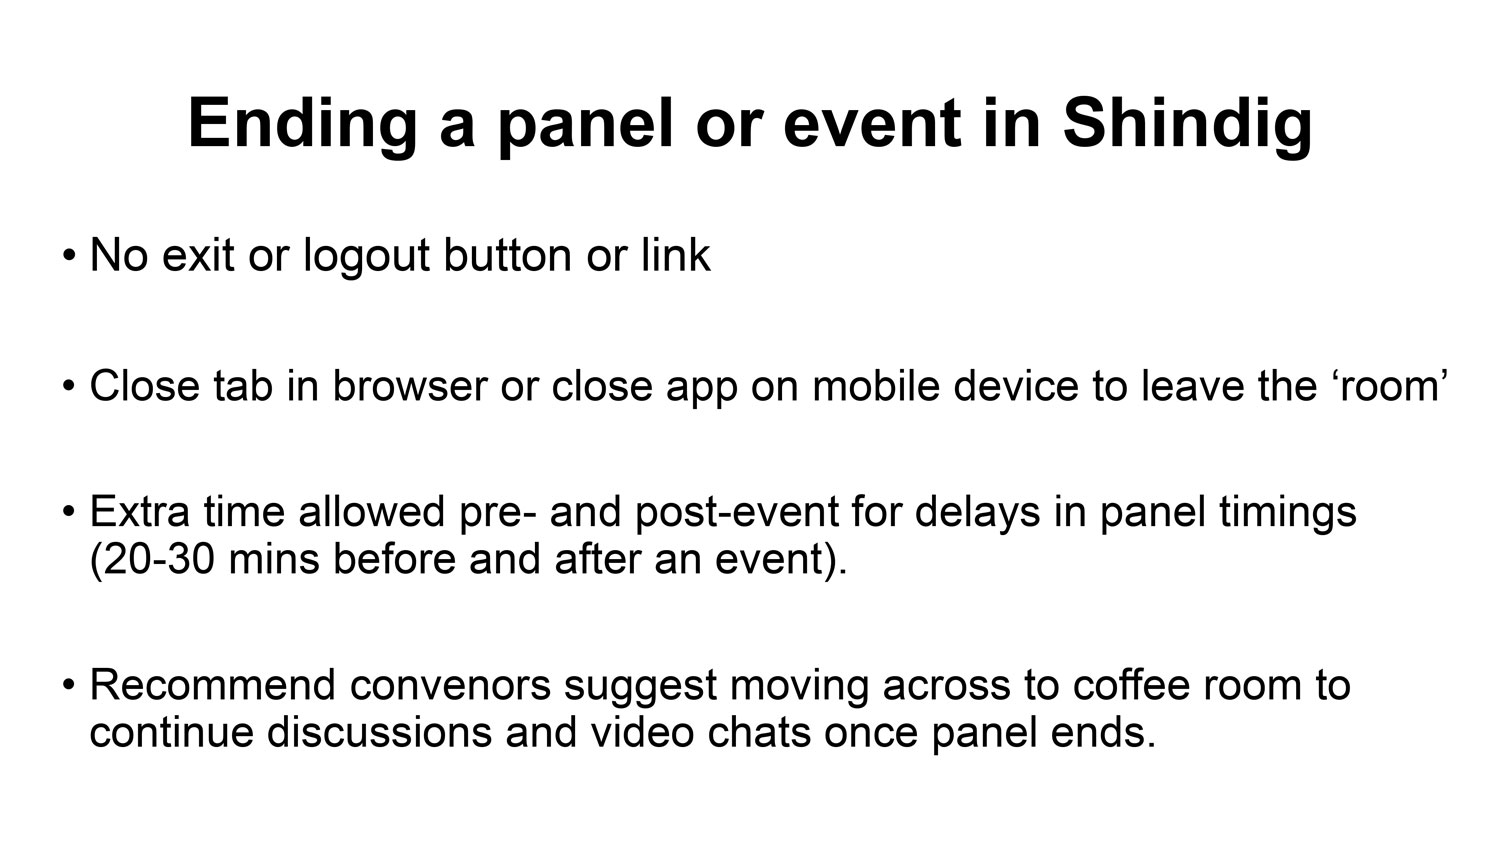
On closing the session tab, head back to the conference timetable to find links to coffee, other panels, etc.


